Hello Sewcial Bee Sampler Makers, it's time to start our second row of blocks!

Since this week's block will be using techniques we've already used in the first five blocks I thought I'd have a little fun and give you some construction options. Go ahead and download block #6--The Seasons from the Sew Along page.

Of course the PDF pattern download has everything you'll need to make the block but I like to add extra tips and hints into my blog post to support beginning quilters. If you're just joining the SBS sew along then you may want to start at the very beginning with the introduction post and work your way up to the present.
Now that we're on our sixth block, you're probably realizing there's more than one way to make patchwork units. I want to take everything we've learned so far and show you four options to make this week's block using those different techniques. Please excuse my photos this week, I made these at the end of a rainy day yesterday (Tuesday) and the lighting was terrible!
The Seasons
The Seasons block is made up of (4) 2-1/2" squares and (12) 2-1/2" half-square triangles (HST) units for an 8-1/2" block (unfinished and before frames). There's a lot of seams in this block. With that said, I will continue to sound like a broken record each week, and stress the importance of a true 1/4" seam allowance. If your seams are off, even a fraction, that will amount to a big discrepancy in the end because of all the seams involved. If you need to review my tips on how to check your seam allowance refer back to the Perfect Patchwork post. Also remember that if you're not comfortable cutting the pieces to the exact sizes needed per the instructions and would rather square up your units after sewing to size, refer to the SBS Extras post. Just note that if you are adding 1/8" to the squares on the Flying Geese units from block #5, be sure to add 1/8" (.125) to the large square as well to keep everything in porportion.
Option 1:
To make the block as written in the instructions with two different fabrics, follow along with the 2-at-a-time half-square triangle tutorial and make according to the instructions.
Option 2:
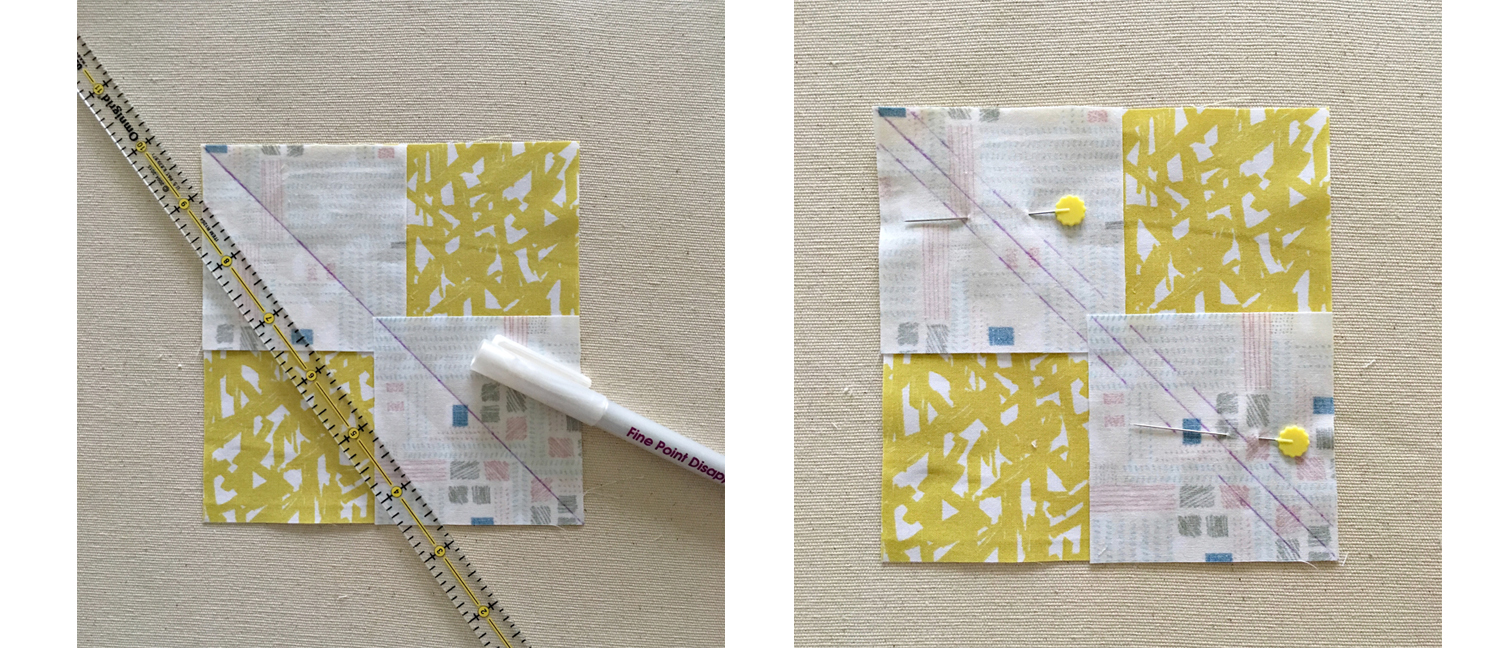
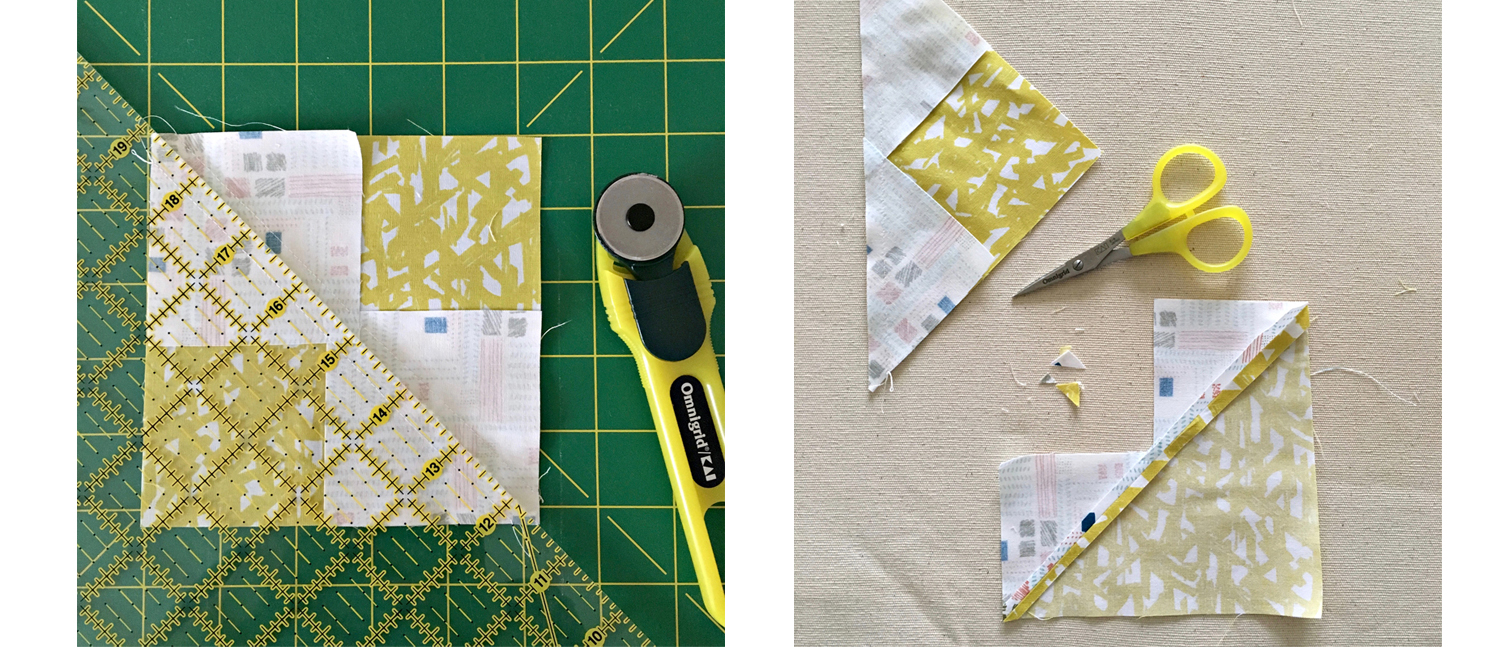
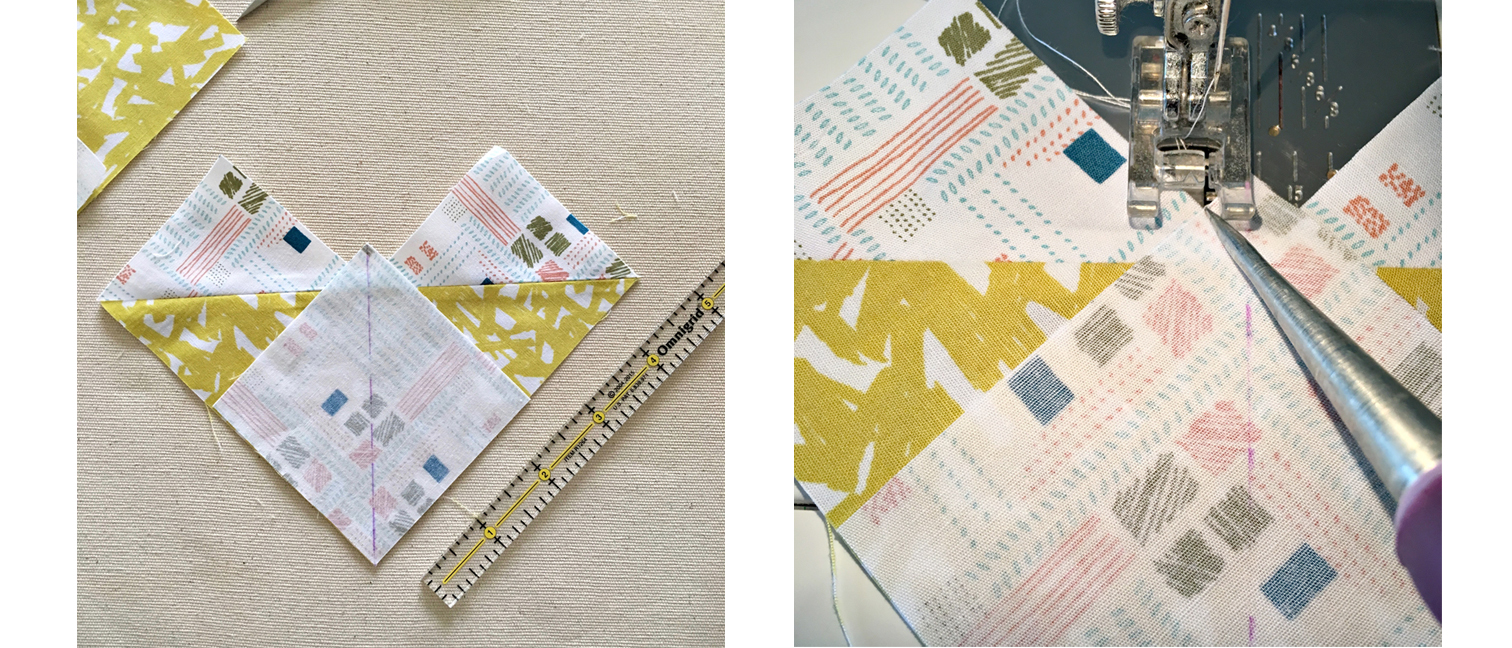
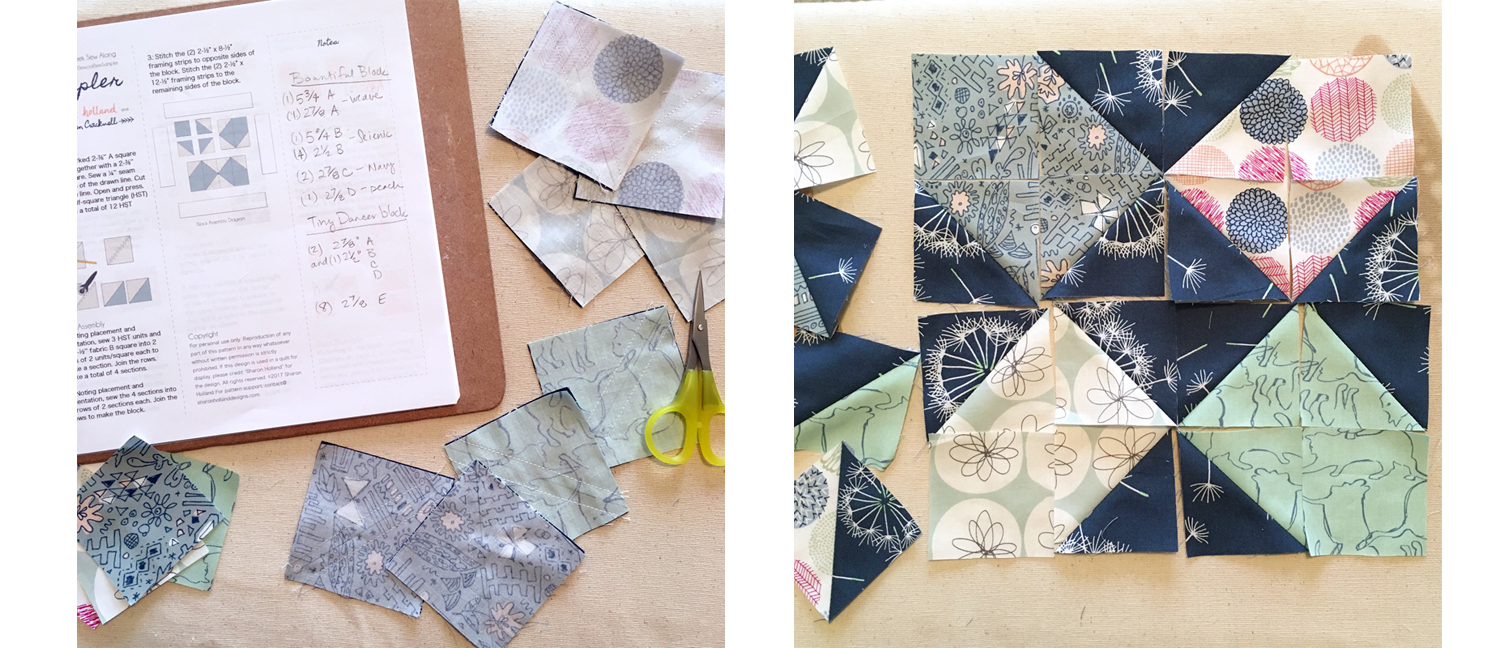
To make the block look more like a compass I decided to add additional fabrics and visually divide up the center of the block in a checkerboard effect. To achieve this I used the 8-at-a-time HST technique from block #1 and the 2-at-a-time HST technique from Block #2.
Cut:
(1) 5-3/4" square fabric A
(1) 2-7/8" square fabric A
(1) 5-3/4" square fabric B
(4) 2-1/2" squares fabric B
(2) 2-7/8" squares fabric C
(1) 2-7/8" square fabric D
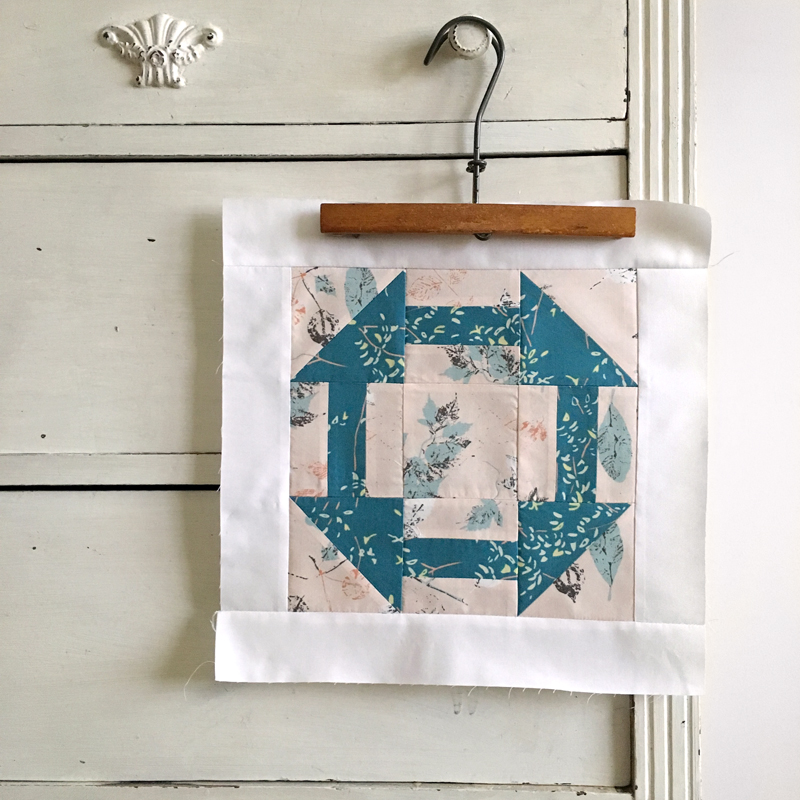
This will yield 8 matching HSTs (2-1/2" square unfinished), 2 matching HST units (2-1/2" unfinished) of one combo (mine are navy and weave print) and another 2 matching HST units (2-1/2" unfinished) of another combo (navy and peach) for the center of the block. Assemble the block in the same way as given for block #6 in the PDF.

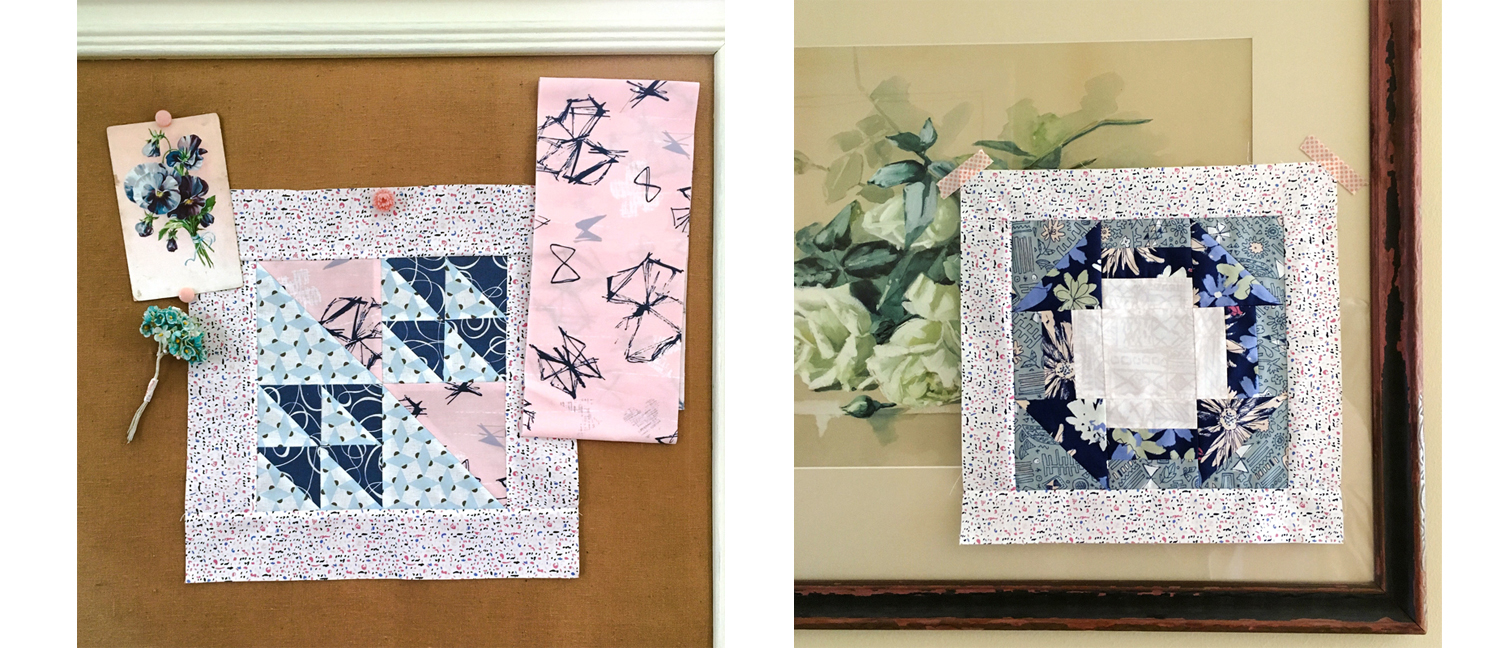
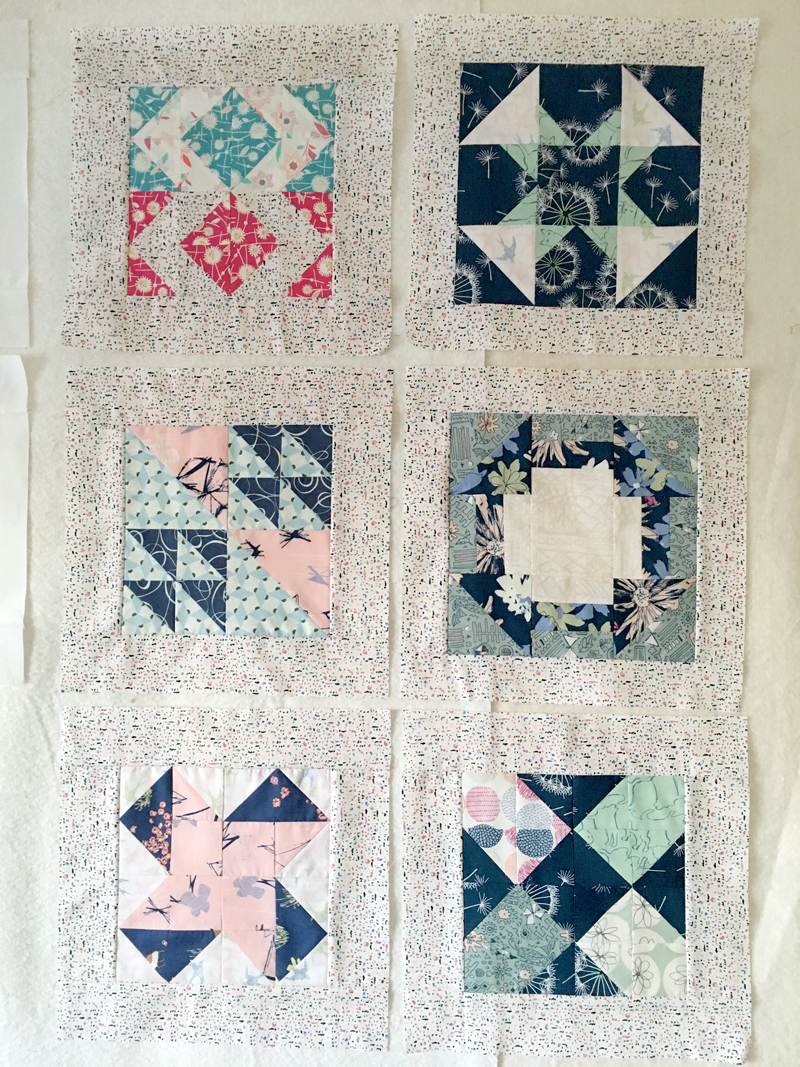
The Seasons block made with my new Art Gallery Fabrics collection Bountiful and Pure Element solids. Here's what all six of my Bountiful fabrics sampler looks like so far with PE-433 Snow Pure Elements solid frames.
Option 3:
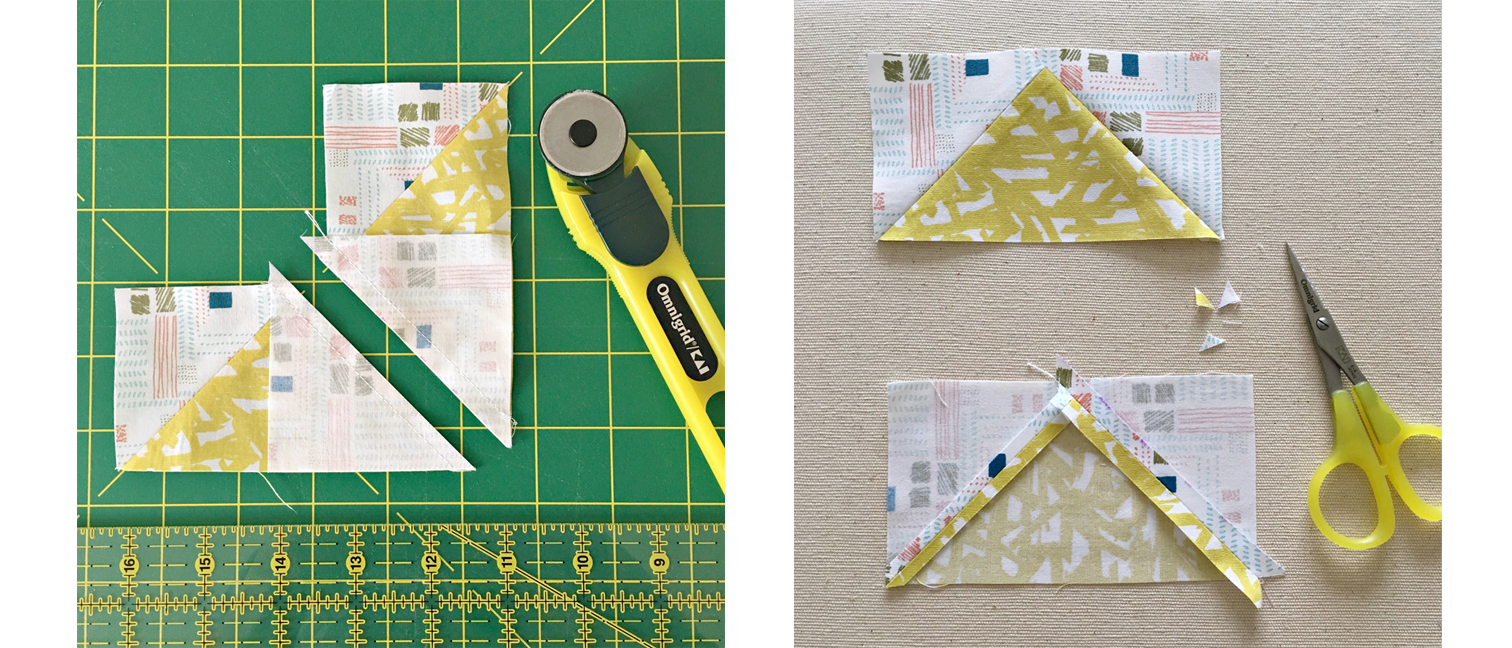
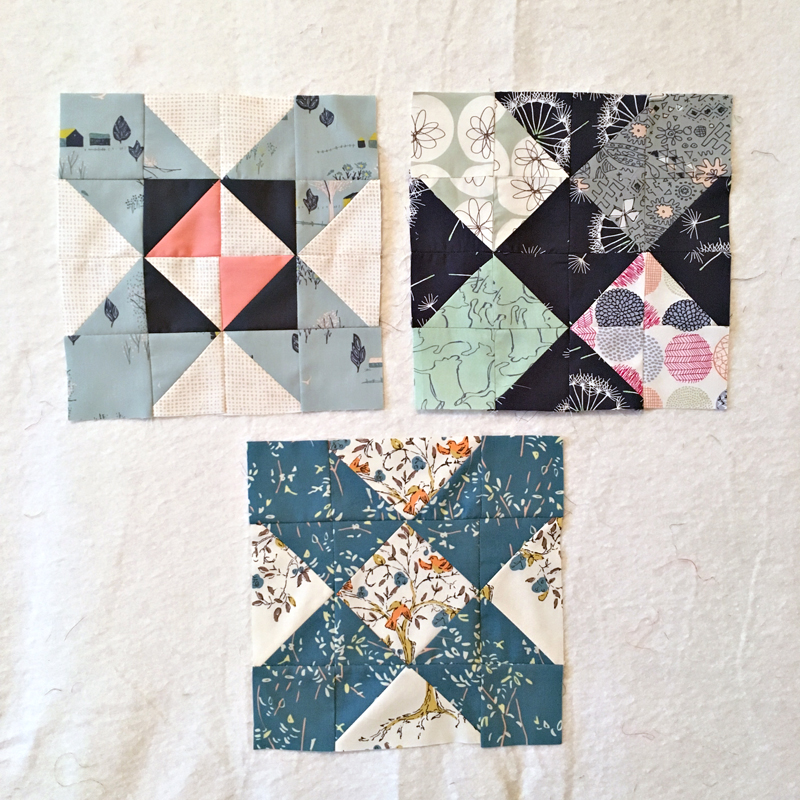
The third way I wanted to play with dividing the four points into four different fabrics. To achieve this look I used the 2-at-a-time HST technique as given in the PDF instructions for this block and from Block #2.
Cut:
(2) 2-7/8" squares fabric A
(1) 2-1/2" square fabric A
(2) 2-7/8" squares fabric B
(1) 2-1/2" square fabric B
(2) 2-7/8" squares fabric C
(1) 2-1/2" square fabric C
(2) 2-7/8" squares fabric D
(1) 2-1/2" square fabric D
(8) 2-7/8" squares fabric E
Note: This options will leave 4 unused HST units. Sew units and pieces together as given in PDF.

The Seasons block made using fabrics from my Gossamer, Sketchbook, and Tapestry fabric collections for Art Gallery Fabrics. Here's what my Tiny Dancer sampler quilt looks like with all six blocks that also include fabrics from my Coastline collection and the two newly re-colored Gossamer prints in the new AGF Fusions fabrics. These blocks are framed with Speckled Lapis from my Sketchbook fabric collection. Again, sorry about the terrible photography!
Option 4:
This is for all those fussy cutting lovers out there that may want to have a solid center block for to showcase a special print. This option uses the Flying Geese technique from block #5 and a variation of the Quick Corner units from Block #2.
Cut:
(1) 5-1/4" square fabric A
(1) 4-1/2" square fabric A (for center square) Note: This fabric could be a third print (fabric C)
(4) 2-7/8" squares fabric B
(8) 2-1/2" squares fabric B
Make four matching Flying Geese units that measure 2-1/2" x 4-1/2".
When adding the Quick Corners to the 4-1/2" square, work on diagonally opposite corners when adding fabric. Stitch the small square to the corner of the fussy cut square, trim, and press corner open before adding additional corners.
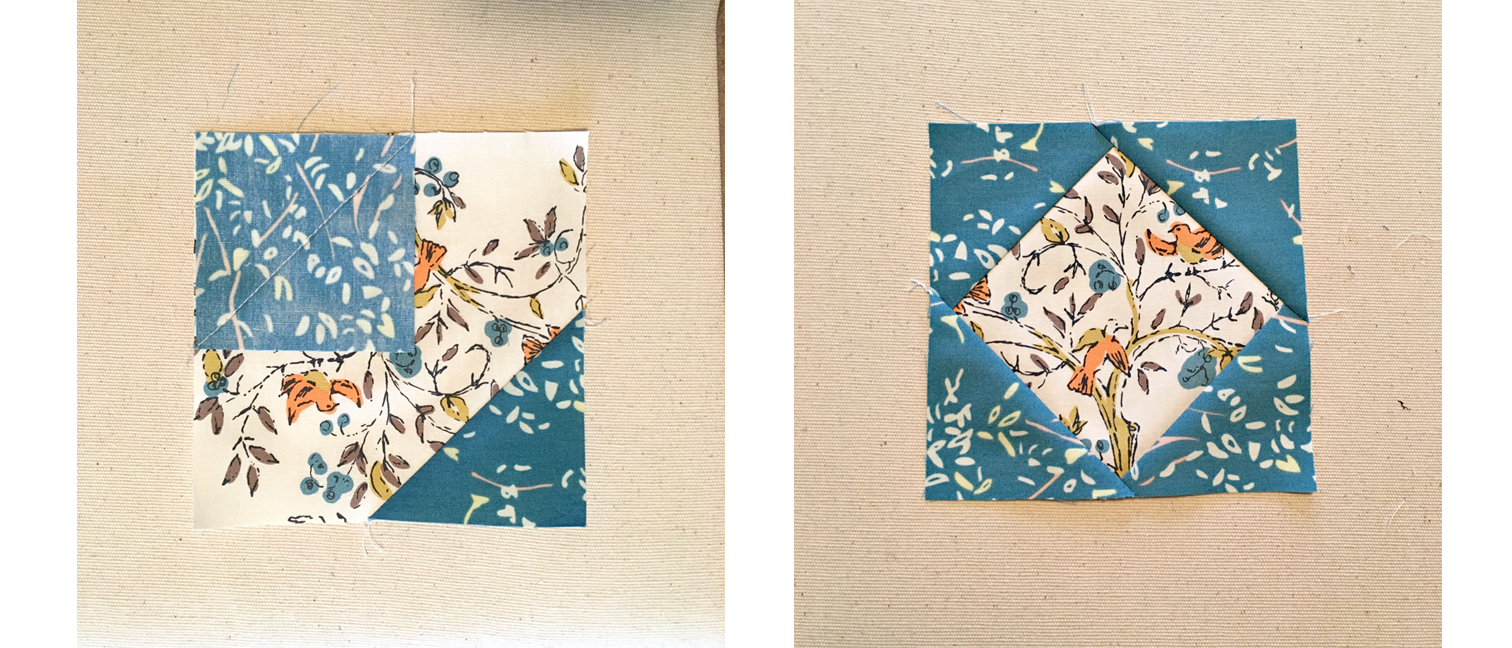
To sew an Option 4 block, arrange the Flying Geese units, center square unit, and (4) 2-1/2" squares into 3 rows of 3 units/squares each. Join the rows.

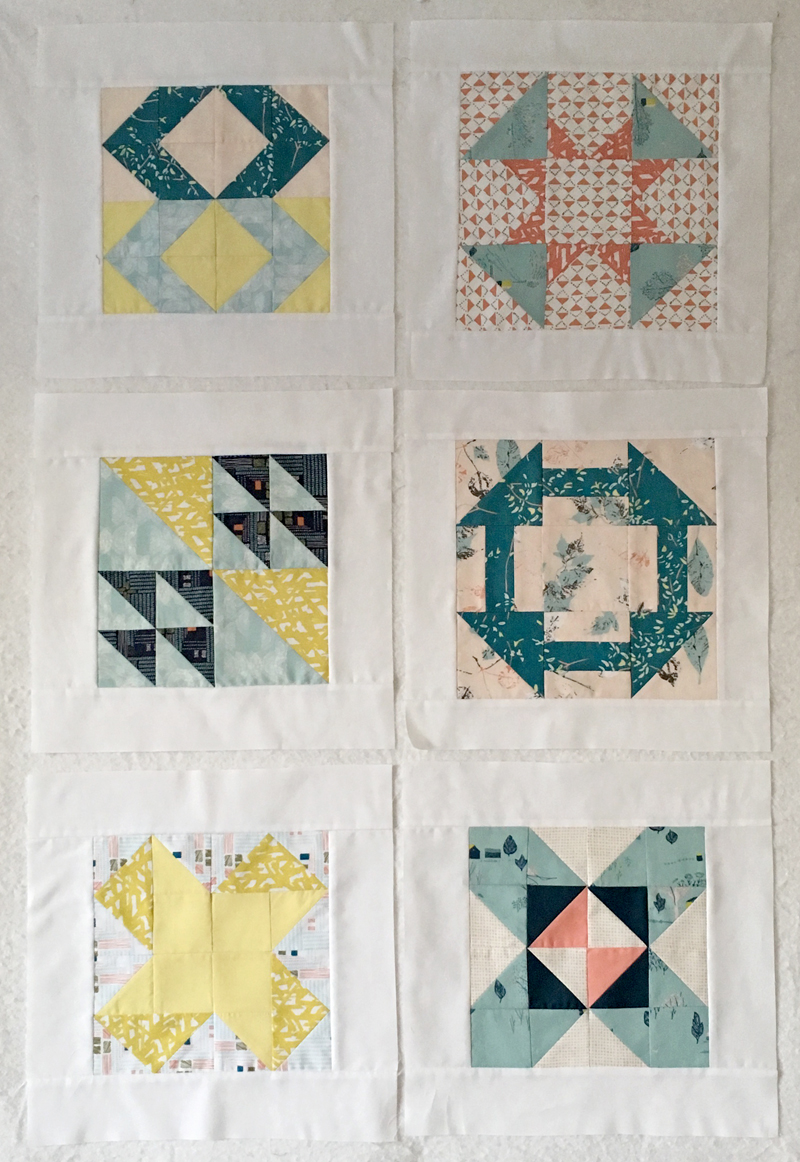
The Seasons block made with my Tapestry and Bountiful fabrics for Art Gallery Fabrics. This is a bonus block and I don't have a third sampler quilt going so this orphan block with get put into something down the line.
I hope with wasn't too confusing?!? I just wanted to show you that the power of knowing different patchwork techniques can help you customize your sewing experience on this sew along. Each week you will have the chance to continue to perfect those skills and grow as a quilter. My co-host Maureen Cracknell and I are continually amazed by the beautiful blocks being posted every week and the joy and excitement each of you bring to our virtual community. Thank you for making this sew along so special. Please be sure to visit Maureen's blog and see the progress she's making on her sampler quilts, she's making two as well using her beautiful AGF fabric collections.

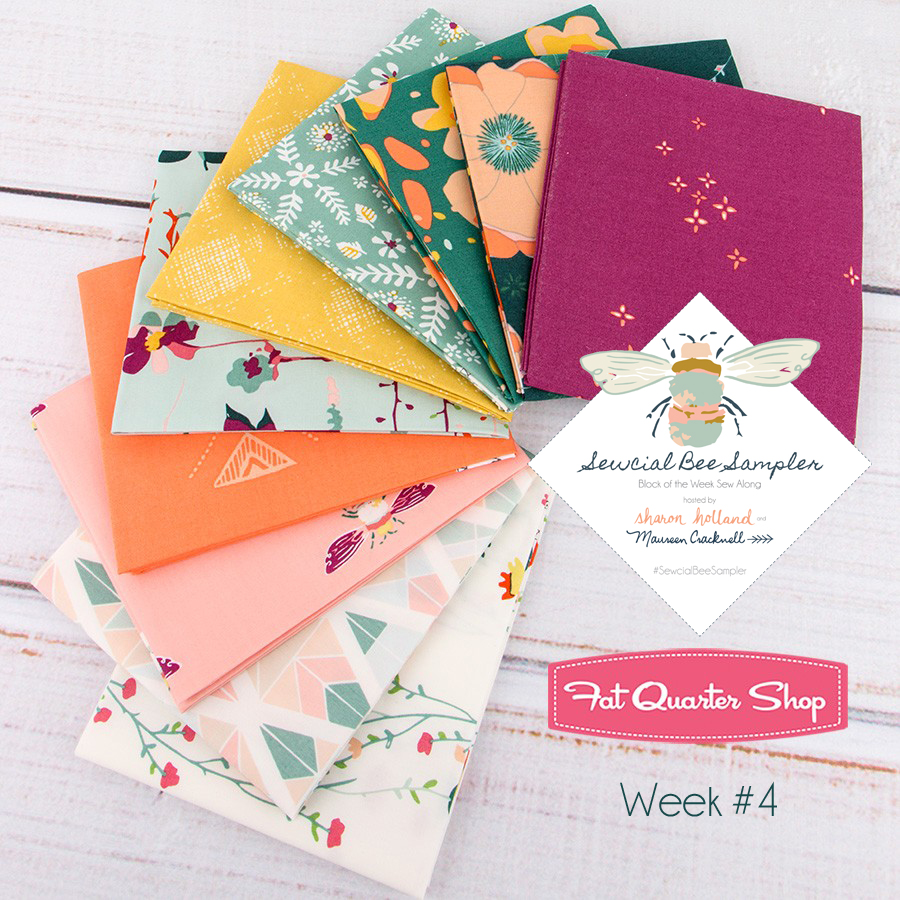
Aurifil Circa 15 The Intrepid Thread Fat Quarter Shop Omnigrid Llama Fabrics Color Girl Lady Belle Fabric Needle in a Fabric Stash Dritz Knotted Thread NeedleandFoot Stash Builder Box
Also, don't forget that Friday is Giveaway Friday and this week Maureen will be hosting the giveaway from her blog. We've got a great giveaway planned from Intrepid Thread I know you'll not want to miss!