
Christmas came early this year with samples of my upcoming Spruce fabric collection for Art Gallery Fabrics and my ribbon collection for Renaissance Ribbons! Both of these new collections will be available from shops in April 2026—hence the early part—so I’m thrilled to have tangible products to photograph and plan out projects. Both collections are being announced by the manufacturers so shops can preorder in time for next year’s winter season so let your favorite shops know you’d like to see it stocked next year. I have a few other, can’t-tell-you-yet, collaborations in the works for 2026 that involve my Spruce collection, so this would be a fun one for shops to stock, offering plenty of great sewing potential for your holiday sewing.
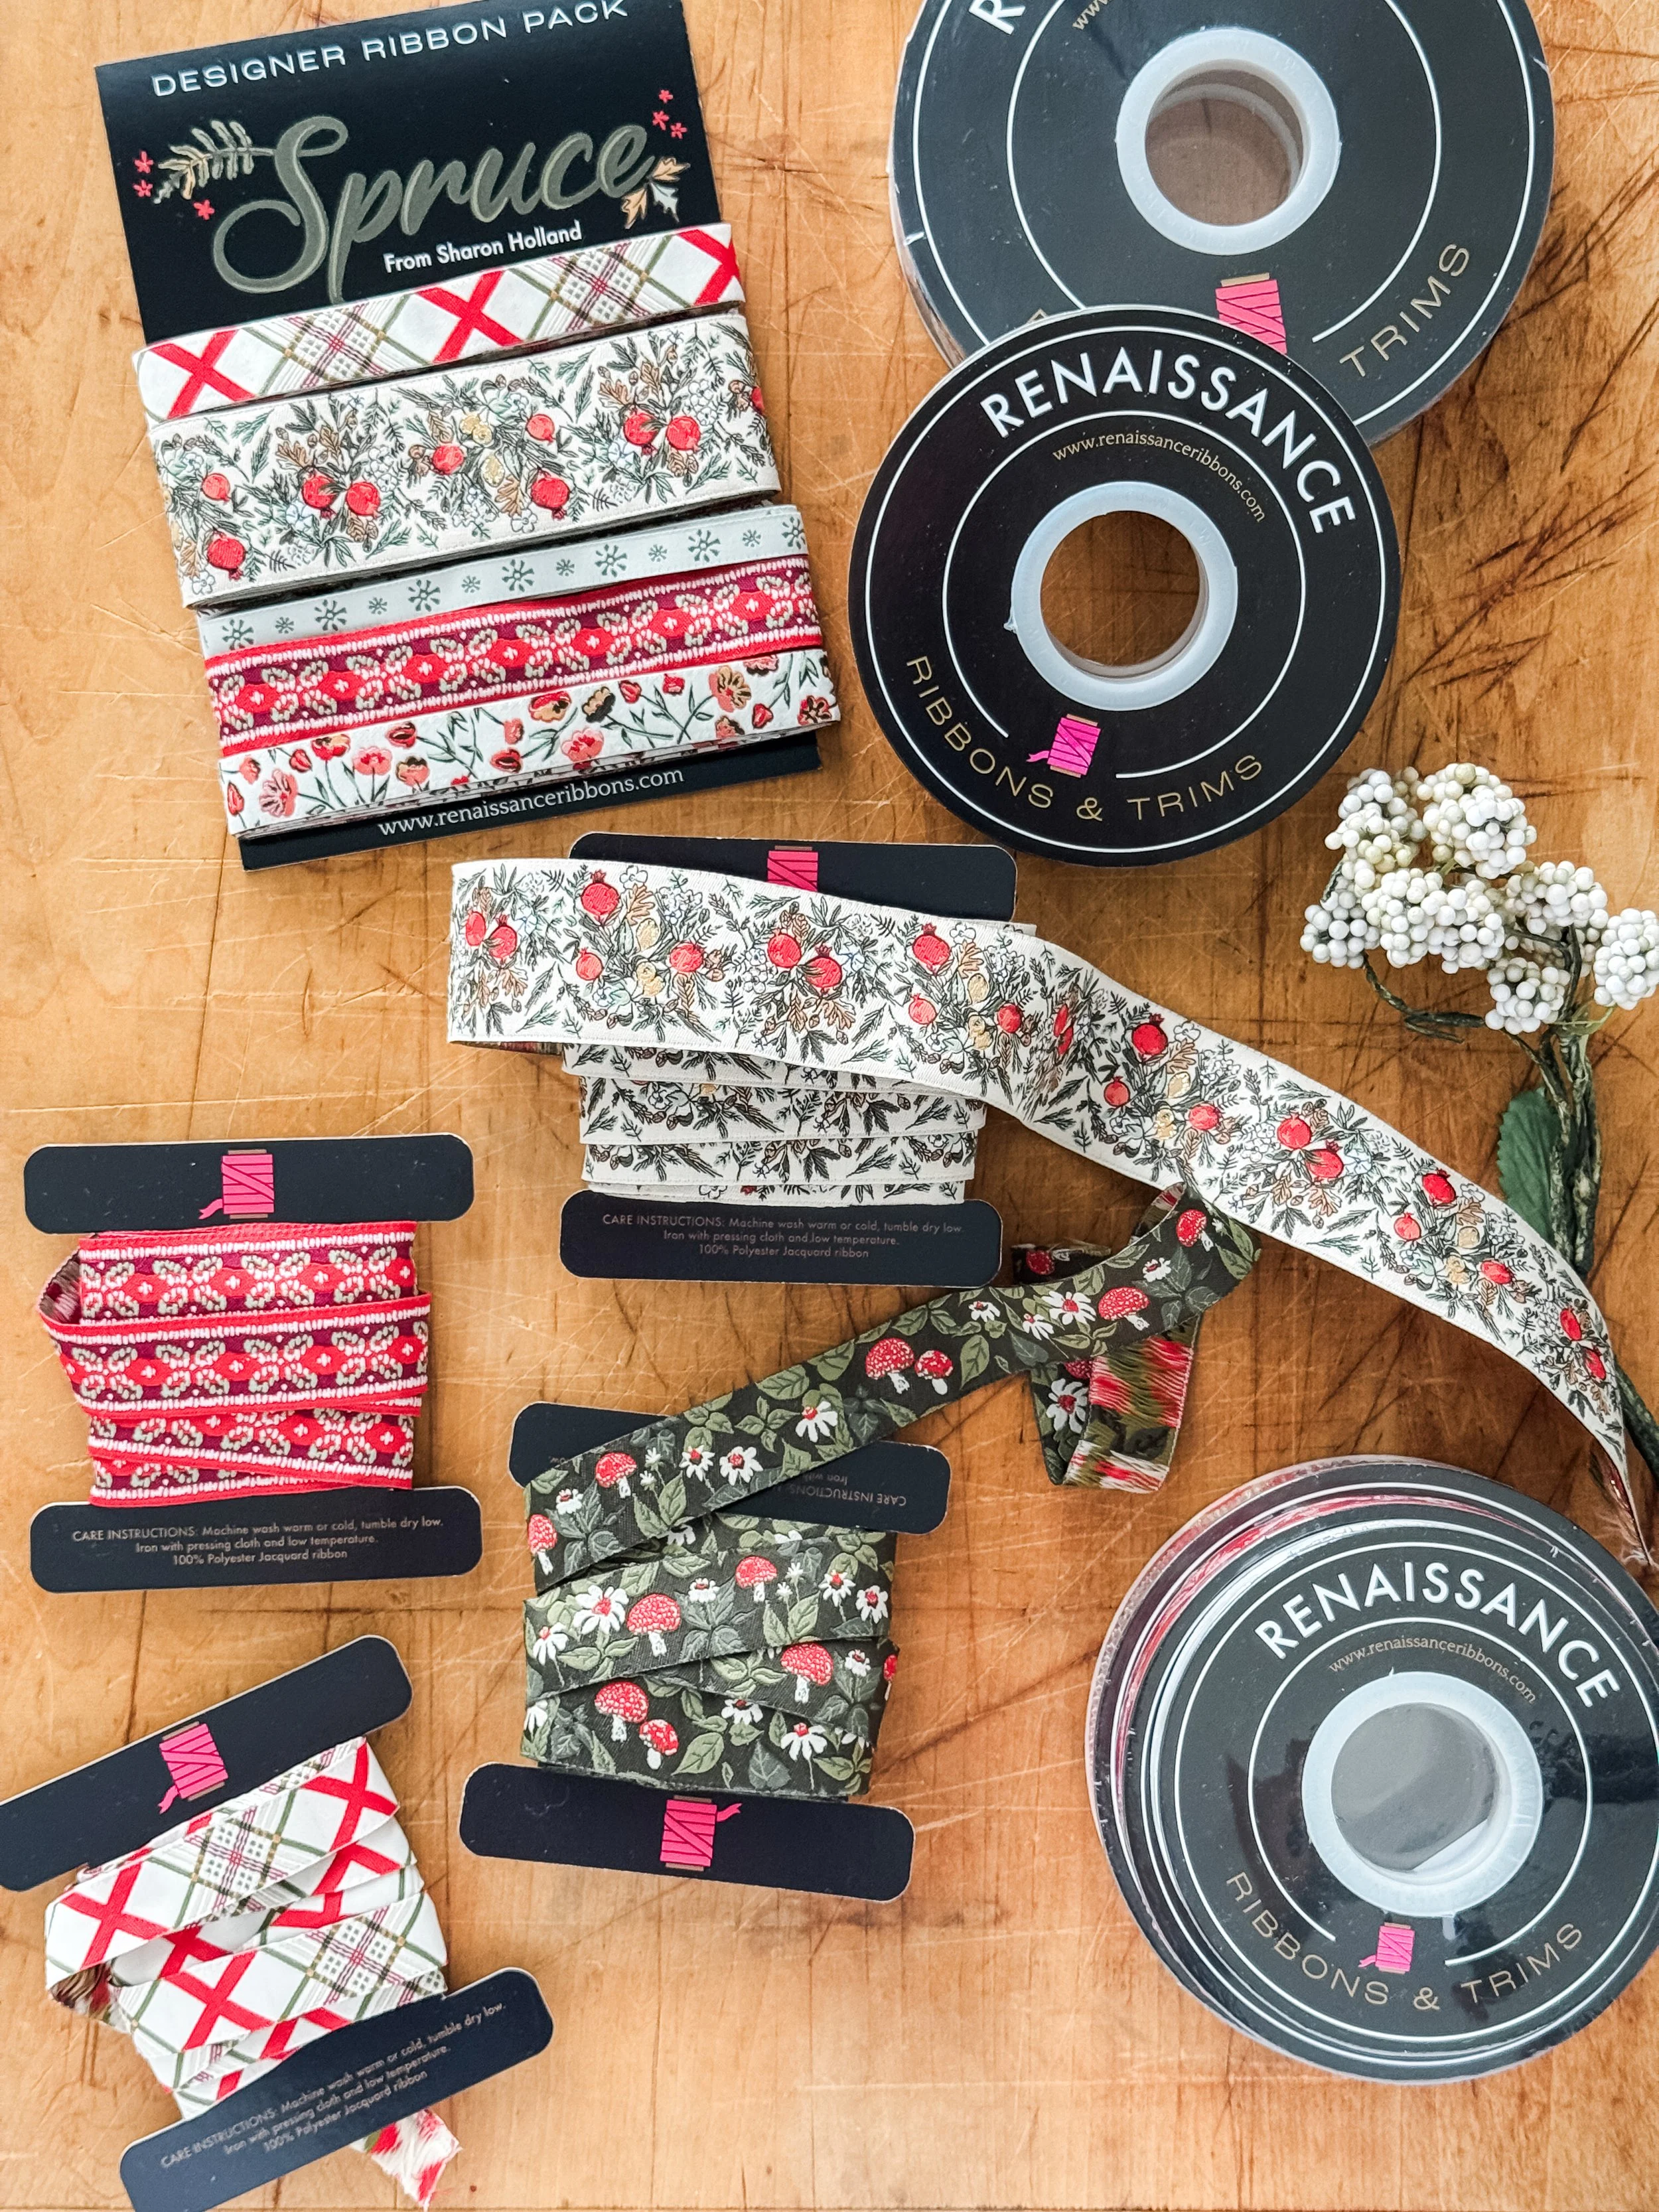
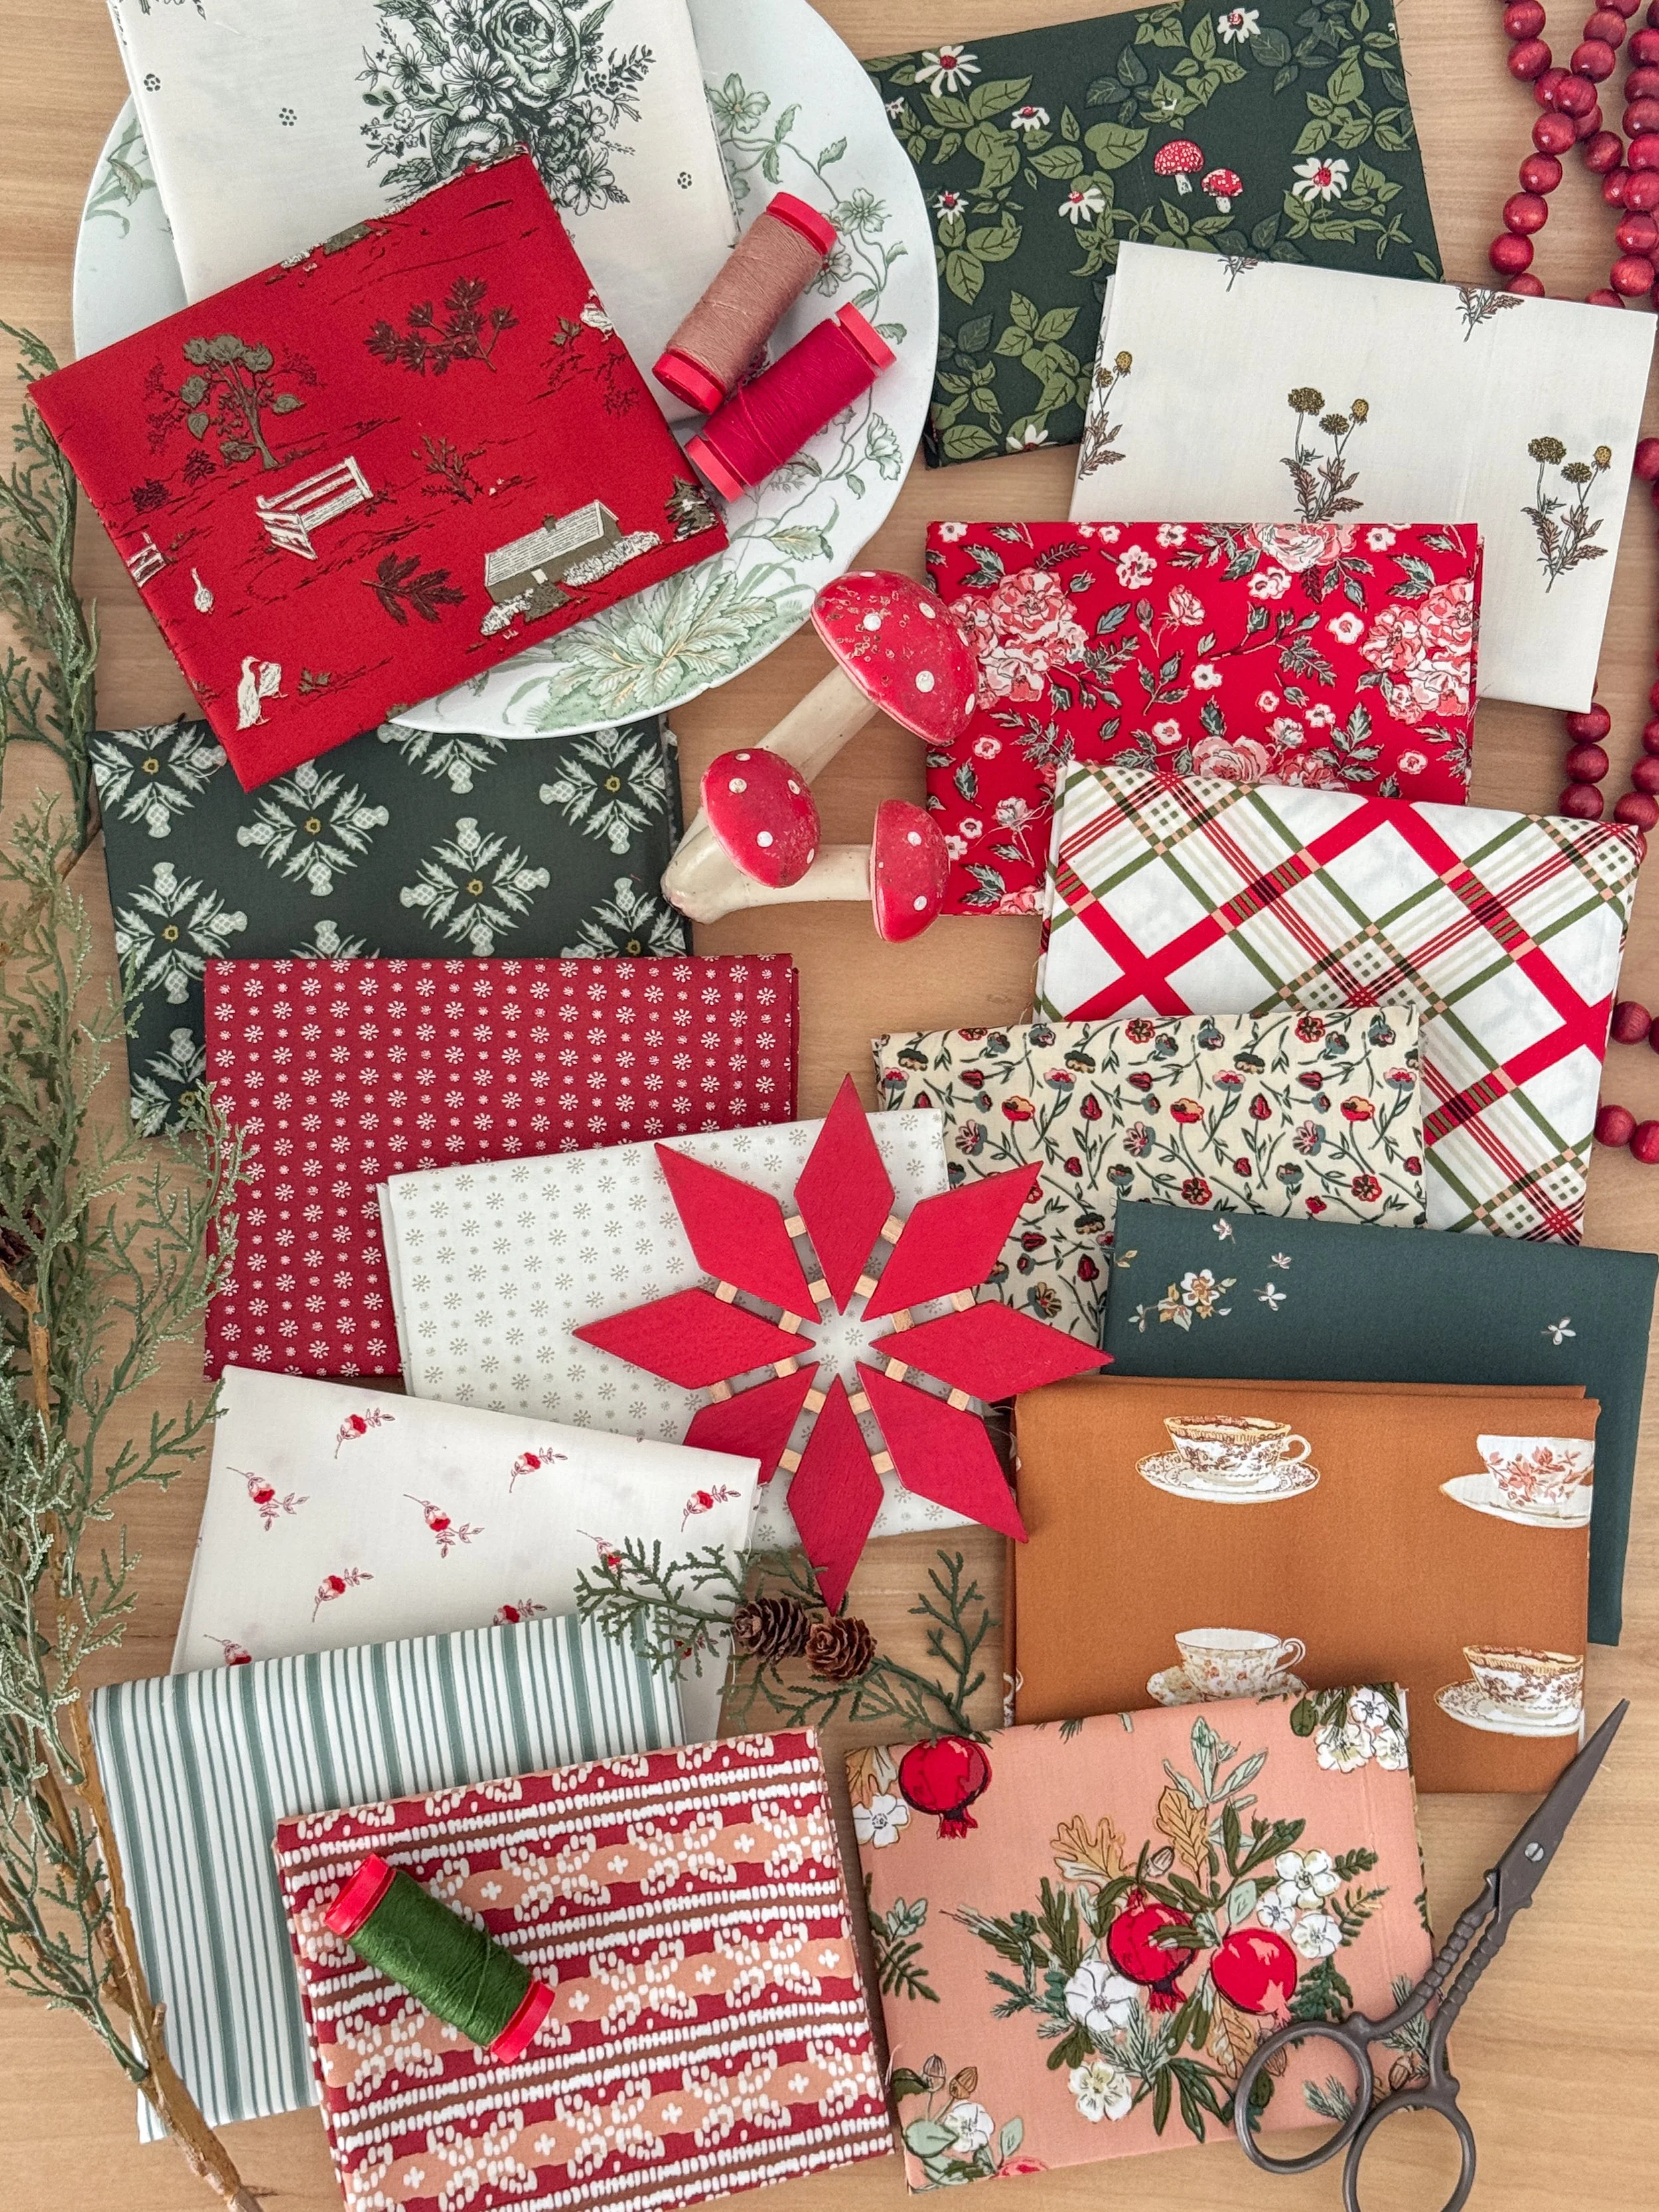
The Spruce fabric collection is a sister collection to Juniper. The Juniper collection, released two years ago, represents a fall-into-winter country farmhouse aesthetic with warm, honied oranges, evergreen, and winter whites. Spruce is Juniper’s UK sister and is decidedly a winter collection, featuring a more traditional palette of deep red, forest green, cream, and warm toffee. I designed Spruce last winter before my Scotland and Ireland trip this fall, and I feel the collection captures the richness of both countries’ culture and landscape, reflecting their rugged scenery, historic charm, and cozy seasonal character.

Along with the 16 quilting cottons show in the first image, the AGF Spruce collection includes a 2.5 Edition Binding and double-brushed flannel.


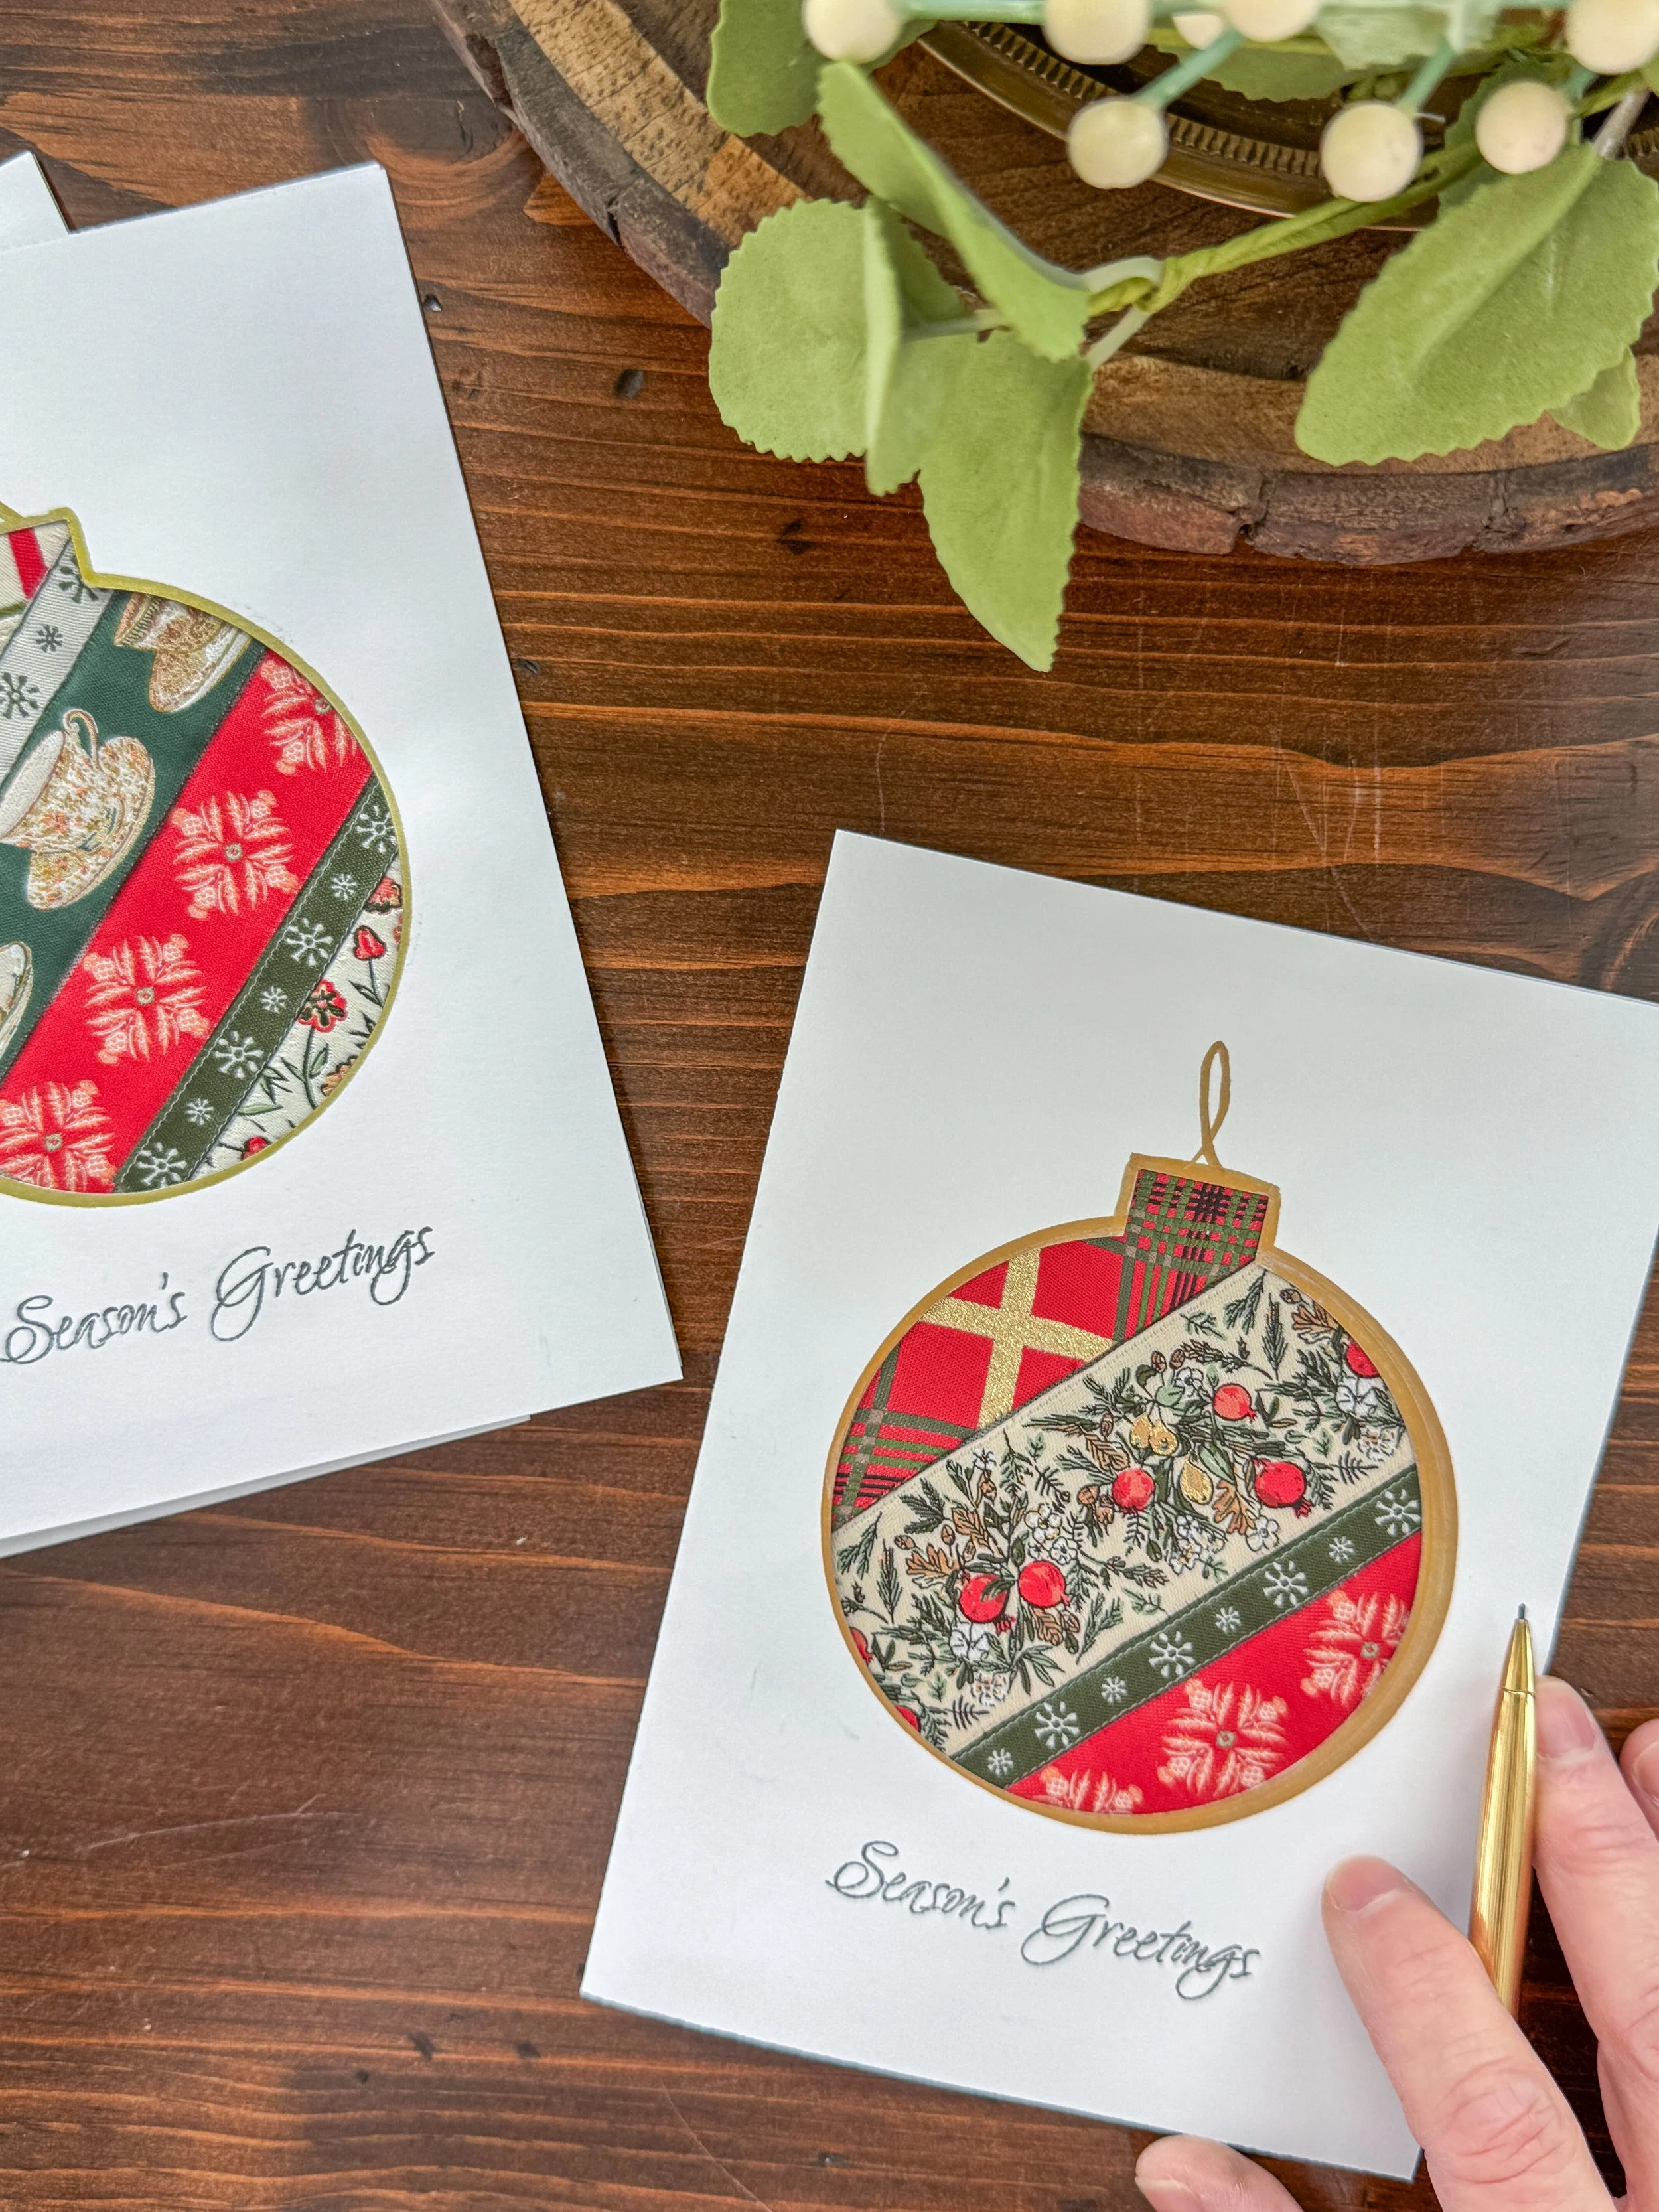
No-Sew Ribbon Ornament Card Tutorial
Here’s a quick tutorial for you for making your own handmade Christmas cards. This adaptable DIY card could be created using many types of materials from fabric strips, felt, colored paper, Washi tape, and more. You could also use just about any sort of simple cutout shape to create other iconic symbols of the season. I used a wide-mouth canning jar lid as my circle template and added a rectangle at the top for the ornament stem but if you have a cutting machine, like a Circut that would make it even easier to cut out a shape on a 5" x 7" card stock card.
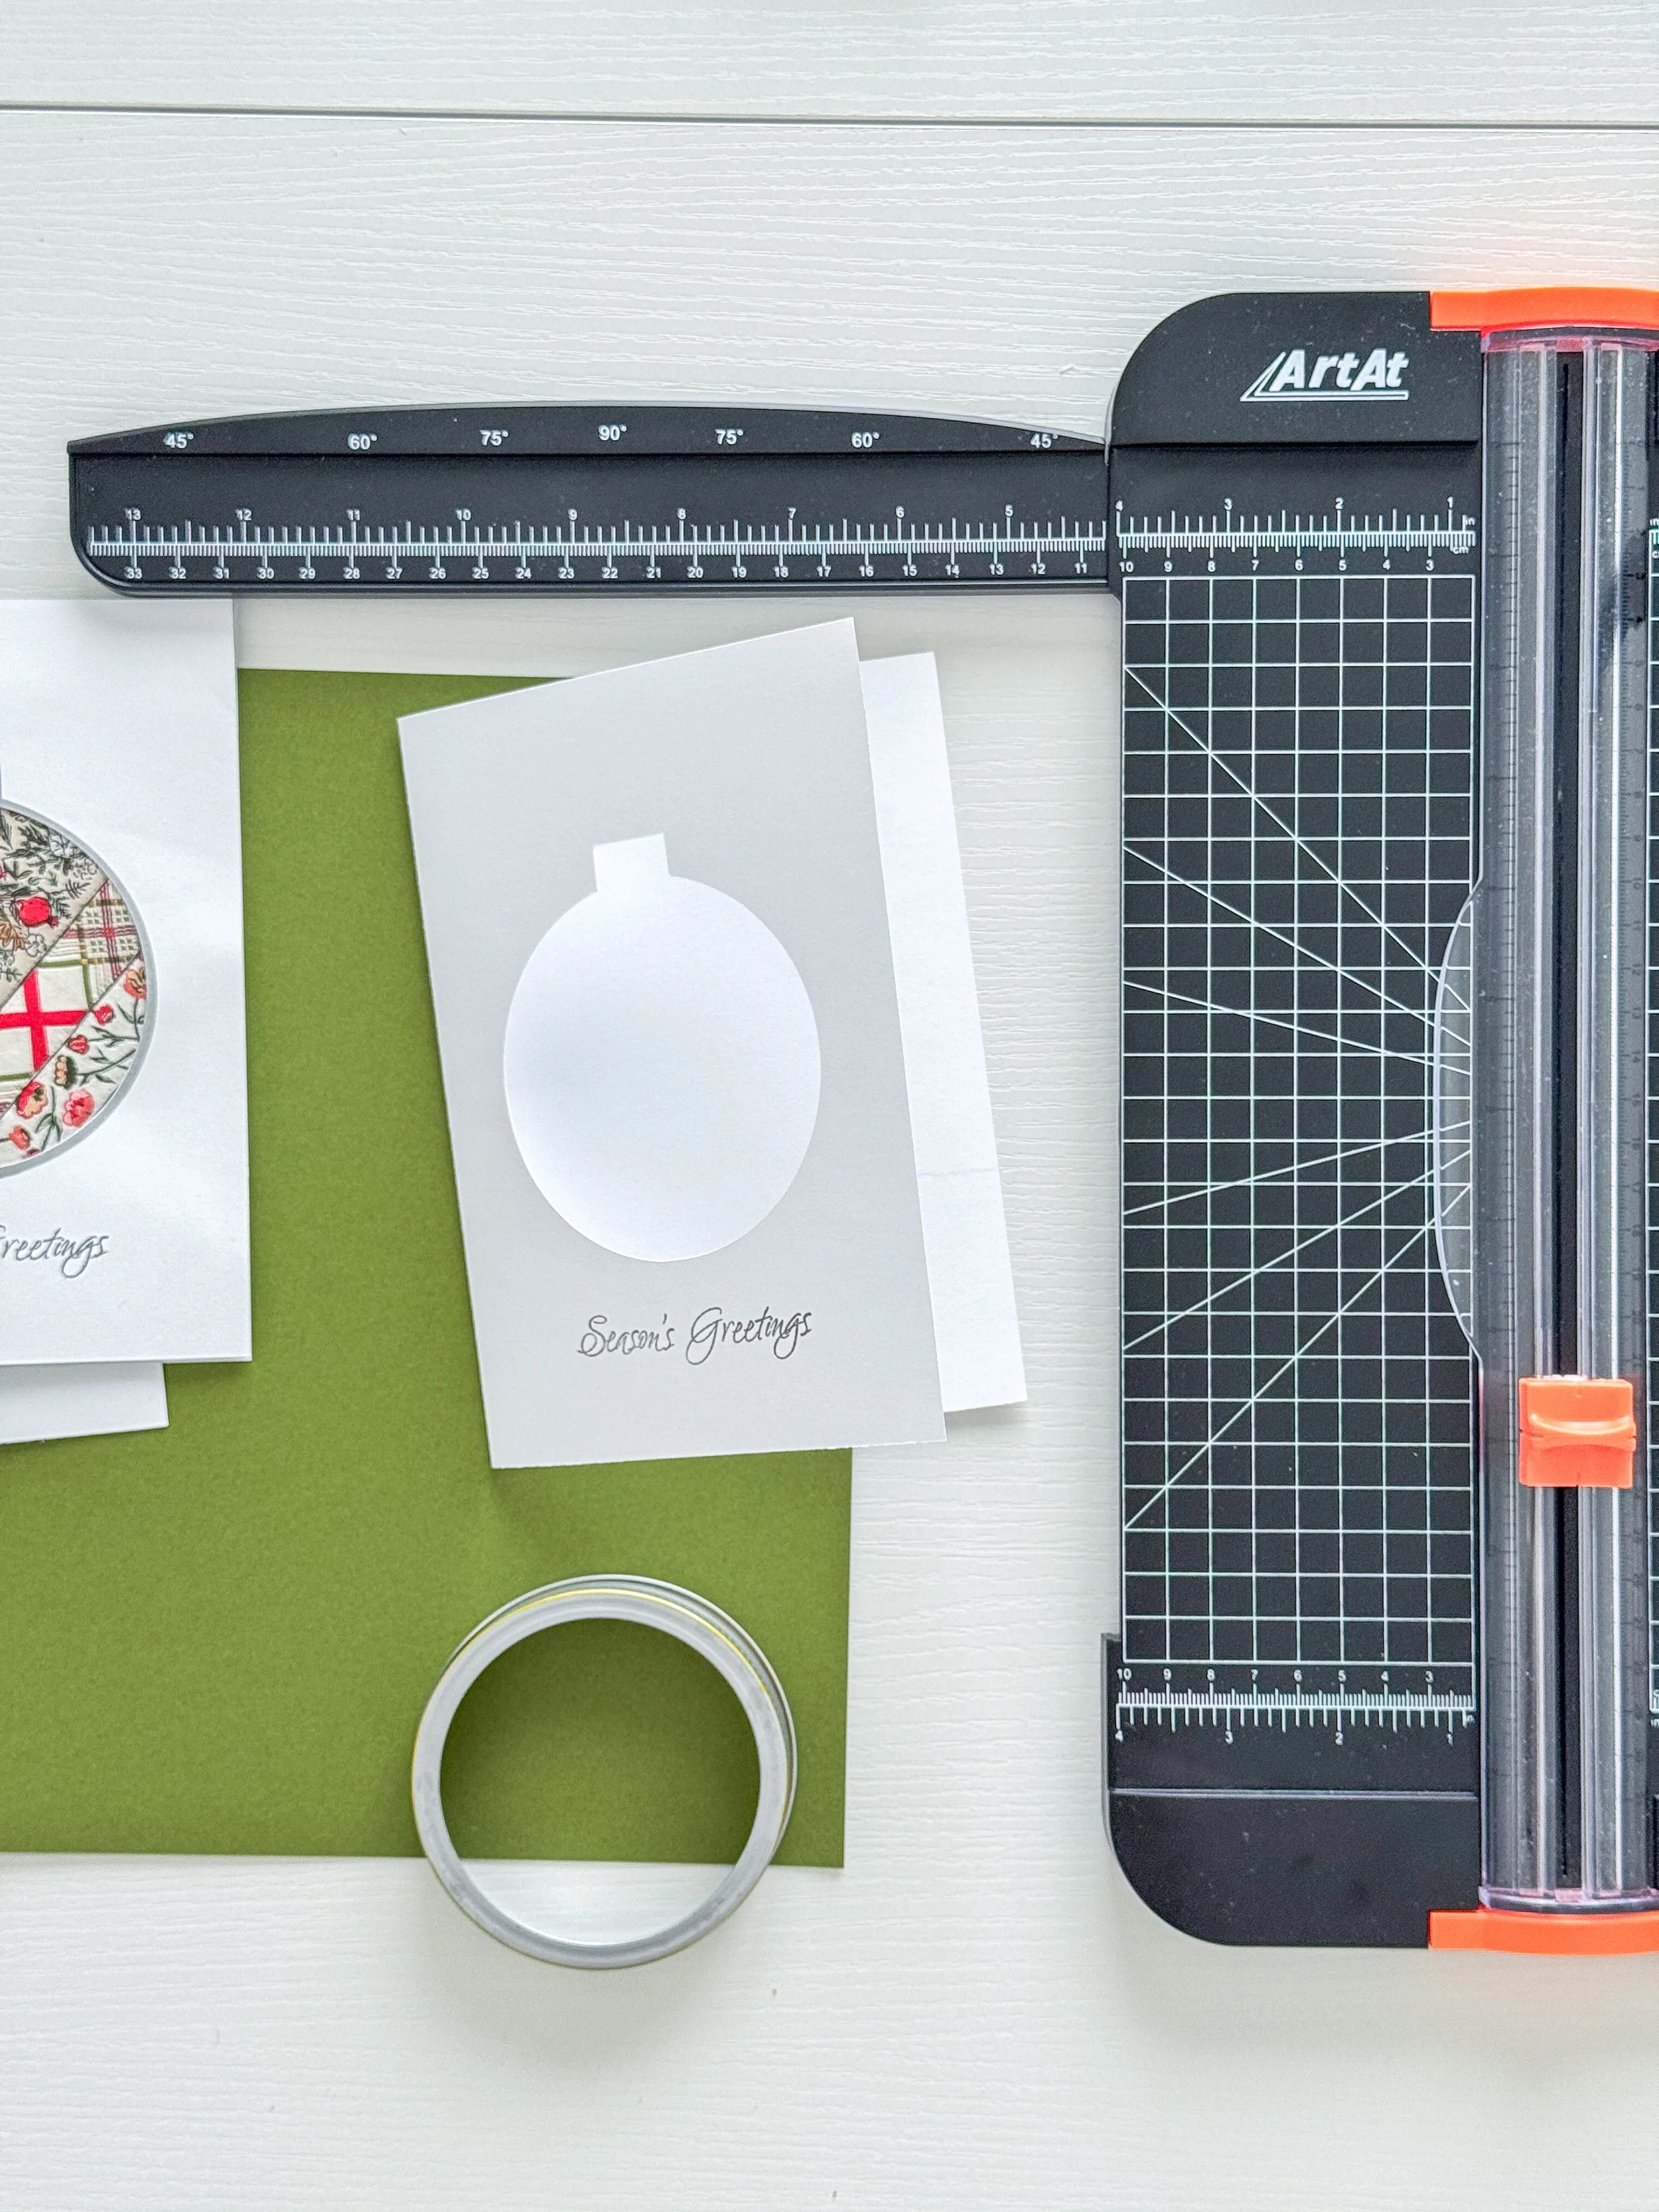
Pre-cut your cardstock to desired card size, fold, and cut a shape opening on the front of the card. I also added a rubber stamped Season’s Greetings to the front of my card.
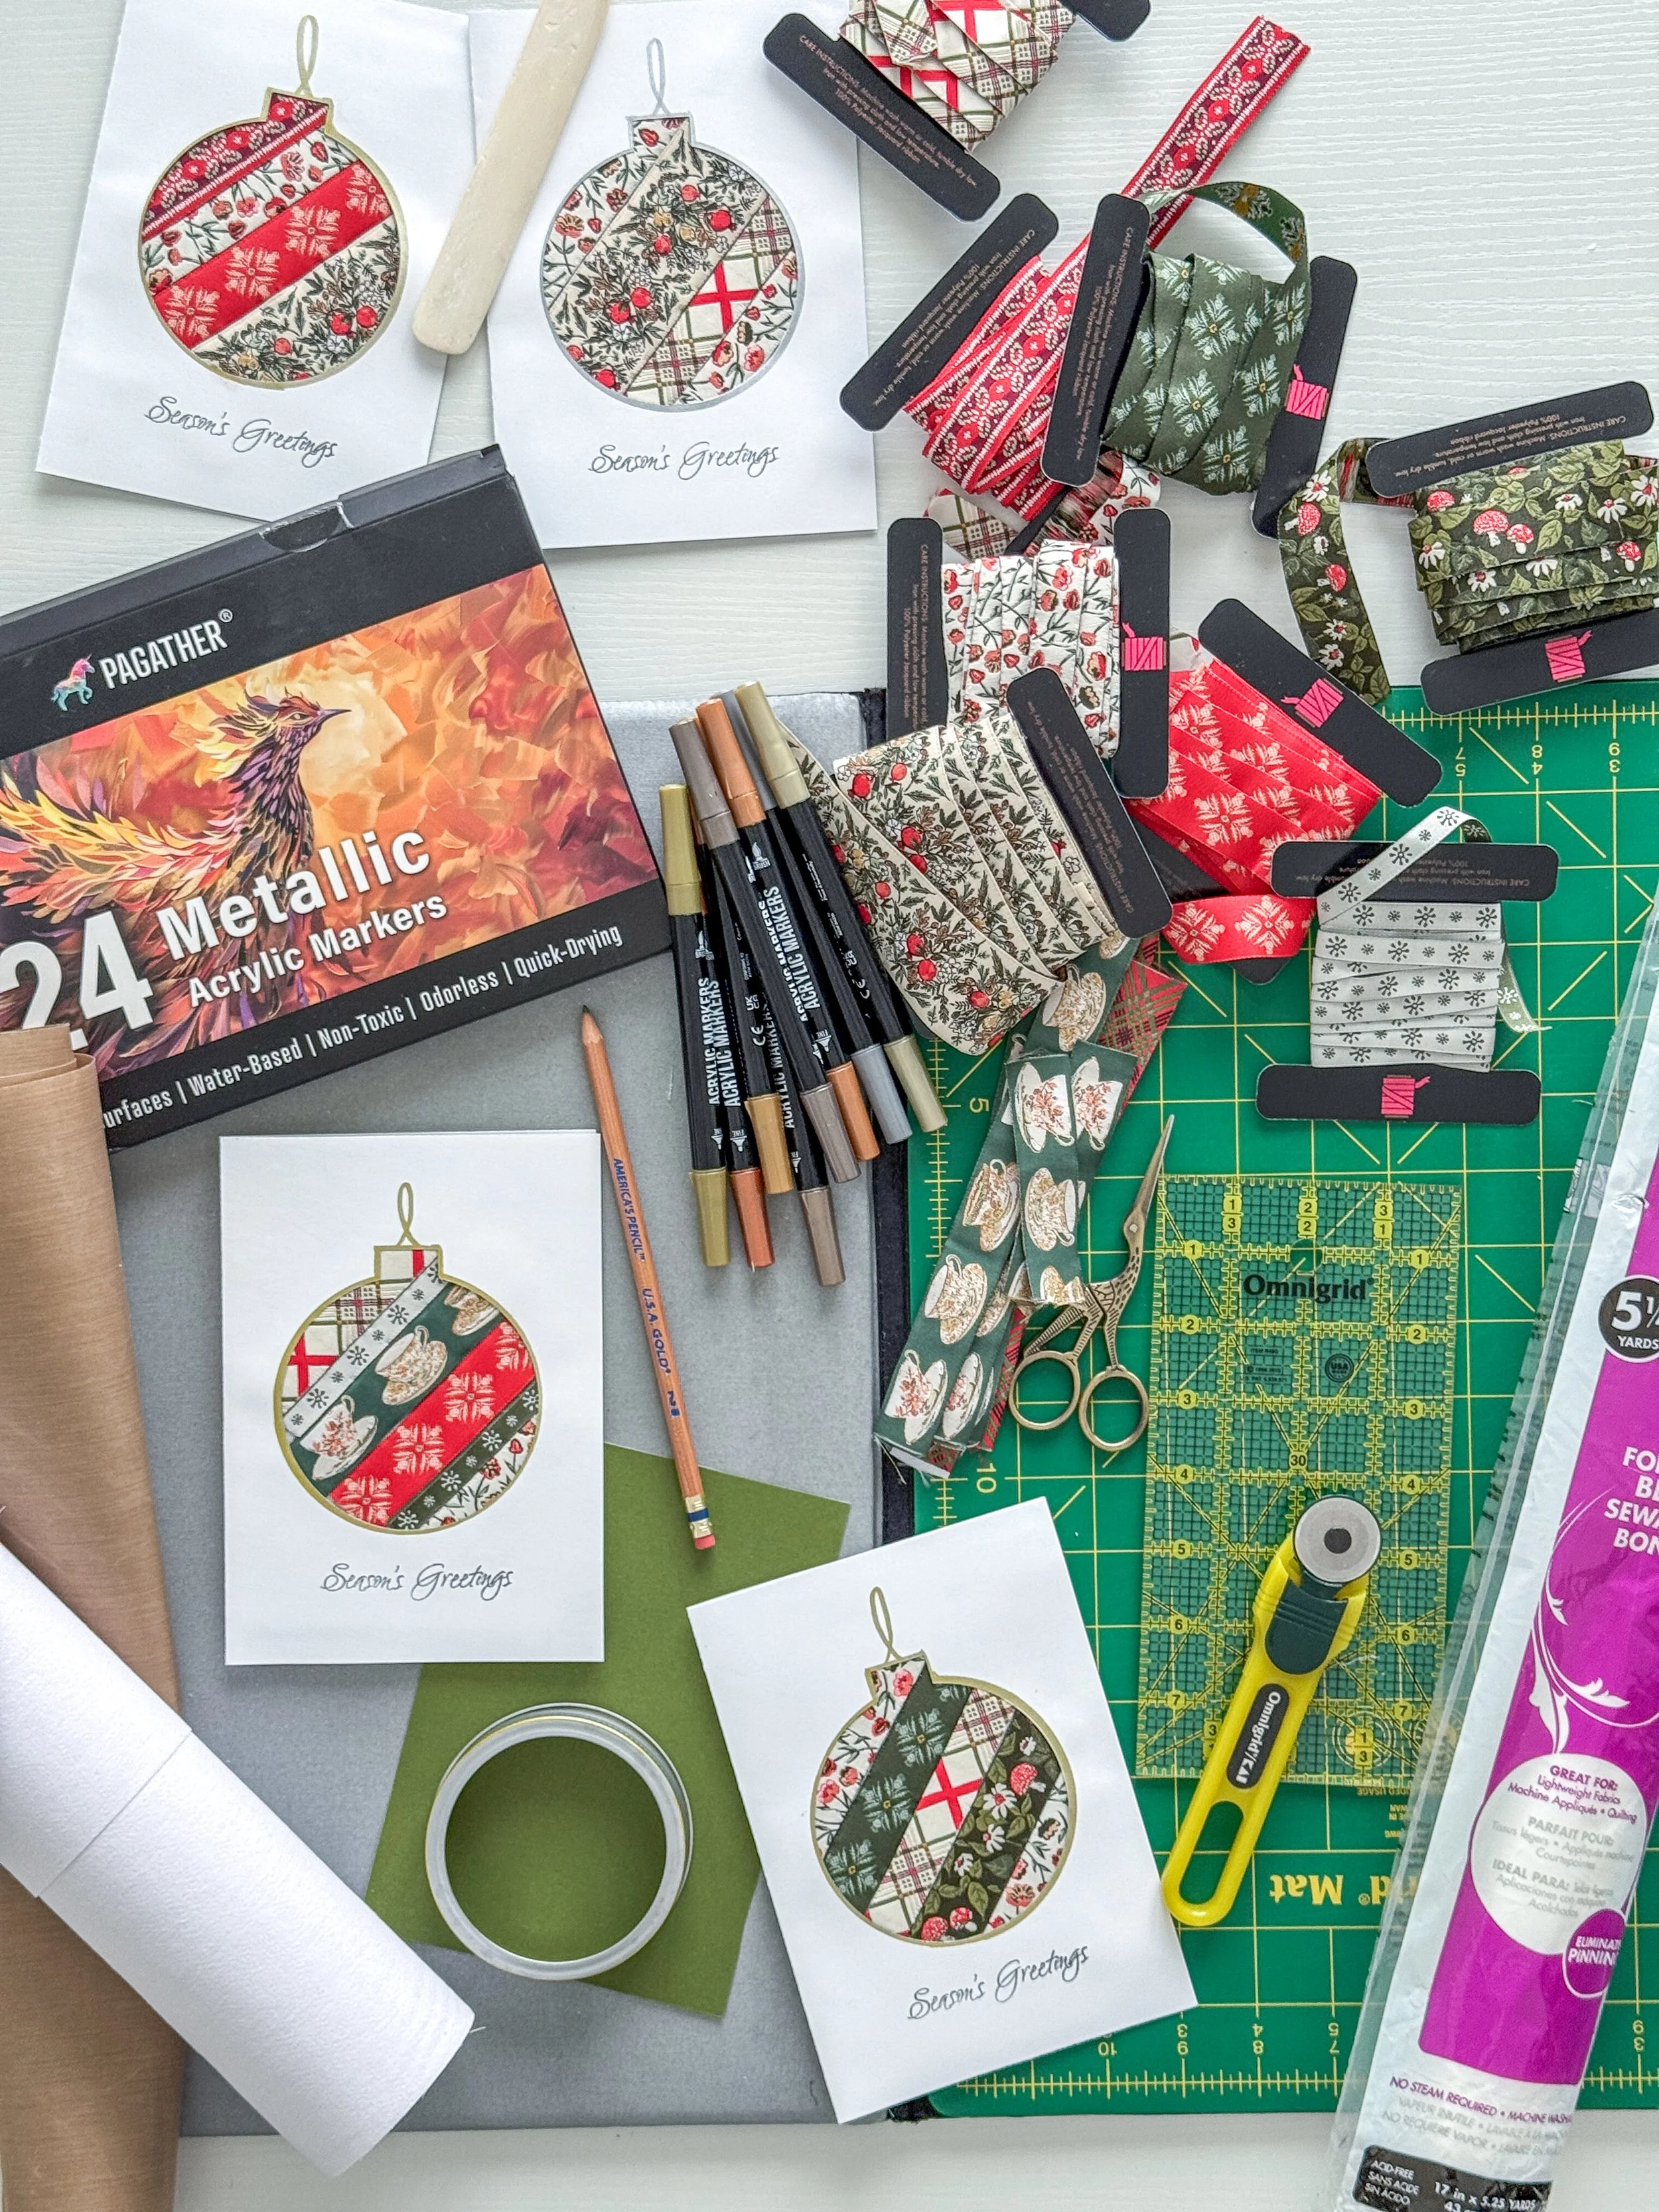
Gather the sewing and craft supplies:
Cardstock cut to a 5" x 7" card once folded
Wide mouth canning jar lid, cookie cutter shapes, or cutting machine for cutting shapes
Extra cardstock for backing the backside of the card front - Cut to 5" x 7"
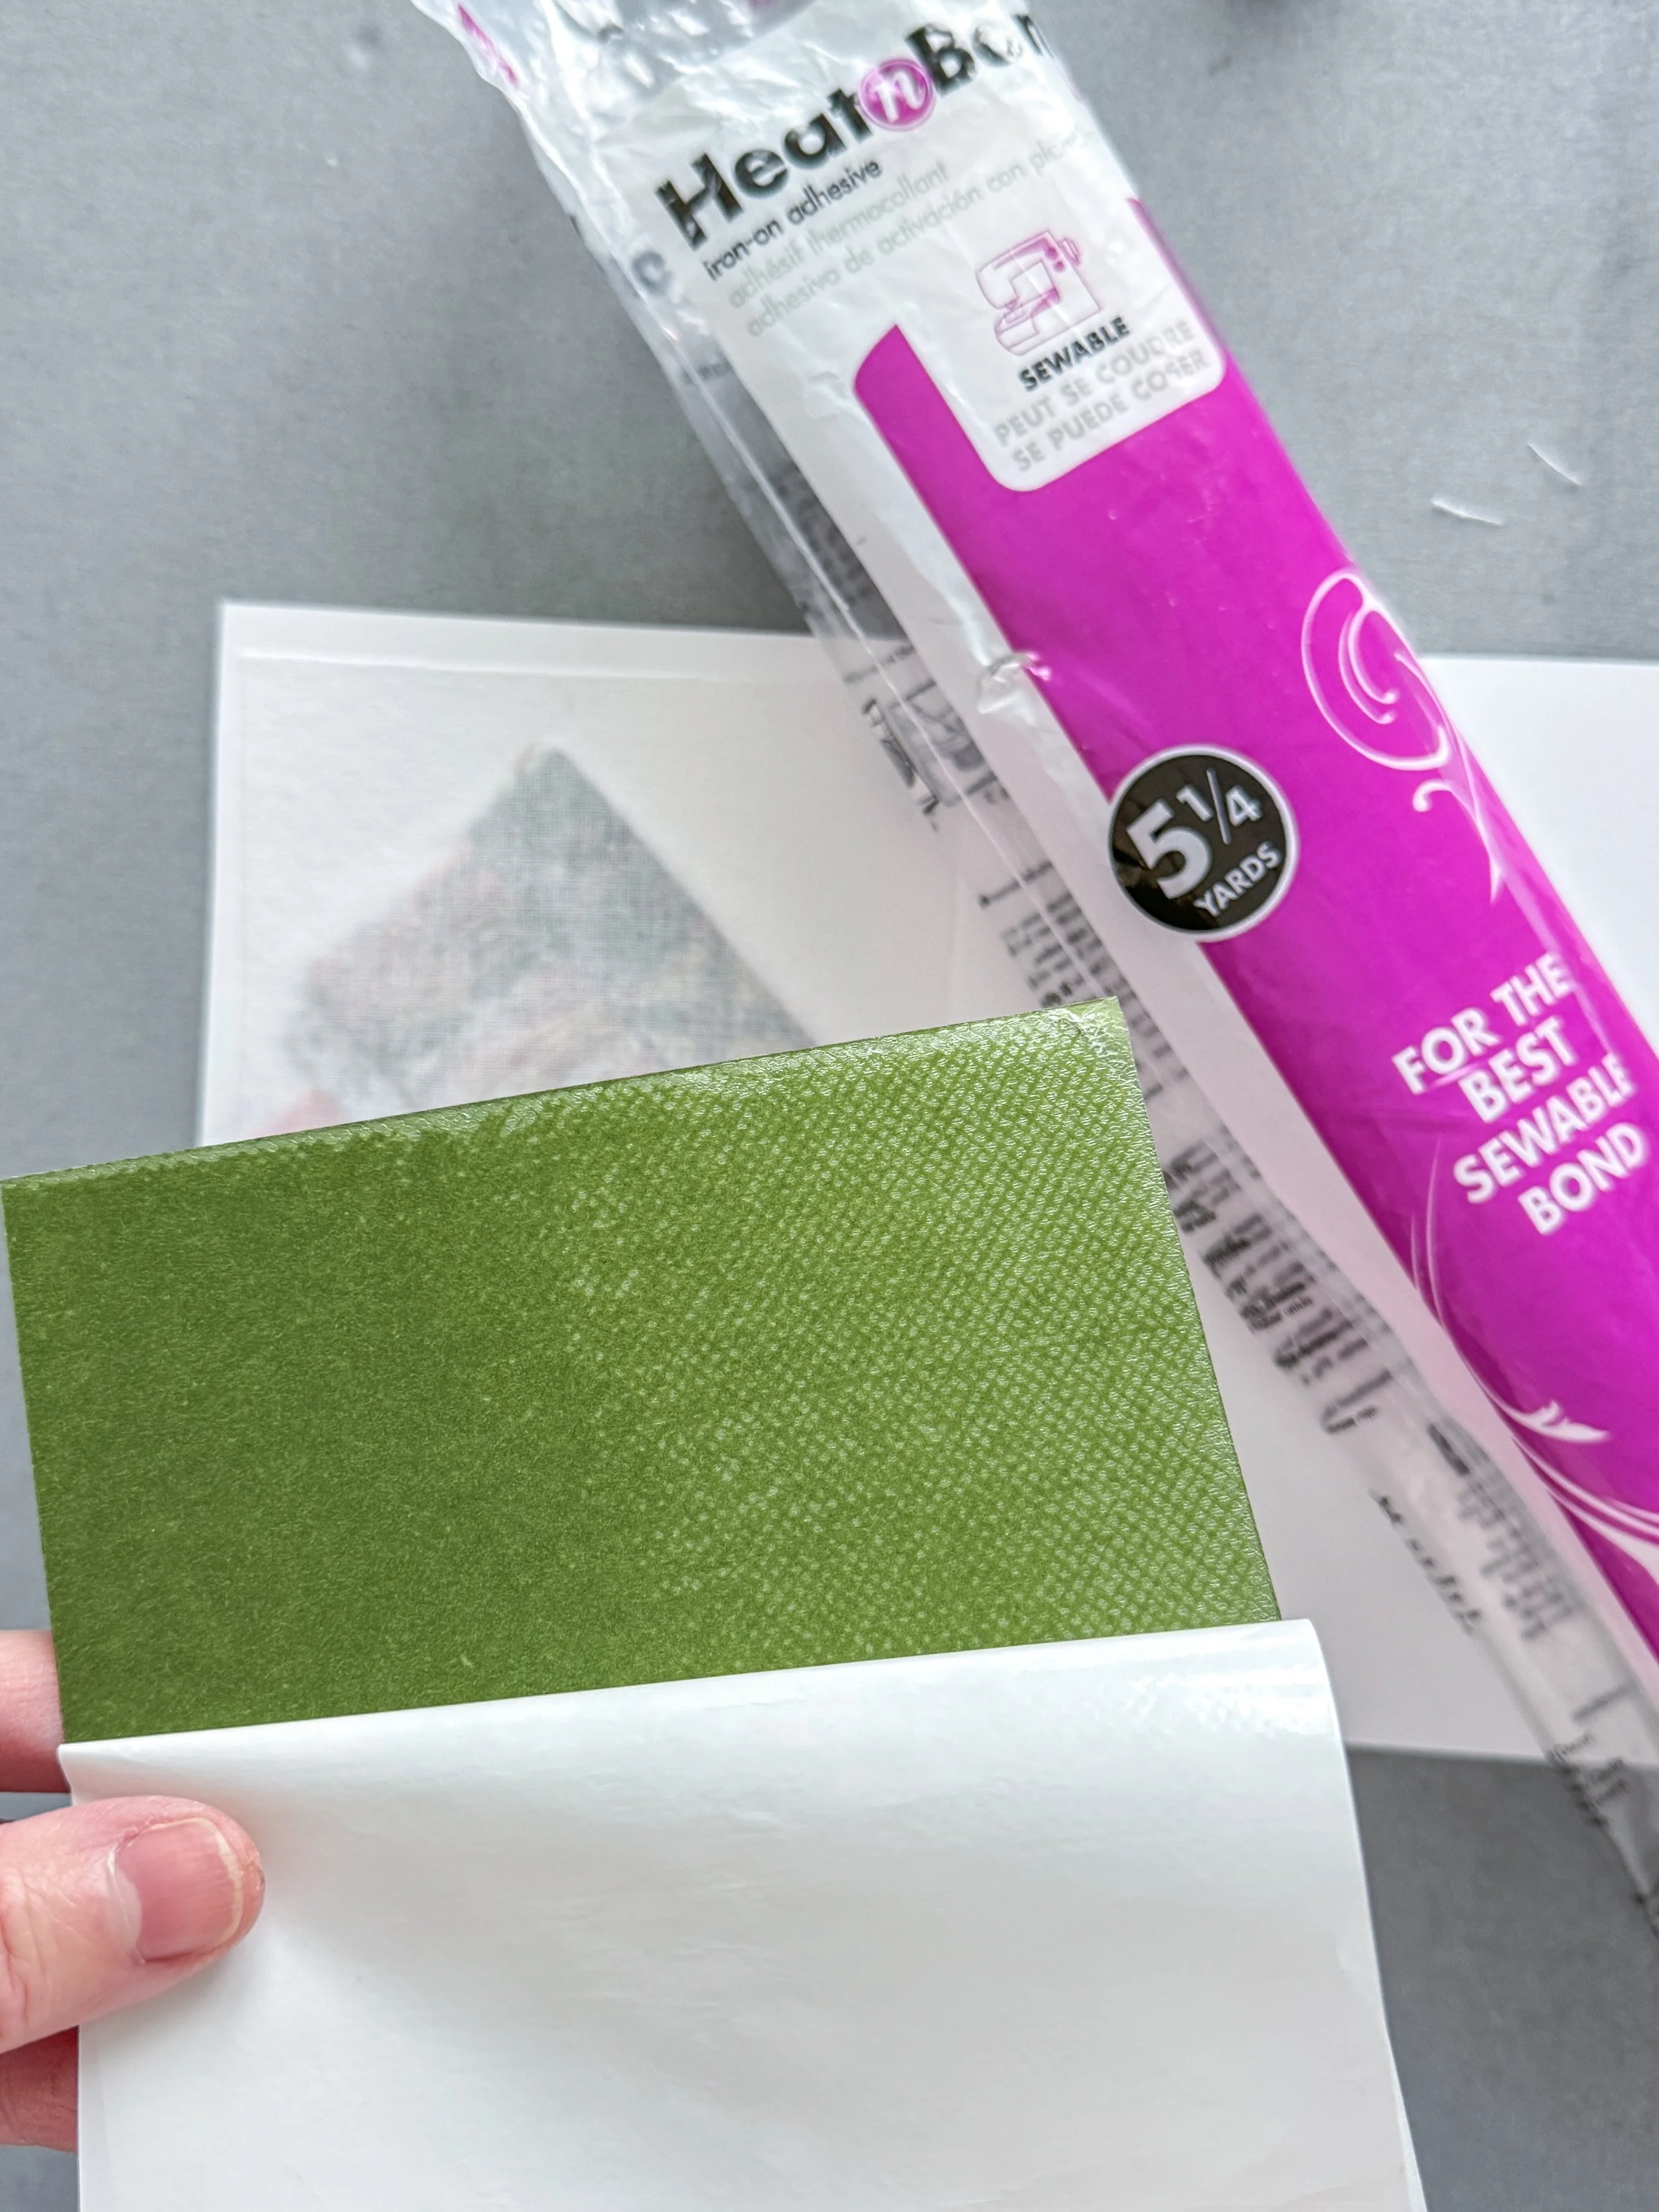
Light to medium weight one-sided fusible woven interfacing (for ribbon base)
Double-sided fusible adhesive webbing (for card front backing)
Teflon or pressing cloth to protect the ribbons when fusing
Ribbons or other materials of choice
Metallic acrylic markers to add some sparkle around your ornament edge
Plus: bone folder, pencil, scissors, paper cutter, cutting mat, ruler, pressing surface
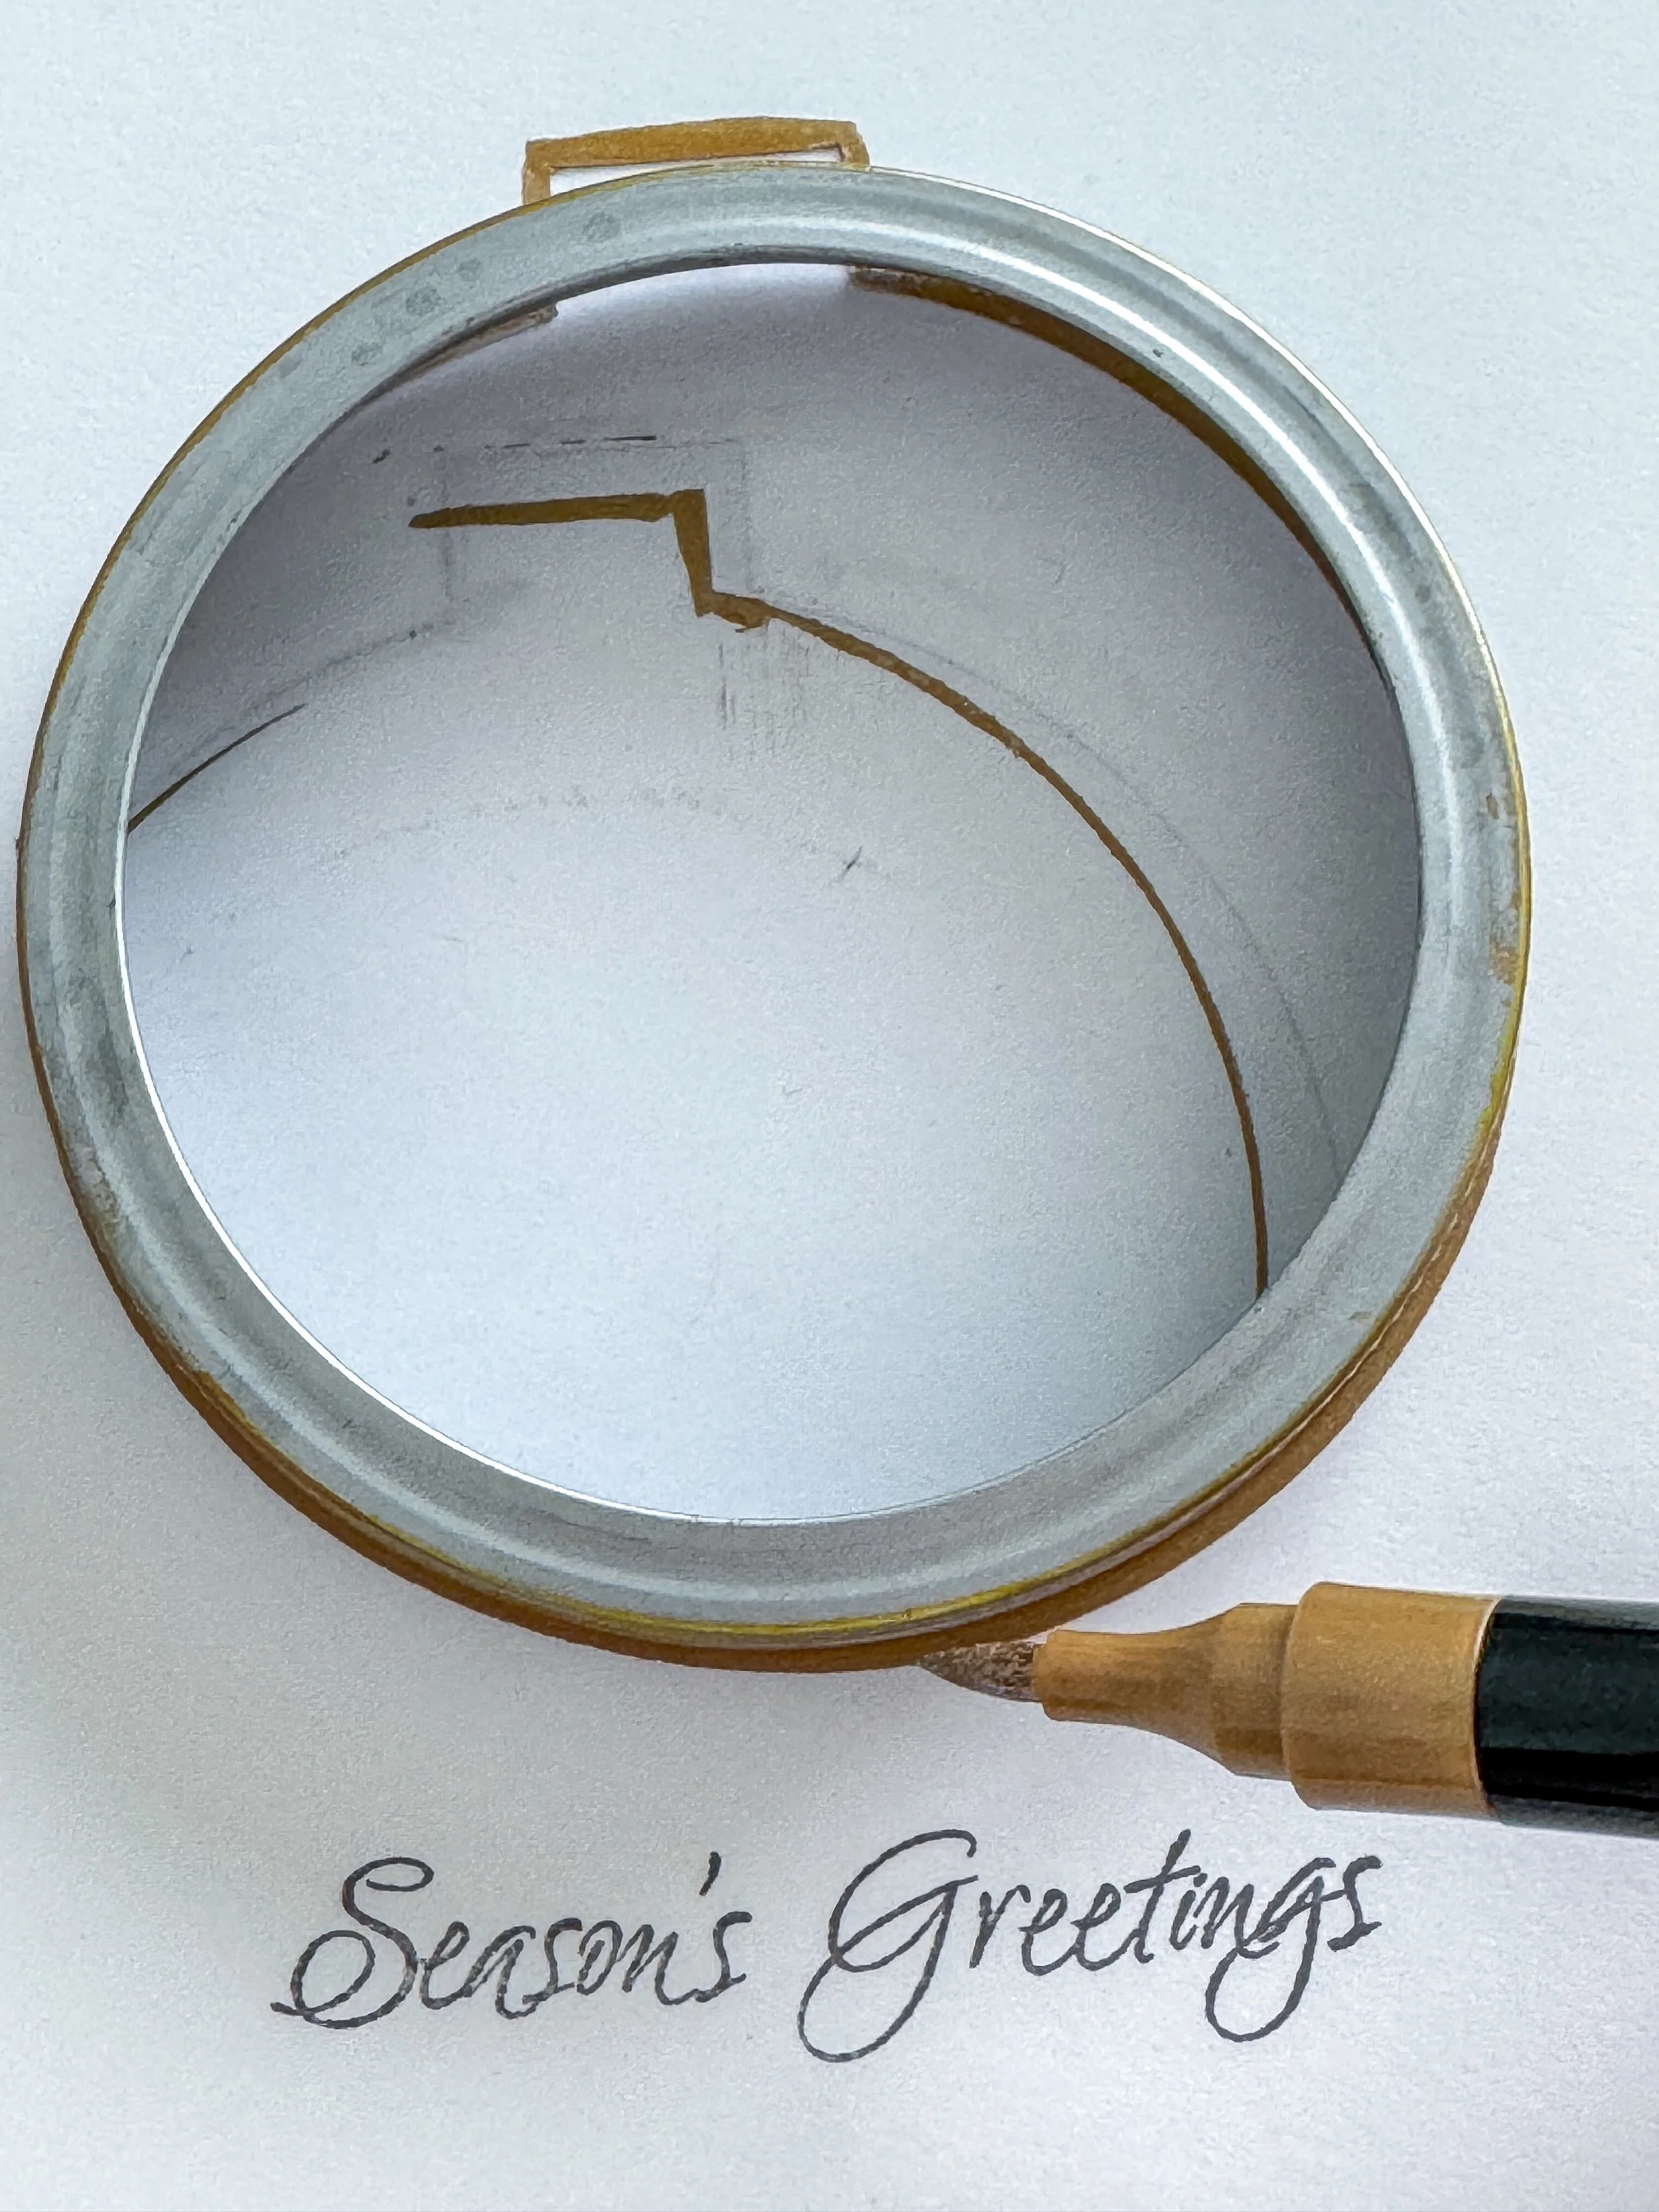
With a piece of scrap paper under the cutout opening, use the canning jar lid as a template and add a metallic edge to the opening. Let dry and wipe or wash off the jar lid often if doing several cards so no unwanted ink is transferred.
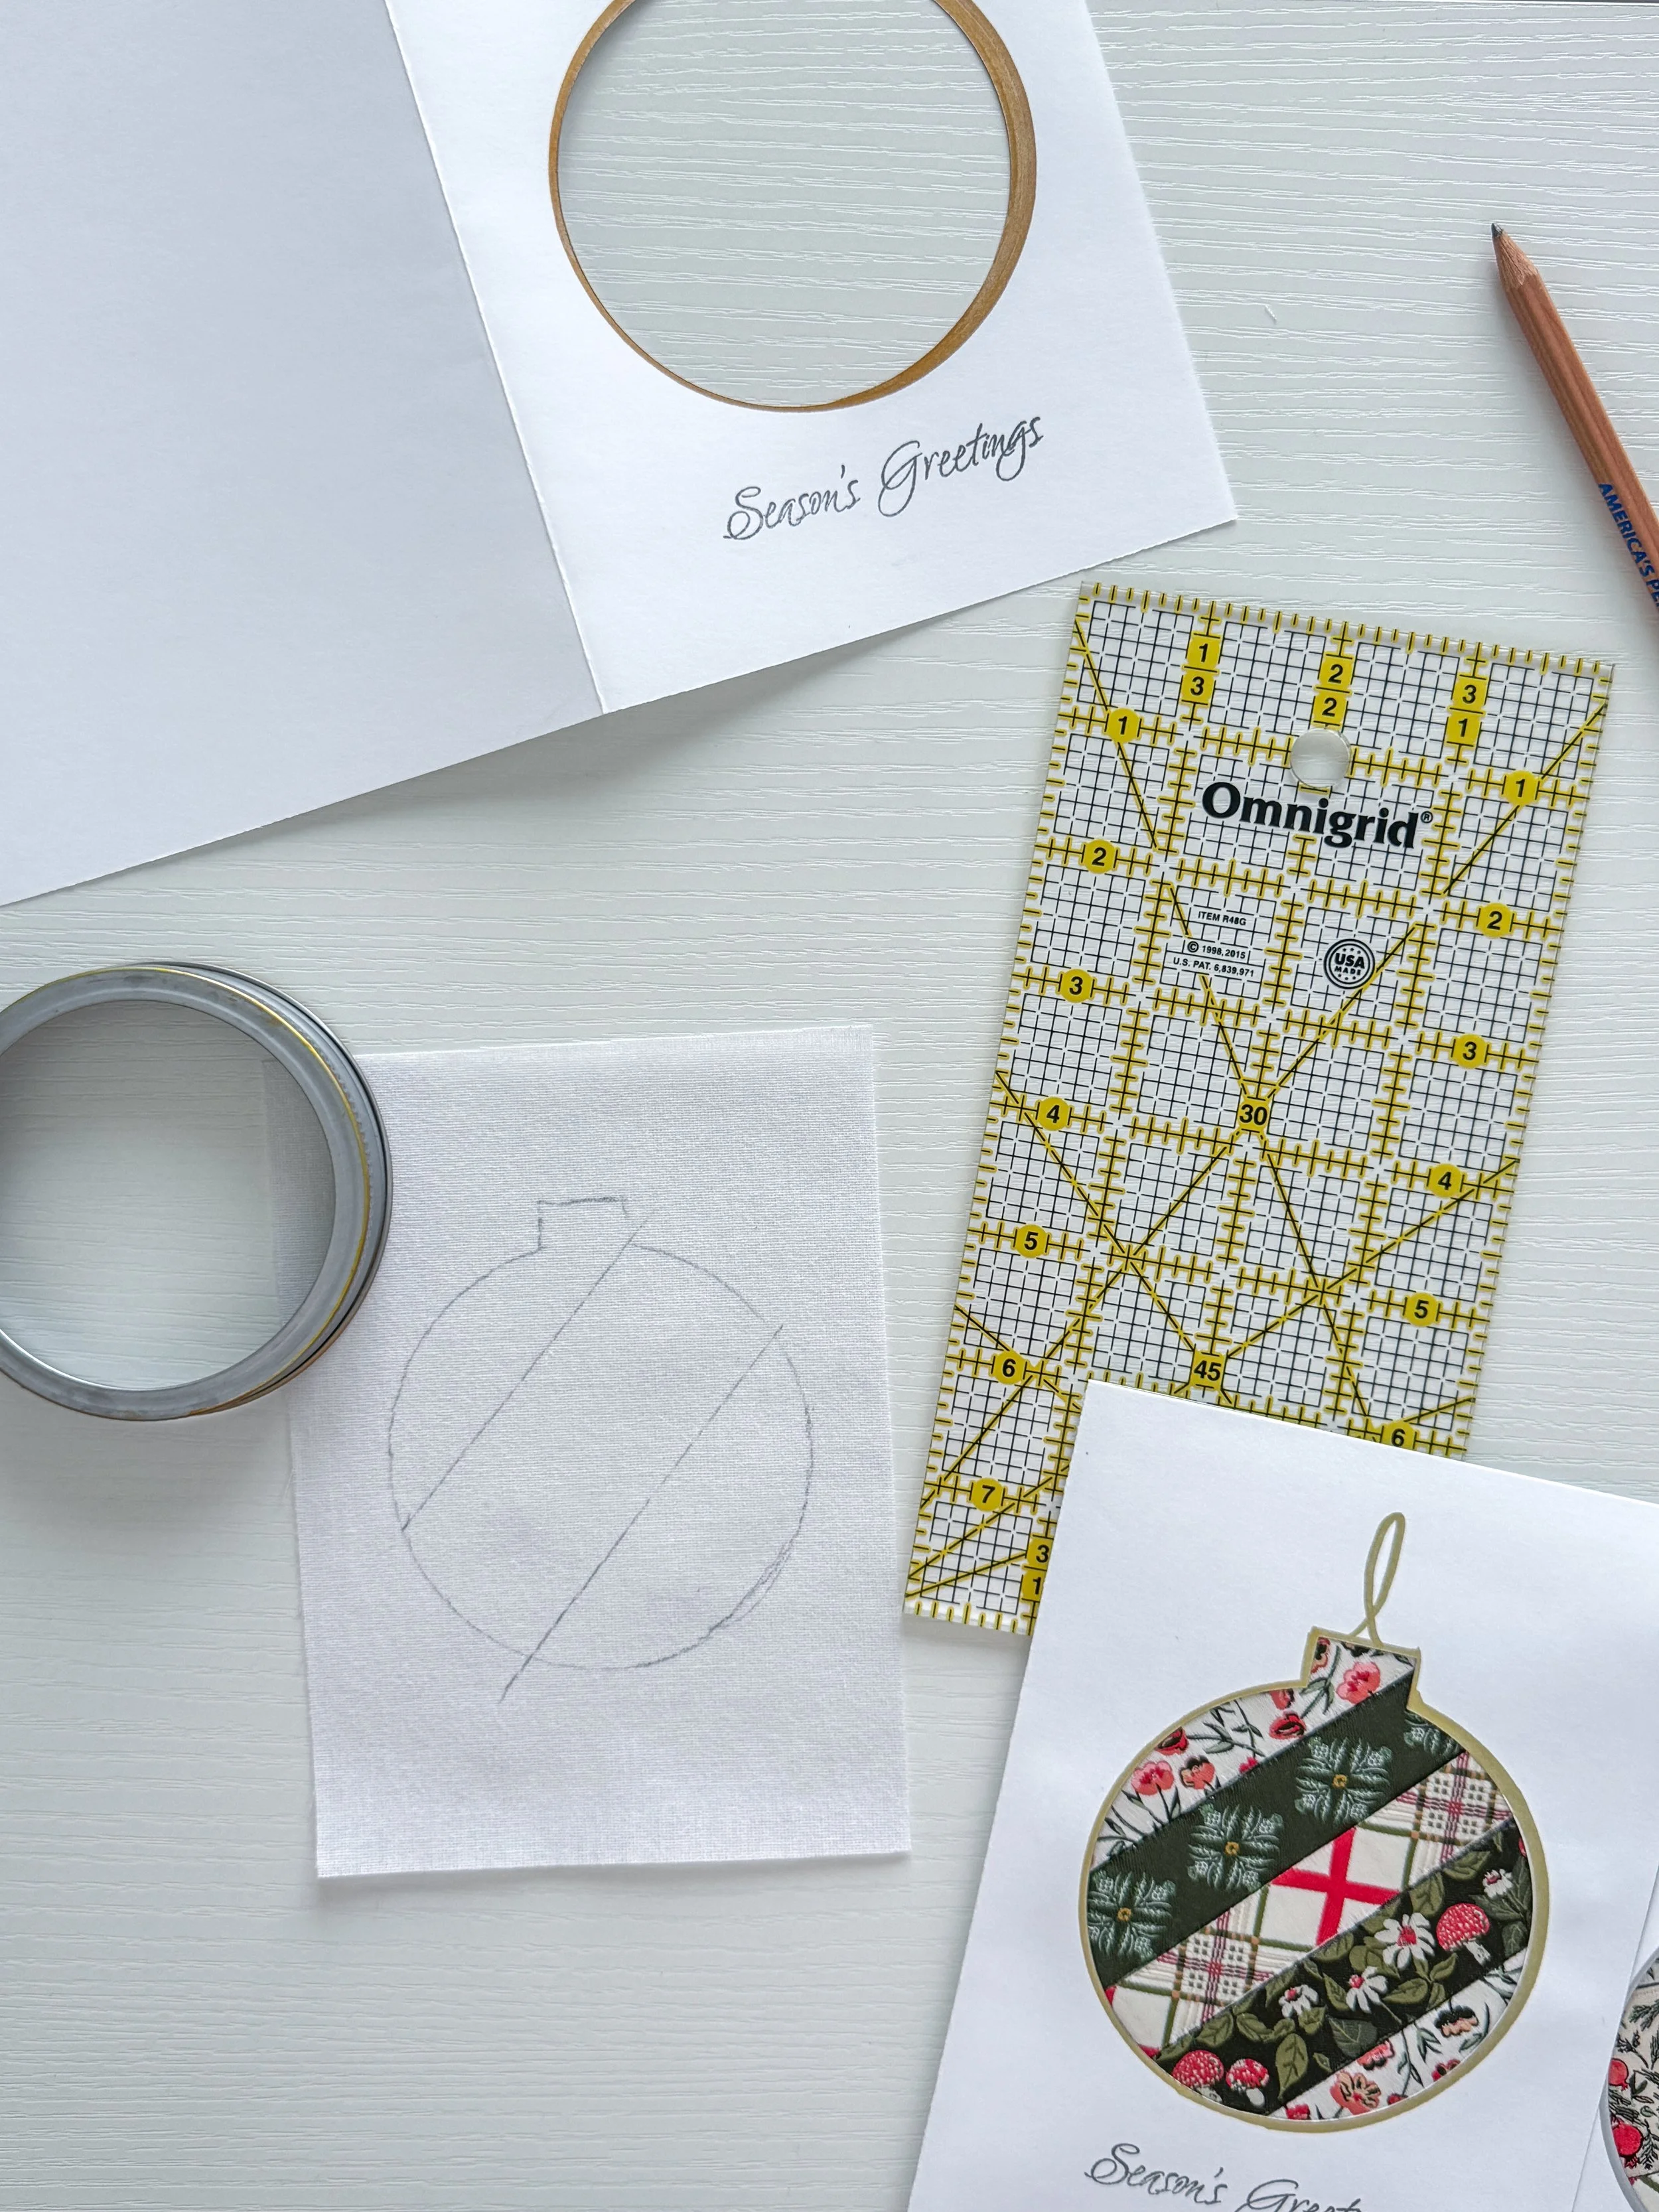
Flip the card to the wrong side and use the cutout opening to trace the shape onto the adhesive (rough) side of a 4-1/2" x 6-1/2" piece of woven interfacing. Add some guide lines for ribbon placement. I decided that 45 degree angled ribbons looked pretty so drew a couple lines. These are just guides and help with keeping things straight—don’t get hung up on them needing to be perfectly spaced.
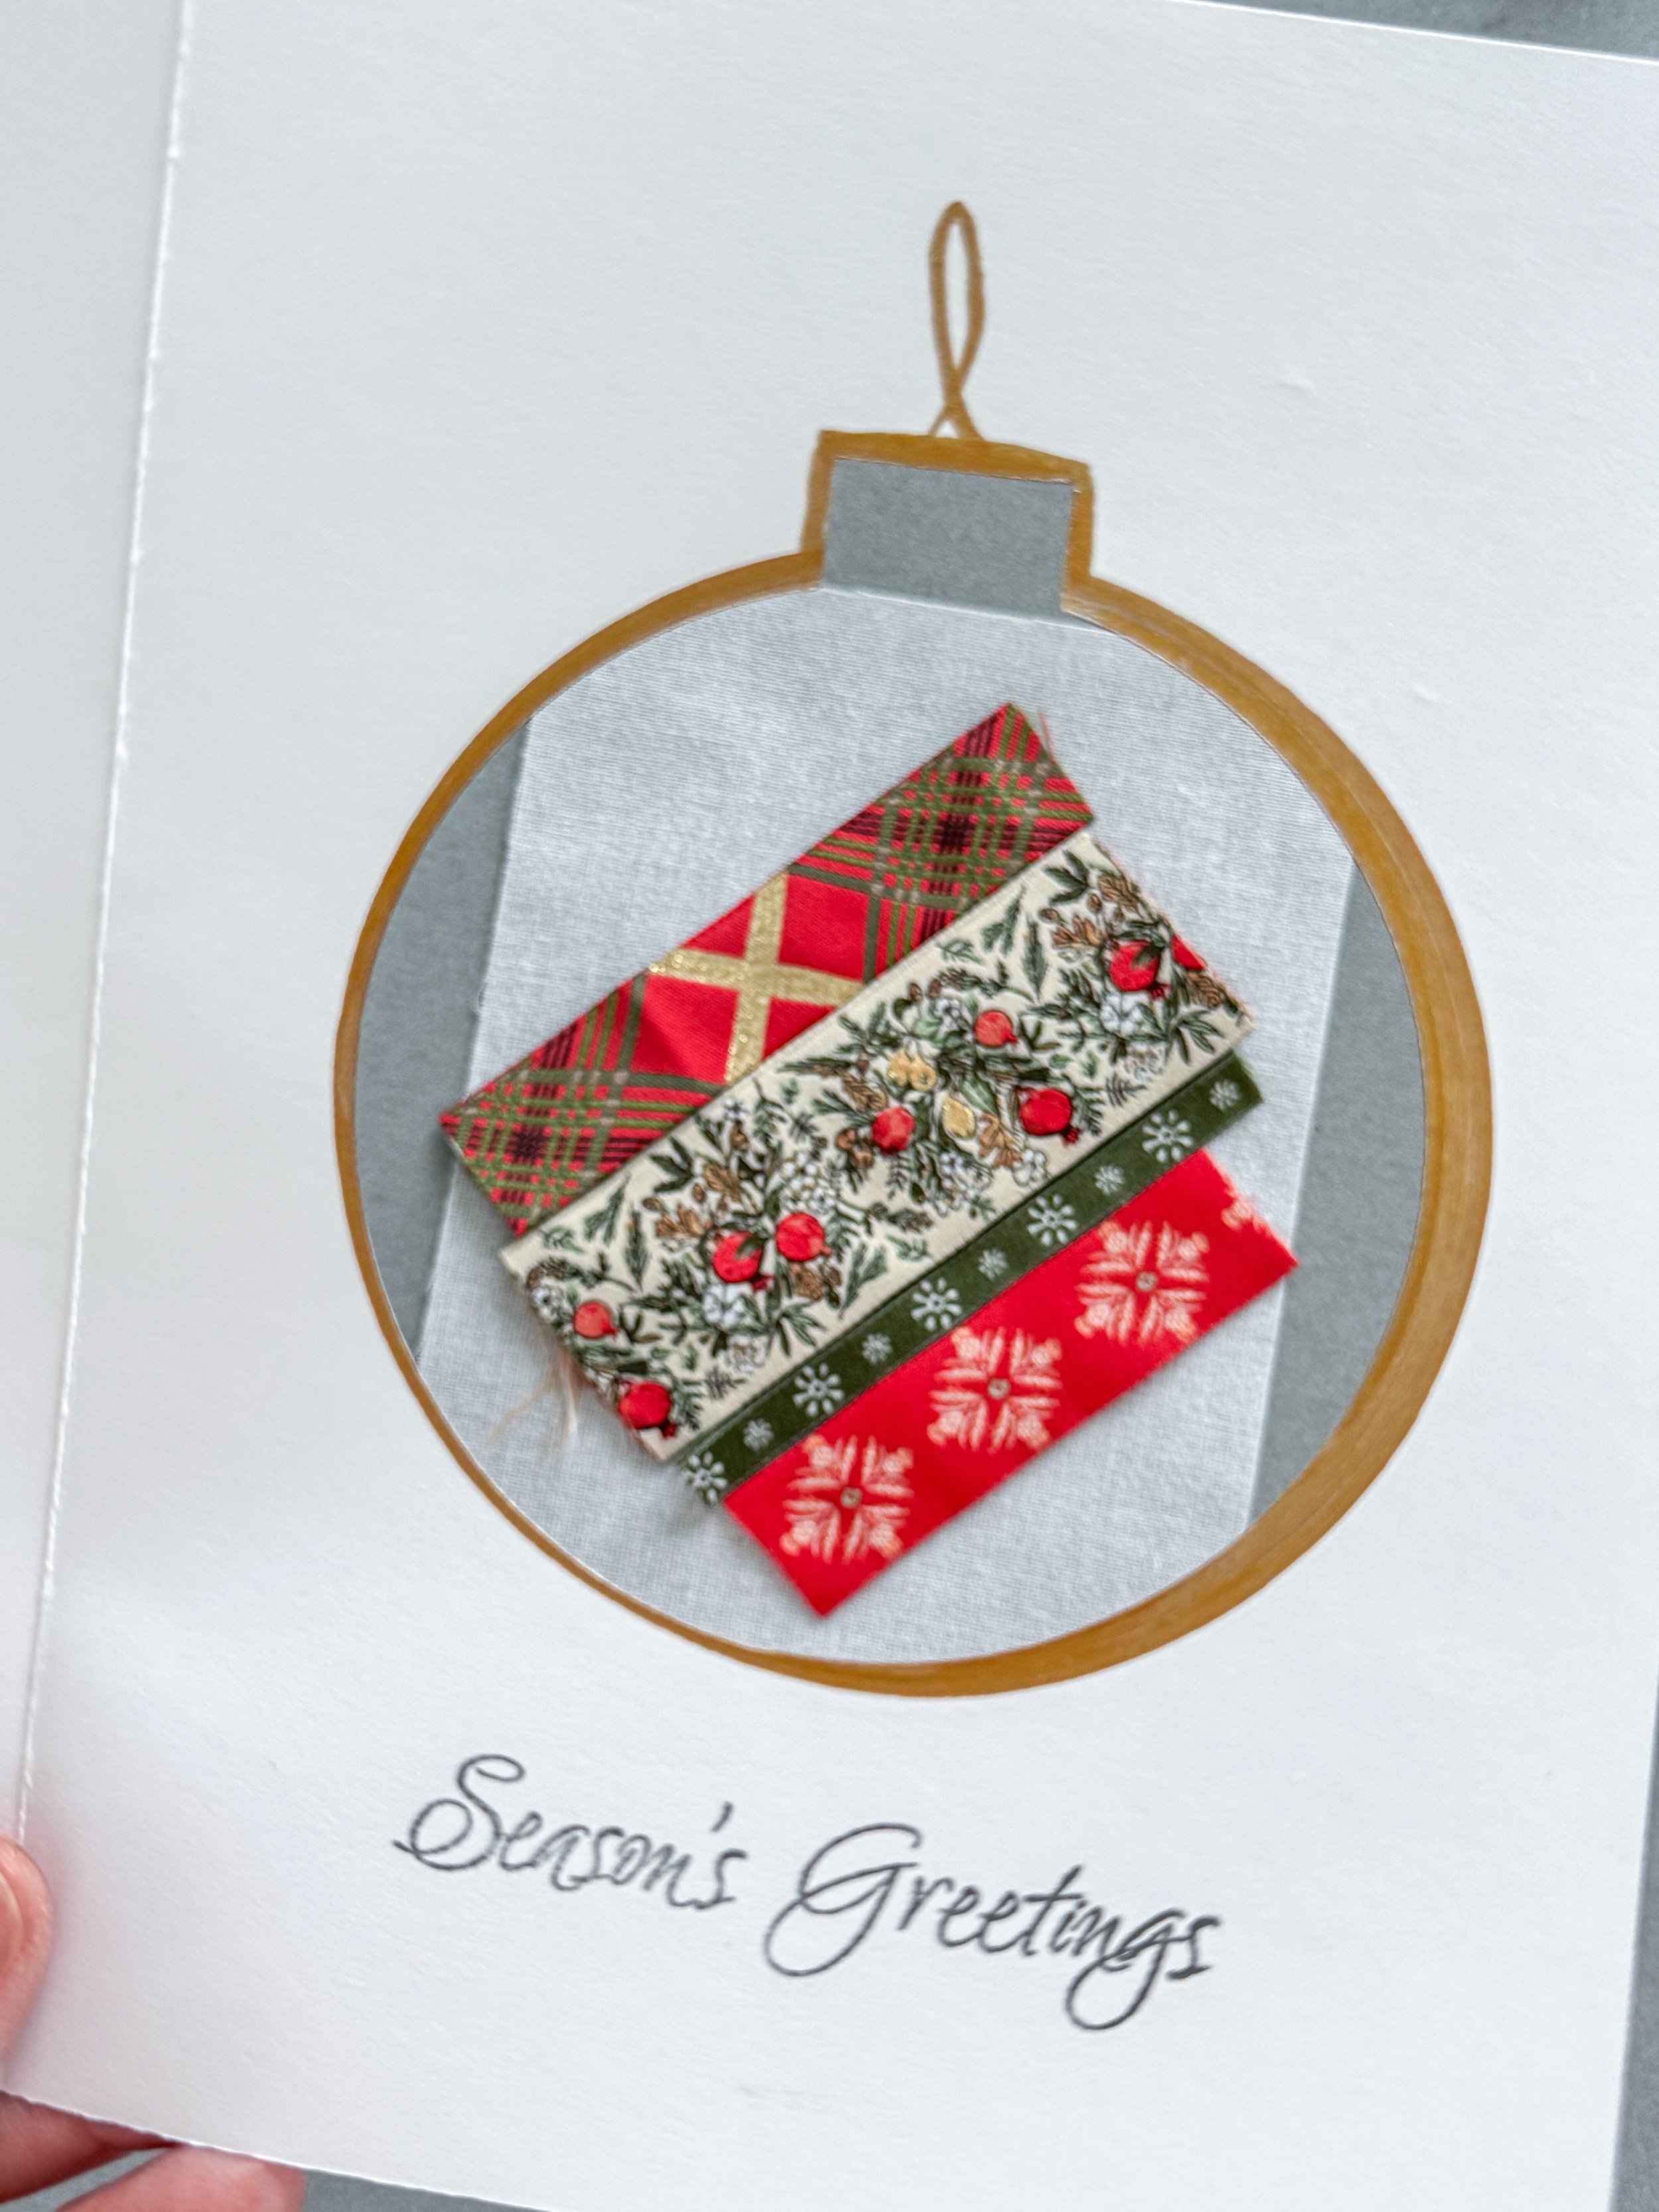
Cut your ribbons a little longer so they extend at least 1/4" past the drawn shape lines. Position the ribbon on the adhesive (rough) side of the interfacing. When the ribbons are arranged how you like, place the card opening over them and ensure the entire opening is covered with ribbon so no interfacing shows. Cover the card, ribbon, and interfacing with a Teflon pressing cloth (or your preferred pressing cloth) and press following the manufacturer’s instructions to bond the materials.
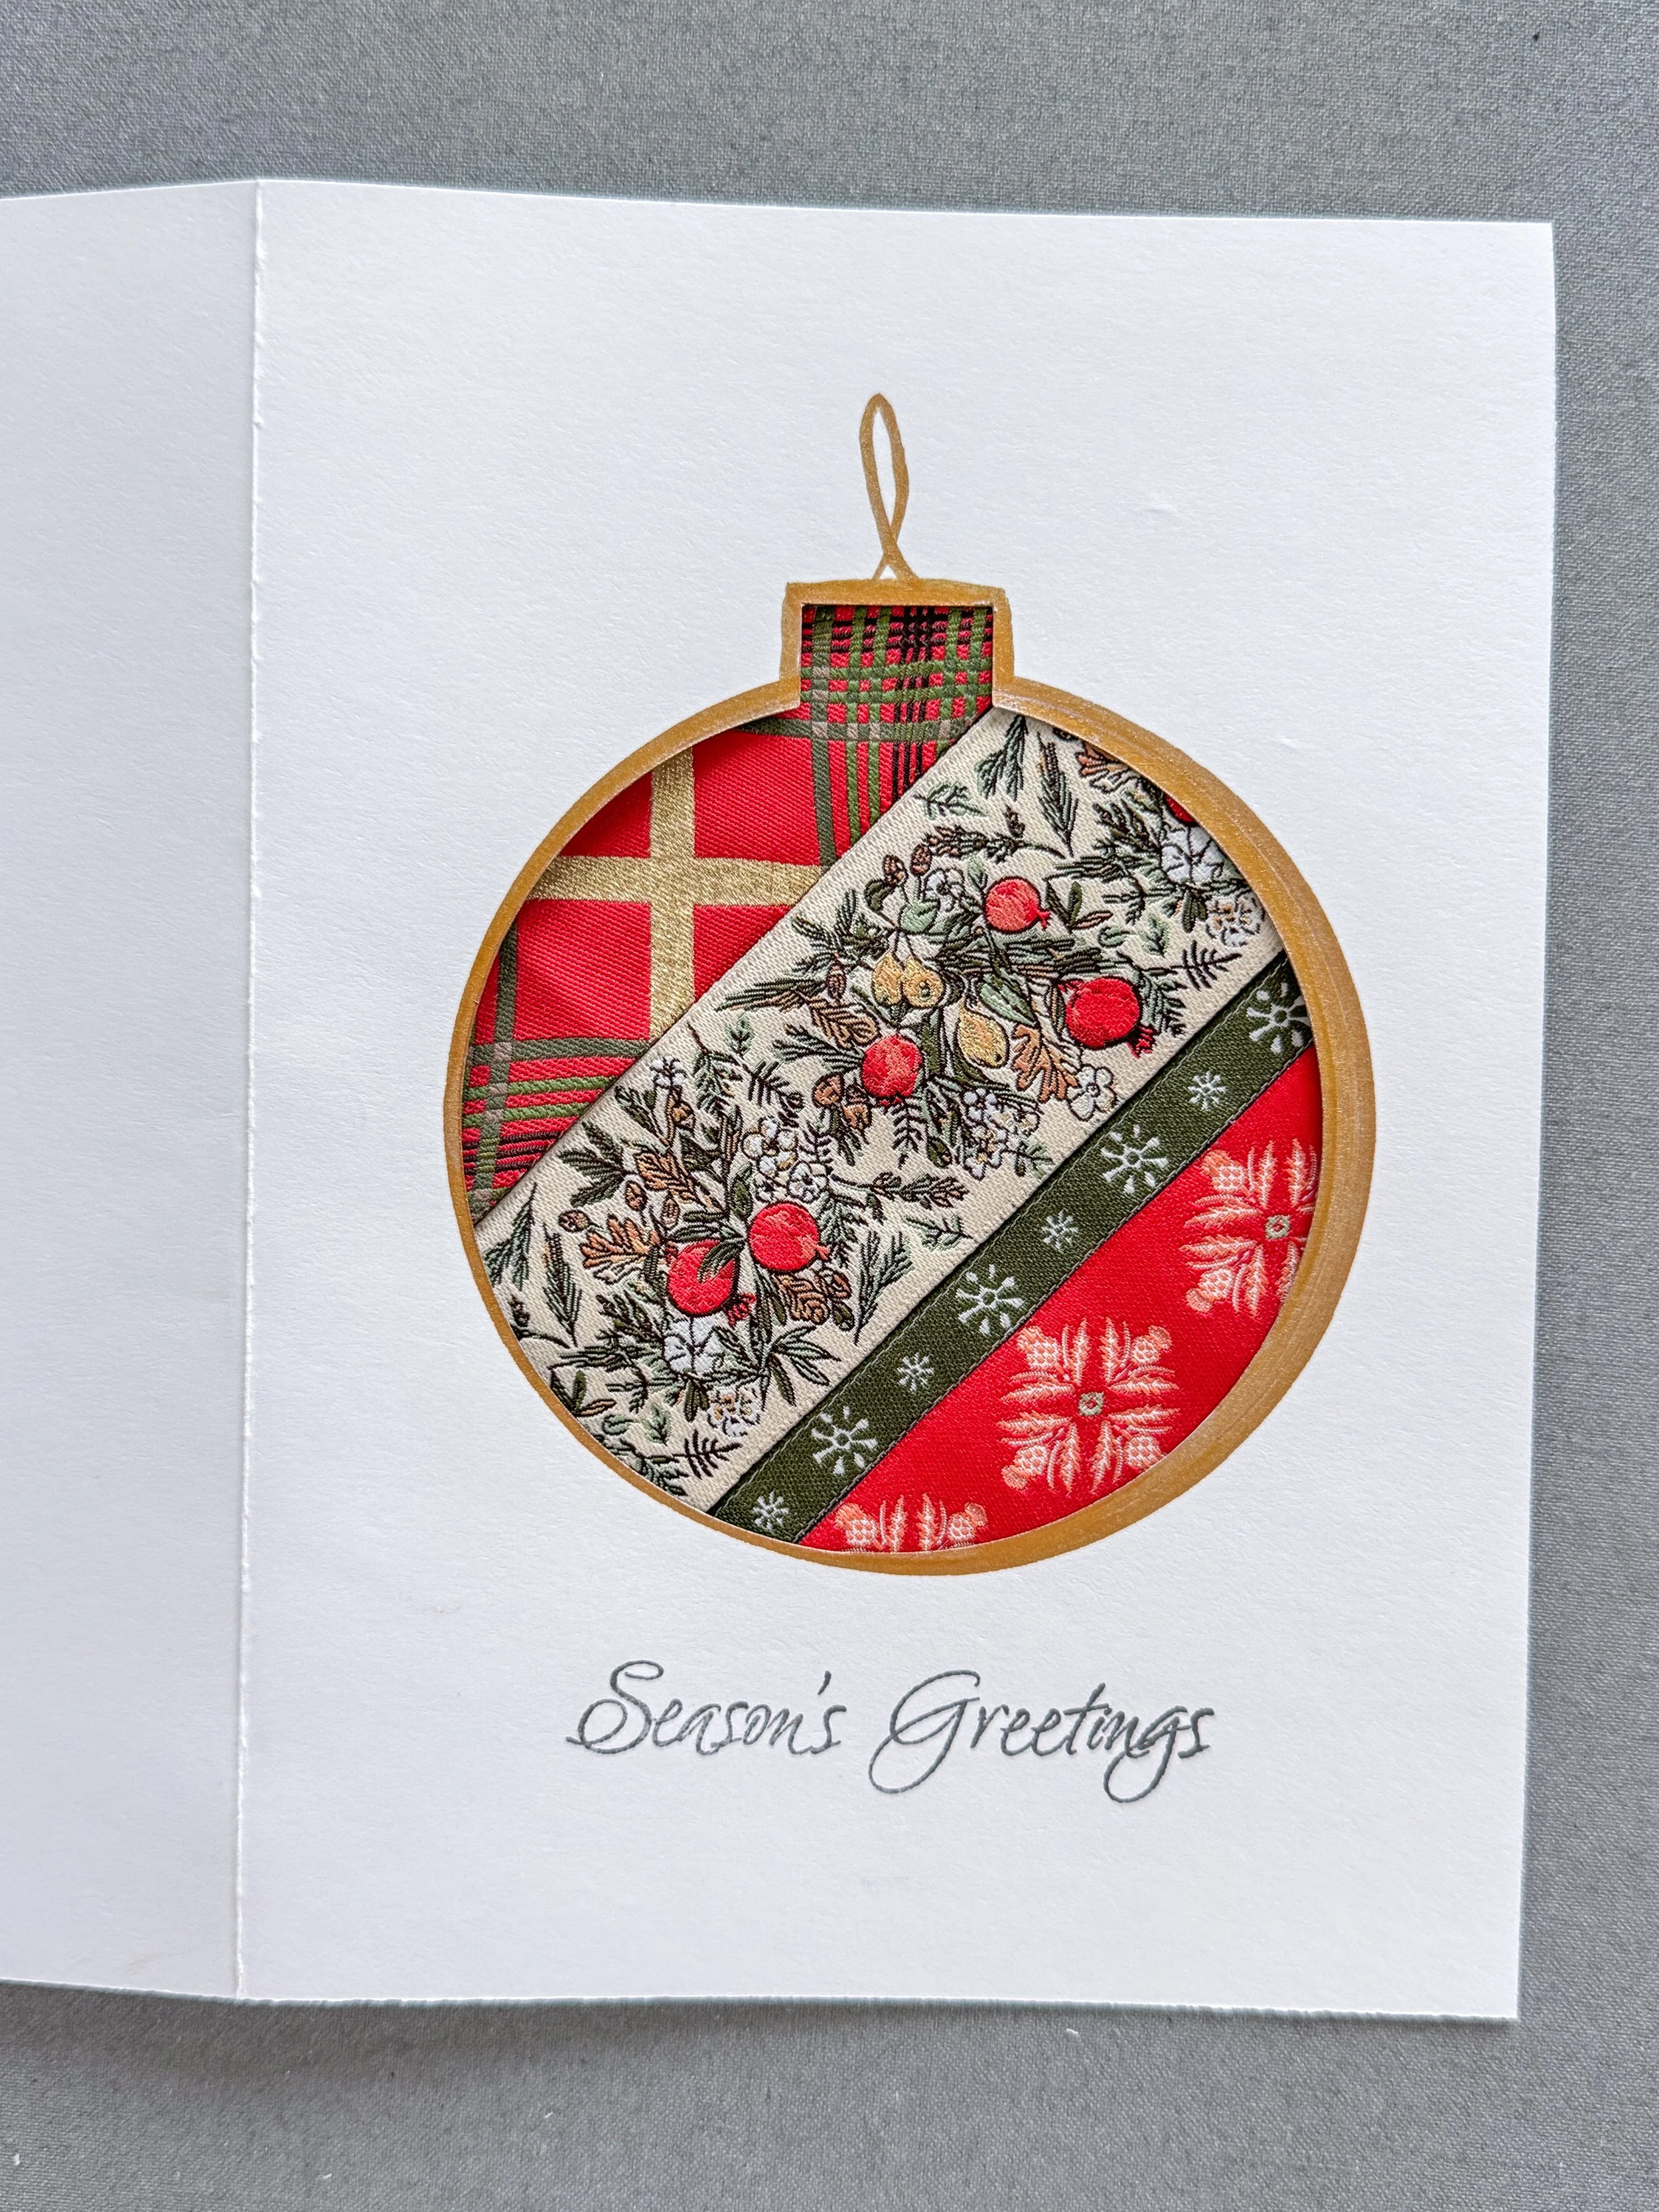
Following the manufacturer's instructions, adhere the fusible adhesive to the back side of a 5" x 7" cardstock. Peel off the backing paper and fuse this piece of cardstock to the backside of the ribbon card front to hide the interfacing and back of ribbon. Trim edges as needed to square up the card.
I hope you enjoyed this little tutorial and project. Receiving a handmade gift or card is priceless!
If you’re on Instagram, I have a video tutorial so you can see these steps in action. Visit me @sharonhollanddesigns and watch the video, HERE.
Happy holidays to everyone, and a wonderful New Year!