
Meet Amy Sinibaldi, the super sweet and extremely talented new designer at Art Gallery Fabrics. I had the pleasure to get to know Amy in person at Quilt Market this fall in Houston. My AGF sister was in attendance to launch her Limited Edition fabric collection--Paperie.
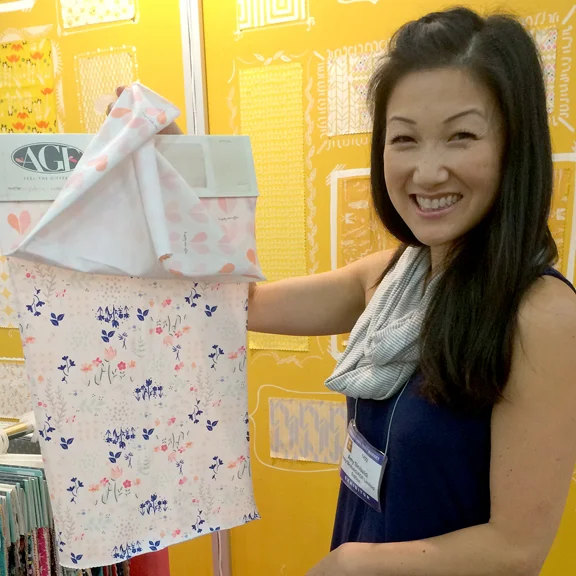
Amy Sinibaldi showing off her Paperie fabrics from Art Gallery Fabrics
When Amy asked me if I wanted to be part of her Paperie Blog Tour I jump on the offer in a heartbeat! These prints are so adorable it was hard to choose.
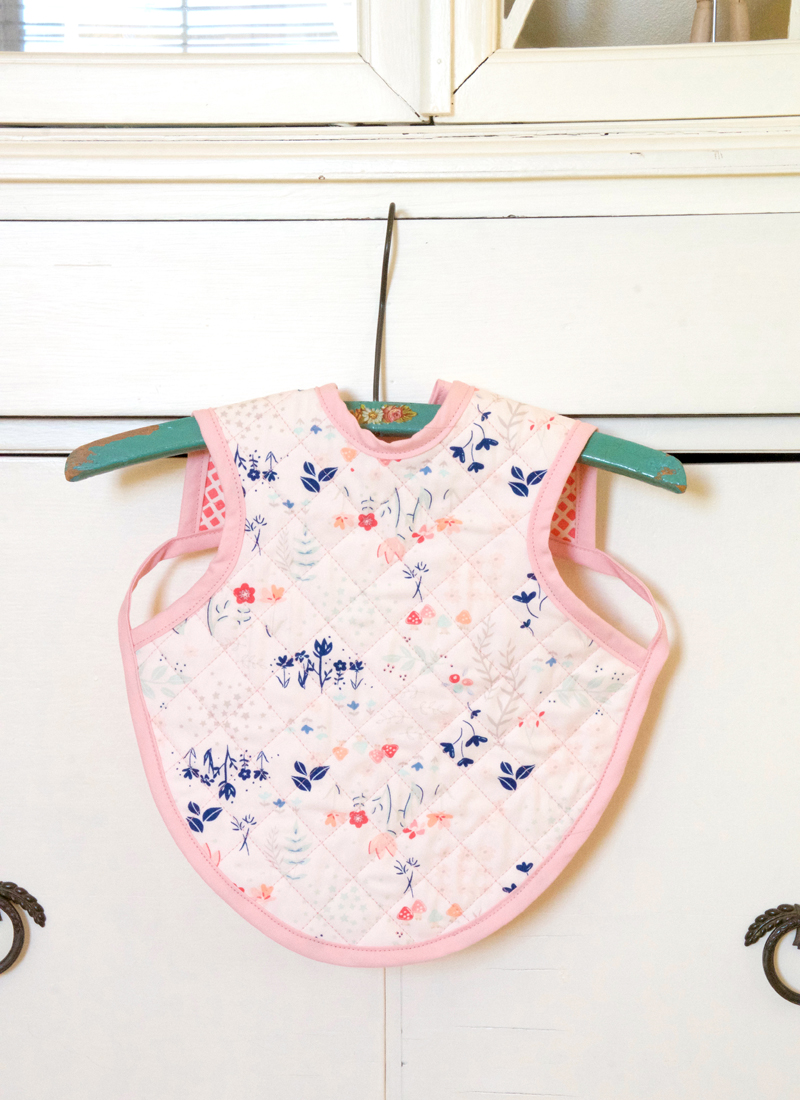
I knew I wanted to make something for my granddaughter and remember my daughter saying she will need to pick up some bibs eventually and didn't have anything yet. I bought "The Bapron" pattern from Cratiness is not Optional patterns. A super easy project that comes in two sizes and has a clever construction to fit around the baby's (or toddler's) shoulders for more coverage and better fit.
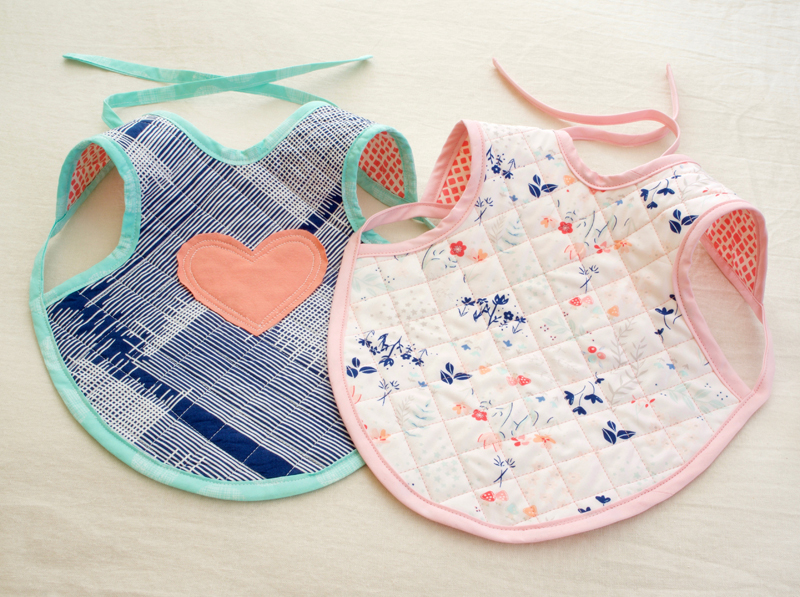
I put my own spin on the pattern by layering some thin cotton batting between the front and backing materials. Machine cross hatch quilting was done to the layers before stitching on the bias binding. I made my bias binding and instructions for making your own binding are included in the pattern. I cut a 1-3/4'' wide binding because of the batting adds some extra thickness. These cute aprons are completely reversible!
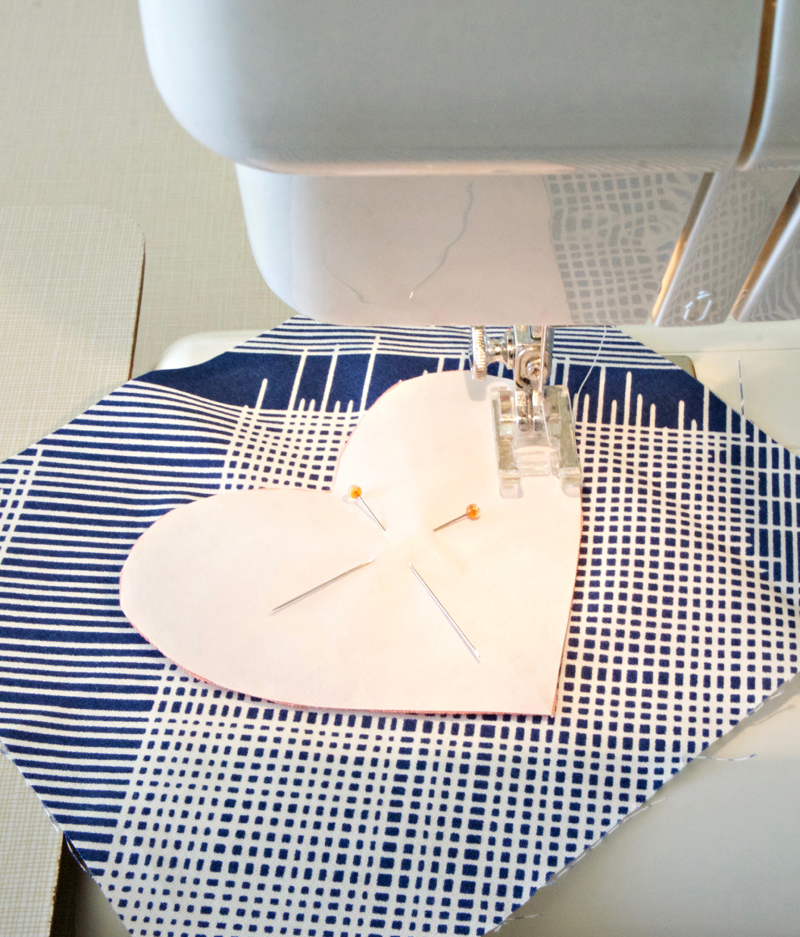
To spice up the blue apron I appliquéd a heart made from Art Gallery Fabric knit material. Because knit does not unravel or fray, I left the edges raw. I am not a fan of the stiffness fusible webbing creates on appliqué and wanted another alternative. The saying, "necessity is the mother of all invention" couldn't be truer. Knit can curl so to hold the shape of the heart while I cut it out and sewed it in place, I used freezer paper.
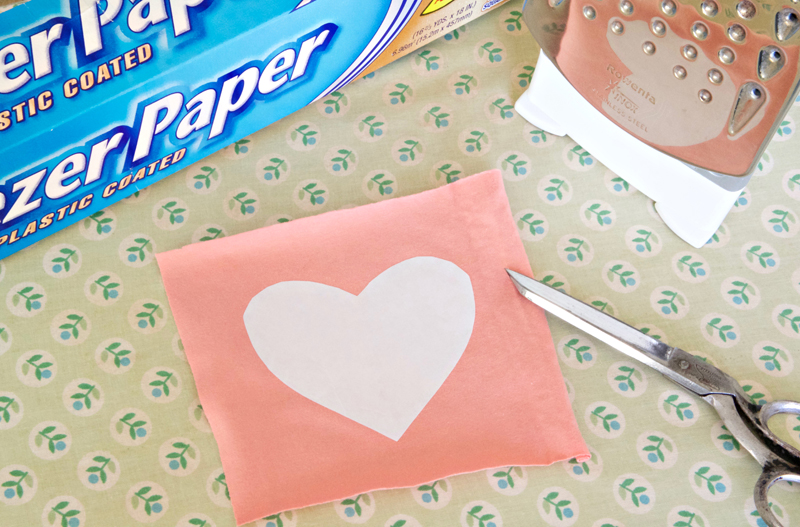
Here's how to appliqué using knit:
Cut desired shape from freezer paper
Using a dry iron, press the shiny side of the freezer paper to the right side of the fabric
Cut out shape using the edge of the freezer paper as a guide
Leave freezer paper in place and pin the cut out shape, fabric side down to the right side of fabric to be appliquéd
Stitch in place as desired through all thicknesses, including freezer paper
Carefully remove freezer paper
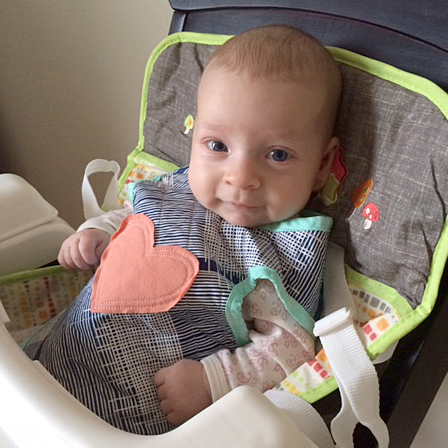
The apron is a little big on her but before you know it she'll be making big messes when eating and her Mommy will get a lot of use out of these over the years. Maybe a brother or sister some day will also enjoy these?!? Isn't she adorable--kiss, kiss--love those cheeks :)
Be sure to visit Amy's blog Nana Company to see the full line-up of talented bloggers for her tour. Yesterday, Cheri Lehnow of tinkerwiththis.blogspot.com posted a tutorial on how to make a cute and easy pincushion. Tomorrow Jemima Flendt of tiedwitharibbon.com will be posting her project on the Paperie fabrics blog tour. Follow along for chances to win fabric and be inspired by more great projects!