Cloth napkins make even the most ordinary meal special. Finding napkins to coordinate with your personal style can sometimes be a challenge, so why not make your own! Making professional looking mitered-corner napkins is very easy to do. Choose an absorbing material like cotton, linen, or cotton homespun in a print or a solid. Follow my step-by-step tutorial below and stitch some up today. Who knows, maybe you'll replace all those throw-away paper napkins with beautiful cloth ones and use them everyday. These also make wonderful hostess gifts--so sew a bunch!
Mitered-Corner Napkins Tutorial

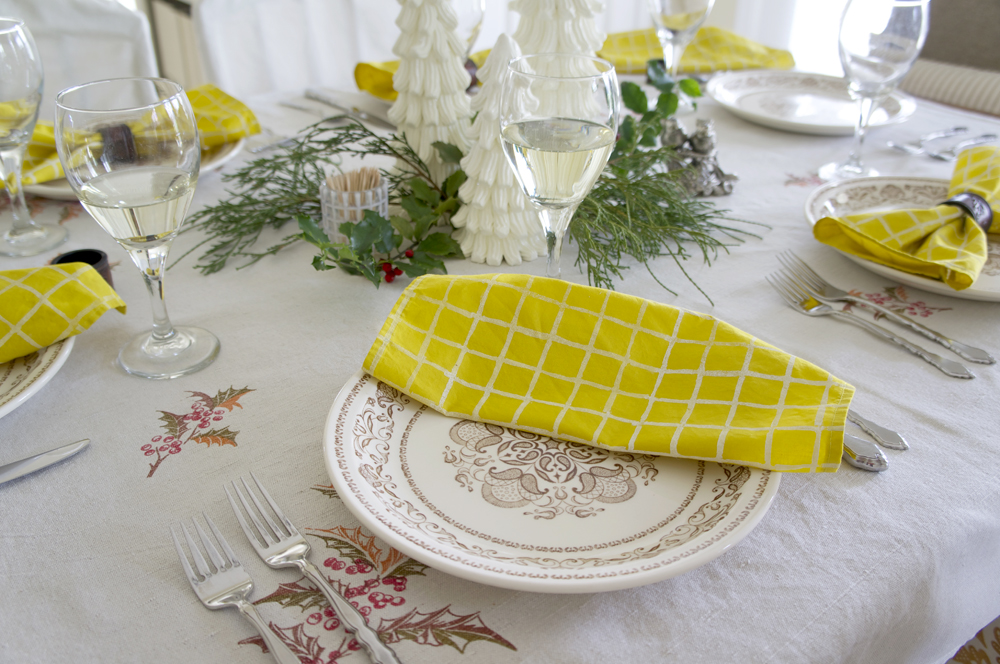
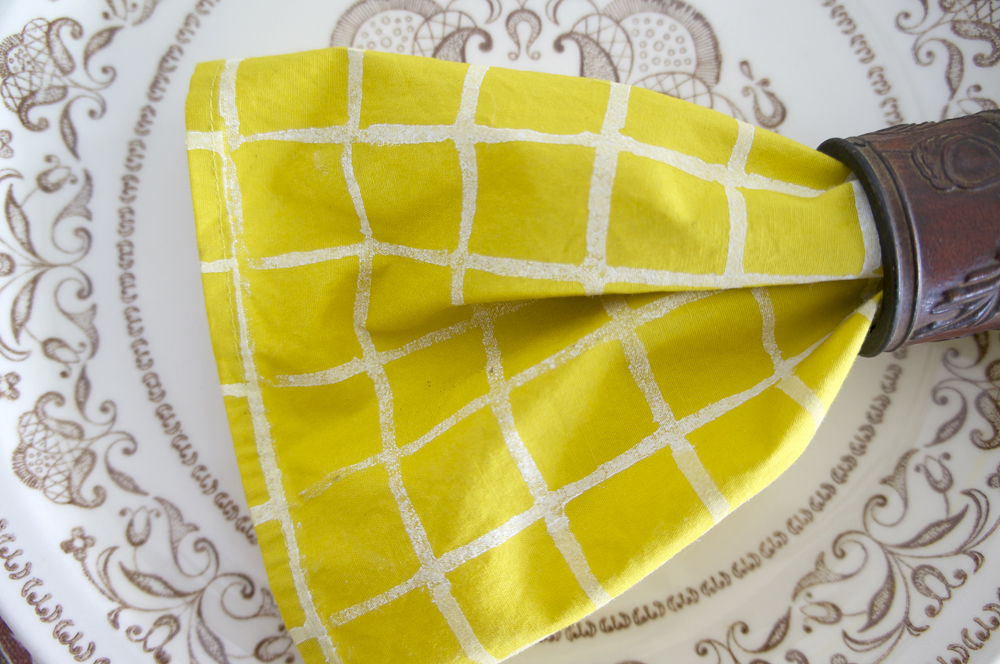
Napkins made with Art Gallery Fabric PE-407 Empire Yellow solid and stitched with Aurifil color 5015 30/1300. Finished napkins embellished with a block print grid design.
Materials List
Makes (4) 17” square
Note: Any size napkin can be made using this same technique. All marking and hemming measurements remain the same; you only need to change the cutting size of the napkin. To resize, add 1” to the desired finished napkin size to allow for hemming. Increase yardage accordingly.
1 yard quilting cotton, linen, or homespun
Clear ruler and rotary cutter
Seam gauge
Starch (optional)
Coordinating thread
From the fabric:
Cut (2) 18” x 42” strips then cut into (4) 18” squares
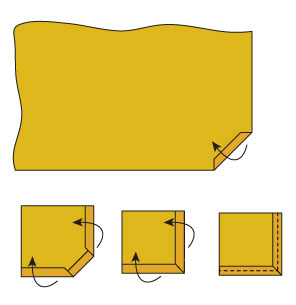
Step 1 Measure and mark 3/4” away from each corner on the wrong side of (1) 18” square. Using the 3/4” marks as a guide, trim off each corner between the marks.

Step 2 Spray edges of square with starch if using optional starch. Fold and press 1 trimmed corner ¼” to the wrong side. Repeat for all corners.
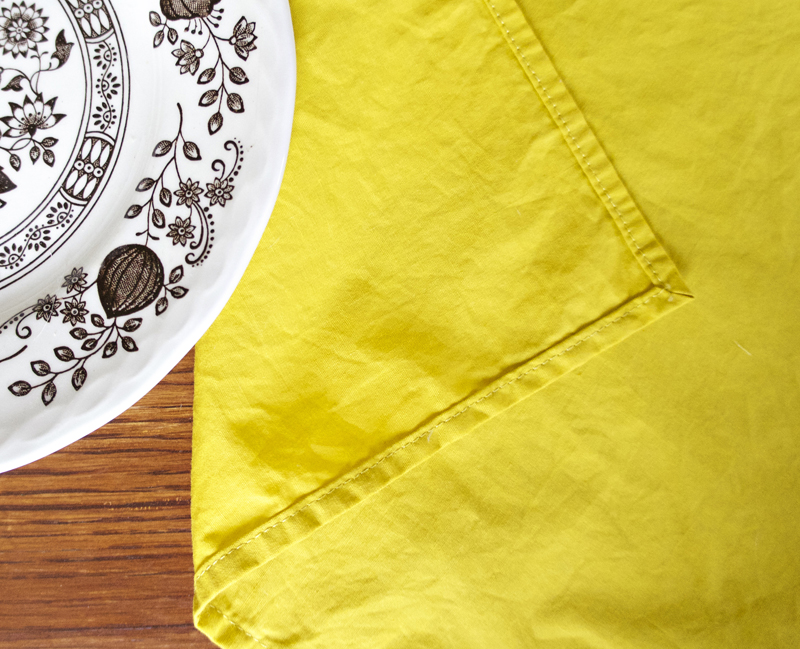
Step 3 Using the sewing gauge, measure, turn, and press all long sides ¼” to the wrong side. Turn and press ¼” again so the corners meet to form a mitered corner. Pin if desired.
Step 4 Sew hems using a ⅛” seam allowance, starting by dropping the needle down into the mitered corner and backstitching. When you reach the next corner, pivot the needle in the mitered corner and continue sewing. Continue until all four sides are sewn, ending with a backstitch in the starting mitered corner. Repeat steps 1 through 4 to make 4 napkins.

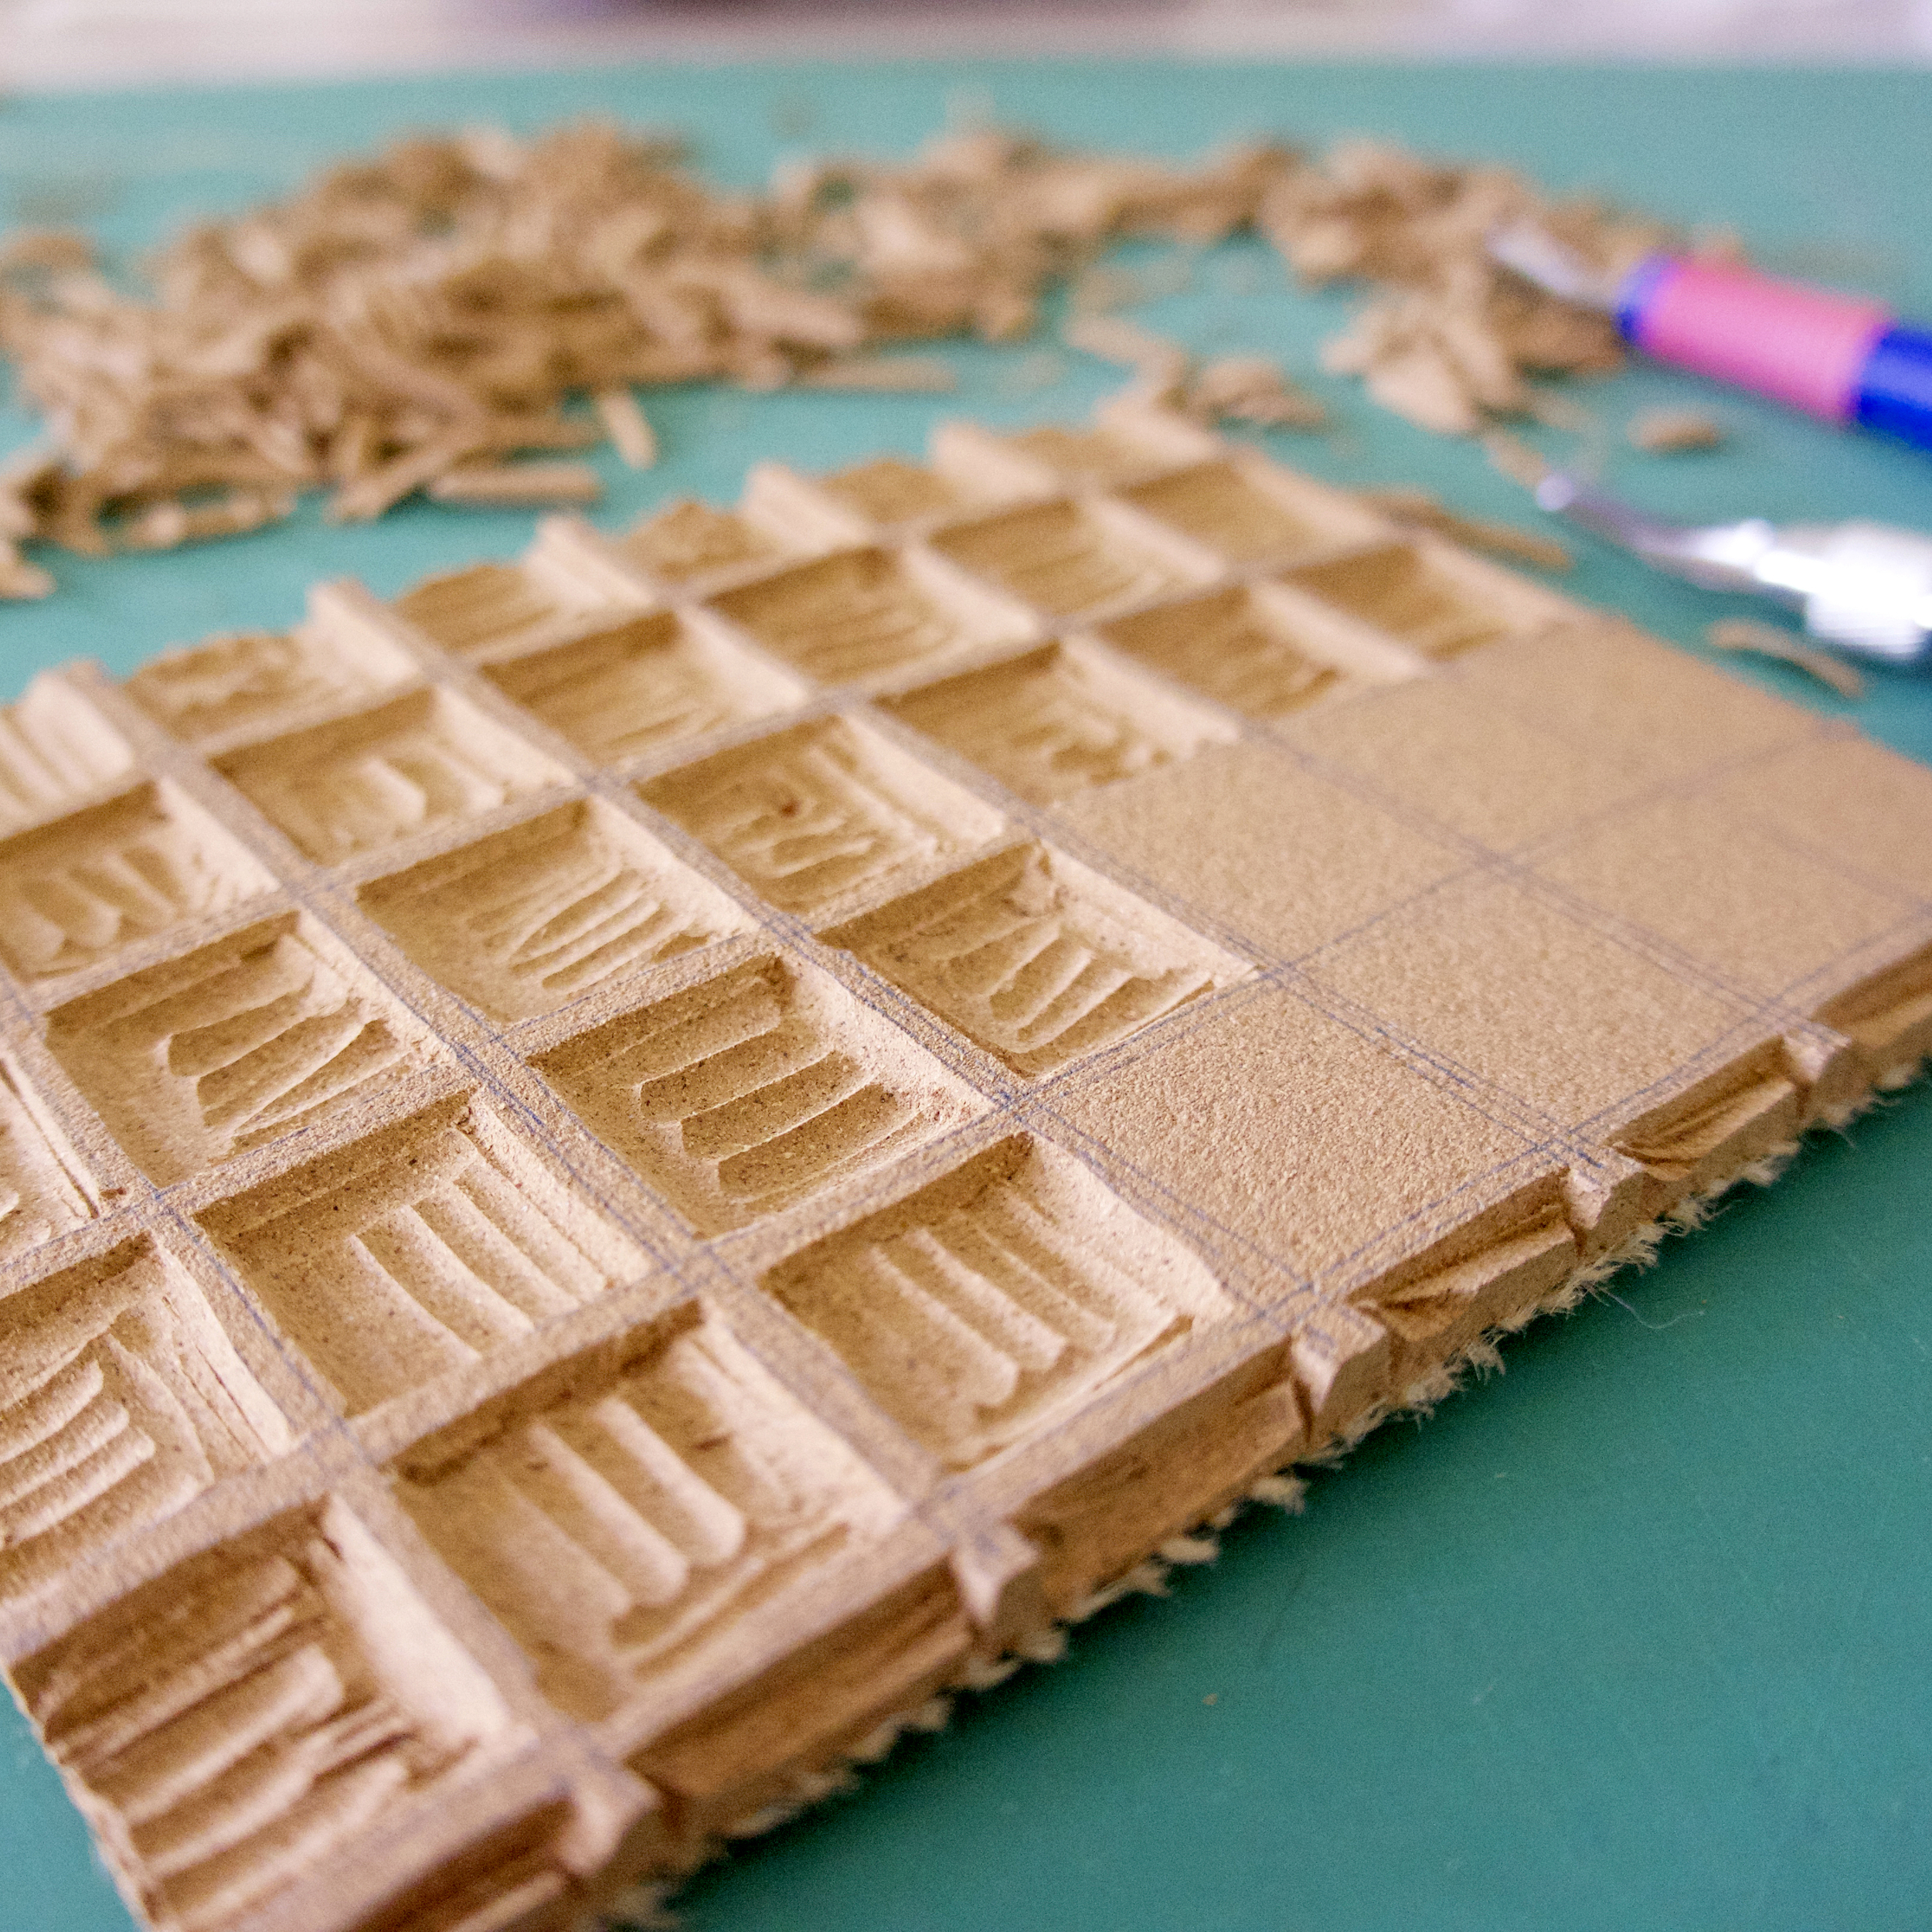
I decided to dress up my solid fabric napkins with a subtle grid design. I printed the pattern onto my finished napkins using a hand-cut linoleum block print. The design was printed directly onto the fabric with a fabric ink designed specifically for block printing. I can use these anytime of year but they look particularly festive on my holiday table and brighten up the table setting.
If you're not feeling adventurous to make your own print you can start with a pretty printed fabric to make napkins instead. If you are using a solid and still want to add a little more pizzaz, think about adding some machine embroidery details around the edges. Maybe a monogram would be more your style and can be done by stitching or stenciling. Monogramming is also a nice gift idea for newlyweds celebrating their first Christmas or as a housewarming gift tucked in a basket of goodies. So much can be done with a little bit of fabric!
Happy holidays to you and yours--Cheers!