
Finishing Your Sewcial Bee Sampler Quilt


Wow, I cannot believe how quickly 26 weeks can go by! All the Sewcial Bee Sampler (SBS) blocks have been released and it's time to put your quilt together. There's only two more weeks to take part in our SBS Survey. Refer back to my last post for all the info and link to the simple eight question survey about your SBS experience. By taking part in the questionnaire my co-host Maureen Cracknell and I can get a better idea as to what we may collaborate on next as well as give us a headcount of actual SBS Makers! Please only take the survey once and much thanks to those who've already responded.
Surprisingly we still have a few new Makers joining our sew along at this late point. If you're new, be sure to take advantage of the in-blog tutorials for the different patchwork techniques used throughout the Sewcial Bee Sampler. Pick up tips and block variations beginning with the first blog post The Start of Something Sewcial. Both Maureen and I will leave all the SBS downloads up on our blogs for you to download long after this event is done. Also, check out the #SewcialBeeSampler hashtag on Instagram, you'll see an amazing array of beautiful blocks as inspiration overload! Soon, you'll be seeing finished SBS quilts too!
Several of you have decided to skip the sashing between the blocks and make a smaller quilt and that's the beauty of this project that it can be customized to fit your needs. For those of you waiting to add the sashing you can download the PDF instructions for finishing your SBS sampler quilt from my Sew Along page.
Today's blog post feels a bit epic with all the tutorials I've prepared for finishing your quilt. The following information on spray basting, quilting, and binding is the way I finish all my quilts. That doesn't mean this is the only way to do things--it's simply how I finish my own quilts. I'm by no means an expert quilter and will only touch upon some aspects of machine quilting. You will definitely want to take advantage of the wealth of knowledge professional quilters have posted on their blogs, YouTube videos, and in books. My favorite quilters to follow and resource are: Christina Cameli, Angela Walters, and Christa Watson. They're pros!
You will also want to check out Maureen's blog as she will be giving you additional information with step out photos of adding the sashing and how she has pieced and is quilting her quilt.
Sashing
Feel free to arrange your SBS blocks anyway you'd like. My first (of the two) sampler I kept all the blocks in order of release but my second quilt I needed to move some of the blocks around for better fabric and color distribution. Be sure all 25 blocks (those with frames and without frames) are squared to 12-1/2" before you start adding the sashing.
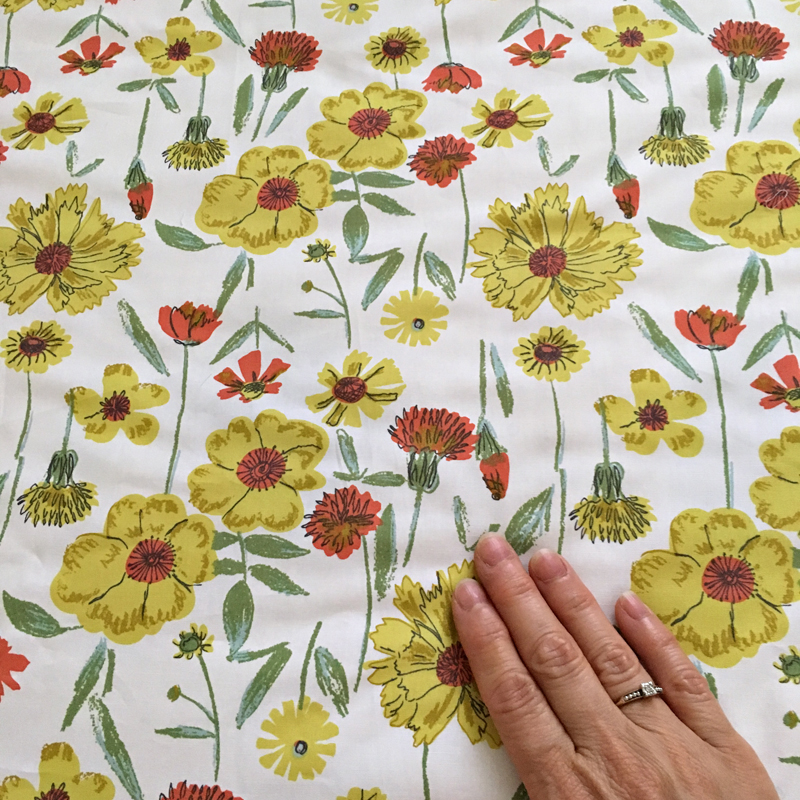
One thing you will notice about the framed blocks is they have an orientation. The opposing sides of the frames are the same size. It doesn't matter if you orient the larger frames on the top and bottom like we've shown in the instructions and in the photo below, or the smaller of the frame sides at the top and bottom, I just suggest orienting the blocks the same way throughout the quilt for a more professional finish. Also be mindful if the prints on your block have an obvious direction and keep them all running the same way as you piece.

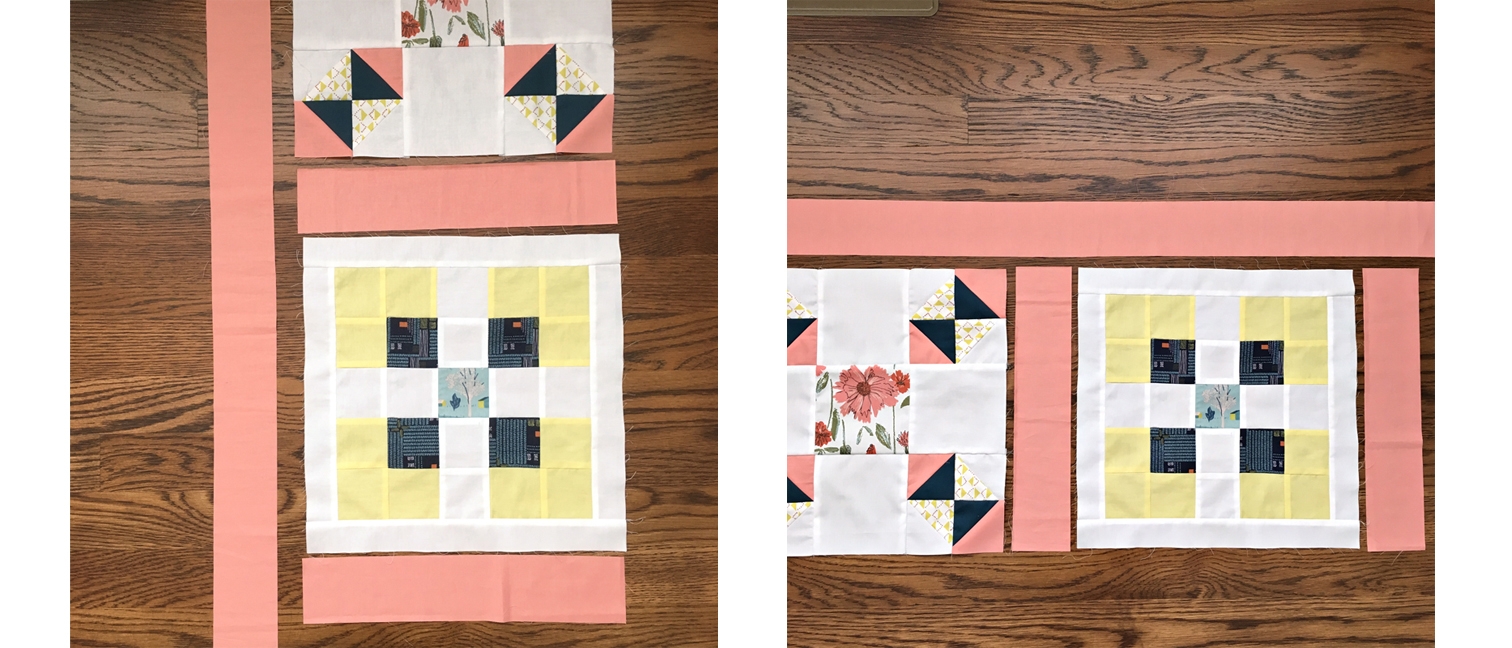
Since our sampler quilt is square, how you add the sashing can also your preference and doesn't change the cutting requirements. The instructions are given for making vertical rows adding 2-1/2" x 12-/12" sashing strips between the blocks then joining the rows with long vertical sashing strips. This can easily be flipped and worked the same way as horizontal rows and sashing.
In example below I used some orphan blocks and Art Gallery Fabrics Pure Elements peach solid sashing to show vertical and horizontal orientation. For the actual Bountiful quilt I chose to use the Pure Elements Snow white solid to match my frames (accentuating the blocks to float on the background) and stitched vertical rows as given in the instructions. For my second SBS quilt the frames and sashing are made from different prints so I felt the prints looked their best with horizontal sashing.
Follow the instructions on the Finishing PDF for cutting number and size of sashing. To make the long sashing strips needed for between the rows, stitch the remaining (11) 2-1/2" x 42" strips short ends together to make one long strip.
Press your seams toward the sashing to reduce bulk and press each block/sashing row well. Measure each block/sashing row without stretching the material. Average those numbers and cut 6 sashing strips to this measurement from the long strip. Sew the long sashing strips alternately together with the block/sashing rows to make the top. Press top well.
Cut and piece the backing to measure 3''-4'' larger on all sides than your quilt top (as sizes will vary depending upon if you added sashing or not) using a 1/2" seam allowance. I prefer to use a 1/2" seam allowance on the backing seam to add strength to the seam. Press the seam open to reduce bulk. Press backing well.
Cut batting to the same size (or slightly smaller) than the backing. For my quilts I'm using Hobbs batting products courtesy of our generous sponsor. Part of the grand finale package will include the Tuscany Wool and Tuscany Silk queen size battings just like the ones Maureen and I are using in our quilts.
Spray Basting
Again, this is a personal preference on how you baste together the layers of your quilt. If you intend to send your top off to be quilted by a longarm quilter you can skip to the Binding section. I like spray basting for two reasons: No pins to put in and no pins to remove when machine quilting. Second, I feel I get a much smoother finished quilt because of the terrific surface contact between the layers. It's totally your choice how to sandwich the layers but I will show you how I do it. There are many YouTube tutorials by industry professionals on this subject if you need more information.
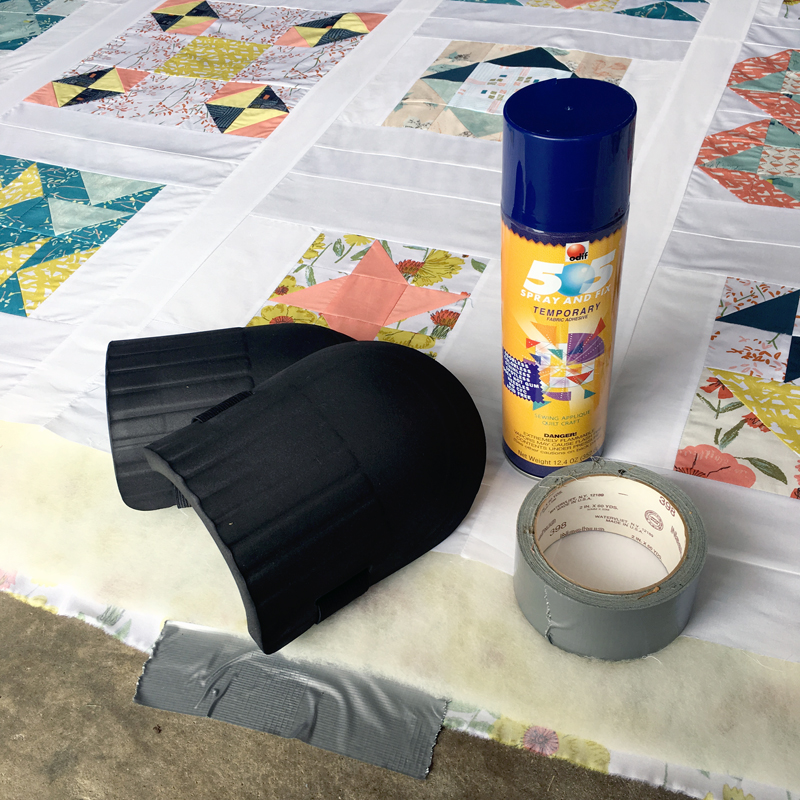
Suggested supplies: Knee pads, duct tape, and 505 basting spray. I love the 505 brand of basting spray. I buy it in bulk and go straight for the large cans! I do have an affiliation link for this product on my right side bar with Amazon. If you are at all interested in purchasing this product I'd greatly appreciate you using my affiliate link. It's not like I'll get rich but every penny does help defer some of my expenses of producing this blog.
I use my garage floor as my large, flat surface for spray basting. My garage floor is free of any oil or grease stains and a simple sweep before I begin is the only prep I need. I don't protect the floor from overspray but if that's a concern, you may want to add cardboard, kraft paper, or some other ink free paper product to the supply list and tape down it around the spray area before you begin.
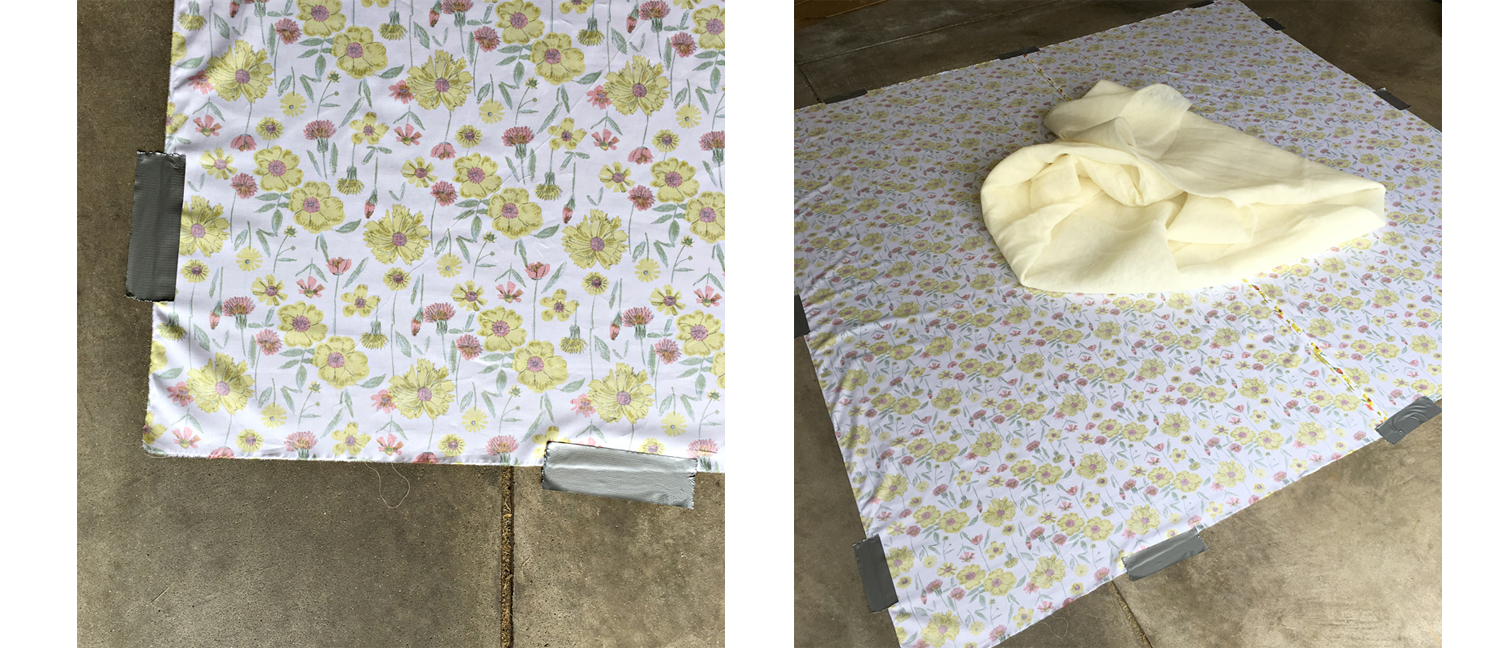
Lay the backing wrong side up and use the duct tape to hold the backing to the flat surface. Don't stretch the backing tight, but keep it relaxed and ripple free as possible. On a quilt this size, I use about three pieces of tape per side. Once the backing is secure, open the cut-to-size batting and center it onto backing.
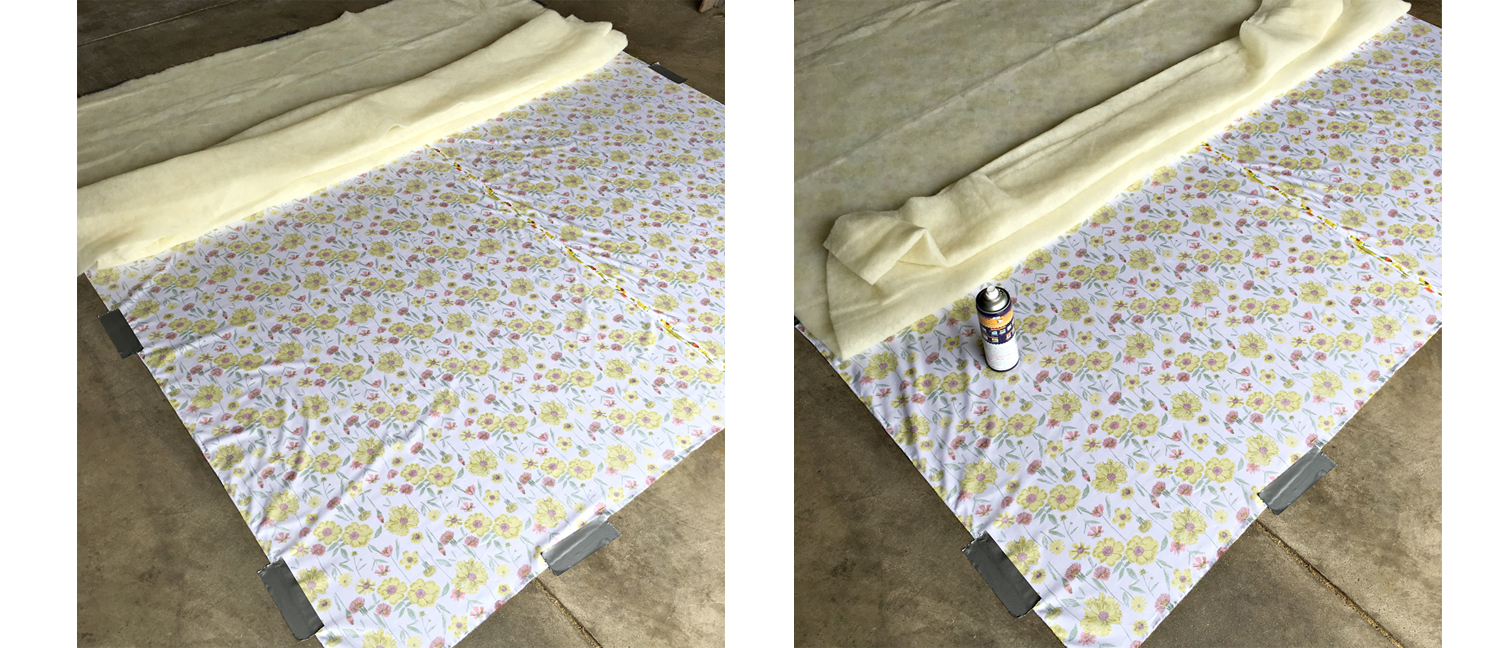
Once the batting is opened, smoothed, and centered, pull half of the batting back to reveal the backing. Following the manufacturer's instructions on the spray baste and spray about a 12" wide section of spray baste onto the wrong side of the backing parallel to the folded back batting. Lift batting and smooth out onto spray basted section working from the center outward.
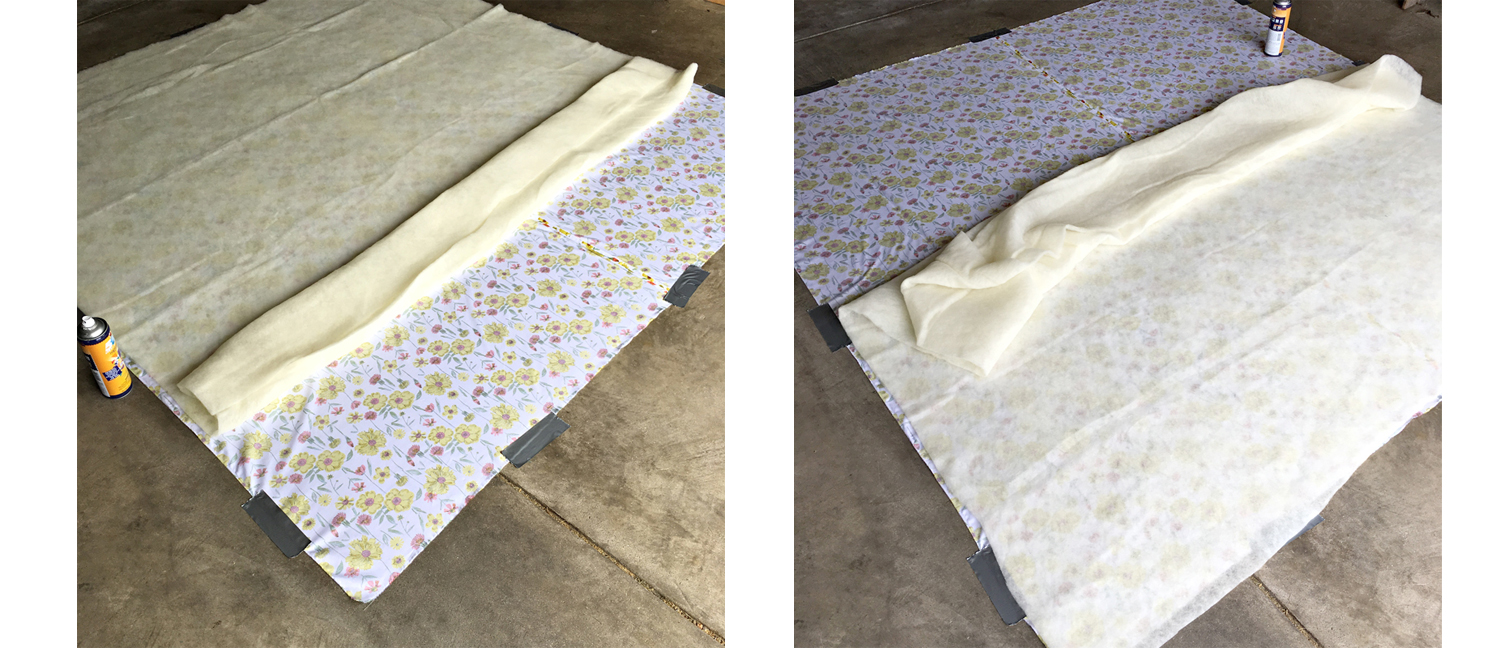
Continue spray basting and smoothing sections of batting in the same manner till the half of the backing is covered. Pull back the other half of the batting and repeat until the batting and backing are adhered and smooth.

Adhere the top in the same manner by first centering the top on the backing/batting sandwich. Pull half of the top back and apply the spray bast in sections to the batting. Smooth the top out from the center as you go until the quilt sandwich is done. Remove the tape and bring your quilt inside. I like to let it rest and dry a bit before I start quilting. I have no idea if that is a thing, to let it rest, but it's what I do.
Before I start any quilting I turn the quilt sandwich over so the backing is right side up and give it a check over for smoothness. The nice thing about spray baste is it's repositionable and if you need to lift a layer to flatten it out you can without losing any integrity. Work from the center outward if you need to fix and puckering.
Machine Quilting
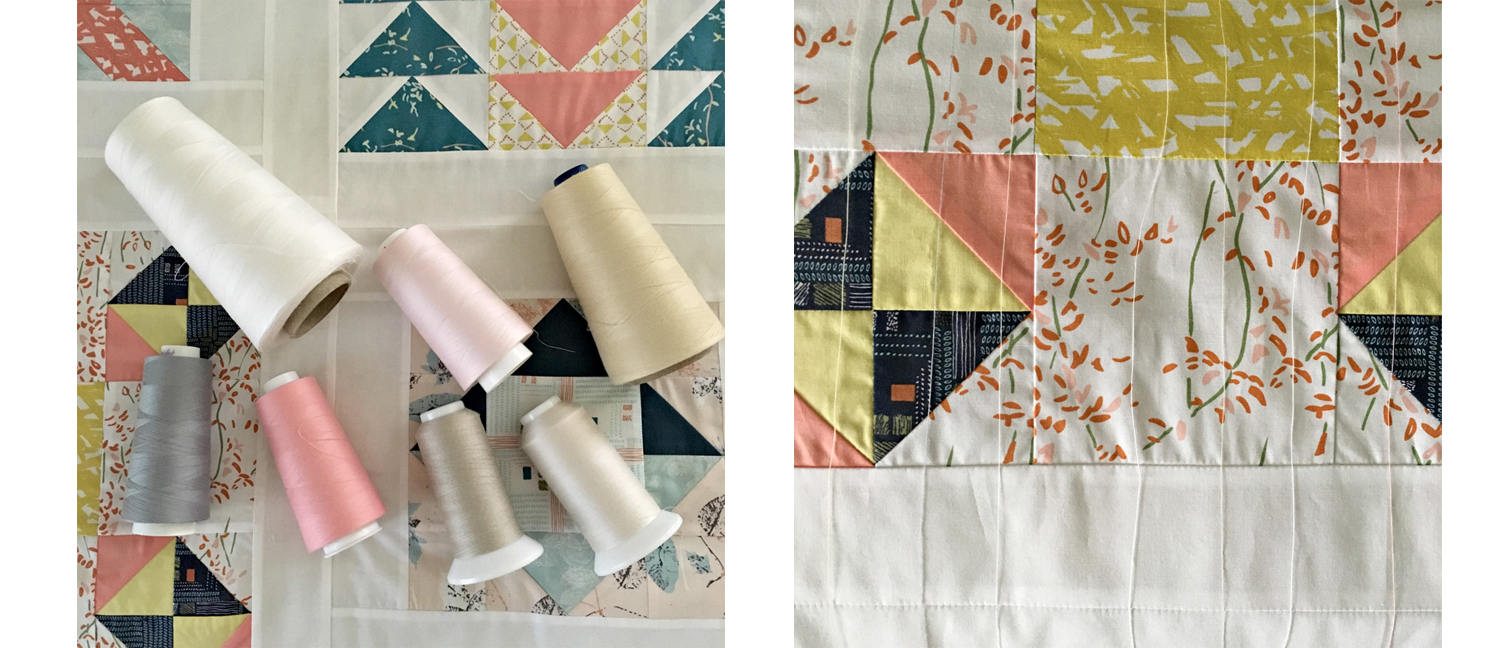
Choosing a thread color and quilting design can feel overwhelming sometimes. Both of these aspects of quilting are purely a personal choice. My suggestion is that if you are new to machine quilting and plan to take on the job yourself, choose a thread color that blends with the quilt so it will be less noticeable. I use a 50 or 40 weight thread. 50 wt will be thinner than a 40 wt and thinner thread equals less visible.
The best way to judge how a thread color will look on your quilt is to pull out a strand of thread and lay it across a section of the quilt. You can see how what looked like bold colors on the cone almost negate out to about the same look when seen just as strands on the second photo. I went with the cream thread (bottom right) for the top thread and white thread for the bobbin. You don't have to use the same color for the top and bobbin thread if you don't want to.
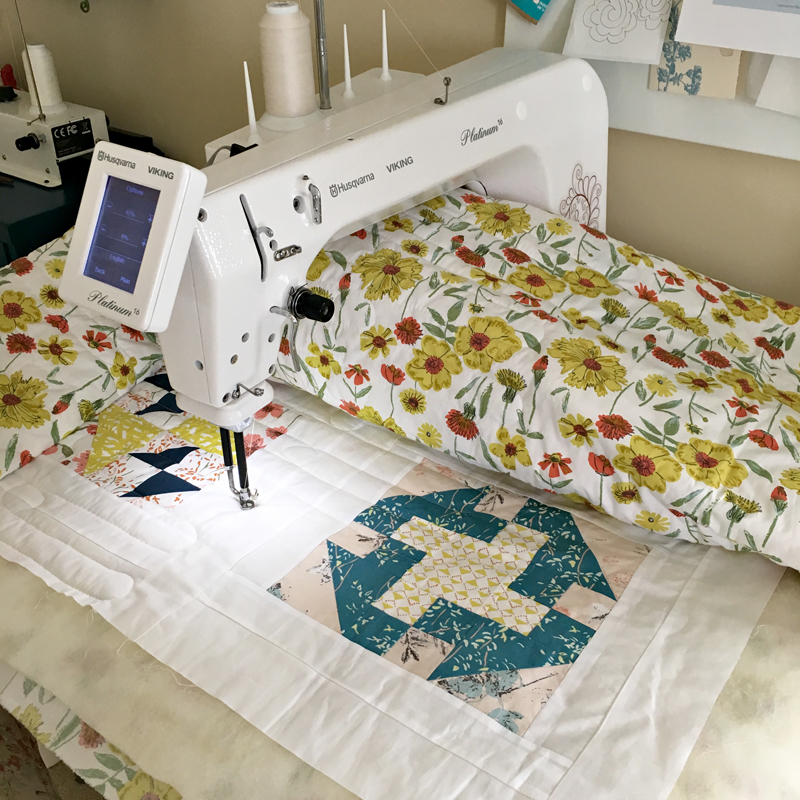
I have a Husqvarna Platinum 16 midarm machine. This type of quilting machine has a 16" arm to accommodate the bulk of a quilt better than a domestic machine can and is also called a sit down machine. The machine is stationary and only the needle moves up and down. There's no feed dogs. It's a free-motion machine and I need to move the quilt under it to quilt. I keep the areas of quilt not being quilted rolled up and on the table so the quilt top doesn't drag and pull as I quilt.
As I said earlier in this post, I'm not a professional quilter. I get by. I call my quilting organic because it's not perfect and lines are not straight. You will see the full quilt reveal next week and I will talk more about my quilting choices for the two quilts. For my Bountiful quilt I went with a very simple loop pattern that when overlapped creates a circle in the overlap. My second quilt I intend to do a denser floral design but I haven't gotten that one finished yet. I do have a tutorial on my Tutorials page for how to quilt a Baptist Fan pattern that is one of my favorite patterns. You can find tons of quilting pattern inspiration online or through the professional quilters resources I listed earlier. The type of quilting design that appeals to you is the best one to choose. Keep in mind the complexity and your skill level when choosing, so you don't get frustrated.
Binding
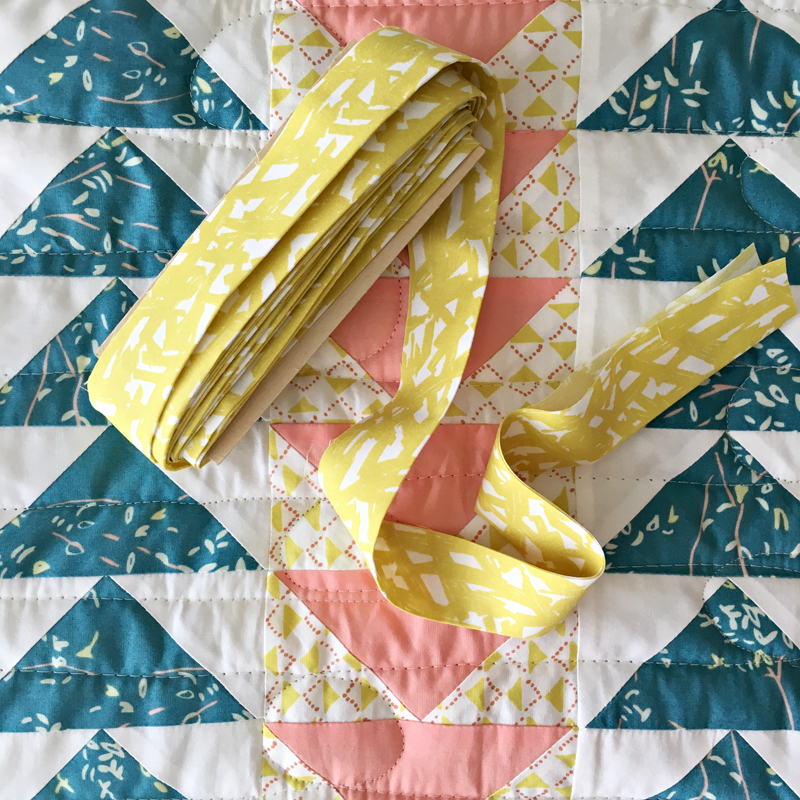
There are many ways to make binding. For the Sewcial Bee Sampler I chose double-fold regular binding. If you'd like to make bias binding, refer to my How to Bind a Quilt tutorial on my Tutorial page.

Cut (8) 2-1/4" x 42" binding strips according to the PDF instructions. Place two strips right sides together at right angles. Sew with a diagonal seam (I've shown a drawn diagonal line on the first photo). Continue adding strips in the same manner to make one long binding strip. Trim seams to 1/4".
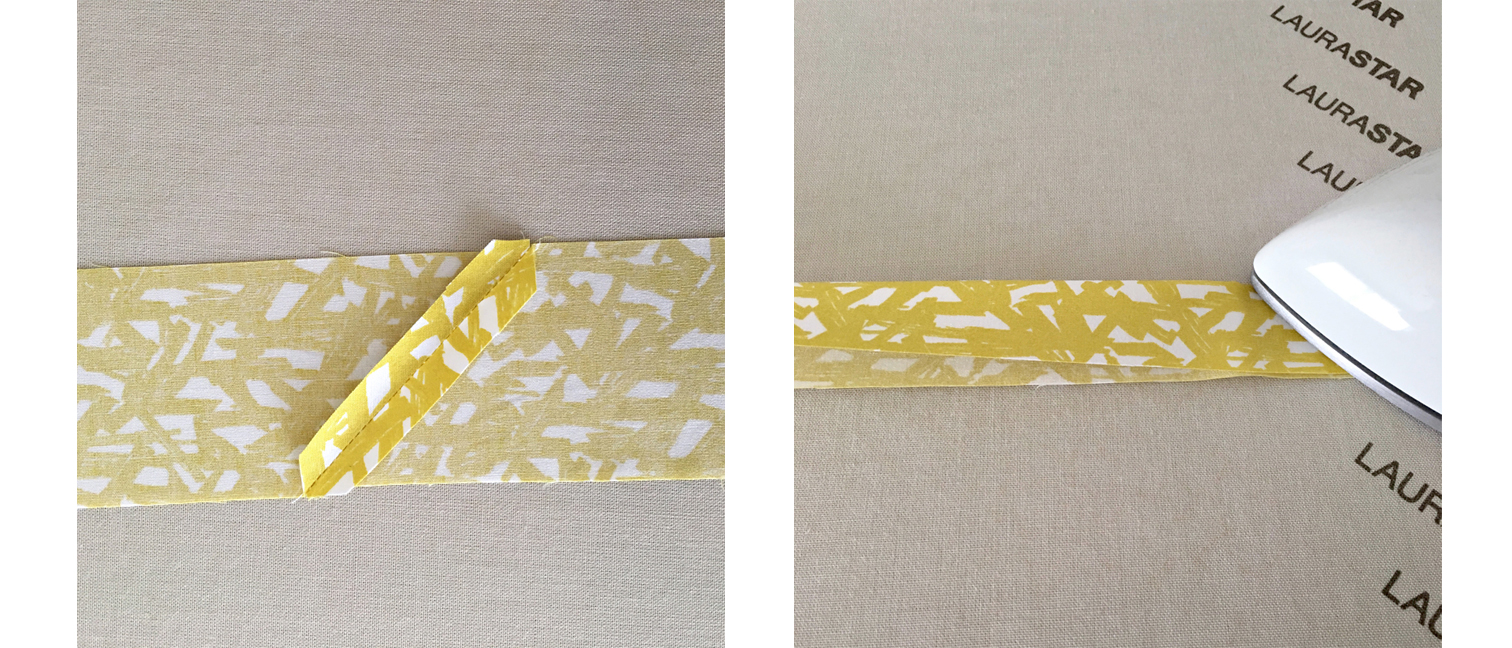
Press seams open to reduce bulk. Fold the strip lengthwise in half with wrong sides together. Press.
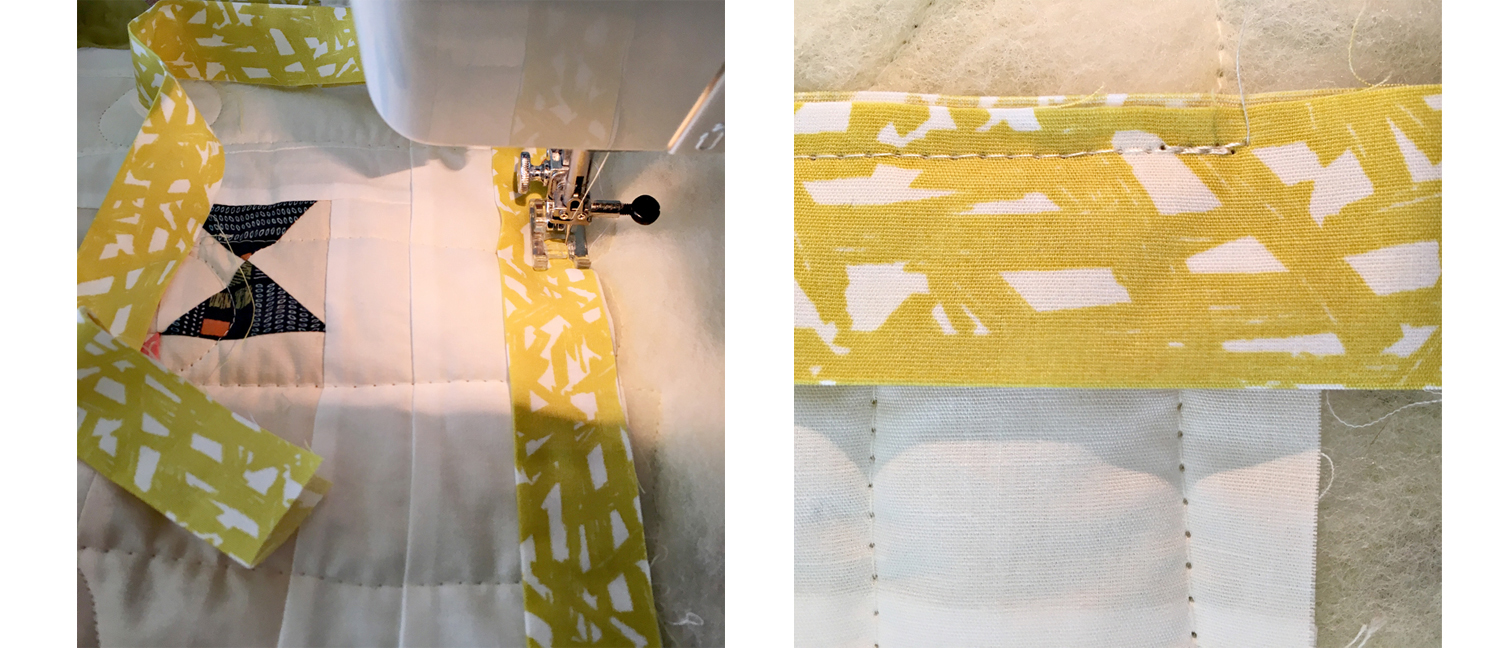
Roll the quilt parallel to a side of the quilt to be stitched for ease of handling while attaching the binding. Starting at the center of the exposed edge of the quilt top, place the folded binding on the front of the quilt with raw edges aligned. Leaving 12" of the binding strip free, begin stitching with a 1/4" seam allowance. Sew to the corner and backstitch 1/4" from the edge. Remove the quilt from the machine and refold so the new edge to be sewn is exposed.
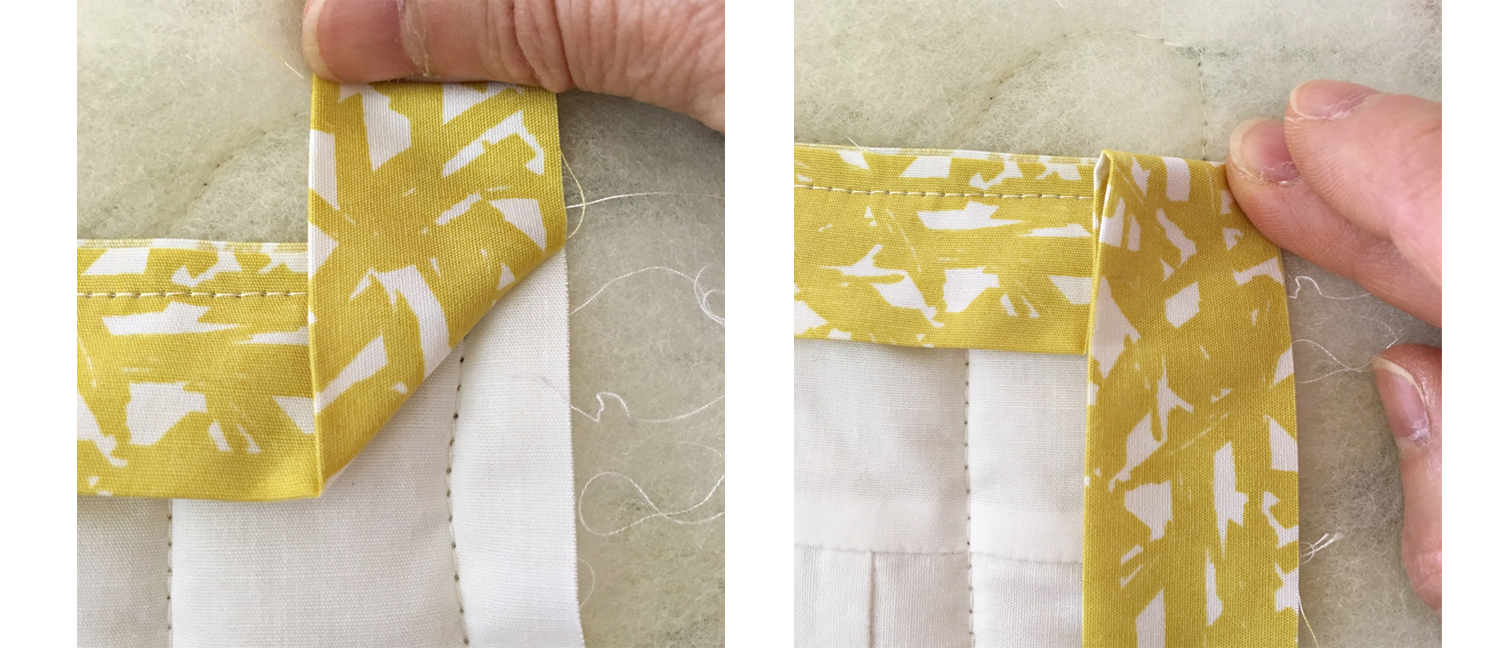
Fold the strip up at a 45° angle and then back down over itself, lining up the raw edges to make a mitered corner.

Resume stitching, beginning at the top edge of the new side and continuing around the quilt to the next corner and backstitch 1/4" from the edge. Remove the quilt from the machine, re-roll to expose the new edge and continue around the quilt to within 12" of the starting point. Tip: I like to miter the final corner and stitch a little way into the beginning side, ending with a backstitch, before removing the quilt for the final steps.
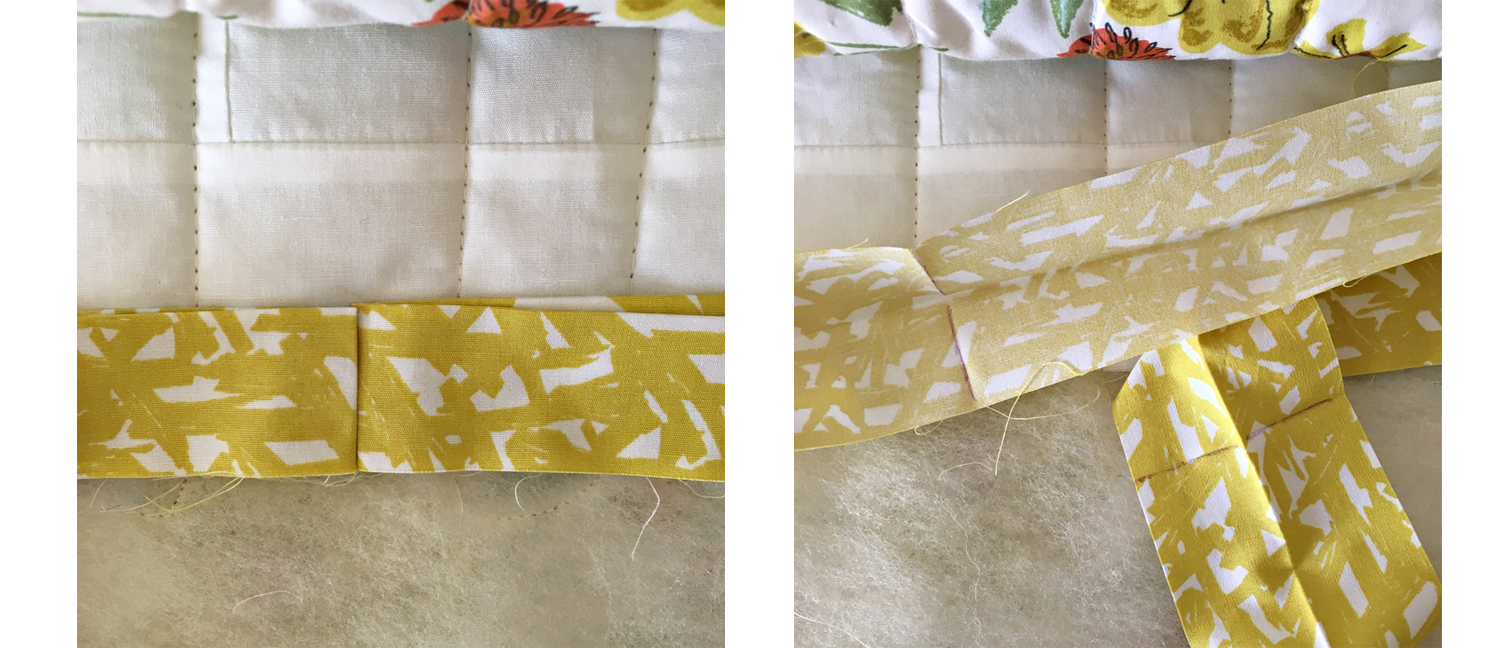
Lay the quilt top on a flat surface. Bring the loose ends of the binding together so the binding and quilt lie flat. Fold the binding ends back onto themselves so the folded edges touch but do not overlap. Finder press to crease. Open the binding. Note: I've marked the creases with an air solvable pen on the wrong side of the left end and on the right side of the right end so you can see the creases better.
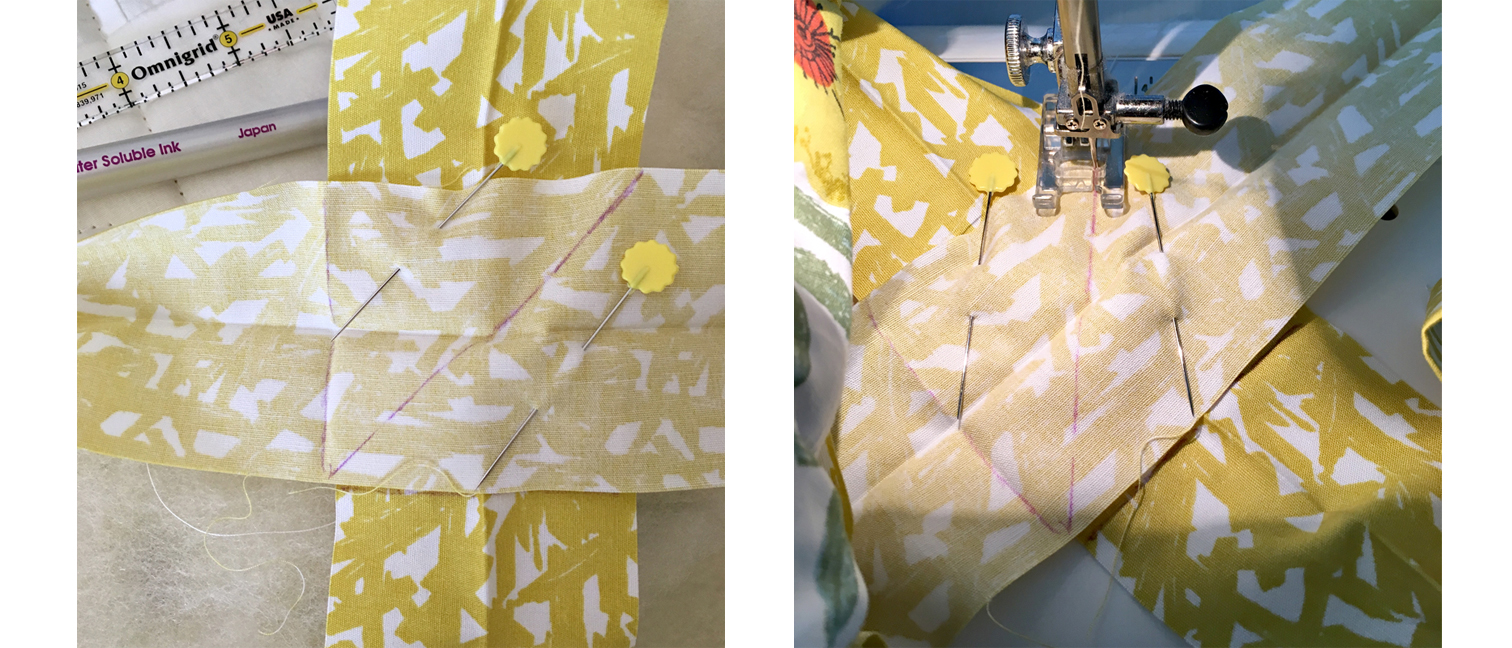
Place the strips at right angles, rights sides together, left end over right end, using the creases to align the strips as shown. Pin the ends together on the diagonal away from the center diagonal seamline. Draw a diagonal line from the corner intersections. Sew on the line.

Before trimming the seam allowance, refold the binding and check that it lies flat on the quilt top. Adjust the stitching if necessary. Trim the seam allowance to 1/4" when satisfied.

Pin the binding down and sew to the remaining edge of the quilt top, ending with a backstitch. Trim the backing and batting even with the quilt top.
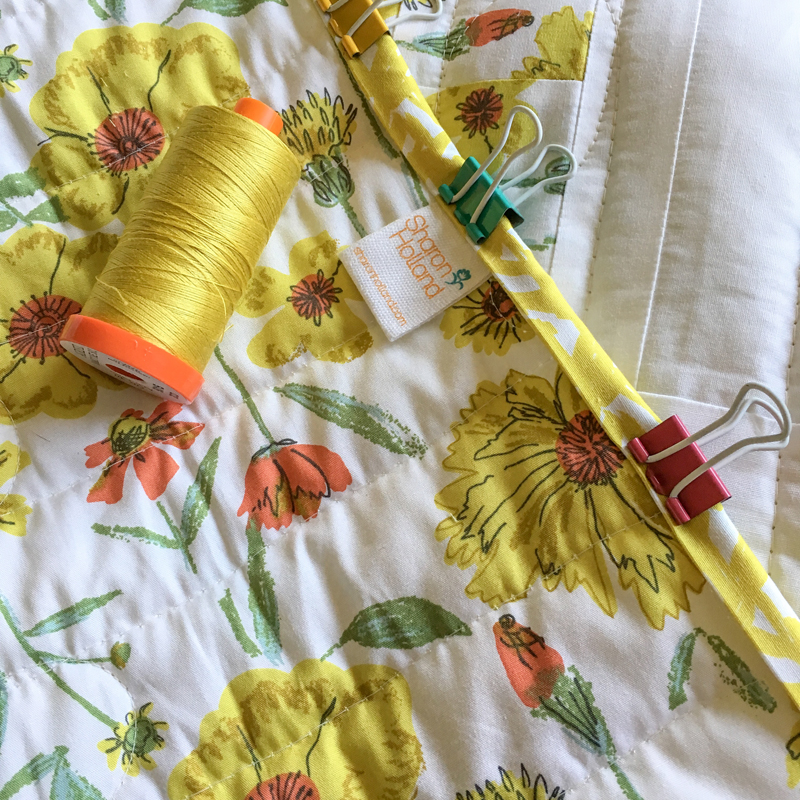
Turn the binding to the back of the quilt and blind stitch by hand or machine stitch to finish. I always hand stitch my binding and like to use office supply binding clips to hold it in place as I sew. My woven cotton labels were made by Custom Couture Label Company. Not an affiliate but I love their products anyway.
Okay, wow, that felt like a lot of information but I know it's not possibly enough to answer all your questions. Use the internet, books, and other quilters to help fill in the gaps I've not covered here. I have only gone over the steps I have used to finish my quilts and there are many other ways to achieve the same end results, find what works best for your skill level and needs. Next week will be the full reveal of my quilts and of course our grand finale giveaway prize.
This Friday we still have another Giveaway Friday! Maureen will be hosting the giveaway from her blog and our sponsor is the the fabulous Circa 15.
