Signature Baby Room Part 2

Signature Baby Room Part 2

Signature Baby collage.jpg

Sometimes my life gets moving so fast, I'm onto the next project like a machine, forgetting to slow down, enjoy, and post about all my accomplishments. My new Signature fabric collection has been such a joy and with each project comes little surprises and great photo ops that I've taken lots of beautiful photos. I thought I'd spend more time with each of these makes and post some additional stories about what I sewed in June for the Art Gallery Fabrics Signature Look Book. I hope you'll enjoy these between the projects posts.

Signature Baby Room View.jpg

It was so much fun to put together a baby room of Signature fabric projects! Signature is my newest fabric collection for Art Gallery Fabrics and came out this May. Ask your local shop for this line or shop the many online stores that carry it. See my Fabrics page for online stock lists. 

Last week in Part 1, I showed you behind the Look Book projects in a bit more depth and links to the tutorials for the pretty projects. I'll wrap up this week with Part 2 plus a fun stuffed turtle make I stitched up last week as a gift for my granddaughter. 

Signatrue Fabrics Crib Sheet Set.jpg

Possibly to two easiest projects stitched for my Signature Baby Room were the crib sheet and the knit blanket. Find a tutorial for my Ruching Rose pillow HERE.

I wish I'd known how easy it was to make crib sheets when my kids were little! Dana Willard, friend and also an Art Gallery Fabrics designer sister has a fun You Tube video for how to make a fitted crib sheet. AGF fabric is so soft and the perfect designer prints to customize the look for baby's room.

Signature Fabrics Baby Room 3.jpg

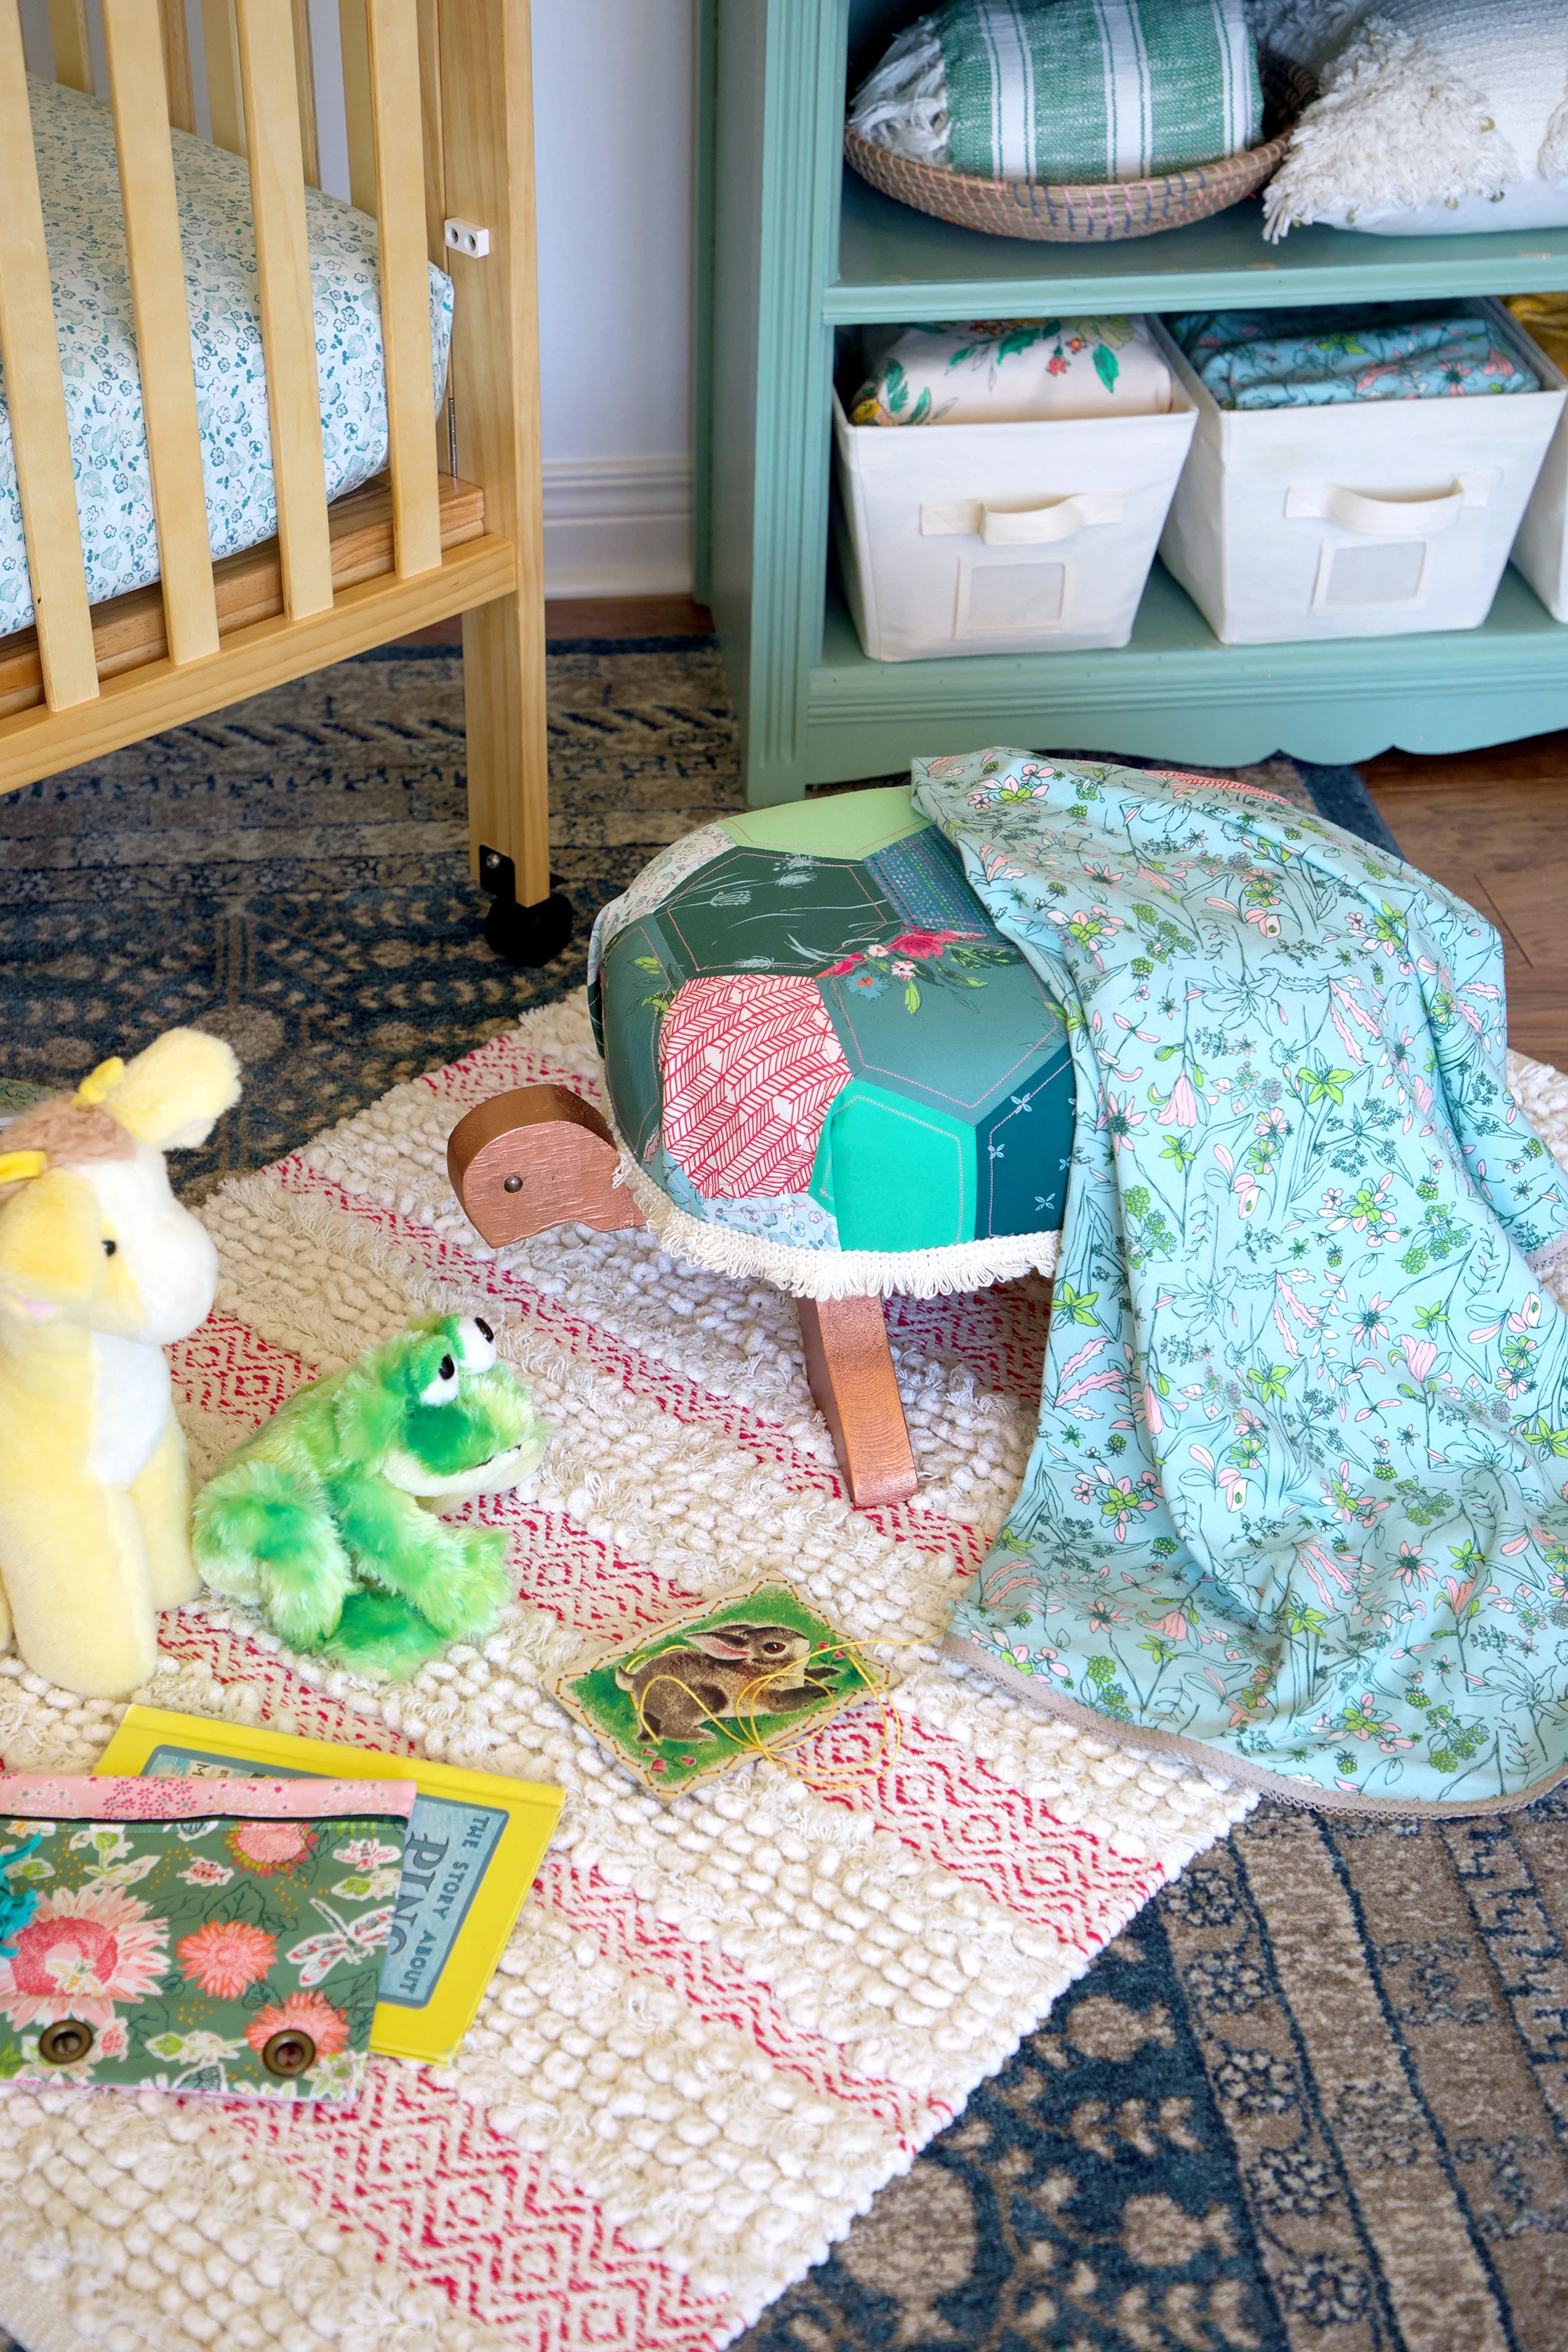
The knit blanket not only is cuddly soft with AGF knits but is another easy make. You wouldn't even have to finish the edges if you didn't want too because knit doesn't fray but to dress it up a bit I added some pre-made bias tape with a crochet edge for a sweet little touch. A nice tutorial for making a knit blanket can be found at Kitchen Table Quilting.

Star Light sq web.jpg

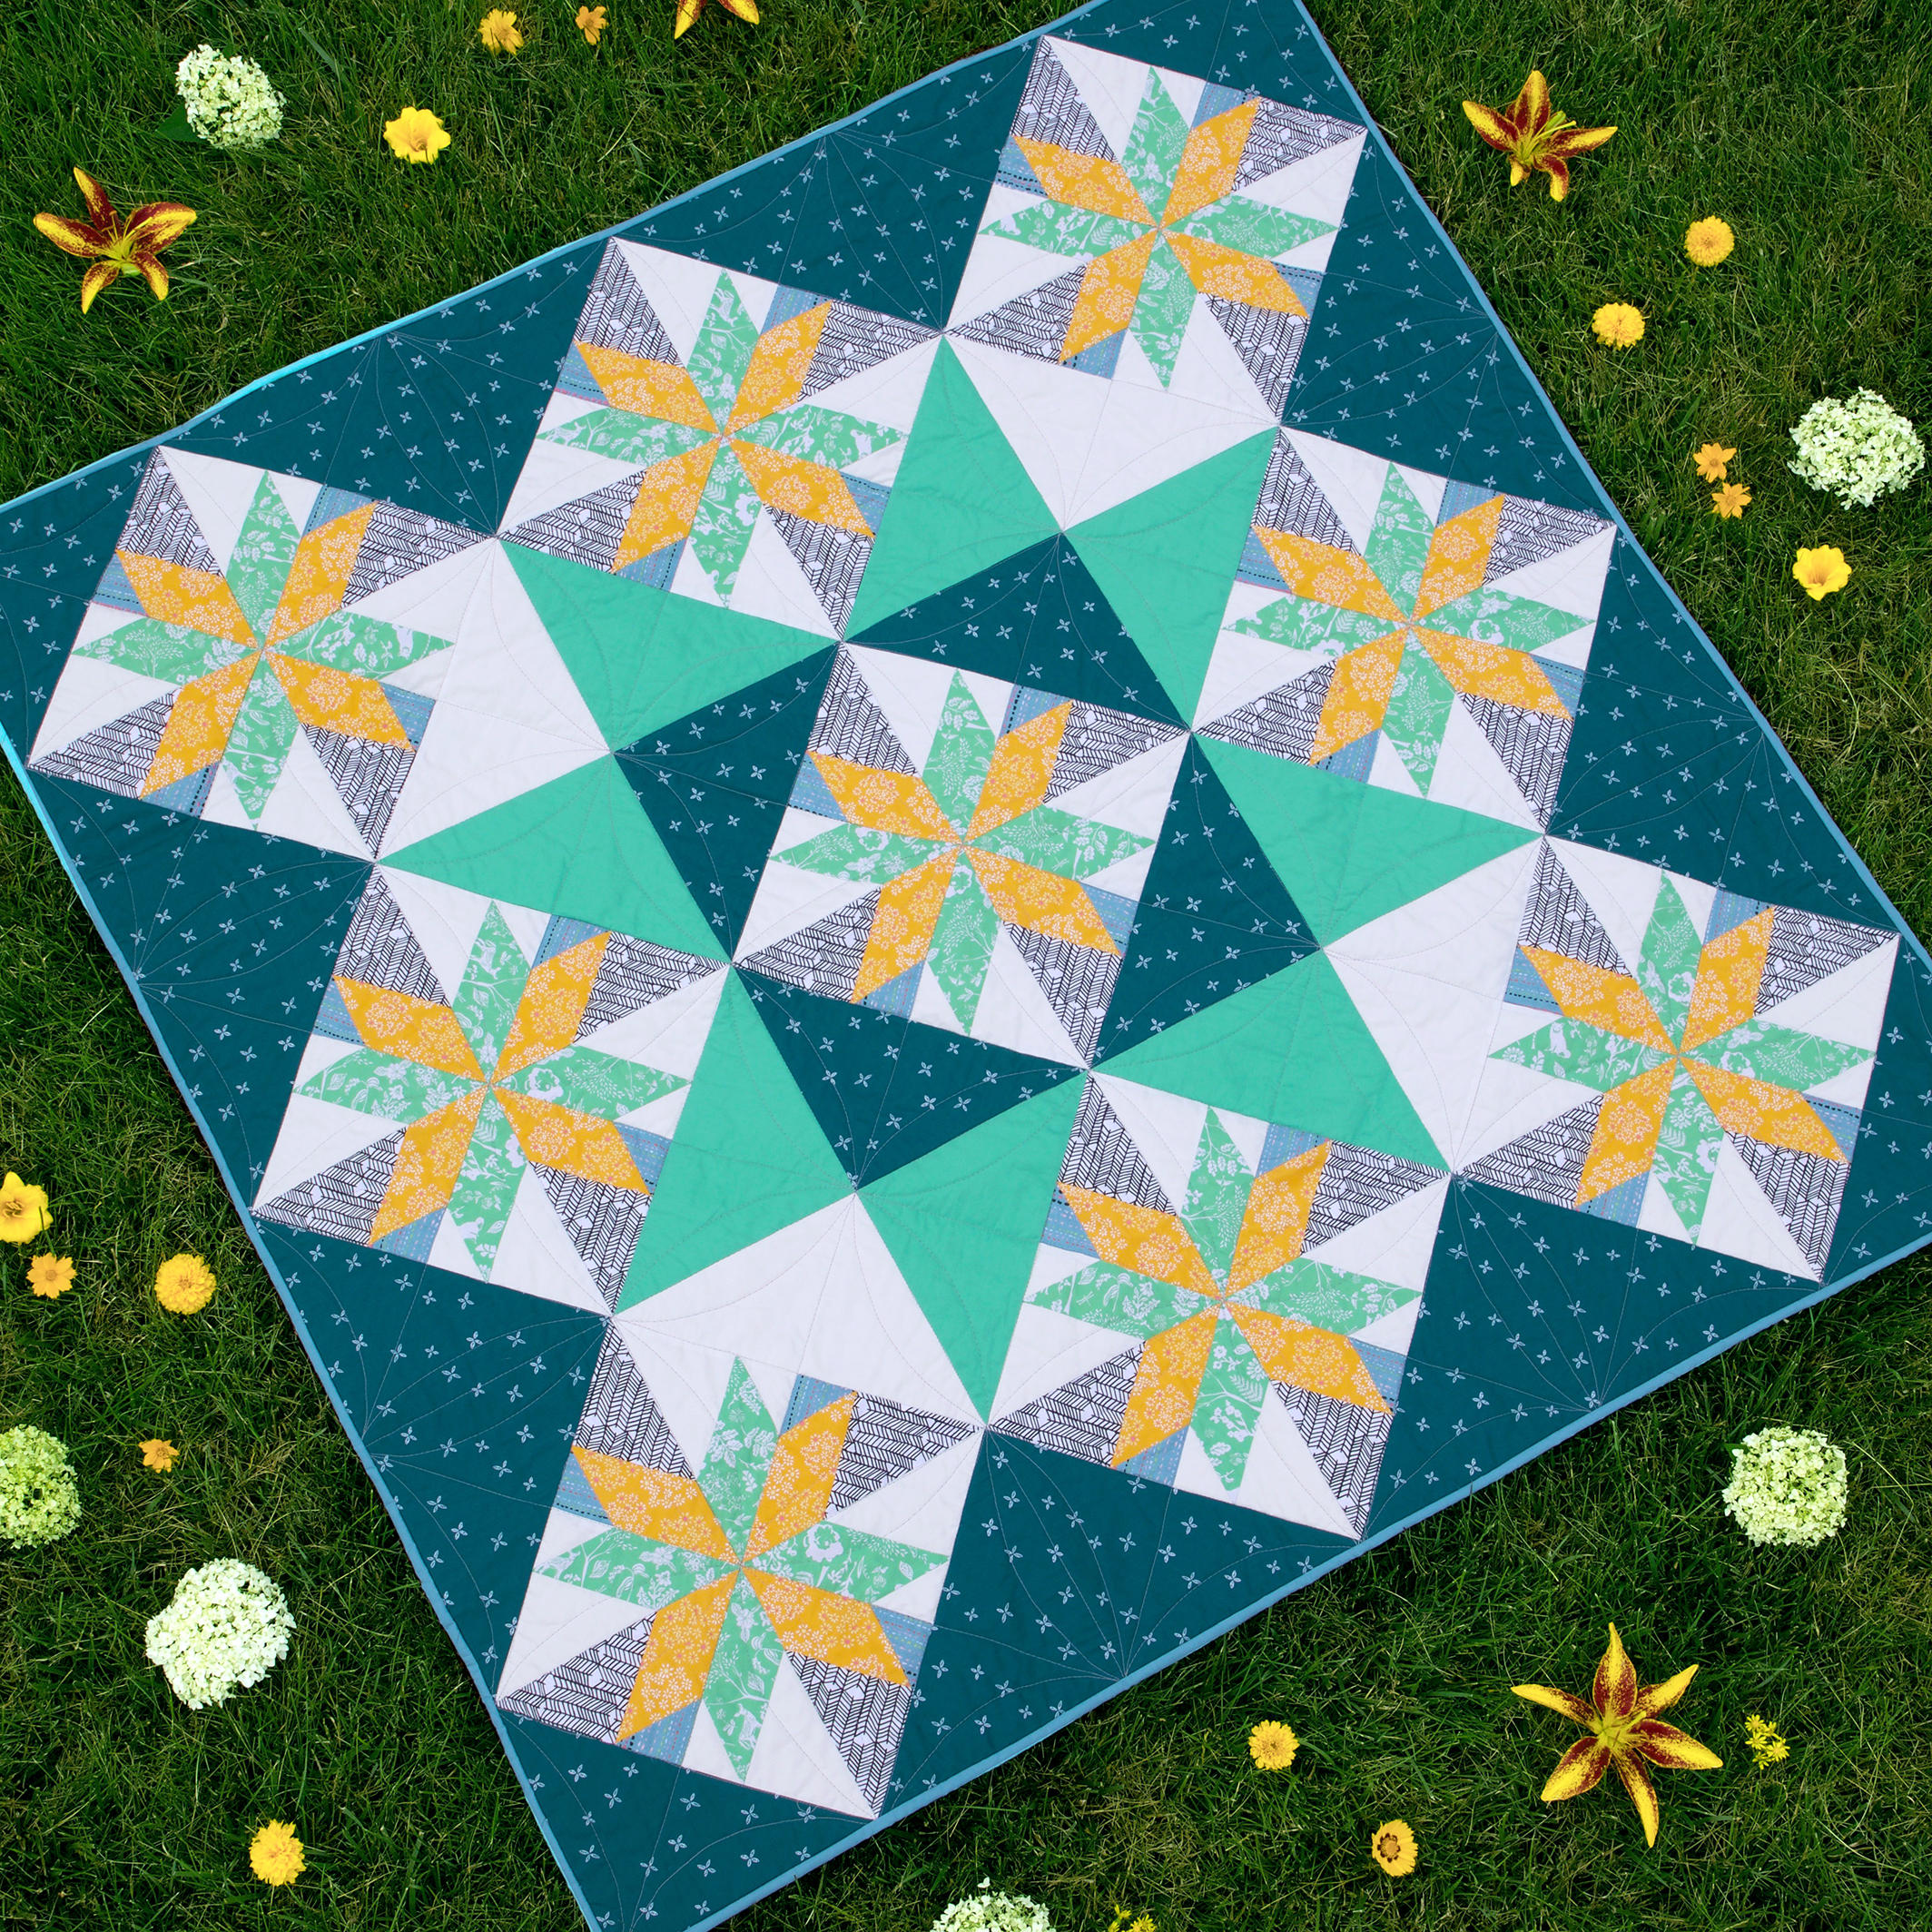
Earlier, in June, I blogged about my free Star Light baby quilt pattern. The inspiration for this quilt came when I was making the Cactus block for the Community Sampler. This shows how you can take a block you love and run with it to make a completely new quilt. Find the free pattern HERE.

Signature Butterfly.jpg

Even though my Signature Baby Room was intended as a gender neutral room I still couldn't help seeing it through my granddaughter's eyes. Because she loves butterflies and this fabric collection is about nature and includes butterflies in some of the prints I made several fabric butterflies and used them in various decor projects. Read more about how I created these HERE and learn how to make them. 

Signature Turtles Stacked.jpg

There are so many Signature makes I'm obsessed about but maybe the one that brings on the biggest smile is the turtle footstool I wrote about in my Part 1 post. Since this guy is staying at my house for the grandchildren to visit I thought I'd make my granddaughter a turtle of her own. 

Softie Signature Turtle 5.jpg

I found the cutest free softie pattern on the Make it and Love it blog and of course had to make a version in Signature fabrics!

Signature Turtle Love.jpg

To add just a little extra to my turtle I stitched some Dritz Make Your Own Chenille to the shell before adding the feet and added a fabric heart outlined with chenille to it's tummy before assembling the body. 

Signature Turtle Feed 2.jpg

Turtle, as he's called, now has an honorary spot in her bed and she love's her new friend!

Signature Turtle and Baske 2.jpg

Because every turtle needs a home, I painted an old basket up to give it a fresh new look (that coordinates, of course with my fabrics) and made the turtle his own blanket. I had as much fun making this as she's having playing with him!

Signature Turtle and Basket 1.jpg

And, way too much fun photographing this turtle. 

Sunflower Quilt from Art Gallery Fabrics.jpg

Don't forget to check out the Art Gallery Fabrics Look Books that come out with every new fabric line and all the oodles of free quilting and sewing patterns like the Sunflower quilt I designed for this collection and the AGF Studio Butterfly pillow pattern. 

Butterfly-Pillow-Instruction 1.jpg

Have a wonderful summer!

Love,

Sharon

Signature Butterflies

Signature Butterflies

Signature Shadow Box Butterfly.jpg

When I was planning my projects for my new Signature fabrics collection for Art Gallery fabrics I created rooms and looks, then designed my sewing around what would fit into those rooms. 

One of the looks is what I'm calling the Signature Baby Room. I wanted a gender-neutral room for a baby or young child that loves nature. Using my granddaughter as my model toddler, I knew there had to be butterflies, because she LOVES butterflies!

Signature Butterflies 2.jpg

My original inspiration for making butterflies using fabric came from Kim of Go-Go Kim. Kim has a great tutorial for gluing fabric to paper to hang butterflies in shadow boxes. I wanted to make a bit sturdier butterfly with all fabric and came up with a hybrid of sorts...

Materials Needed for Making Signature Butterflies:

  • Signature Butterfly Templates
  • Fabric scraps at least 1/4'' larger around than template size
  • Heat n Bond Lite iron-on adhesive or similar product like Pellon EZ-Steam one-sided pressure sensitive fusible web (optional, see next item on list)
  • Pellon TP970 Thermolam Plus Sew-in fleece (Note: If using a fleece with an adhesive side, omit iron-on adhesive product from the line above)
  • Iron and pressing cloth
  • Coordinating thread
  • Scissors
  • Air-solvable marking tool
  • Spray paint (optional)
  • Frame or shadow box

Making Butterflies

Download the Signature Butterfly Templates and print out at actual size. Check for accuracy using the 1'' reference square on the PDF. Cut out butterfly shapes. Tip: For a more durable template, print onto card stock paper. 

IMG_6264.jpg

On the Pellon Thermolam Plus Sew-in fleece, trace around desired butterfly shapes, leaving at least 1/8'' between shapes. Note: There's no right or wrong side to sew-in fleece but if using a fleece with an adhesive side then draw on the non-adhesive side. 

Following the manufactuer's instructions, adhere the iron-on adhesive (Heat n Bond or EZ-Steam type product) to the unmarked side of the fleece. Omit if using a fleece with an adhesive backing.

My butterflies only have fabric on one side and those wishing to do the same can move onto the next step noting that my tutorial images reflect only one side with fabric. But, if you're planning on fabric backing both the front and the back of your butterflies then adhere iron-on adhesive to the marked side of the fleece as well before moving to the next step, leaving the paper backing on until ready to adhere to fabric.

IMG_6265.jpg

Cut out butterfly shapes.

IMG_6266.jpg

Following the manufacturer's instructions, fuse the adhesive side(s) of the fleece butterfly shape to the wrong side of desired fabric(s). 

IMG_6268.jpg

Cut out butterfly shape using the edge of the fleece as your guide.

IMG_6269.jpg

To add even more durability to your butterfly, add decorative stitches around the shape, add details like body shape, or embellish as desired. 

IMG_6270.jpg

I always love playing around with materials and thinking outside the box. Because I wanted to add a bit of bling to my butterflies and include some metallic elements I decided to try spray painting the backs. 

Using a piece of cardboard and pin to hold the butterfly in place while I sprayed it I was very pleased how the gold spray paint took on the fleece backing. It didn't change the feel of the fleece and gave a nice gold tipped edge to my creations. 

IMG_6276.jpg

After the spray paint dried, I could go back in and add more dimension to my butterfly by folding and sewing very close the the folded body edges. 

IMG_6277.jpg

Let Your Imagination Soar!

Once know this technique for fusing fabric to fleece and making butterflies, the sky's the limit to what you can create. 

Signature Butterfiles.jpg

My largest butterfly became an unique piece of art when I hand stitched it to the center of a rush placemat from Target. 

IMG_6287.jpg

I used this technique to cover a mirror with fabric faced fleece and simply glued the fleece in place with Aleene's No-Sew Fabric Glue so it's non-permanent and can easily be removed with water in the future. 

IMG_6284.jpg

To fill the gaps between my mirror backing and the frame I used fabric glue to attach some Dritz natural-colored Twist Cord to act like decorative molding. 

Siognature Baby Room Wall Art.jpg

A 3-D butterfly was simply pinned with a decorative straight pin directly to the fabric backing. 

Signature Shadow Box.jpg

For this bejeweled shadow box I fleece backed fabric in the same technique as in the above projects and cut a backing size to fit a dollar store shadow box frame that had a saying printed on the backing. The opaque quality of the fleece blocked out the saying on the picture. Before hot gluing the fleece back fabric to the frame I pinned vintage brooches to the fabric for a one-of-a-kind, nature-inspired wall art. 

Hoop Art

Signature Needle Work.jpg

For a more traditional way to create art for your walls and bring nature inside is to use prints from my Signature and embellish them with embroidery and appliqué. For my Hoop Art I fussy cut a bouquet from my Extempore Celebration print and appliquéd a dragonfly, bee, and butterfly from the Small World Sprightly print. 

Small World Signature fabrics.jpg

Starting with an over-sized square each I sandwiched the following materials: Extempore Celebration right sides up on top, Hobb's Tuscany Silk batting in the center, and a Pure Element solid right side out on the back. I embellished the main print with embroidery and quilting stitches then added needle turn appliquéd cut outs from the Small World Sprightly print with blanket stitch edge detail. 

Once all the needle work was done, I re-stretched the art in the hoop, secured it tightly with the screw at the top, then trimmed the edge of the fabrics even with the edge of the hoop. 

Signature Wallhanging 2.jpg

I hope this gives you some new ideas for how to customize and create art for your home. So many more things can be done with these techniques--I hope you'll give it a try!