Sweet Home Quilt Along - Week 3

Sweet Home Quilt Along - Week 3

SH_Sweet Home Bungalow Blocks-08.jpg

Welcome to the third week of the Sweet Home Quilt along hosted by (me) Sharon Holland, Maureen Cracknell, and Jennifer Jones. We’re halfway through the quilt along and excited to connect with the Sweet Home quilt makers on our Instagram community and here on our blogs!

I hope you’ve been following along on all three hosts blogs and Instagram accounts as we’re each making different versions of this quilt and let me tell you I’m loving ALL OF THEM!! See what I mean when you search the #SweetHomeQAL hashtag on Instagram.

Sweet Home Weeks Graphic 3.jpg

If you’re just joining us you’ll probably want to pop over to the Sweet Home Quilt Along - Week 1 post to get caught up. Purchase the Sweet Home quilt pattern from my SHOP here.

If you’ve been following along since the start then you should already have your fabrics cut out and Log Cabin blocks assembled.

Sweet Home QAL Schedule.jpg

The quilt along will run six weeks total and we’ll cover a different aspect of piecing or finishing for that week. Some of you are working ahead and that’s wonderful—it’ll give you more time for the quilting and finishing portion. This quilt along is very relaxed. If you feel like completing the top in a week—go for it! But, if you’re a beginner and want more instruction along the way—we have that too in the form of LIVE and recorded Instagram tutorials over on my IGTV channel on Instagram. I just added a Bungalow Block tutorial on Monday of this week.

I’ve recorded step by step tutorials for you to access on my @sharonhollanddesigns IGTV channel on Instagram and so far the Sweet Home Quilt series covers fabric selection, Log Cabin block, and Bungalow block construction.

Sweet Home Bungalow Blocks-11.jpg

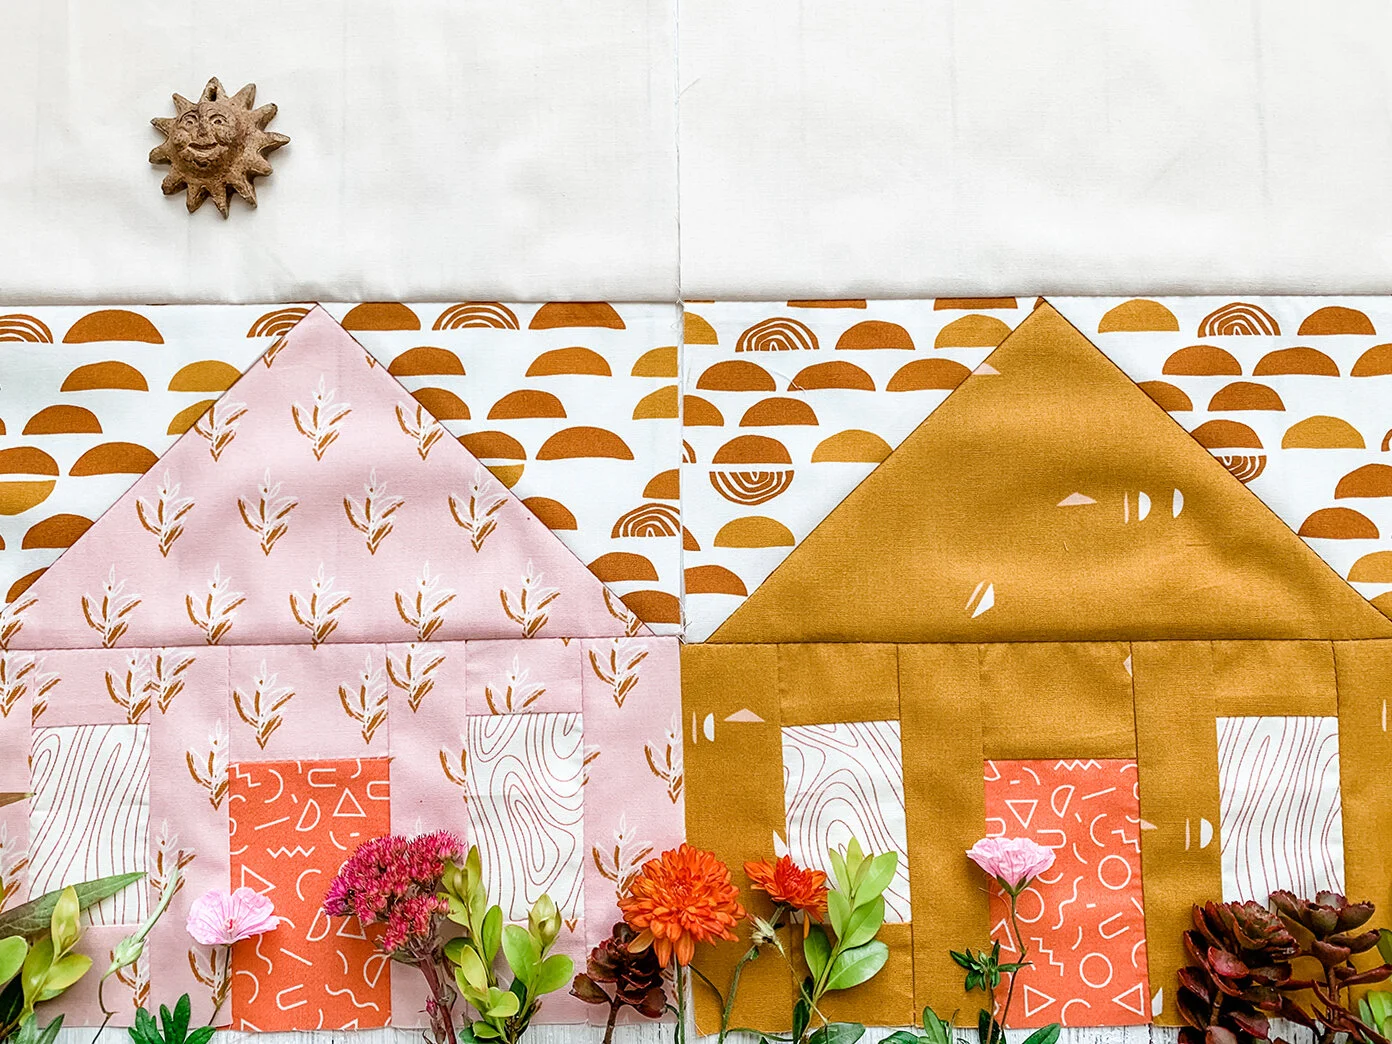
Today we talk about piecing the Bungalow blocks. I’m using Art Gallery Fabrics Terra Kotta prints mixed with AGF Pure Solids Sandstone for the background and one of my Spirited prints for half of the Log Cabin block roofs. The Sweet Home Terra Kotta kit can be purchased from Fat Quarter Shop.

SH_Sweet Home Bungalow Blocks-01.jpg

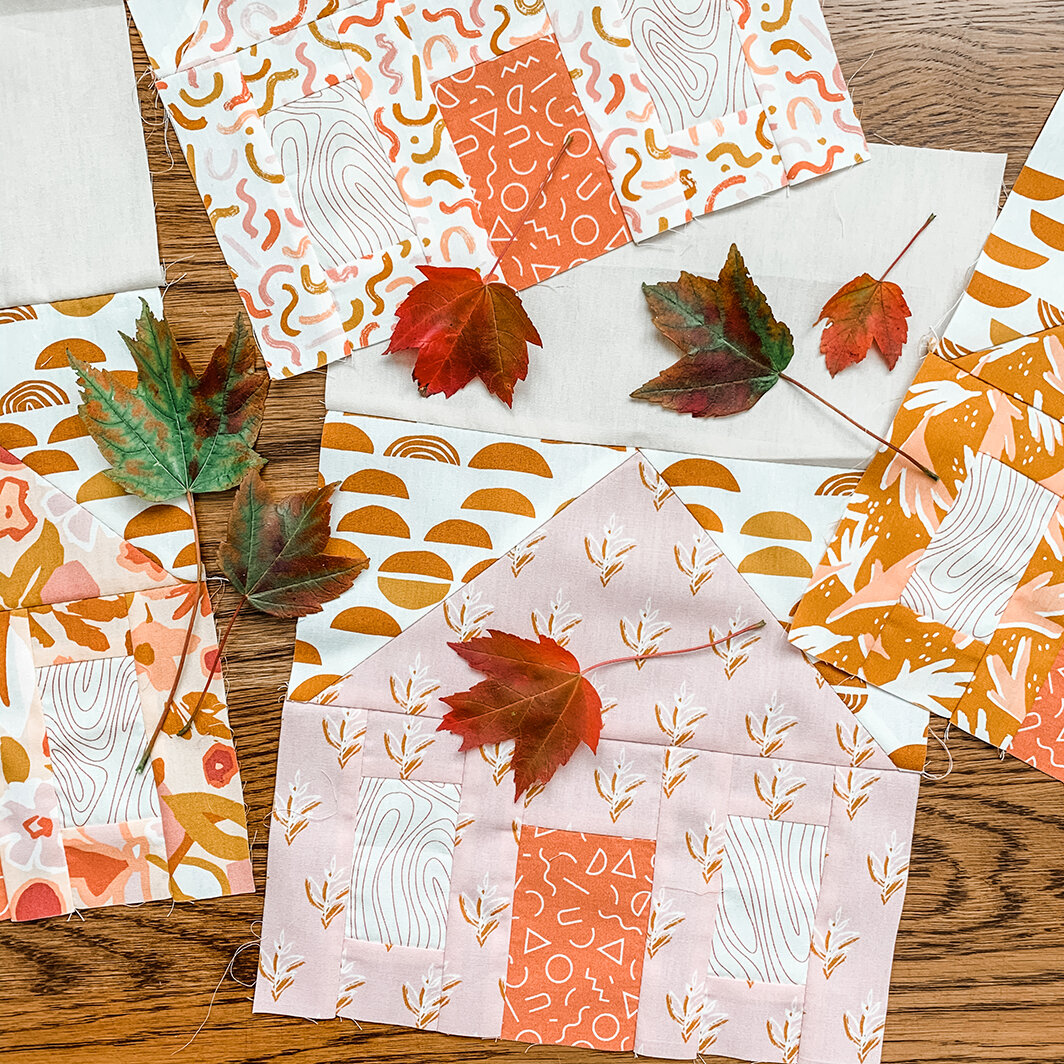
Once you’ve made one Bungalow block all the way through and are comfortable with the construction you can utilize chain piecing to help speed up the repetitive sewing steps.

SH_Sweet Home Bungalow Chain Piecing-09.jpg

In the photo above, I’ve added all the long strips to one side of the window units without clipping the threads. Once the same sewing step has been applied to all the pieces needed for the Bungalow blocks I remove the chained pieces, snip the connecting threads and add the long strip to the opposite side before moving on to the next step.

SH_Sweet Home Bungalow.jpg

When constructing the roofs for both the Log Cabin and Bungalow blocks there’s usable trimmings from the Flippy Corner construction. I’ve been saving all my trimming and am planning to make something scrappy from them in the near future.

HST Pile.jpg

If you’re looking for some ideas of what to do with those leftover half-square triangles (HST) units, take a look at an oldie but goodie blog post were I show examples of what to do with leftover HSTs to create new quilt blocks.

HST pillow.jpg

If you don’t want to commit to making another quilt from leftover HST scraps then why not think smaller and make a pillow? I had a similar stack of half-square triangle (HST) trimmings when Maureen and I hosted the AGF Heart Quilt sew along earlier this year. If you’d like some inspiration for a pillow project, read about my pretty pillow that also uses Chenille-It Blooming Bias for an added bit of fun!

SH_Sweet Home Bungalow Blocks-04.jpg

Just like the Log Cabin construction, you’ll find the Bungalow block uses much the same piecing techniques. The window sections are assembled in a Log-Cabin fashion and the base of the Bungalow comes together quickly—especially if you’re chain piecing. The roof is constructed exactly like the Log Cabin roof only minus the chimney.

SH_Sweet Home Bungalow Blocks-06.jpg

If you’re working with a directional print for your roof like I am then you’ll want to either watch my Instagram IGTV video for this block construction or read about Controlling Directional Prints in Patchwork Units on my tutorial post.

Sweet Home Bungalow Blocks-12.jpg

Next week we’ll be making the corner squares and attaching sashing to blocks.

I’m enjoying seeing your postings to Instagram and following along on your progress—you’re all are doing amazing and beautiful work on your Sweet Home quilts!

Sweet Home QAL Sponsors.jpg

Don’t forget that this Friday will be a new Friday Giveaway with fabulous prizes from our sponsors. Be following along on Instagram as all the giveaways will be held on that platform and winners will be randomly drawn the following Monday from the #SweetHomeQAL hashtag pool. The quilt along members that post their progress photos to public account on Instagram and use the hashtag #SweetHomeQAL will automatically be entered into every Sweet Home Quilt Along drawing! It’s that easy to enter, so enter often to up your chances!

And, while you’re on Instagram, take a look at the #SweetHomeQAL hashtag on Instagram and see what the other QAL Makers are using in their quilts—it’s an amazing resource not only to see fabrics but to make new friends!

I am an Amazon Associate site and earn from qualifying purchases on the products I’ve linked below. The helpful products selected are the same or similar to materials used to make the project(s) in this blog post or related items I think you may enjoy.

Heart Quilt Sew Along - Week 3

Heart Quilt Sew Along - Week 3

Sharon Holland Heart Quilt Cozy SQ.jpg

It’s the final week in the Heart Quilt sew along. This fast and fun sew along has been hosted by myself and Maureen Cracknell with special thanks to Allison Harris of Cluck Cluck Sew for allowing us to use her Heart Block in our quilt layout.

If you’re just joining us, you’ll want to get up to speed by reading first weeks post announcing the sew along. If you’re already making heart block or at the point to start adding the sashing and borders—check out week 2 HERE.

This last post is dedicated to turning that top into a quilt plus I’ve added an extra bonus project for all those left over half square triangles from trimming the large flippy corners off the hearts!

Sharon Holland Heart Quilt Finished-5.jpg

Quilting

Rather than reinvent the wheel, I'm directing you to the blog post for Finishing that was originally posted during the Sewcial Bee Sampler sew along. You'll find all the tutorial information for spray basting, quilting, and binding your quilt. The sizes have changed but the concept for basting, quilting, and binding your quilt are the same. As stated in that post, there are many ways to finish a quilt and I am blogging about how I finish my quilts. If you have a preferred method, please do it the way you're comfortable with. If you intend to send your top off to be professionally quilted, discuss with your long-arm quilter how they'd like you to prepare your quilt top and backing for being quilted. 

IMG_6074.jpeg

I'm not a professional quilter by any means. I get by and call my quilting style "organic" because it's not perfect and lines are not straight. I love the human touch that non-perfect quilting adds to my quilts. I used my mid-arm Viking Platinum 16 for quilting my top. The quilting guide lines were marked out ahead of time and the quilting went really fast after that to just follow the diagonal lines as shown below in the quilting diagram.

Quilting diagram

Quilting diagram

I used my favorite Hobb’s Tuscany Silk batting inside my quilt and love how light and drapey it is—especially for handling and maneuvering when quilting.

IMG_6137.jpeg

The backing on my quilt is from my Everlasting fabric collection for Art Gallery Fabrics and is called Summer’s Dance. For the binding I used Woodblock Ballerina that was also used for hearts.

Sugared Hearts Material List 2.jpg

Here’s another look at the prints that went into my quilt. My Heart quilt’s stitched from a curated mix of fabrics from Art Gallery Fabrics Ballerina Fusion (a recolored mix of AGF designer prints), my Spirited, Everlasting, Signature, and Maureen’s Enchanted Voyage and Mystical Land collections.

My non-traditional Valentine colors remind me of sugared gum drops and candy. I’m crazy over this color palette and went with my heart when I did my fabric pull.

Sharon Holland Finished Heart Quilt-1.jpg

One of the biggest challenges of photographing quilts this time of year is the gloomy, cold weather. I had some grand plans for how to photograph this out doors but the wind didn’t cooperate. It started to rain shortly after we got these shots…

Heart Quilt Sharon Holland-1.jpg
 
Heart Quilt Sharon Holland-2.jpg

Be sure to check out Maureen’s blog to see her finished quilt top and bonus project from left over HSTs all made using a mix of Amy Sinabaldi’s MayFair and the new Foresta Fusion collection. Quilt kits for Maureen’s quilt are available at Lady Belle Fabric.

Photo and Heart quilt by Maureen Cracknell

Photo and Heart quilt by Maureen Cracknell

Bonus Project

Since I finished my quilt by Sunday I could’ve easily stopped there, written this blog post and moved on to the other projects stacking up on my desk but no—that’s too easy!

Pillow from HSTs-7.jpg

Remember in my Instagram Stories videos where I told you to hold onto those large half square triangle (HST) waste pieces???

Sharon Holland Finished Heart Quilt-2.jpg

I turned mine into this fun pillow! As a bonus, I’ll share with you how to make one (or more) for yourself!

The beauty of this type of project is that it can be customized to any size you want. I happened to have an extra rectangular pillow I wasn’t using anywhere in the house so I used it as my pillow form. It measures around 14’’ x 26’’ and is probably not a standard size.

Pillow from HSTs-5.jpg

I trimmed 36 HSTs to 3-1/2’’ square using my Bloc_Loc Ruler then arranged them into a design. I would’ve loved if the design was symmetrical but no such luck in this improv piece using scraps. I don’t really notice it now that the pillow is done.

I added 2’’-wide strips to the top and bottom to get it all up to the size I needed.

HST pillow  Chenille-it quilting.jpg

I’ve done a few projects on this blog where I’ve incorporated Chenille-it Blooming Bias and I can’t tell you enough how much I love this added texture—especially to pillows!

Pillow from HSTs-3.jpg

After stitching quilting lines to outline the chevron shapes 1/4’’ inside the seam allowances I added the 3/8 inch-wide Chenille-it to my pillow top. Stitching the blooming bias down not only adheres the product but also works as quilting.

Pillow from HSTs-2.jpg

I added two echo rows of chenille to the background areas. To read about how to stitch and then bloom the chenille, read more on my Chenille Pillow with Hidden Zipper post/tutorial. Plus, to see the gorgeous decorator pillows I made more recently with my Spirited Trail Marker print and Chenille-it, read HERE.

For more Chenille-it projects, here’s a fun You Tube video!

HST pillow.jpg

Personally I love a zipper closure on a pillow. Especially in a case like this where I’m using an existing pillow as the pillow form and like to switch out or clean the pillow covers regularly. You’ll find my go-to method for adding a hidden zipper on a pillow HERE. It’s insanely easy to do!

Sharon Holland Heart Quilt Finished-3.jpg

Now, not only do I have a heart quilt to snuggle under this Valentine’s Day but I have a coordinating pillow to go along with it!

Sharon Holland Heart Quilt Finished-1.jpg

Maureen and I want to thank you for sewing along with us and sharing your progress of your blocks to Instagram. We love seeing your work and encourage you to follow along, share, and tag when you post. Use the sew along hashtag of #agfLOVEquilt and be sure to tag @sharonhollanddesigns @maureencracknell and @cluckclucksew so we can see your progress! If you’re sewing with Art Gallery Fabrics don’t forget to tag them too as they love to see what Makers are making with @artgalleryfabrics !

Happy Valentine’s Day!

I am an Amazon Associate site and earn from qualifying purchases on the products I’ve linked below. The helpful products selected are the same or similar to materials used to make the project(s) in this blog post or related items I think you may enjoy.