
Sweet Home Quilt Along Giveaway Week 3
Each Friday, throughout the Sweet Home Quilt Along, there’ll be a Giveaway. Your QAL hosts, Maureen Cracknell , Jennifer Jones, and myself have coordinated special giveaway prizes with our amazing participating sponsors for each and every week! If you've happened to miss the first Sweet Home QAL post, take a look back and read about it HERE then follow the posts in chronological order until you get caught up.
These Friday blog posts will highlight the Sponsor and awesome giveaway prize offered for this week’s QAL giveaway. The randomly drawn winners will be selected from the growing Instagram hashtag pool the following Monday around 4 pm Eastern with the winner(s) announced on Instagram.
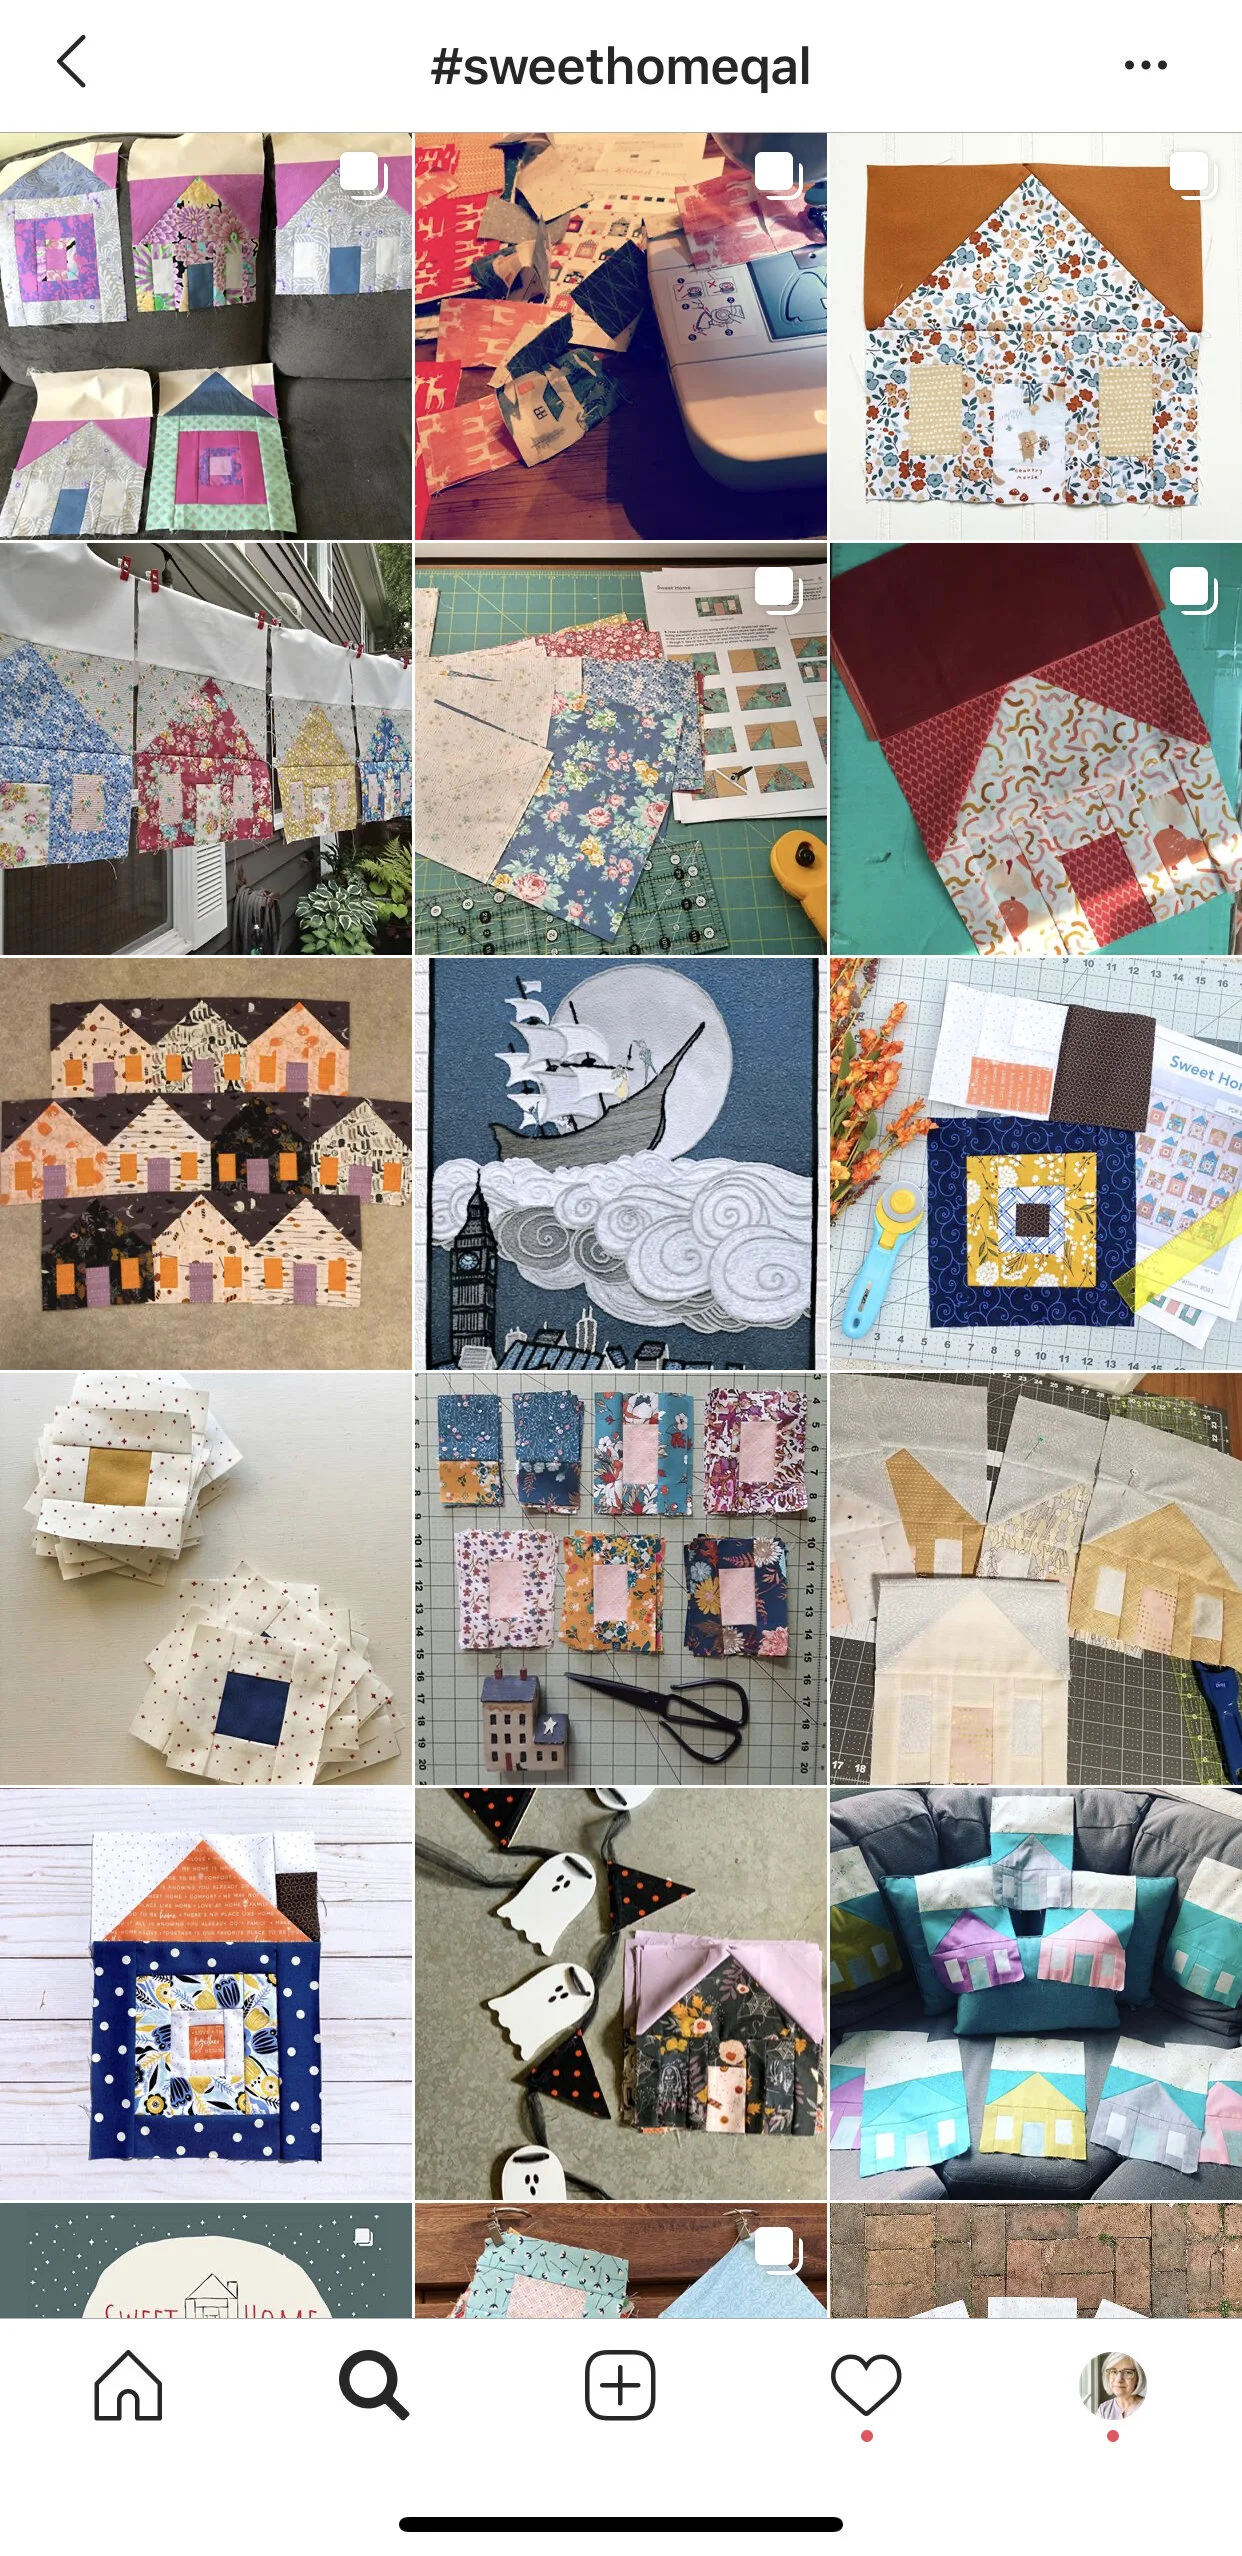
Recent #SweetHomeQAL posts in the Instagram hashtag pool
Is your Instagram post featured in this #SweetHomeQAL hashtag pool snapshot for this week???
We’re using Instagram as a Sweet Home QAL community share spot where we can follow along and comment on each others quilt progress and share beautiful photos of our work.
Every time you share a post to your public instagram account and use the official #SweetHomeQAL hashtag in your post caption your post is automatically entered into the giveaway hashtag pool! That’s right—it’s as easy as that—just do what you’d do anyway! So, to up your chances, post a lot of of progress shots of your fabric pull, cut pieces, blocks, sashing, assembly, tops, and ultimately, finished quilts.
You may notice I keep saying you need a public Instagram account to be entered into the giveaway drawings. That’s because if you have your IG account set as a private account, Instagram does not add any hashtags to hashtag pools from private accounts—it’s just the way they roll. So, you may want to go into your IG settings and turn your account to public for the QAL or if not, and I totally get the need for privacy in this strange world we live in, just know that you won’t be eligible for the giveaways.
SWEET HOME QAL SPONSORS

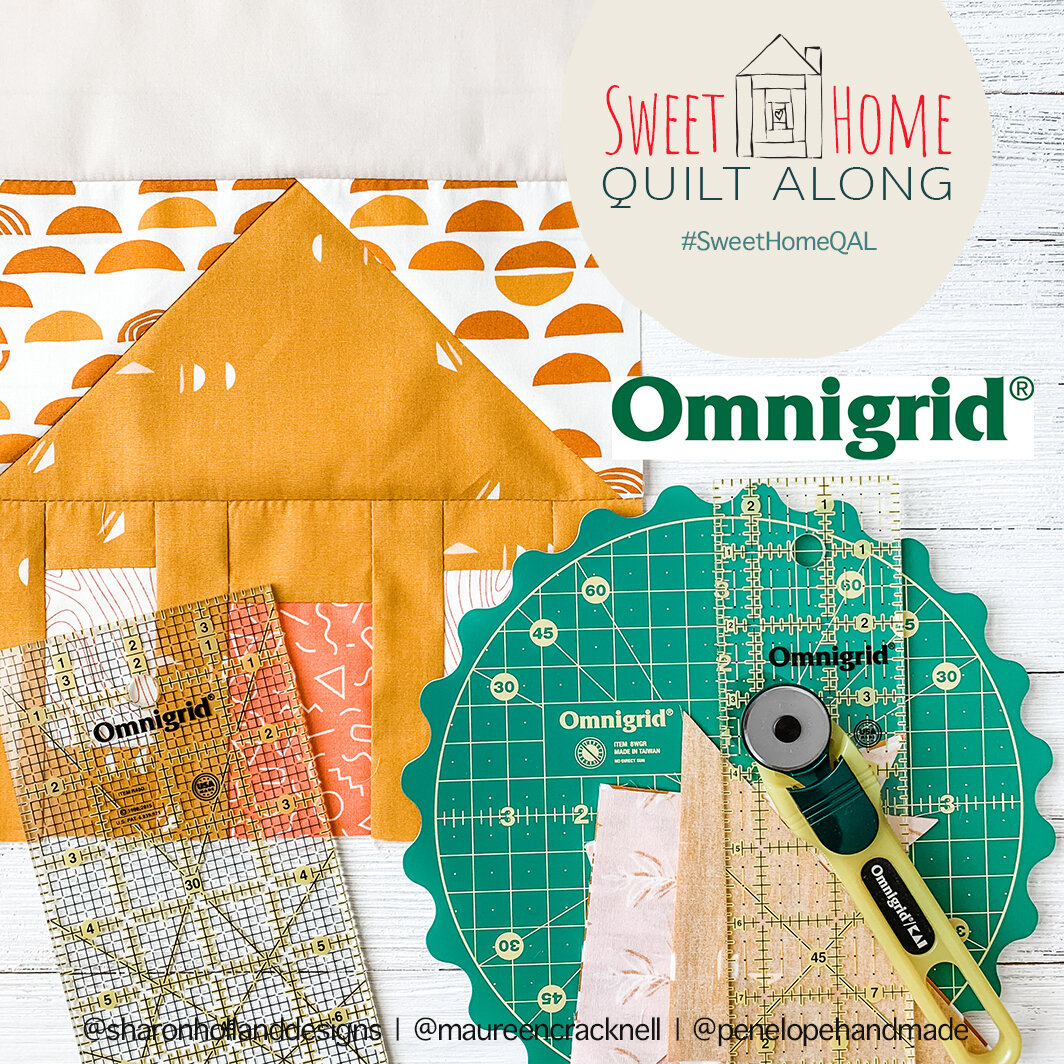
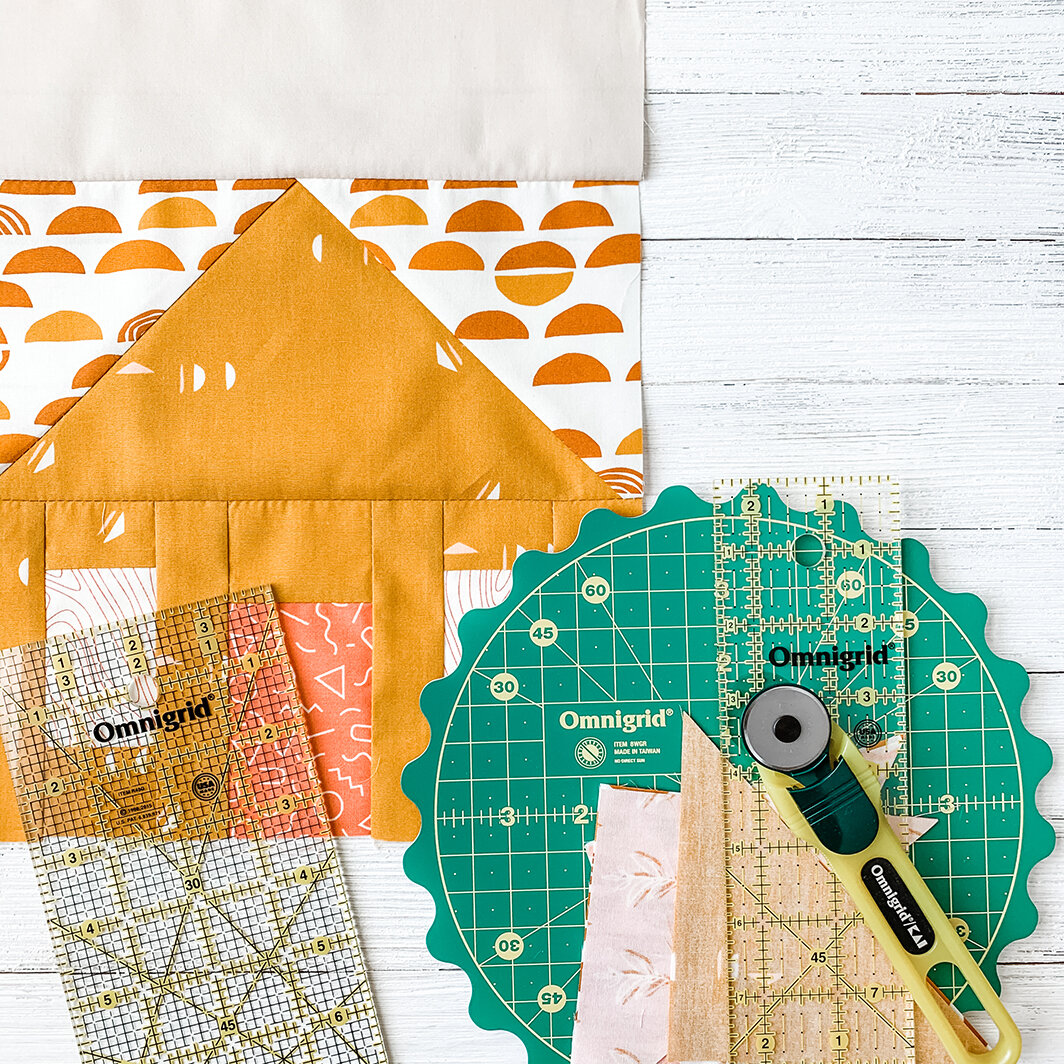
TODAY'S FEATURED SWEET HOME QAL SPONSOR IS Omnigrid!

Omnigrid® is a family of measuring and cutting products. When Omnigrid® tools are used together they provide quilters, sewists and DIY aficionados with unsurpassed accuracy and quality. A product concept born of the genius of Peggy and Randy Schafer, Omnigrid® products work behind the scenes allowing makers to flawlessly bring their creations to fruition. - See more at: Omnigrid!
Products * Projects and Patterns * Instagram * Pinterest
We hope you enjoy visiting Omnigrid!
For this week's Sweet Home QAL Giveaway, Ominigrid is offering an incredible prize of the wonderful Omnigrid sewing/quilting products shown below! Please note that this prize will be limited to winners within the United States only, sorry international friends.

THIS PRIZE PACK INCLUDES:
8” Rotating Cutting Mat Omnigrid | 2-1/2’’ x 8’’ Omnigrid Ruler | 4’’ x 8’’ Omnigrid Ruler | 28mm Rotary Cutter
Thank you Omnigrid for this generous prize!
Don’t forget to share your Sweet Home quilt makes with your fellow quilt along makers over on Instagram and you’ll automatically be entered into this week’s drawing if you have a public IG account. One winner will be drawn from the growing hashtag pool on Monday, September 28th around 4 pm Eastern and the winner will be tagged and notified on Instagram.
Be sure to follow along on all three host’s blogs as well as our Instagram accounts: Me @sharonhollanddesigns , Maureen @maureencracknell , and Jennifer @penelopehandmade
I also want to let you know that during the QAL Jennifer and I plan to have impromptu IGTV live videos to give you tips and tricks for sewing your Sweet Home Quilt.
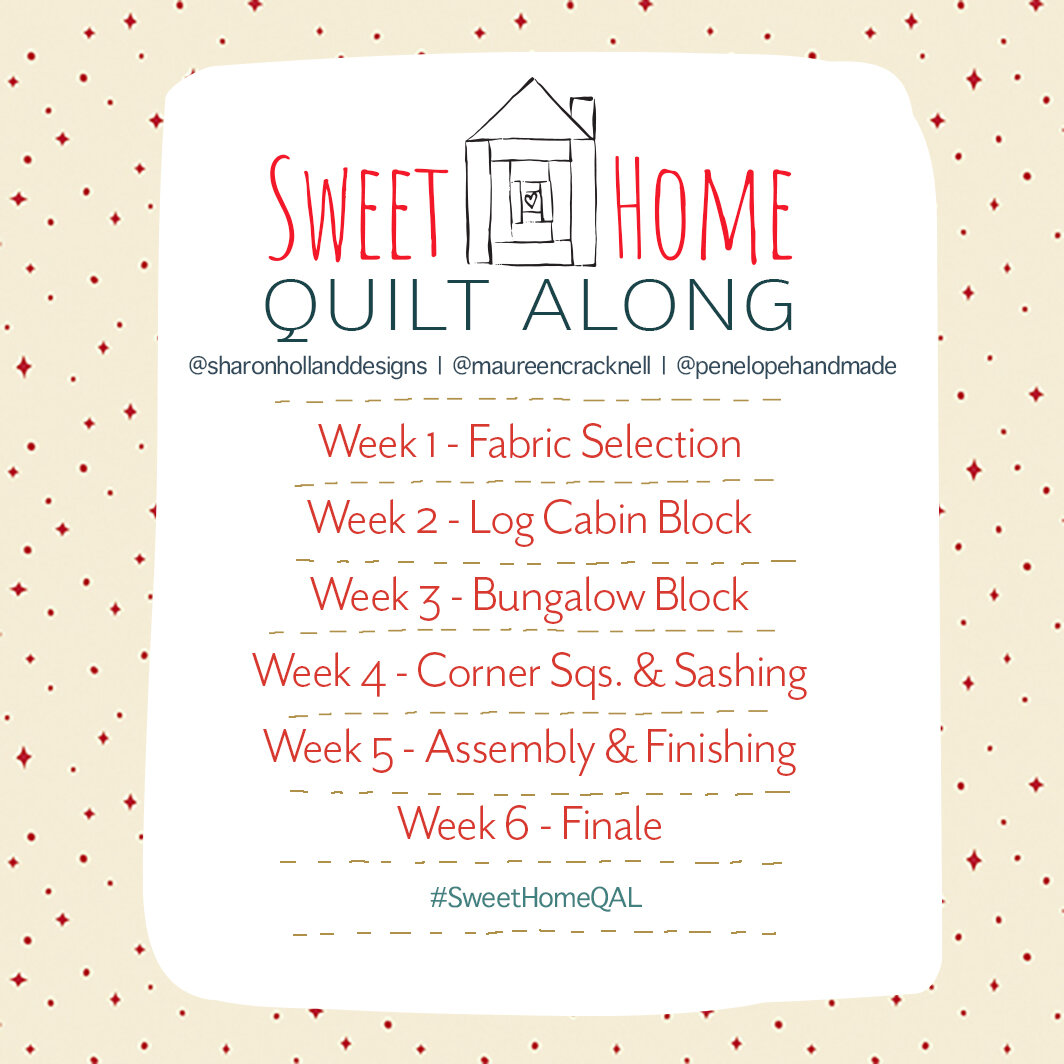
Next Wednesday for week 4, we’ll be piecing our Corner Square blocks and adding the sashing to put together the Sweet Home quilt top!
—Happy sewing
I am an Amazon Associate site and earn from qualifying purchases on the products I’ve linked below. The helpful products selected are the same or similar to materials used to make the project(s) in this blog post or related items I think you may enjoy.