Week #4 SBS Giveaway

Sewcial Bee Sampler Giveaway Friday

Each Friday, throughout the Sewcial Bee Sampler sew-along which Maureen Cracknell and I are co-hosting, will be a Giveaway Friday. We've coordinated special giveaway prizes with some amazing sponsors. 

If you're just now joining us, welcome, it's never too late to start sewing along! Please take a moment to catch up by reviewing all my earlier posts, beginning with the January 30th, 2017 post The Start of Something Sewcial.

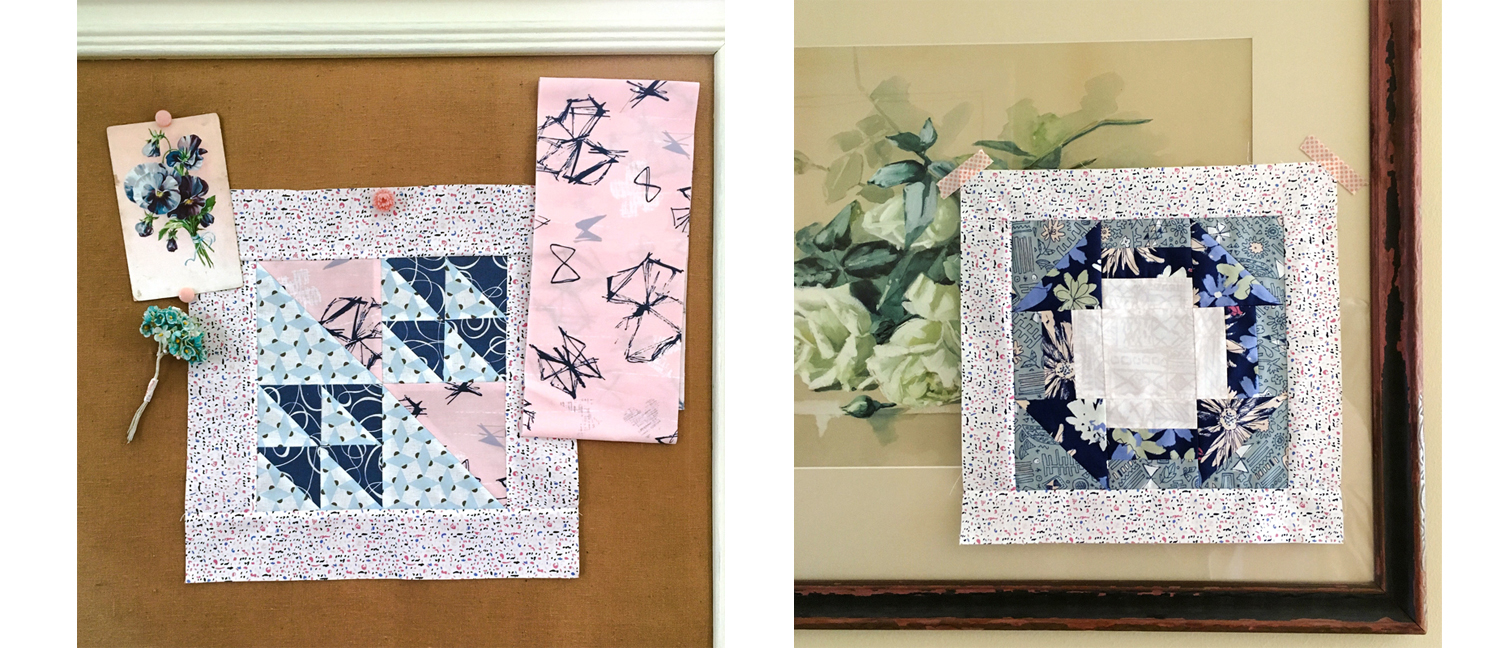
Before I introduce this week's sponsor I want to sneak in some photos of the second SBS quilt I've started using fabrics from my first four Art Gallery Fabrics collections: Gossamer, Sketchbook, Coastline, and Tapestry plus the two re-colored Fusion prints from my original Gossamer collection. I'm always so busy posting the how-to's that it leaves little room for the have-mades!

Week #3 Flock and this week #4 Crow's Nest. Next week I'll show you how pretty the first five block look together as we get 1/5 of the way through making the blocks. Hope you've been having fun so far?!!!?


Aurifil      Circa 15      The Intrepid Thread      Fat Quarter Shop      Omnigrid      Llama Fabrics      Color Girl     Lady Belle Fabric      Needle in a Fabric Stash      Dritz      Knotted Thread        Needle and Foot      Stash Builder Box


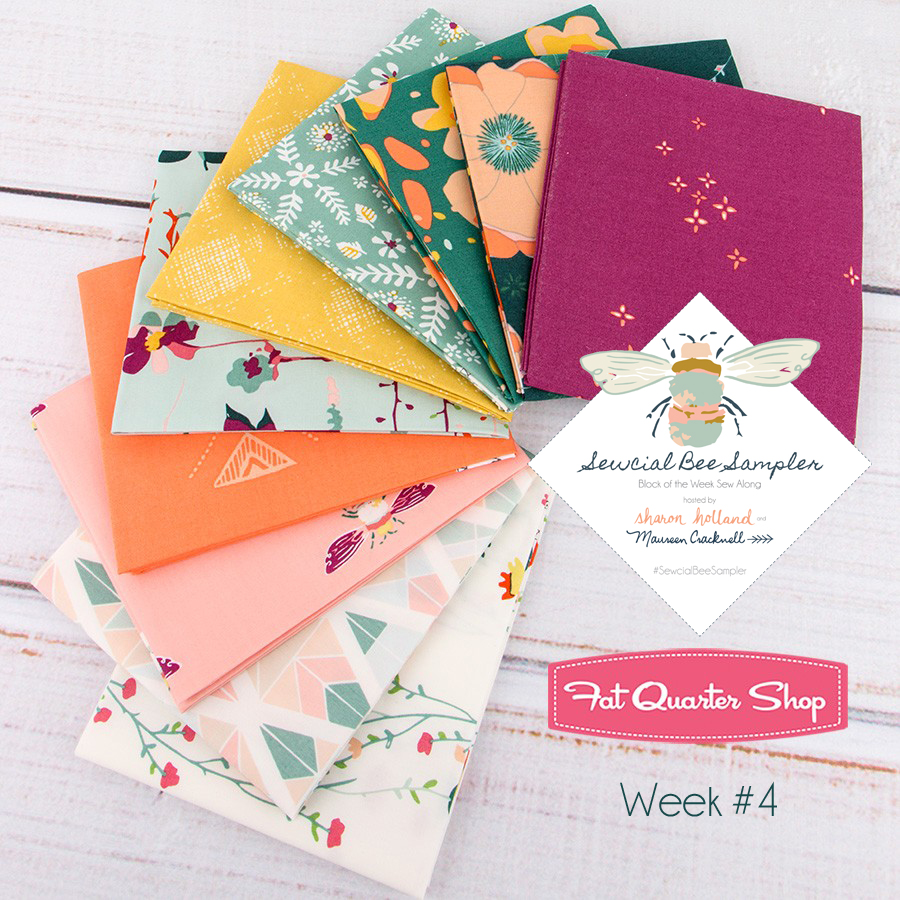
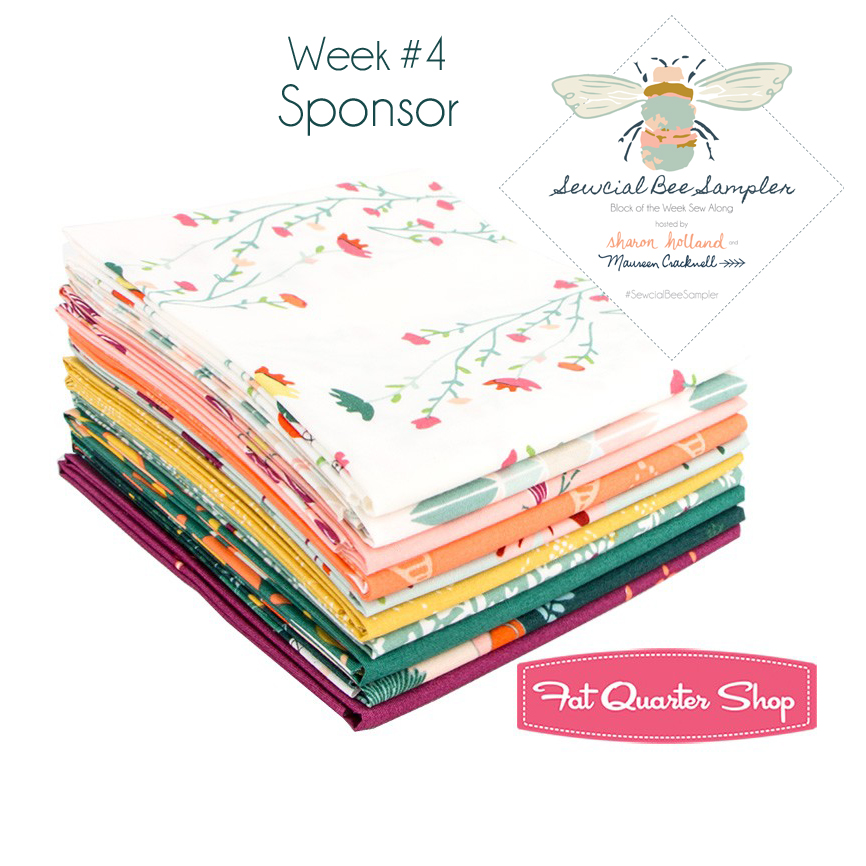
TODAY'S FEATURED SEWCIAL BEE SAMPLER SPONSOR IS THE FAT QUARTER SHOP!

The Fat Quarter Shop was founded in 2003 by Kimberly Jolly. An avid quilter, Kimberly began her shop as a side business while still working a corporate position, cutting, packing and shipping right out of her house during evenings and weekends. From the very beginning, she was committed to delivering top-notch service for every single order and customer. As the Fat Quarter Shop's reputation grew, Kimberly decided to make it a full-time operation. Her husband Kevin joined her not long after, and with his help, lots of hard work, and a tireless commitment, the store began to grow. Over the past few years a few more people have joined the staff! As a team, they continue to branch out with the best fabrics, exclusive kits, quilt clubs, BOMs, and more. And they will always be driven by the passion that Kimberly founded the store upon, which is always giving you the best products and service!


SHOP  *  PINTEREST  *  TWITTER  *  BLOG  *  FACEBOOK  *  YOUTUBE 


We hope you enjoy visiting Fat Quarter Shop! 


For this week's Sewcial Bee Giveaway, Fat Quarter Shop is offering to one lucky commenter these beauties from my Garden Dreamer collection for Art Gallery Fabrics, the Greenhouse Fat Quarter Bundle! This prize includes TEN Garden Dreamer prints! You can find this bundle available at Fat Quarter Shop right HERE

ENTER TO WIN!

Here's how: Since Maureen and I are taking turns hosting the Sewcial Bee Sampler Giveaway Fridays, this week I'm sending you to Maureen Cracknell's blog to enter!

A BIG thanks to all of you who are joining the Sewcial Bee Sampler sew-along and to those who enter our Giveaway!  ♡ Sharon

Sewcial Bee Sampler Block #4

Hello, it's Wednes-yay and that means it's block release day! Are you starting to feel more confident about sewing half-square triangles? Block #4 is called Crow's Nest and has only 4 HSTs as well as introduces piecing of strips.

My partner in crime, co-host, and good friend Maureen Cracknell and I have been so impressed by all the blocks being made--you makers are amazing! Because of your enthusiasm and beautiful block postings, new Sewcial Bee Sampler makers are joining us everyday! We'd like to welcome our new friends. If you're new to the SBS sew along or haven't already read some of my helpful posts with tips and tutorials, please refer back to these posts: SBS ExtrasPerfect PatchworkSewcial Bee Sampler Block #1Sewcial Bee Sampler Block #2, and Sewcial Bee Sampler Block #3.

Download the free PDF pattern for the Crow's Nest block on my Sew Along page

Crow's Nest Block

Be sure to cut all pieces accurately and square. Use a true 1/4" seam allowance when piecing your patchwork. Refer to the step-by-step Half-Square Triangles tutorial from the Block #2 post for making the HSTs for this block.  

1. When sewing the strips together for the Crow's Nest block keep in mind there are two seams in the strip set unit. I say this because if your seam allowances are off, that's two times the problems. I like to press my seams open on strip set units so they lay nice and flat.

2. After the three strips have been sewn together, the unit should measure exactly 3-1/2" square. Likewise, the HST units will also measure 3-1/2" square. Press seams open on HST units and trim dog ears to reduce bulk. When joining the rows, I press the seams of the rows to one side, rather than pressing open. By pressing the seams to one side it allows me to lock the nested seams in place when pinning to sew. Once the Crow's Nest block is pieced, I press open the row seams. The block before adding frames should now measure 9-1/2" square. 

Be sure to visit Maureen's blog and see her beautiful block. She was much bolder than I and used several different prints from her Art Gallery Fabrics fabric lines. I decided to keep things simple and only use two prints from my new Bountiful fabrics line for Art Gallery Fabrics. The leaf print, called Arborescent is one of my favorite prints from the collection and I wanted to see more of it! 

Lorraine Isaac from @quilting_nanny on Instagram left a tip in my comments that she uses small pants hangers to hang her blocks so they don't get messed up before getting into a quilt. What a great idea and fun way to photograph a block too!

My little tip and money saver is to use the flannel side of an inexpensive vinyl tablecloth as a design wall. Since I don't rent or have any plans of putting my house on the market, I have simply used flat thumb tacks pushed directly into the drywall on a bare wall in my sewing room. The tablecloth is not heavy and thumbtacks are all that's needed to hold the tablecloth flat against the wall. 

Do you like my sewing basket? I've had that every since I was a kid and red was my favorite color back then. Now, I'm more of a peachy-pink lover but I'll never get rid of that basket! Here's a look at all four of my SBS block in my Bountiful fabrics sampler quilt. I have two quilts going and the second sampler is being made from a curated group of 20 prints pulled from my first four Art Gallery Fabrics lines (Gossamer, Sketchbook, Coastline, and Tapestry) plus the two newly recolored designs (original to Gossamer) found in the new AGF Fusion collections. More about that second quilt on Friday--I didn't get block #4 made yet! 

Also, don't forget that Friday is Giveaway Friday and this week Maureen will be hosting the giveaway on her blog. We've got a great giveaway planned from the Fat Quarter Shop I know you'll not want to miss!

Aurifil      Circa 15      The Intrepid Thread      Fat Quarter Shop      Omnigrid      Llama Fabrics      Color Girl     Lady Belle Fabric      Needle in a Fabric Stash      Dritz      Knotted Thread    NeedleandFoot      Stash Builder Box

Happy sewing, I look forward to seeing your Sewcial Bee Sampler blocks!

Perfect Patchwork

It's been exciting to learn so many of the Sewcial Bee Sampler Makers are new to quilting! Teaching people how to sew patchwork is as rewarding for me as it is for my co-host Maureen Cracknell. We love seeing all the blocks being made and following you via the Instagram #SewcialBeeSampler hashtag and watching your creative journey in the SBS block-of-the-week sew along. 

We're a week and a half into the virtual sew along and I've gotten some questions from new quilters about achieving better points on their blocks. I've put together a little tutorial in hopes of answering some of these questions and list some patchwork basics to improve your piecing experience. 

Cutting the Strips

Using a rotary cutter, rotary cutting mat, and acrylic ruler are essential for making straight and accurate pieces.

1. Press fabric. Fold the fabric in half with selvage edges matched. Place the folded fabric on the cutting mat with the fold edge nearest to you and ample mat area extending beyond the fabric. Note: If working on a small mat, you may need to fold the fabric twice so the first folded edge is even with the selvage edges and the second double-fold is nearest to you.

2. Place a square ruler on top of the fabric with the edge of the ruler aligned with the fold closest to you and near the left edge of the fabric raw edges. Position the long side of a 24'' ruler against the left edge of the square ruler and ½'' to 1'' in over the left raw edge.

3. Carefully slide the square ruler out of the way while keeping your left hand firmly on the long ruler. Note: The raw edge of the fabric should be completely under the long ruler and fabric to be cut and there should be ample mat area around the fabric to be straightened.

4. Hold the rotary cutter next to the right edge of the long ruler and roll the cutter away from you using a firm, downward pressure while cutting through the layers of fabric. As you cut through the fabric walk your fingers up the ruler to keep even pressure on the ruler.

5. Remove the trimmed starting edge without disturbing the straightened edge of fabric and you're ready to begin cutting strips.

6. Cut width of strips according to pattern by aligning the vertical markings on the long ruler with the straightened fabric edge, using the horizontal markings for the desired strip width. Tip: Add Glow-Line™ Tape onto your ruler to mark the strip size for quick reference. Hold the ruler in place with your left hand and walk your fingers up the ruler to keep even pressure on the ruler when cutting through the layers to make a strip. If you are left-handed the steps for rotary cutting are the same; except you cut from the right side of the fabric instead of the left. 

Strip Cutting 4.jpg

How to Sub-Cut Strips

Cutting quilt block pieces from strips is a time-saver and makes the piecing process easy because you're working with accurate-sized shapes. 

1. Place a folded strip on the cutting mat in front of you horizontally with folded edge on your right (on the left if left-handed). Use a ruler to square-off the ends of the strip, removing the selvage edges.

2. Align the straight edge of the strip with the ruler marking that corresponds to the width of the piece indicated on the pattern. Cut the number of pieces needed from the fabric strip(s), opening the folded end, if necessary, to cut a single layer of fabric. For strips longer than my ruler is wide, I rotate the ruler, running the long side even with the long side of the srtip.

Strip Cutting 5.jpg

Seam Allowance

Patchwork pieces are cut with an additional ¼'' seam allowance on all sides. The cutting instructions for all the Sewcial Bee Sampler blocks have already included the seam allowances.

The term finished block or finished size refers to a block once it's sewn together. This reference no longer includes the seam allowances in the final measurement. A finished quilt can vary in size from the actual given size on the instructions because of variations in sewing, quilting, and shrinkage. Before we sew the Sewcial Bee Sampler blocks into the sashing setting and finish our quilt top, all the blocks (with framing, if applicable) should be measuring at an unfinished 12-1/2" square. 

Checking the accuracy of your ¼'' seam allowance before you start sewing is an important first step in achieving perfect patchwork. If your seam allowance is off, too wide or too narrow, by even a fraction these small amounts can add up to significant differences when piecing blocks and assembling a quilt. Stitching with a ¼'' presser foot does not guarantee an accurate seam allowance and a test should be done to understand what adjustments, if any, are needed before beginning your patchwork project.

An easy way to see if your sewing machine is hitting the ¼'' mark is to place a sheet of quarter-inch rule graph paper under the needle on your machine and lower the needle to where two perpendicular lines intersect and cross. If the right edge of the presser foot aligns with the closest quarter-inch mark then no further action is needed.

If you don't have a proper ¼'' presser foot, you can always mark out ¼'' seam allowances using a specially marked ruler. This works well for marking stitch lines when sewing half-square triangles, but can be time consuming.

To adjust your sewing machine, try these steps: If the right edge of the presser foot extends beyond the nearest quarter-inch mark and your machine has the ability to move the needle side to side adjust the needle position to the left until the right side of the presser foot aligns at the quarter-inch mark. Make note of this adjustment and reset your needle position each time you need a ¼'' seam allowance for sewing. Likewise, if the initial position test shows the presser foot to the left of the mark move the needle position to the right to adjust placement.

If you are unable to re-position your sewing machine needle then placing a temporary tape guide on your sewing machine the throat plate will help you keep the edge of your patchwork straight and aligned for accurate ¼'' seam allowances.

Next time I will give some basic pinning and pressing tips. Just remember, accurate cutting and precise seam allowances will make piecing so much more enjoyable. Less frustration means more time playing with fabrics and planning your next block!

IMG_2339.jpg

If you've been following my posts on Instagram @sharonhollanddesigns then you know I've now started 2 sampler quilts! The second quilt will feature fabrics from my first four Art Gallery Fabrics collections: Gossamer, Sketchbook, Coastline, and Tapestry plus two new fabrics recently release in the new AGF Fusions lines. Fusions are re-colorings of the most popular AGF prints from the different AGF designers and regrouped into fresh and fun mini collections. 

Don't forget to visit Maureen's blog to enter this week's giveaway (ending Monday). Wednesday we will be releasing block #3! 

Happy sewing

Tea Leaf Quilt Pattern

To celebrate my birthday month, I'd like to give you a gift with a new free quilt pattern! If you remember, back in August, I wrote a post about a quilt I made just because I wanted it. That may sound strange but actually, most of the sewing I do is for other reasons rather than for my personal enjoyment. Not that I don't love everything I make, but my personal wants are not usually factored in when I sew. My Tea Leaf quilt was just for me! My August post has a little tutorial about how to figure cutting sizes for half-square triangles (HSTs) of any size. 

Today, I share the free PDF download pattern for the Tea Leaf quilt along with a little tutorial about how to draw and stitch a fan or Baptist Fan quilting design on the finished top.

Tea Leaf by Sharon Holland

Tea Leaf by Sharon Holland

I've always admired this traditional quilt block called Tea Leaf. I love the movement of the block and have a thing for triangles in quilts. I also have a thing for leaf designs, so when it came time to make a quilt just for me--this was the one!

I used prints from 3 of my 4 fabric lines for a scrappy look and included Art Gallery Fabrics White Linen PE-408 solid. Gossamer, Coastline, and Tapestry prints in soft fall tones are the perfect look for my living room where this cozy throw resides. I used wool batting for drape, warmth, and definition of the quilting stitches. 

I love how some of the prints almost fade away, giving even more interest and energy to this quilt. This is a 60" square quilt--just a small throw-size quilt. If you want the quilt to be larger, just make more blocks and add on. Remember, you will also need to increase yardage requirements for blocks, backing, batting, and binding if going larger. 

The Fan or Baptist Fan quilting design in one of my favorite quilting designs. I feel it goes well with just about any quilt top. I love how it is an independent design placed over what's already happening in the quilt, adding yet another layer to the overall effect.  

Probably the only hiccup with a fan design is that it needs to be drawn out on the quilt top and does slow down the finishing process. However, once it's marked out, the quilting can be stitched in continuous rows and goes relatively quickly so I think it evens out in the end. 

How to Draw and Quilt a Fan Quilting Pattern

1. Use a non-permanent fabric marking tool (I like the ceramic lead pencils that have a screw on tip). Test marks on scrap material to make sure they can be removed with water or washing before proceeding. Read manufacturer's instructions for marking tool, as some can become permanent after exposed to heat such as an iron.

Determine how far apart you want the radiating fan arches. I used 2" spacing for my Tea Leaf quilt but have also used a 1-1/2" spacing on other quilts which I also like. Your batting choice may also influence how far apart your arches should be. 

Cut a 13" length of embroidery floss (light colored works best). Lay the floss out against a ruler and mark 6 evenly spaced segments starting about 1/2" from the end. Cut a 1/2" to 1" tail after the last mark.

Slightly unscrew the tip of the marking tool and wind the floss around the marking tool tip just so the last mark is secured in the tip once tightened. If using a marking tool without a screw tip, use tape to hold the floss in place at the mark. Note: You may need to re-secure the floss as you work, just pay attention if your fan designs start to get a little out of shape.

You now have an odd number of marks showing on your floss. The reason to have an odd number of arches to the Fan quilt design means you will now be able to stitch with a continuous quilting line. See Step 4.

2. With the floss attached to the marking tool. Hold the first mark on the floss at a corner starting point on the quilt top. While holding the floss with one hand, mark an arch with the marking tool. 

Move the second mark on the floss to the corner starting point and make a smaller arch in the same manner as the first. Continue adding arches for a total of 5 concentric rings.

3. To add additional fan, repeat Step 2, starting and the base of the large ring of the previous fan. Continue adding fans till the end of the row. Start the next row directly above where you started the first row.

4. To quilt, begin at the small arch of the first row. Follow the black dashed line arrows. The red dashed line arrows indicate bridge stitching and where you will need to backtrack over earlier stitching to keep a continuous line flow to the quilting stitches. Each arch will be quilted the same direction till you reach the end of the row. Remove the quilt, and start at the beginning of the second row, quilting in the same direction as before. 

5. To remove the marking stitches after quilting and binding, I like to gently wash my new quilt in the wash machine. I use Woolite on wool setting and very low heat dry. Remove when still a little bit damp and hang dry or press top if desired.