Table Scraps

Table Scraps

Stacked Strips Runner 1.jpg

Okay, that blog post title was funny, wasn't it!!?? What did you think I was going to blog about, composting? No, silly, this post is about using up those left over fabric strips to make something beautiful for your table!

Stacked Strips Runner 2.jpg

I definitely have a thing for quilted table runners--they're just fun and fast to make, plus quick for changing up the look of your table for the different seasons. 

Stacked Strips Runner 3.jpg

This is my second time making my Stacked Strips Table Runner. See the original tutorial with instructions, HERE. I stitched this one exactly the same as the first, with 2"-wide strips but the finished size of this second runner is larger and finishes out at 18" x 84". The beauty of this pattern is you can easily customize the size to fit your table. 

Stacked Strips Sewing.jpg

The fabrics used in this runner are all Art Gallery Fabrics and include prints from all six of my fabric lines. Here's the list: Pure Elements solids, AGF linen, Gossamer, Sketchbook, Coastline, Tapestry, Bountiful, Signature, and Ink Outburst from Woodland Fusions.

Stacked Strips Runner 5.jpg

The other variation I made from my original pattern was to utilize Quilt As You Go (QAYG) when sewing the strips together. By doing this, not only was I assembling the runner top, but I was quilting the runner as I sewed the strips!

Stacked Strips Runner QAYG.jpg

Using QAYG for a table runner is a great way to try this method on a small project. I used my favorite Tuscany Silk Blend batting and AGF linen for the backing to give the runner a nice weight and feel. To learn how to sew the QAYG method for quilts and other projects check out my dear friend and sister AGF designer Maureen Cracknell's QAYG Craftsy class

Stacked Strips Runner 6.jpg

This was really fun to make and since I had some strips left at the end, I decided to make some matching coasters!

Stacked Strips Coasters 2.jpg

My coasters finish at 4-1/2" round and I trimmed the strips to 1-1/2" wide to start with so the scale would be better proportioned. You could even start with 1" wide strips if you wanted even more fabrics in the coaster.

I used the same strip assembly method of sewing strips short ends together before trimming to the desired size and sewing together QAYG-style to a batting and backing foundation.

Stacked Strips Coasters Assembly 1.jpg

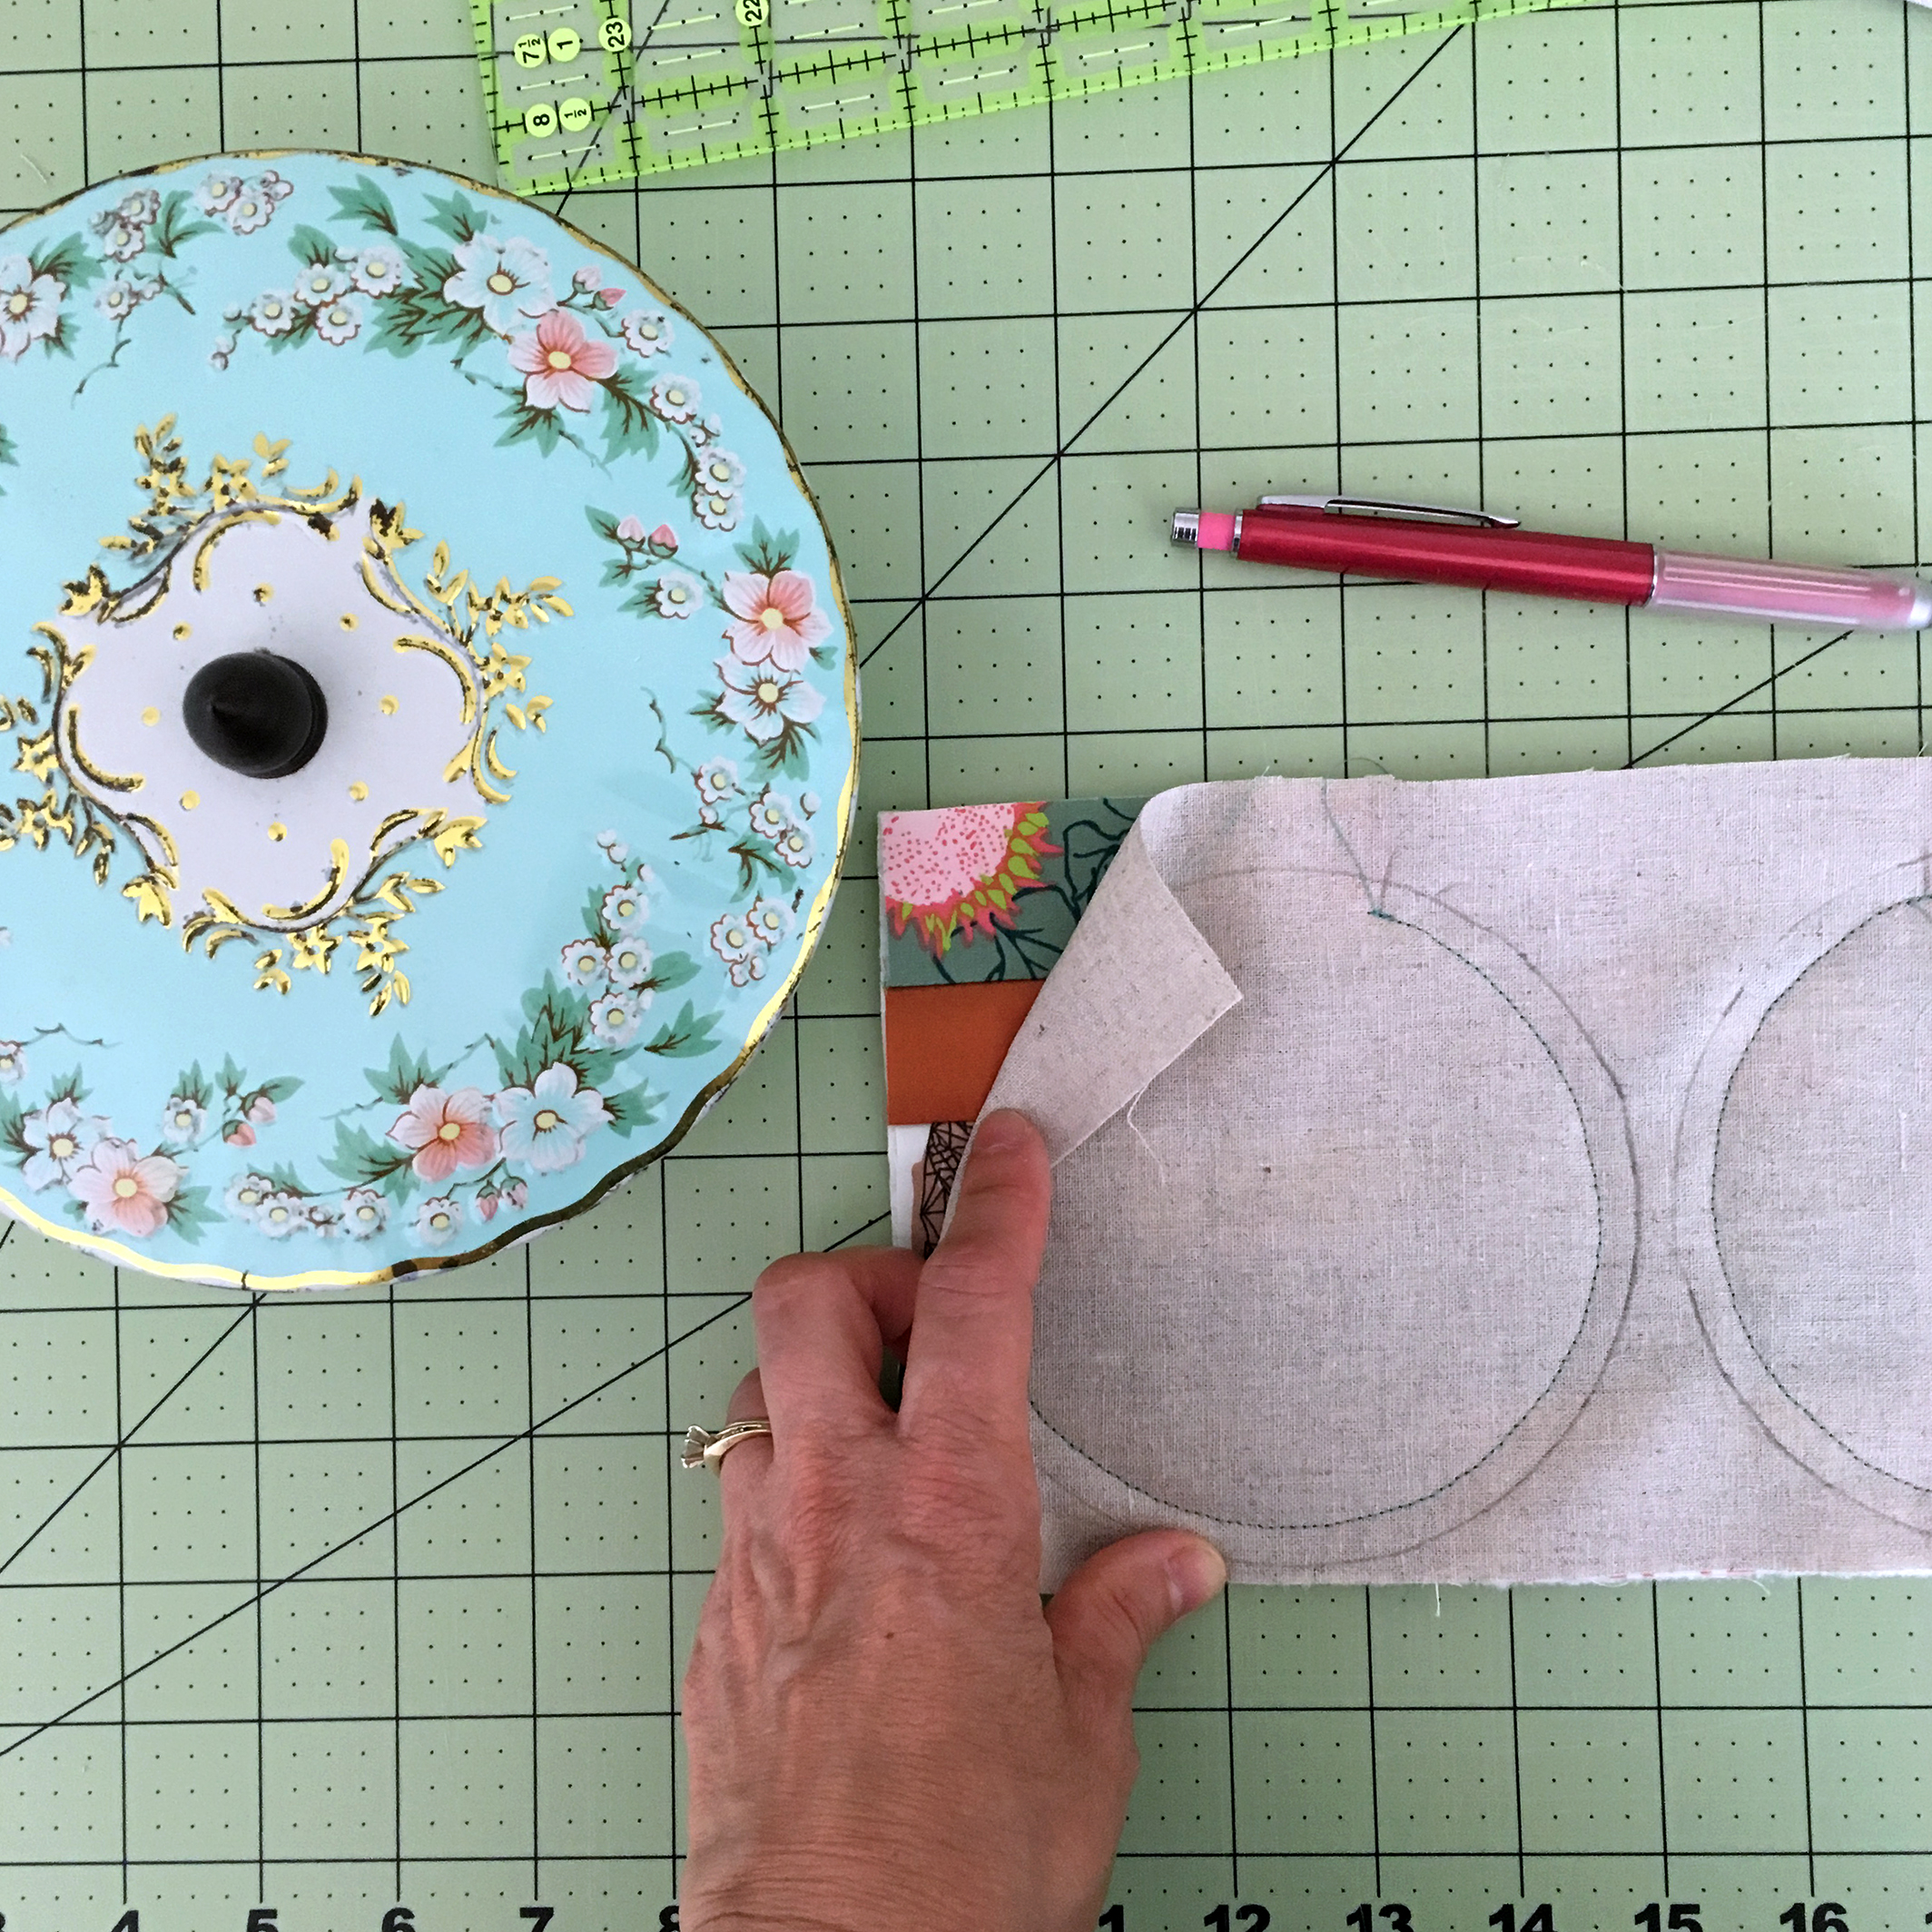
After I had the strips sewn into a large enough piece to cut out 5" circles from, I placed another piece of linen, right sides together with the QAYG piece and marked out circles with the bottom of a tin that was the right size. 

I sewed a 1/4" inside the drawn line, back stitching at beginning and end, and leaving and opening for turning. 

Stacked Strips Coasters Assembly 2.jpg

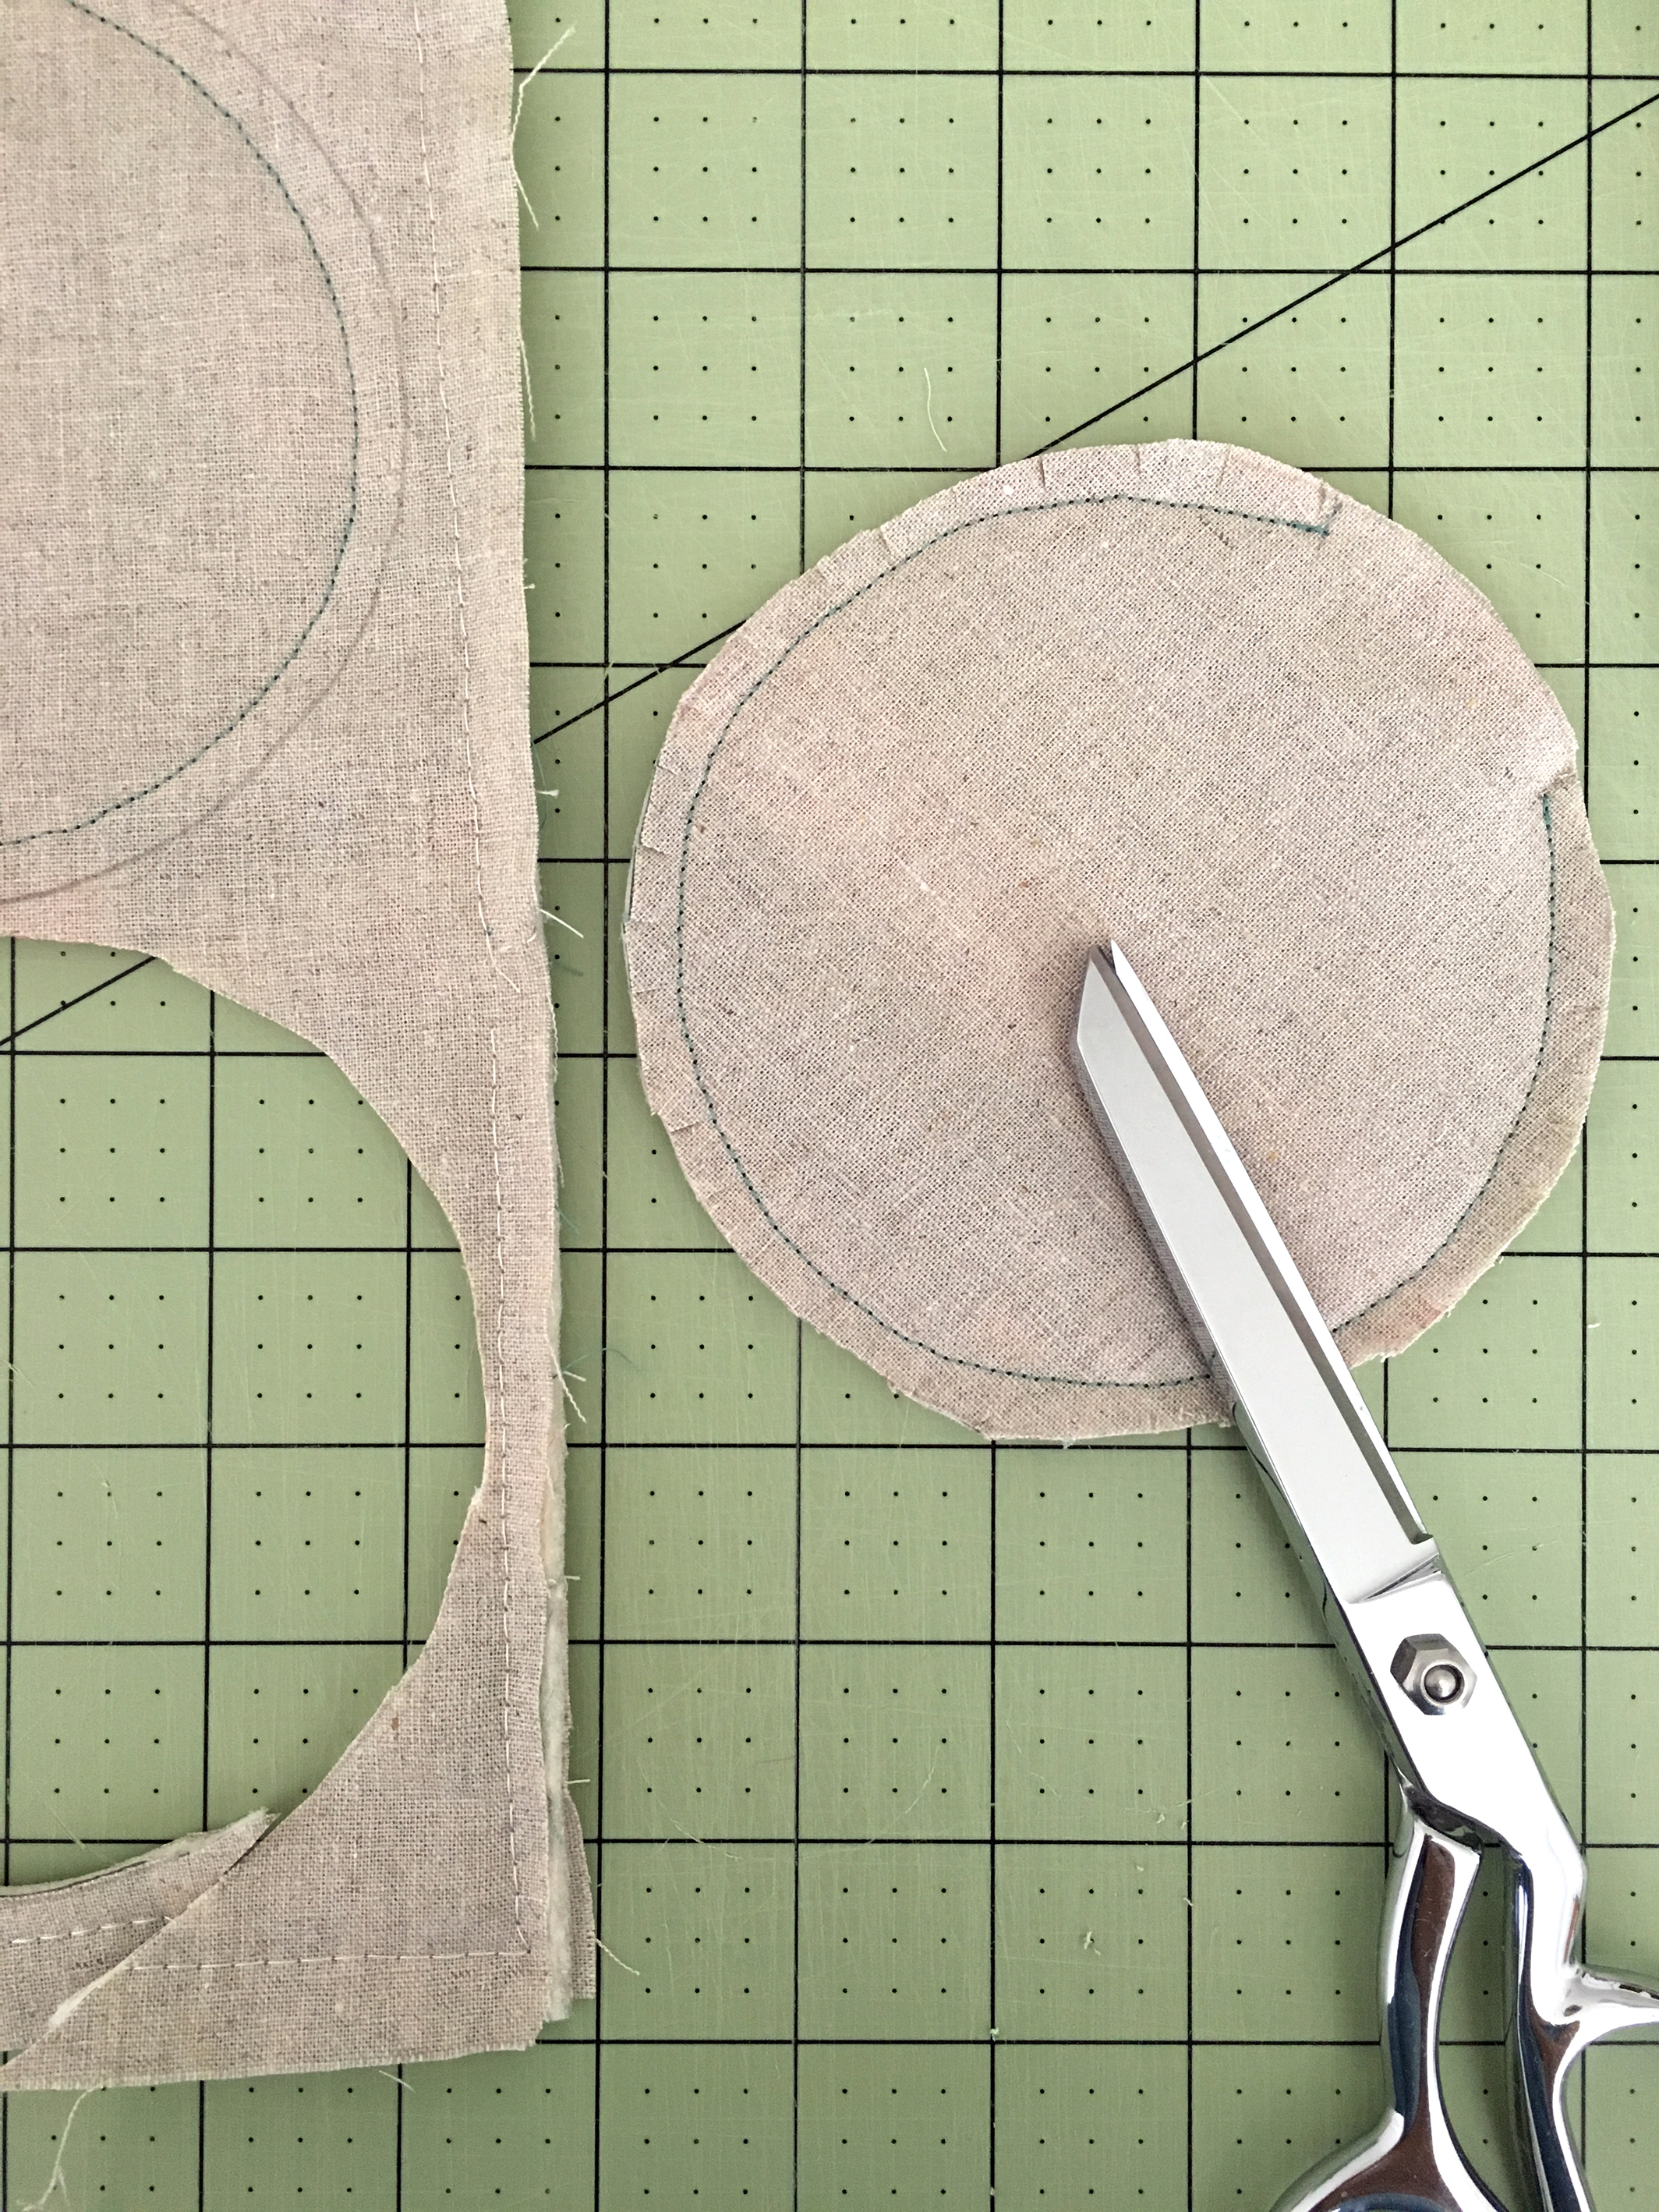
Cut out on the drawn line. Clip curves and turn right side out through the opening. Turn opening under 1/4" and press. Blind stitch opening closed by hand. 

Stacked Strips Coasters 1.jpg

I did not do any additional quilting or stitching to my coasters once turned. This method has four layers: patchwork top, batting, and two layers of linen. 

Stacked Strips Coasters 4.jpg

I think next time I try this I will make some placemats. It's really very addictive and I'm sure we all have a bunch of left over fabric scraps begging to be turned into something useful and beautiful!

H-Block Quilt

H-Block Quilt

IMG_5108.jpg

Some time ago I did house cleaning on my Free Patterns page to clear out PDFs that were not up to my current formatting and pattern writing standards. Unfortunately, the H-Block baby quilt pattern was one that was pulled. I have been intending to bring this pattern back but it's hard to find the time to devote to a free pattern or get excited about remaking a quilt when new projects keep cropping up! 

BG0A4205.jpg

Well, I got a whole bunch of motivation not only to publish a new version of this free pattern but to make a baby quilt for a new grand baby coming this spring! Now I was ready to remake this quilt with renewed love and excitement. 

BG0A4049 2.jpg

The H-Block quilt it simple but so much fun and rewarding to make. It would be an excellent use of jelly roll strips because all the pieces are 2-1/2"-wide. I selected an assortment of prints from my various Art Gallery Fabrics collection: Gossamer, Coastline, Tapestry, Bountiful, and Fusions reprints (of my prints and other designers like Bari J. and Bonnie Christine) from Bachelorette, Woodland, and Floralia. I've also added in AGF Smooth Denim for a lovely departure from solids. See my Fabrics page for online shops that carry my collections.

My quilt uses 8 dark fabrics, 8 medium fabrics, and 6 light fabrics. My daughter wanted an earthy-boho look too the quilt and goes beautifully with her eclectic style of decorating. I couldn't be happy with how the quilt came out!

Download the free PDF H-Block pattern from my Free Patterns page.

H-Block Close sm.jpg

The finished size of this quilt is 46'' x 58'' and a great snuggling size as baby gets bigger. I used a very simple free-form half circle with a loop machine quilting design that was fast and easy to make. I didn't mark out the design ahead of time--just free motioned it and it's not perfect but I love it! 

H-Block 2 sm.jpg

For the batting I used my all-time favorite Hobbs Tuscany Silk batting. It's incredible in every way. The batting handles like cotton but it light weight. The drape of the quilt is exquisite and will be warm and soft for years to come. I machine washed the quilt before brining it to my daughter this weekend and dried in the dryer on low. There we no noticeable shrinkage of the quilt so this makes an excellent product for a baby quilt. 

A Community Sampler Giveaway - Week #1

Community Sampler Giveaway - Week #1

MC_SH Sampler Bundle CS1.jpg

Each Friday, throughout the Community Sampler sew-along, which Maureen Cracknell and I are co-hosting, will be a Giveaway Friday. We've coordinated special giveaway prizes with our amazing participating sponsors for each and every week! If you've happened to miss the first Community Sampler posts, take a look back from the first post Sneak Peek at the 2018 Sew Along to get caught up to the present. Feel free to start sewing with us at anytime--it's never too late to join in, and it's free! 

CS Promo banner 2.jpg

The Community Sampler Sponsors

Sponsors Graphic Use-01.jpg

Lady Belle Fabric  Omnigrid   Aurifil Thread  Art Gallery Fabrics 

Hobbs Batting  Dritz  Fat Quarter Shop  Bloc-Loc

Today Maureen and I are kicking off our weekly Community Sampler Giveaway with a prize from the two of us!!!

That's right, this week we're offering the winner a 12-piece Community Garden curated bundle including six gorgeous prints from my Bountiful, Tapestry, and Sketchbook collections for Art Gallery Fabrics. These prints mix perfectly with coordinating prints from Maureen's beautiful new Love Story collection and a favorite from Nightfall also from Art Gallery Fabrics. This bundle will include a fat quarter cut of each of the 12 prints that you see here. 

MC_SH Sampler Bundle CS2.jpg

This bundle is also available exclusively at Needle in a Fabric Stash! See their online shop for more information and orders will get a bonus fat quarter free to make a baker's (or gardener's) dozen. Plus, don't forget to shop their huge selection of Art Gallery Fabrics and check out the Sharon Holland Sampler bundle with free shipping!

ENTER TO WIN!

Here's how: Since Maureen and I are taking turns hosting the Community Sampler Giveaway Fridays, this week I'm sending you to Maureen Cracknell's blog to enter!

A BIG thanks to all of you who are joining the 2018 Community Sampler sew-along and to those who enter our Giveaway!  

♡ Sharon

October

My Favorite Month

Leaf prints by Sharon Holland for Art Gallery Fabrics

Leaf prints by Sharon Holland for Art Gallery Fabrics

Fall is my favorite time of year and October (being my birthday month) is my favorite month of the year. I have always loved trees and tend to draw and paint them a lot. Many of my fabric collections contain some sort of leaf print:

Top row - Sketchbook Framework, Tapestry Eternal, and Coastline Tropical

Middle row - Bountiful Vine, Bountiful Arborescent, and Sketchbook Framework

Bottom row - Tapestry Eternal, Coastline Tropical, and Bountiful Scenic. 

This year the weather here in Ohio has been all over the place and our growing season seems a bit turned around. The plants and trees got an early start due to a mild winter but a hot spring slowed growth so spring and summer flowers were not very showy. Although the plants in my yard are still not full, we are experiencing some second blooms on plants like Coneflowers, Black-eyed Susans, Coreopsis, and of course Mums, Autumn Joy, and Sunflowers are seasonally now in bloom. I don't normally have this much color in my yard this late in the season and it makes one think summer might last forever. 

BG0A2682.JPG

In the past I've painted predominantly landscape paintings and landscapes with barns. I've been wanting to get back to my canvases for some time now but it never seems to fit into my schedule. I've been taking photos of flower bouquets to have a reference for painting later when I have time to paint and want to try my hand at still life painting this next time around. I wish I could stop and paint while the flowers are fresh but my days seem to always be full of other priorities. These photos will have to do when I'm ready to paint and I love that the flowers and branches came from my yard. 

BG0A2431 2.JPG

I did have a chance at the end of September to get out my oil paints and relearn how to paint. It has been too long between sessions and I feel very rusty. In fact, I am so rusty that my first attempt paining this creamer with flowers I grabbed some tubes of acrylic paint (which I though were oils) and painted with a mix of oil and acrylic. Needless to say it was not a great experience and I couldn't figure out why the paints didn't act like I was used to them handling. 

BG0A2499.JPG

This very clumpy painting is okay but left much to be desired. I decided to redo the same image the next day so I could concentrate on mixing colors better, working with only oils (hee hee, that was a big improvement right there!), bolder and looser strokes.

BG0A2533.JPG

Much improved but still a long ways to go to get to where I want to be. This is something that will take time and because I love the process of learning as much as I like doing it will be a fun challenge. I still want to loosen up my strokes but once I have reacquainted myself with the basic techniques of painting with oils I wont have to concentrate on those so much and can work on style and strokes next. 

IMG_4438.JPG

Last week my husband and I had a great time in Phoenix, Arizona celebrating his father's 89th birthday. It always blows my mind seeing the desert landscape and I cannot help but feel I've stepped onto a different plant! I have no idea if the plants in AZ normally bloom this time of year or if they're also experiencing a second bloom season but I was pleasantly surprised to find so many blooming plants there this visit. I do love all the texture and the small leaves on the trees. 

I did come away with a pattern idea from our trip that I intend to explore this week and see if anything comes from it. My only hint is it's not from the plants and is inspired by something man-made and natural at the same time. Although the desert plants are really beautiful I don't feel a deep connection to them as I do the plants native to the Midwest so I will leave those to photography at this time. 

Photo cortesty of Quilter's Planner

Photo cortesty of Quilter's Planner

Looking ahead October will fly by. Quilt Market is only a week and a half away! The 2018 Quilter's Planner calendar will be available soon and this year it's packed with goodies. A separate magazine will have quilt patterns and it also comes with 4 pages of planning stickers by Alison Glass! To see all what the 2018 Quilter's Planner has to offer read more here (affiliate link).

Photo courtesy of Quilter's Planner

Photo courtesy of Quilter's Planner

Enjoy the beauties of October and soak in the last warm rays left-over from summer!