Community Sampler Week #5

Community Sampler Week #5

Cactus 1 2.jpg

Welcome to week #5 of the Community Sampler sew along where we not only work on our patchwork piecing techniques but also share our makes on Instagram and have fun with a like-minded community of quilters. My co-host and sister Art Gallery Fabrics designer Maureen Cracknell and I are so happy to have you sewing with us and look forward to spending the next few months with you.

CS Promo banner 2.jpg

There are eleven blocks in our quilt and each Wednesday will be a new PDF block release or finishing step for the quilt. If you are just joining us, pick up the Introduction PDF on the Sew Along page and you'll get a material list along with coloring pages so you can get started planning your quilt. Then, work your way through the first Community Sampler post to the present.

Many of the patchwork units (like Quick-Corner, Flying Geese, Half-Square Triangle, and Square-in-Square units) used in this year's sampler have already been oversized to allow for trimming and squaring of units before assembling your block. Please cut your pieces EXACTLY as given in each of the PDF instructions because bumping up the size of the pieces from the measurements give will not bring great results in some cases--especially in this week's block. Cut carefully and as stated in the instructions. Take advantage of my in-blog tutorials for each of the different quilting techniques used in our sampler.

Accurate cutting and use of a true 1/4'' seam allowance is a must for successful patchwork piecing. All your blocks will measure 12-1/2'' square (unfinished). Review how to cut strips, sew with a true 1/4'' seam allowance, and other helpful piecing tips on my "Are You Ready to Sew" post.

Week #5-01.jpg

Let's start sewing the Cactus block. Here we make two, half-blocks that fill positions 4 and 5 in our quilt. Download the free PDF on the Sew Along page.

Tutorial for Piecing the Cactus Block

The success of this block rest solely in your ability to cut and sew accurately. You'll be put to the test here and hopefully rewarded for your efforts.

If you're wanting to use directional prints for either the HST units or the rectangle units you may want to check out my tutorial for controlling directional prints that was posted during the Sewcial Bee Sampler sew along. 

Rectangle Units

Cactus 1.jpg

Cut your A and B pieces exactly as stated in the instructions. Yes, that means a true 7/8" on the end of those cut size numbers. The reason we are using a 7/8'' measurement rather than rounding up to the nearest full number is we are cutting our pieces on the diagonal and creating our necessary 1/4" seam allowance on our pieces and not trimming down when done. 

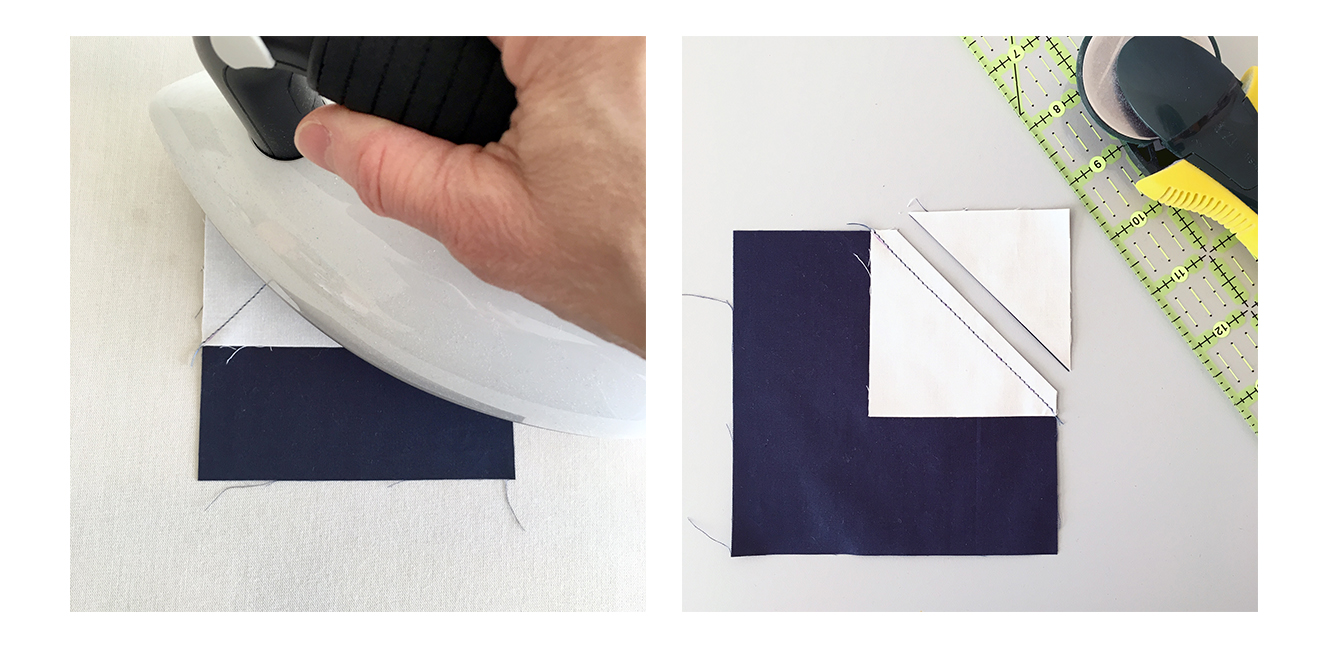
Draw a diagonal line on the wrong side of each 2-1/2" fabric A square. Noting orientation of the drawn line, place a marked square right sides together on a corner of a 2-1/2" x 6-7/8" fabric B rectangle as shown in the instructions. 

Sew just outside the line (a needles worth) to keep the unit square. Trim 1/4" past the sewn line (like we've done in making other types of units). Press toward the darkest fabric. 

Cactus 2.jpg

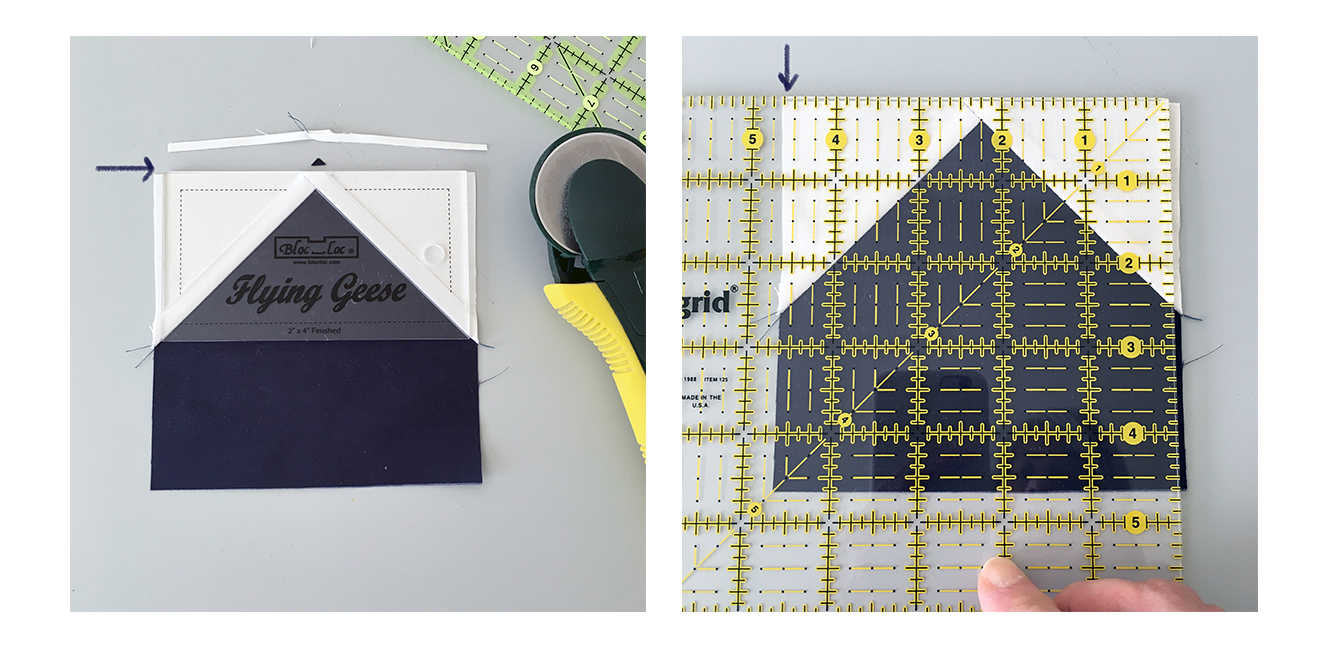
Note that I've rotated my pieced rectangle so I can align the 45° mark on my ruler with the long edge of my rectangle. Rulers vary for where these additional markings are placed and you will have to flip your ruler around a bit to get the 45° angle aligned to a long edge according to your ruler and if you're right or left handed.

Noting orientation of the seam and using the straight edges and 45° marking on a ruler, cut the opposite end of the rectangle diagonally, creating an angled end parallel (running the same direction) to the stitch line. Cut diagonally from the corner point of the rectangle on a 45° angle. This makes one A/B rectangle unit that measures 2-1/2" x 6-7/8". Make a total of four in this orientation. 

Catcus Mirror.jpg

In the same manner as in the steps above, and noting the orientation of the drawn line and parallel diagonal edge cut, make a total of four A/C rectangle units. Press seams toward the dark fabric.

Cactus 3.jpg

Notice how I've rotated my rectangle and aligned the 45° marking on my ruler on the long edge of the unit. These are just two different rulers but the results are the same, rulers can vary for where they've included these extra markings. Just make sure the diagonal cut is parallel (running the same direction) to the stitch line and cut from the corner point of the rectangle on a 45° angle. 

Cactus 4.jpg

Sew a large fabric A triangle (a 4-7/8" squares that's previously been cut in half diagonally to make two HST shapes) to a A/B rectangle unit to make a quarter section. Use the shorter of the two long edges and square short end of the rectangle to align the large triangle, right sides together. Notice how the tip of the large triangle extends past the rectangle unit. The seam line will enter right in the "V" of these two pieces. Press toward the dark fabric. 

Repeat with the mirror image A/C rectangle unit and large fabric D triangle. Sew the two quarter sections together to make one half block. Make a total of two half blocks. 

BG0A5068.jpg

I believe the success of this block comes first from good piecing and second from upping the contrast a bit so each shape can stand out. In my block there's obvious light and dark fabrics and they stand out in the solids. By always press toward the dark fabric I was assured my seams would nest when it came time to piece and this locking in of the seams made the points nice and sharp. 

It's unavoidable that the longest edge of our half blocks are bias edges. Normally these two half blocks would be sewn together into one block but for our quilt layout we need three half blocks. You may want to starch this block if you think it will get a lot of handling between now and the time the block is sewn into a top. Just take care not to stretch or vigorously press this block to avoid distortion. 

BG0A5039.jpg

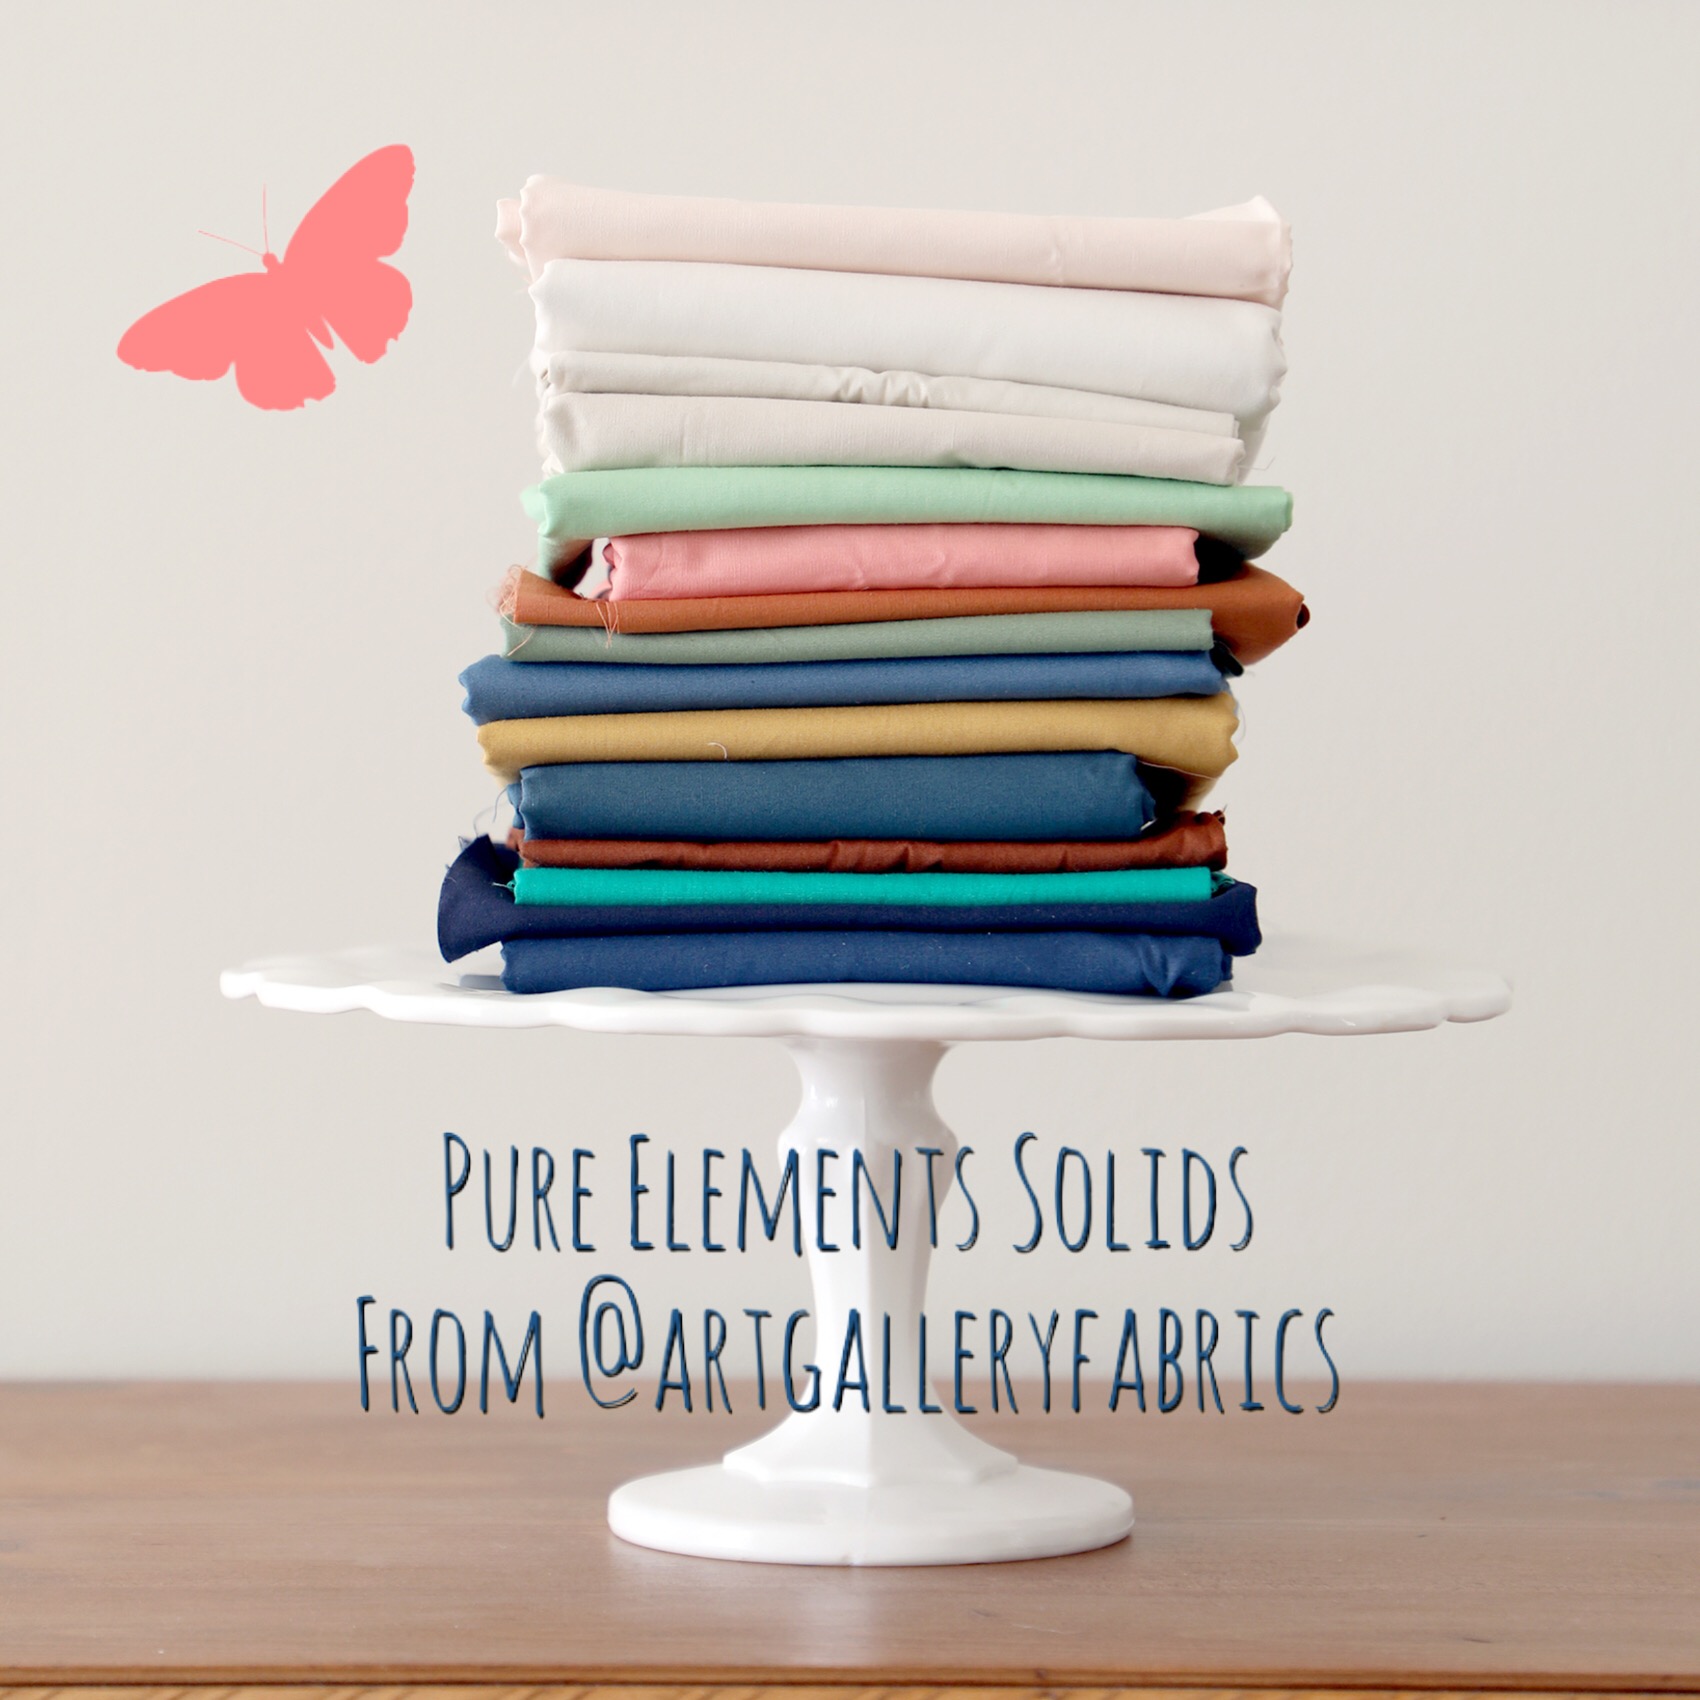
You can see how this would make a beautiful full block and I have already designed a baby quilt using this block from my new spring collection for Art Gallery Fabrics (coming in May, so be watching soon for spring Market reveals). For my sampler, I'm using Art Gallery Fabrics Pure Element solids  and when it came time to photograph this block I happened to have this vintage quilt nearby and realized how the green backing of this quilt almost matches the Pistachio Creme green (PE-462) of the AGF solids!

Thank you for making this sew along so special I love seeing all the blocks being posted. Please visit Maureen's blog and see the progress she's making on her sampler quilt, using her beautiful AGF fabrics Love Story collection. Be sure to use the #CommunitySampler hashtag when posting your blocks to Instagram and tag both my @sharonhollanddesigns and @maureencracknell so we don't miss any of your beautiful work!

Community Sampler Sponsors

Don't forget that this Friday's a Giveaway Friday on the Community Sampler sew along. Maureen and I will take turns hosting a giveaway each week where one of our generous sponsors will be featured and offering amazing prizes both here on our blogs and a second chance on Instagram. Maureen will be hosting the giveaway this Friday and you'll be instructed how to enter at that time.

Happy sewing!

Community Sampler Week #2

Community Sampler Week #2

CS Promo 1.jpg

Welcome to the Community Sampler sew along and the first block in our quilt! My co-host and sister Art Gallery Fabrics designer Maureen Cracknell and I are so happy to have you sewing with us!

There are eleven blocks in our quilt and each Wednesday will be a new PDF block release or finishing step for the quilt. If you are just joining us, pick up the Introduction PDF on the Sew Along page and you'll get a material list along with coloring pages so you can get started planning your quilt. 

Many of the patchwork units (like Quick-Corner, Flying Geese, Half-Square Triangle, and Square-in-Square units) used in this year's sampler have already been oversized to allow for trimming and squaring of units before assembling your block. Please cut your pieces EXACTLY as given in each of the PDF instructions because bumping up the size of the pieces in some blocks will not work well.

Accurate cutting and use of a true 1/4'' seam allowance is a must for successful patchwork piecing. All your blocks will measure 12-1/2'' square (unfinished). Review how to cut strips, sew with a true 1/4'' seam allowance, and other helpful piecing tips on my "Are You Ready to Sew" post.

Week #2-01.jpg

Time to get to our first block, Kitty-Corner. Download the free PDF on the Sew Along page.

collage 1.jpeg

For my sampler quilt I'm using Art Gallery Fabrics Pure Elements solids. Using all solids is a personal challenge for this pattern designer and is not without it's own set of additional challenges. See my previous post for the inspiration behind my color palette. I've already made a few of the blocks for this sampler to work ahead and have found that I really need to bring my A-game for piecing because solids are very unforgiving and show every little missed point. Again, this is a good challenge even for a quilter that's been doing this awhile and I will need to take extra care in my stitching!

IMG_5179.jpg

Quick-Corner Units Lesson

For the Kitty-Corner block I've prepared a supplemental lesson for making Quick-Corner units. The cutting sizes for these units have already been enlarged and you will need to trim and square your unit once assembled. See PDF for full material list and block piecing instructions.

Quick-Corner 1.jpg

Draw a diagonal line on the wrong side of each 2-3/4'' fabric B square. Noting orientation of the drawn line, place a marked square right sides together on a corner of a 4-3/4'' fabric A square. Sew on the line.

Quick-Corner 2.jpg

Press fabric flat before proceeding to trimming the corner. Trim 1/4'' past the stitch line. Press corner open. 

Quick-Corner 3.jpg

Noting orientation of the drawn line, repeat on the other corner with another marked square, stitching on the drawn line. Press to flatten. Trim 1/4'' past the stitch line and press corner open.

Quick-Corner 4.jpg

One of the wonderful sponsors in this year's sew along is Bloc-Loc. In the first image, I'm using my 2'' x 4'' Flying Geese Bloc-Loc ruler to trim the point edge of my unit and leave the perfect amount of 1/4'' seam allowance. Watch more on the Bloc-Loc video for using the Flying Geese ruler on Square-in-Square units. 

Since this unit needs a little extra care in trimming I've trimmed the remaining sides of the unit with a regular square ruler. I trim one side at a time starting with point edge up. Align the left side of the block with the 4-5/8'' mark on the square ruler (see arrow) and trim 1/8'' off the right side.

Quick-Corner 5.jpg

Rotate the unit 180° (point edge down) and align the square ruler on the left edge at 4-1/2''. Trim the right side 1/8''.  Finally rotate the block 90° (point edge to the left) and align the square ruler with the point edge at 4-1/2". Trim the right side 1/8". If you're left handed, mirror image these instructions, measuring from the right side and cutting from the left side. 

IMG_5193.jpg

Your trimmed Quick-Corner unit should measure 4-1/2" square. 

BG0A4455.jpg

My co-host Maureen Cracknell and I are continually amazed by the joy and excitement each of you bring to our virtual community. Thank you for making this sew along so special. Please visit Maureen's blog and see the progress she's making on her sampler quilt, using her beautiful AGF fabrics Love Story collection. Be sure to use the #CommunitySampler hashtag when posting your blocks to Instagram and tag both my @sharonhollanddesigns and @maureencracknell so we don't miss any of your beautiful work!

Photo Feb 28, 8 25 22 AM.jpg

You all know I'm passionate about photography. Taking photos is part of our everyday lives and with social media we want to be able to share our very best. I intend to utilize Instagram Stories to bring you some very informal photography tips and tricks and eventually start posting more blog posts dedicated to the subject. See the post titled Flat Lay Photography Tips post I wrote almost 2 years ago. It has some great information to get you started. Be watching both of those platforms for more photography lessons.

You don't need a fancy camera (although it makes life a lot easier) or super expensive gear to get great shots. A little extra time and creativity can result in share worthy images!

Community Sampler Sponsors

Don't forget that this Friday's a Giveaway Friday on the Community Sampler sew along. Maureen and I will take turns hosting a giveaway each week where one of our generous sponsors will be featured and offering amazing prizes both here on our blogs and also on Instagram. I will be hosting the giveaway this Friday and you'll be instructed how to enter at that time.

Happy sewing!

Are You Ready to Sew?

Are You Ready to Sew?

Thread Heart photo by Sharon Holland

Thread Heart photo by Sharon Holland

Great news everyone, there's going to be another free sew along this year! May co-host, good friend, and Art Gallery Fabrics sister designer Maureen Cracknell and I will be hosting another block-of-the-week sew along and it's going to start February 21st! Be sure to follow us both on our blogs, Instagram at @sharonhollanddesigns and @maureencracknell for all the upcoming details. Next week we will give you your first peek at the new name, new look, and a Maker button to share on your blog and/or Instagram feed. Everything you loved about the Sewcial Bee Sampler will be there plus we took into account all the wonderful feedback from last year's survey. We're hoping you'll love this new sampler even more. 

2017 block from the Sewcial Bee Sampler with Bountiful and Pure Elements fabrics from Art Gallery Fabrics

2017 block from the Sewcial Bee Sampler with Bountiful and Pure Elements fabrics from Art Gallery Fabrics

In preparation for all that sewing you'll be doing I wanted to give you a little pre-flight checklist so your sewing experience can be a good one. 

Machine Maintenance 

BG0A3948.jpg

Having your sewing machine in tip-top running condition is a must. Not only does it protect your investment but it makes for a hassle-free sewing session. Check out my past tutorial on how to clean your machine and help it perform at it's best. 

Accurate Sewing

IMG_2334.jpg

You heard me say it a million times last sew-along "sew with an accurate 1/4'' seam allowance." I'm going to always stress that point and it's the number one reason beginning and seasoned quilters get wonky blocks and clipped points. Make sure you're starting out on the right foot and review my Perfect Patchwork tutorial

Pressing Questions

Pressing 5.jpg

Pressing is always a question every quilter has. The answer is, "Yes, and often." I press my fabric before I cut it and after every time it's been stitched. I especially think it's important to press before cutting apart units like Half-Square Triangles, Flying Geese, etc. By pressing the fabrics before cutting apart it not only flattens the unit but sets the seams and helps for a sharp edge once the unit is opened. Read more on the Perfect Patchwork tutorial page. You'll also find my favorite sure-fire, easy pinning method. 

Stip Cutting

Strip Cutting 1.jpg

Another must for making your patchwork effortless is starting with accurately cut strips and shapes. Even the small amount off will cumulate once pieces are sewn together and your block again can be wonky or way off the mark. Review how to straighten the edge of your fabric before cutting strips and how to cut the right size strips and shapes for your blocks here

Directional Prints

Print Direction 3.jpg

One of the things I noticed about last years sampler blocks was the desire for quilters to have their chosen prints all running the same direction. In the past I've not been overly concerned about that because I think of a quilt as an object that is seen from all directions and not static. But, it was a good eye-opening for me to realize that others did find this something they wanted to achieve in their work. To help with that problem, especially when making units like Half-Square Triangles and Flying Geese I put together a little tutorial for controlling the direction of prints

Prints designed by Sharon Holland for Art Gallery Fabrics

Prints designed by Sharon Holland for Art Gallery Fabrics

You have a little less than two weeks to dust off your machine, finish up UFOs, and get ready for some sewing fun with Maureen, myself, and the amazing other Makers online that take part in our virtual sew along. I'm looking forward to seeing all your beautiful makes and reconnecting. 

With love,

Sharon