
There's been a lot of interesting in how I take my S H Nature Study flat lay photos. So I thought I'd throw together a tutorial about how I set up my space, take the photos, and touch on some editing programs that will help you get similar results.
What's a flat lay photo? A flat lay is a photograph shot from above, parallel to the surface (table). A bird's eye view.
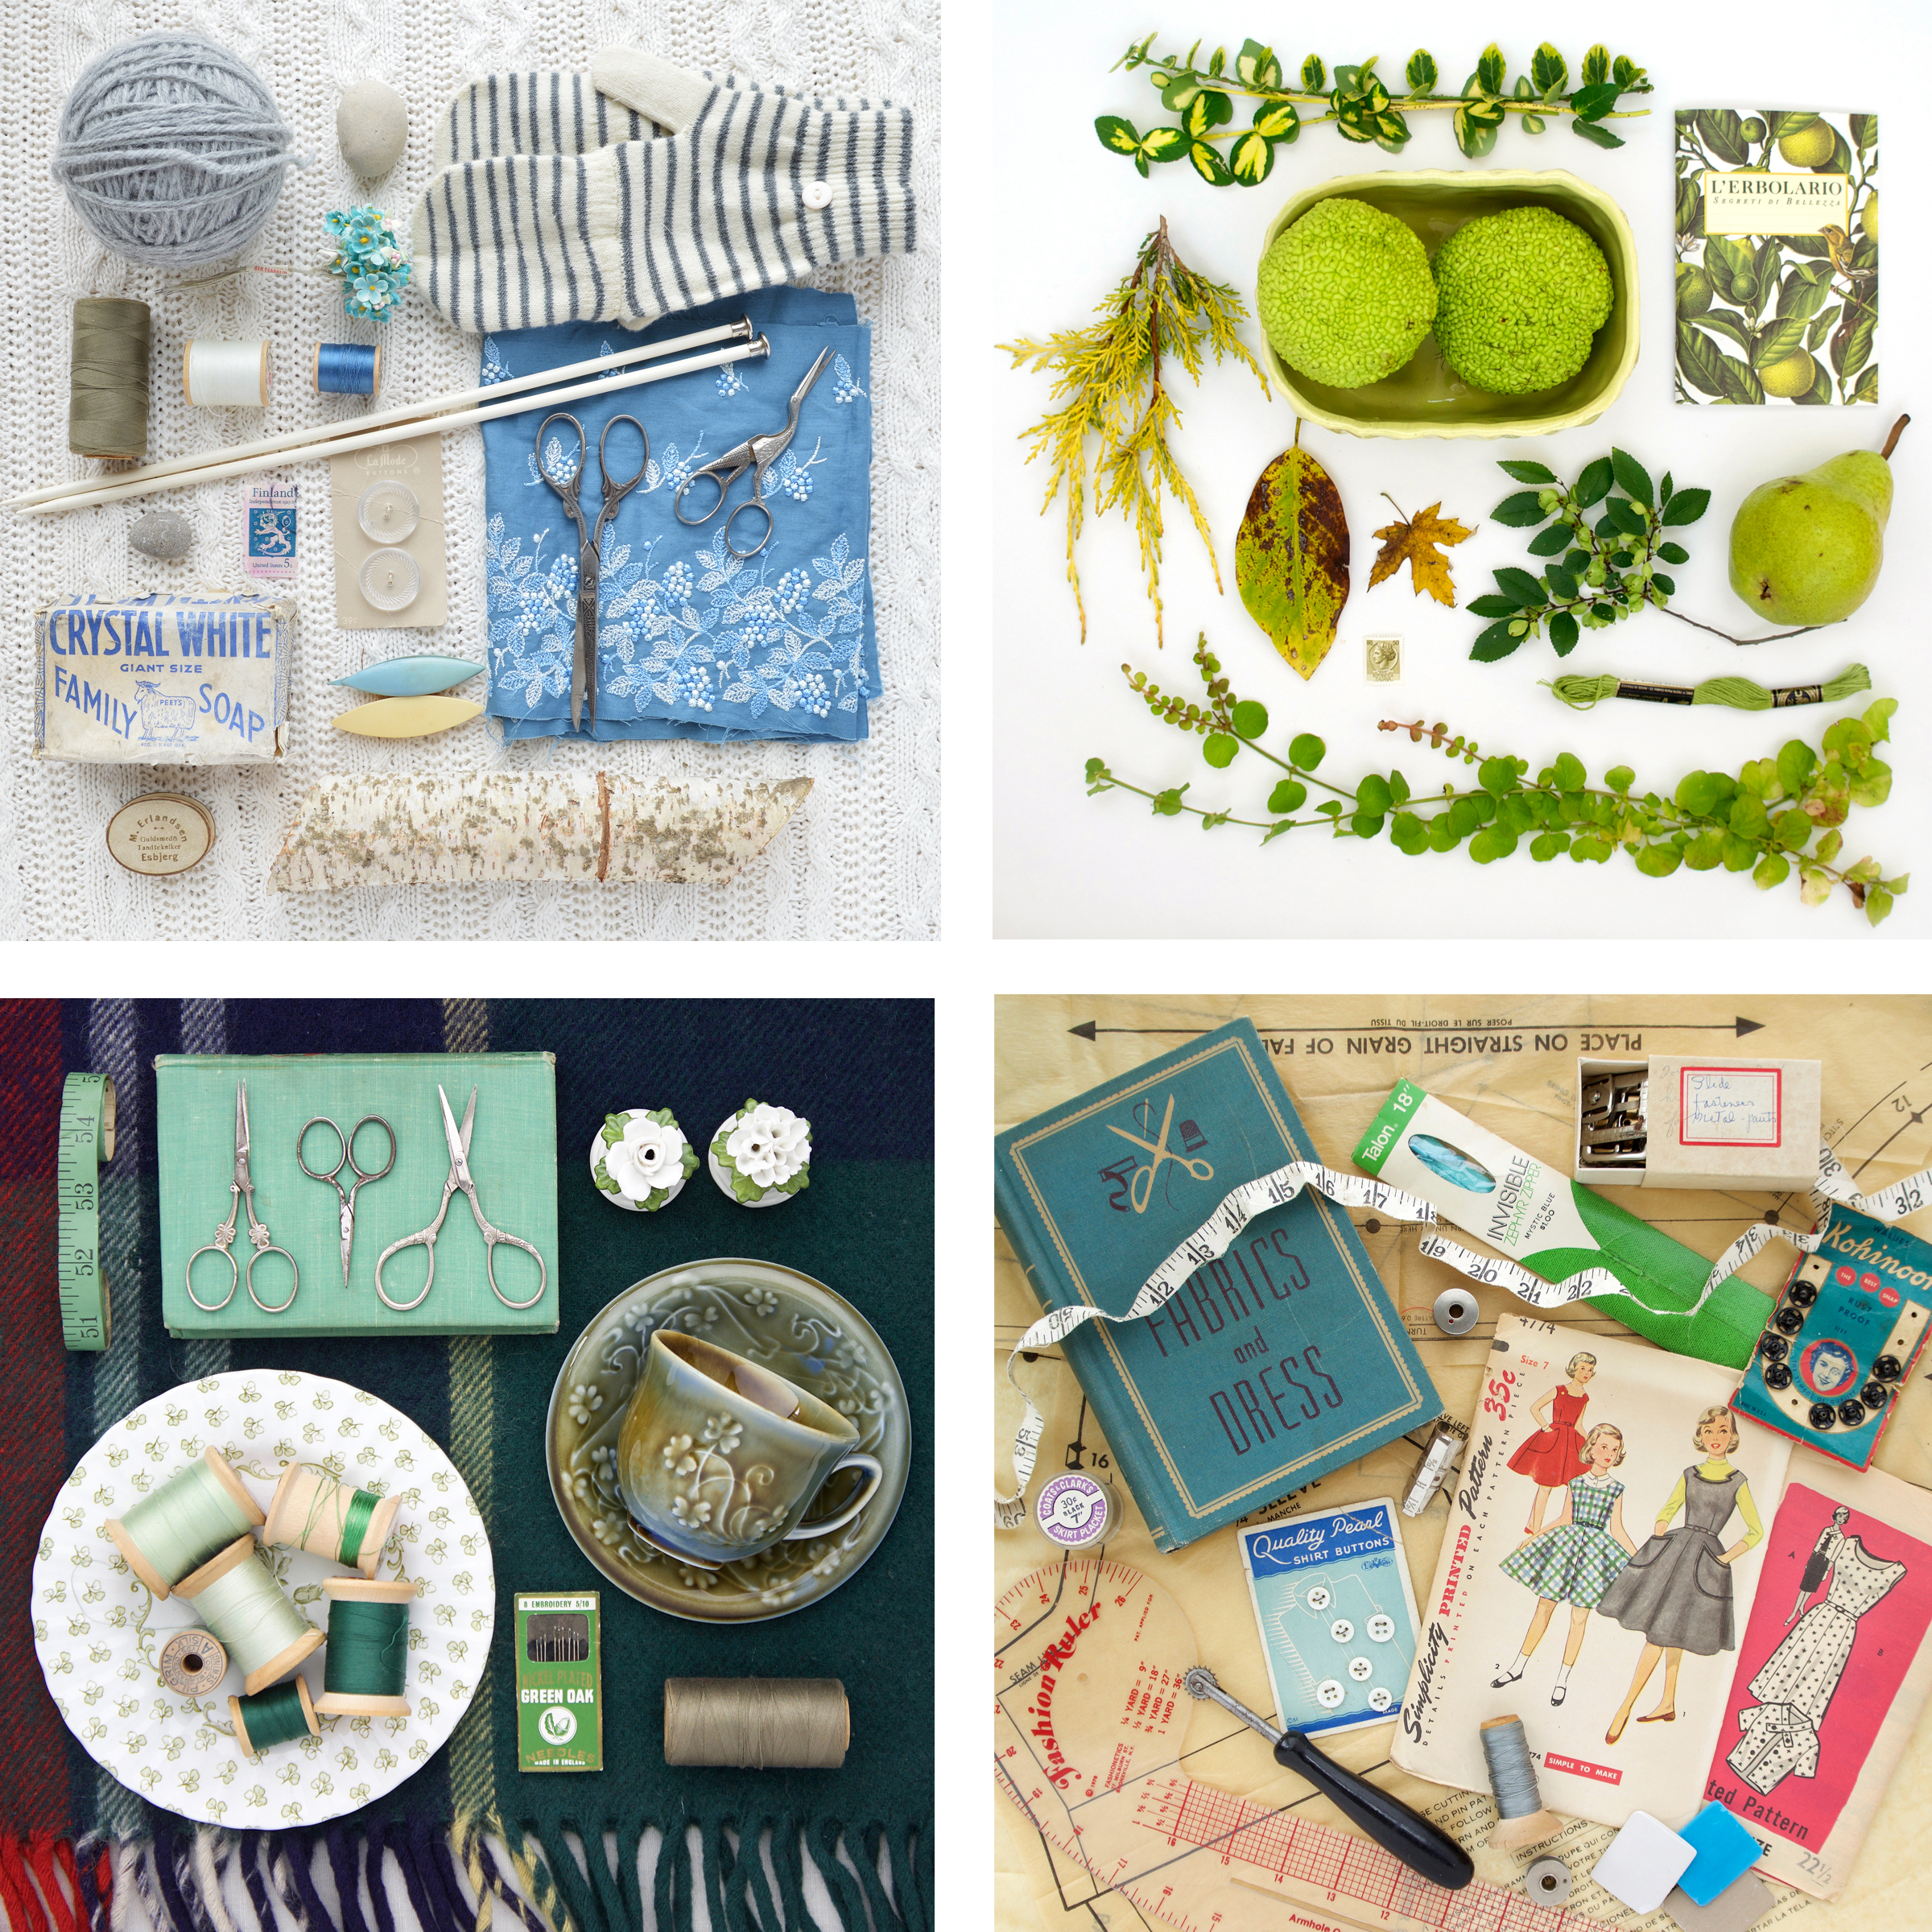
S H Nature Study flat lay photos
When I first started my photo-a-week-for-a-year series, I gave myself the parameter that I would use only natural origin objects like flowers, wood, rocks, and other found or man-made items with an organic base. Well, that was a totally unrealistic goal when you live in the mid-west and winters make it hard to find flowers and the like. So, I took off my constraints and started playing with sewing notions and ordinary everyday objects that would photograph well and tell a little story. Even though the name S H Nature Study no longer seems a good fit for my photos, I have used that hashtag with all 41 out of 52 pictures so far. You can see the whole series thus far on Instagram if you use the hashtag #shnaturestudy. There you will see the progression/evolution of style and subject matter in my year-long challenge.
PROPS
Sourcing props can be fun and as simple as looking around your home and yard. You can assemble a flat lay of totally random objects but it's better to have a focus (pardon the pun). Suggestions for flat lays: Subject, color, texture, materials, size, shape, product, or a combination.
Try to keep the items a similar height. If you have one or two items considerably higher (taller) than the other items in the flat lay, the camera will want to focus on the object closest to the lense, making the other (lower) items out of focus. Vica versa if you focus on the lower objects then the taller one(s) will be out of focus.
LIGHTING
The most important thing about photography is lighting! Always use natural lighting when photographing. Do not use a flash or add light with incandescent or fluorescent light sources. I set up my shots by a north facing window that has no overhanging eaves, awnings, or light blocking trees on the outside. North light is ideal because it has the truest white light. East facing windows are second best. South and west windows will produce warmer light and generally have too strong of sunlight streaming in, making the shot harder to take and producing stronger shadowing. Where you live on the globe and the time of year can also affect the quality of your light source. However, you may only have a west facing window or not ideal conditions due to one factor or another--not to worry. We can get around these obstacles with some simple tricks (more on this, read on).
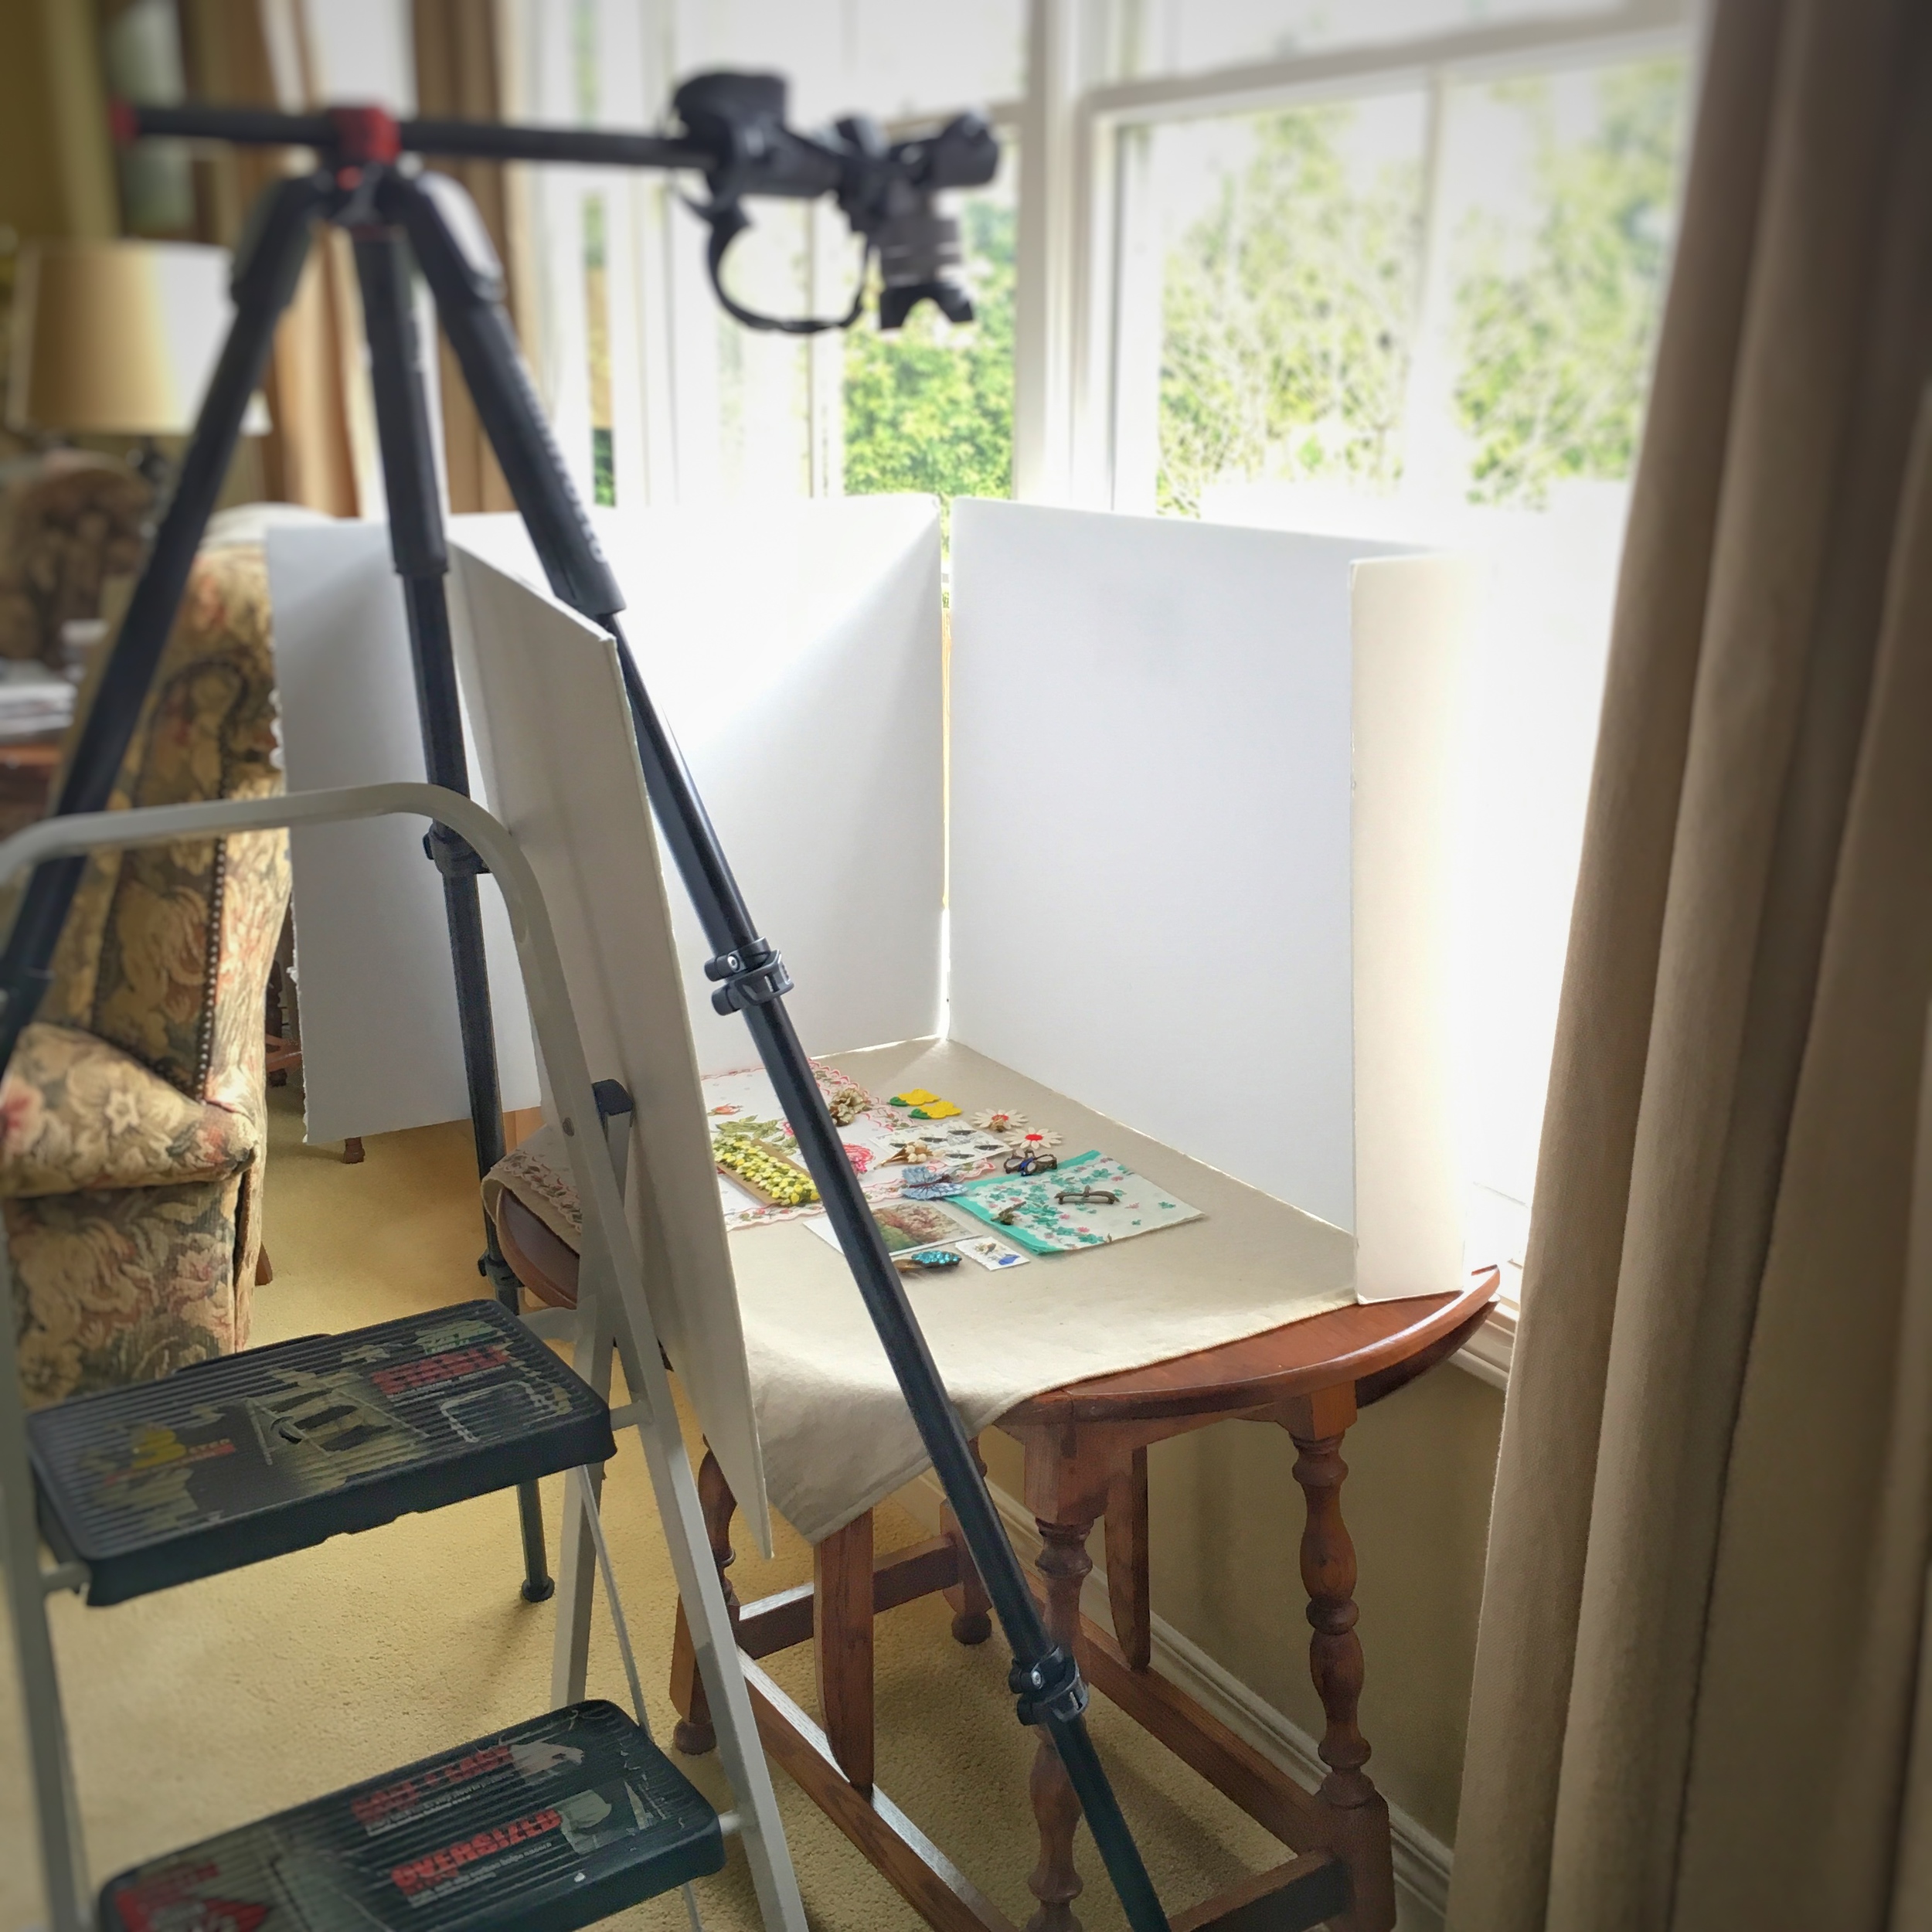
SETUP
Think about what format you want your image to be. Knowing where the photo will be used will determine what format to use. Since I am posting my images to Instagram I went with the standard square photo format for all my flat lays in this series. The shape of your format will help you understand how to arrange your flat lay items and save time as well.
You've probably seen many flat lay photos online with pristine white backgrounds. To achieve this look I use an inexpensive white foam core board as the base and lay out my props on top of the board. Thinking beyond white, the skies the limit. Your subject and props may indicate a mood or feeling and help you come up with creative backgrounds. Some suggestions for backgrounds: Fabric, wood cutting board, table tops, chalkboard, black or colored foam core, wicker, leather, etc. Being thoughtful and creative about what you select for the background can add that extra layer to your image.
Set up a small table by your light source. Arrange your props on your background surface in the desired photo format configuration. I don't fuss too much with my props for my shots. I like an organic as-you-find-it feel to the arrangement and just start laying them down in the space. This saves me a lot of time not to fuss much with perfect alignment and angles, I just let my years of designing call the shots and do it intuitively. Don't over think it.
I shoot with a DSLR camera mounted to a boom tripod. I can view my shot on the camera's back screen and stand on a step ladder.
You may not have this sort of equipment but can achieve the same result with the camera on your phone. A tripod is nice for reducing camera shake so if it's an available choice for you go to the extra work setting it up. If not, your phone camera may have some onboard tools you can use. See if you have a lock focus feature (newer iphone models have this) by first, tapping the screen with your finger where you want the camera to focus. Second hold down where you want the focus until the Lock icon appears. If you do not change the camera's position after it is locked, you can take more time to steady yourself when taking the photo. If you reposition, you will need to reset the focus each time.
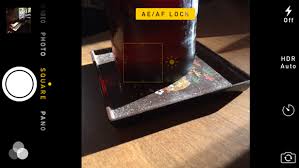
Photo curtesty of Mac Worlds
Another way to reduce camera shake if holding the camera is to take a deep breath and hold it until you've clicked the shot.
SHOOTING
Your space is set up and you're ready to shoot, yay! Always photograph in the highest resolution possible so you capture the best quality from the start. I like to use the manual settings on my DSLR but that is not a requirement for great shots. The defaults on your camera or phone are impressive as is. But, if you can (or want) to play around with settings on your DSLR here's what I set my camera at: ISO 100-200 is preferred for clear (non-grainy) film and allowing the most light into the camera. I can also adjust the exposure as well. Generally I shoot anywhere from +1.0-+2.0 steps up from the default exposure depending upon the lighting and what I am shooting. I like to bracket my initial shots to get a feel for what's too much or too little in the exposure department.
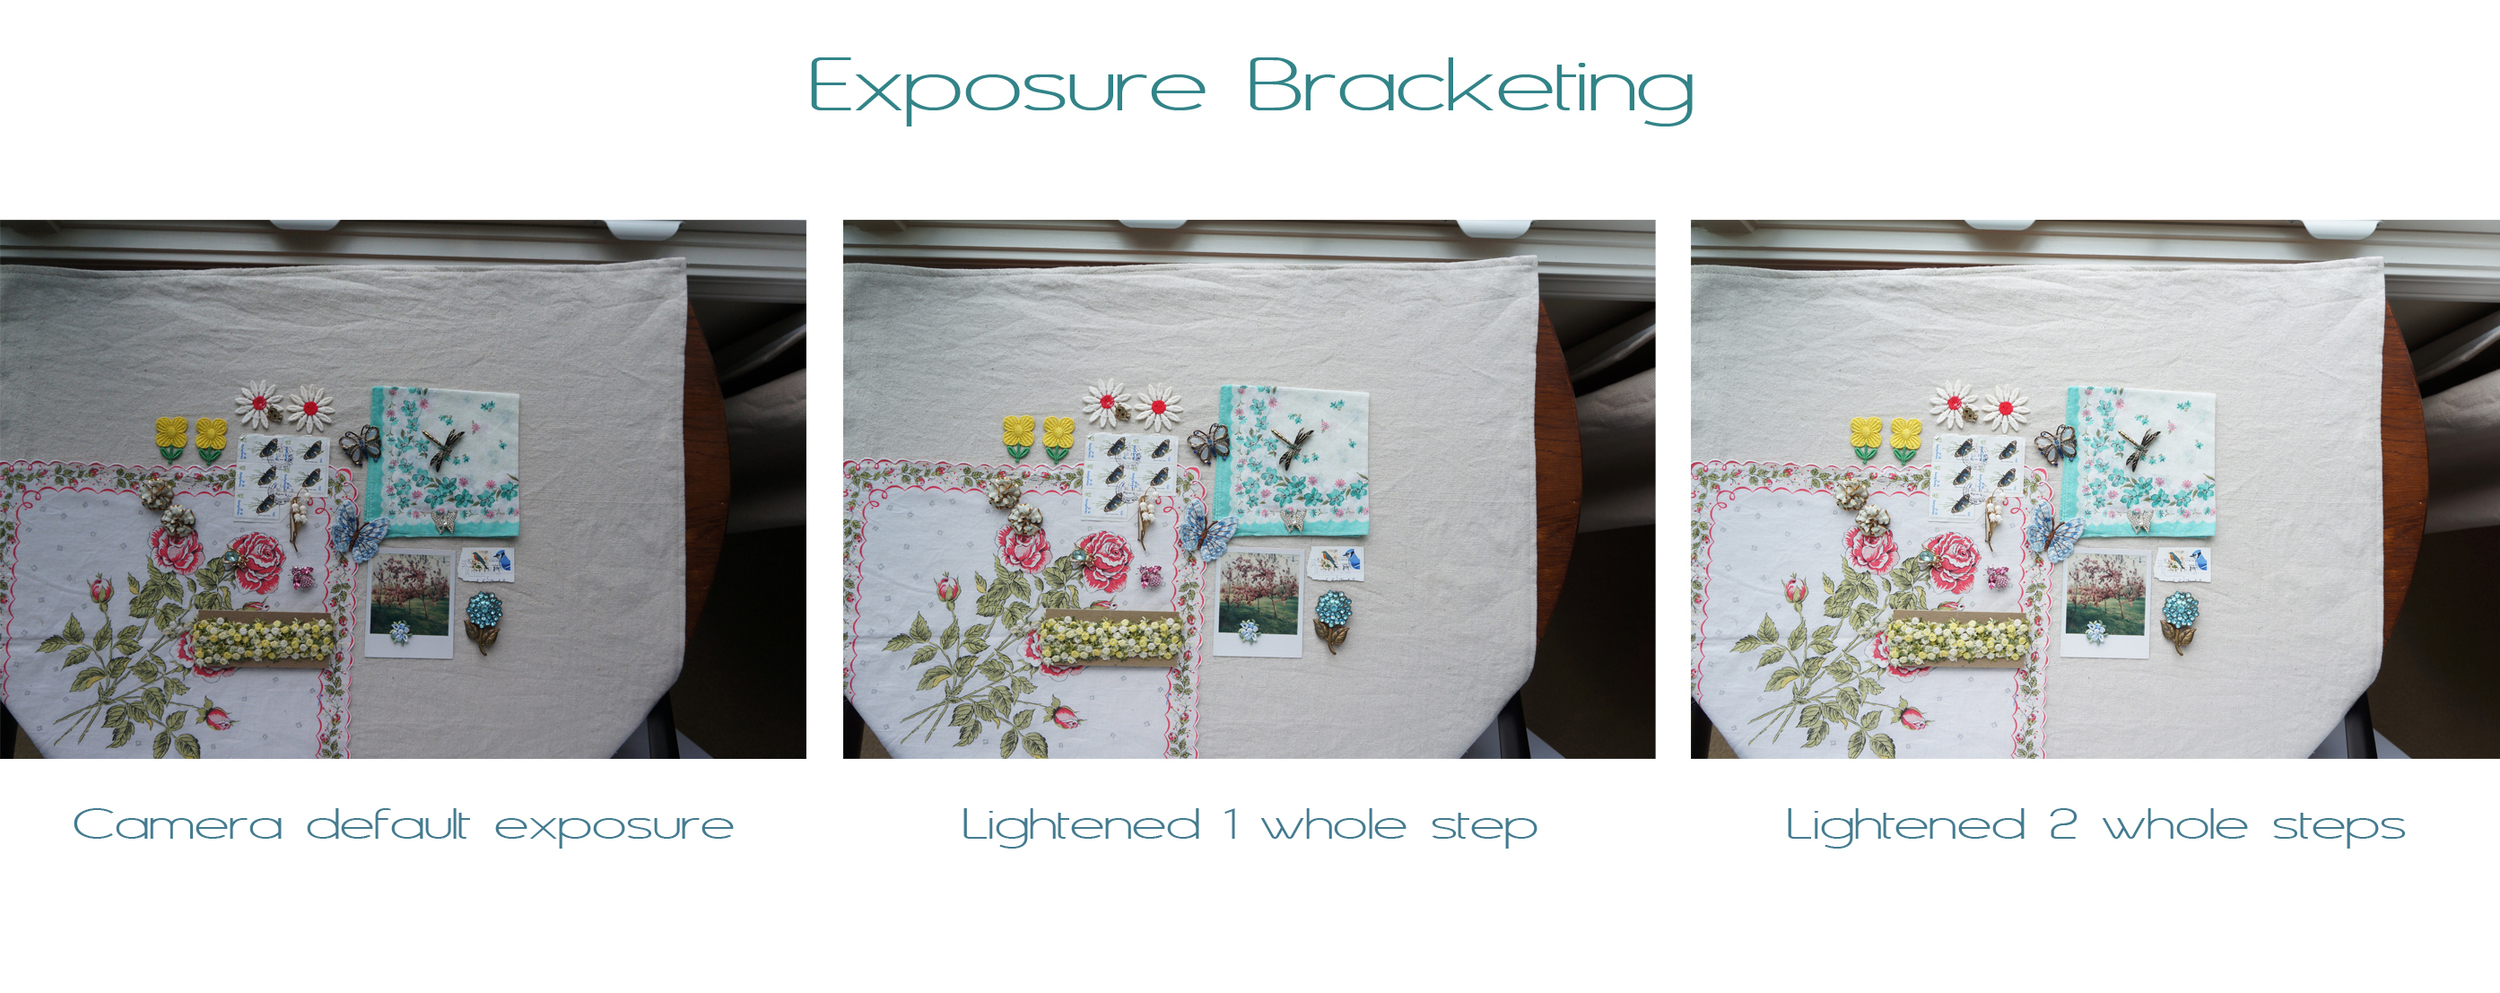
Above is an example of bracketing. Bracketing is adjusting the camera's exposure by steps. Photographing a very dark subject may require higher exposure steps then photography a very light subject. Too much exposure on a light subject can cause the white areas of the image to be blown out, loosing too much pixel information. Editing will not improve a blown out photo so it is always best to err on the side of underexposure to make sure all the pixel information is available. Brightness issue can be resolved later in editing.
Many phone cameras can adjust for exposure. An iphone can compensate for a dark exposure by tapping on the screen and using the sun slider icon to adjust exposure up or down.

Courtesy of www.imore.com
Take a few shot, trying to crop the image in the frame close to the desired size as possible. Bracket to the exposure. Take about 3-5 initial shots. I upload my initial shots to my computer so I can see a large view. From here I can see if something isn't working in my prop arrangement, camera setting, or any angle issues.
SHADOWS
Depending upon the mood of your image and the effect you're looking for will dictate if you want any shadows are your flat lay.
I have seen several stunning flat lay photos where the shadows play an important role in the message or mood of the photo. The extremely talented Robin Zachary, a prop and fashion stylist from New York, effortlessly uses shadows as part of her photography to create subtle moods and intimacy to her photos.
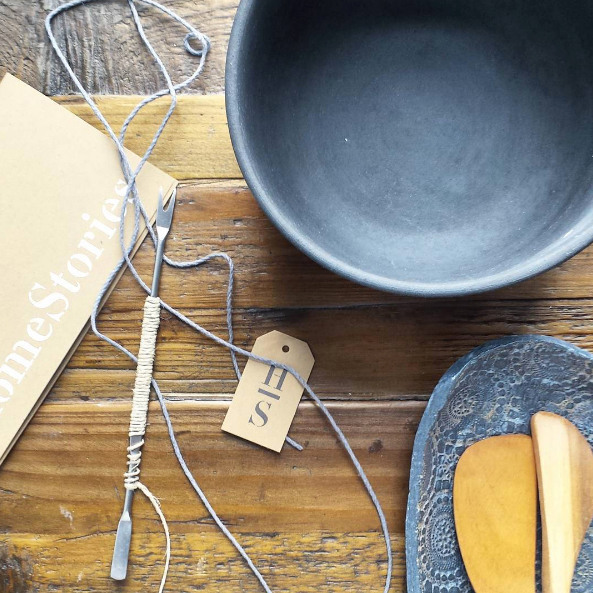
Photo courtesy of Robin Zachary
Or, maybe you want a slick, shadowless, clean flat lay what places all the attention on the object(s) or product(s). Small Talk Social has a fun tutorial on how to style flat lay photos for instagram and some great styling tips with examples of clean, white flat lay images.

How to Style a Flat Lay by Small Talk Social
I tend to do a little of both these worlds of shadows vs. no shadows. To cut down or avoid shadows use foam core boards (see image in SETUP) to block light and shadows from all sides of your subject. Note, you may need to readjust the exposure when adding boards. If the light reflected from a white board directly across from the window is too strong, use a black or gray board instead. The boards will defuse the light but also bounce light onto the area. Play around to see what works best for you.
If you are photographing reflective or shiny objects you may need to defuse the light even more. I use an inexpensive reflector that opens into a large diameter circle. It comes with a removable cover that can switch out to black, silver, gold or opaque white. With the cover removed, it has a diffuser capability.

You can totally DIY a diffuser with stretching sheer material in a large embroidery hoop, taping white tissue paper to a empty frame or canvas stretcher frame, taping tissue paper to a window, or holding up a sheet.
Sometimes holding a black foam core board over the shoot will also block glare on reflective surfaces. Again, experiment with what works in your space with your lighting. Each time I shoot there is a new set of challenges and unique conditions.
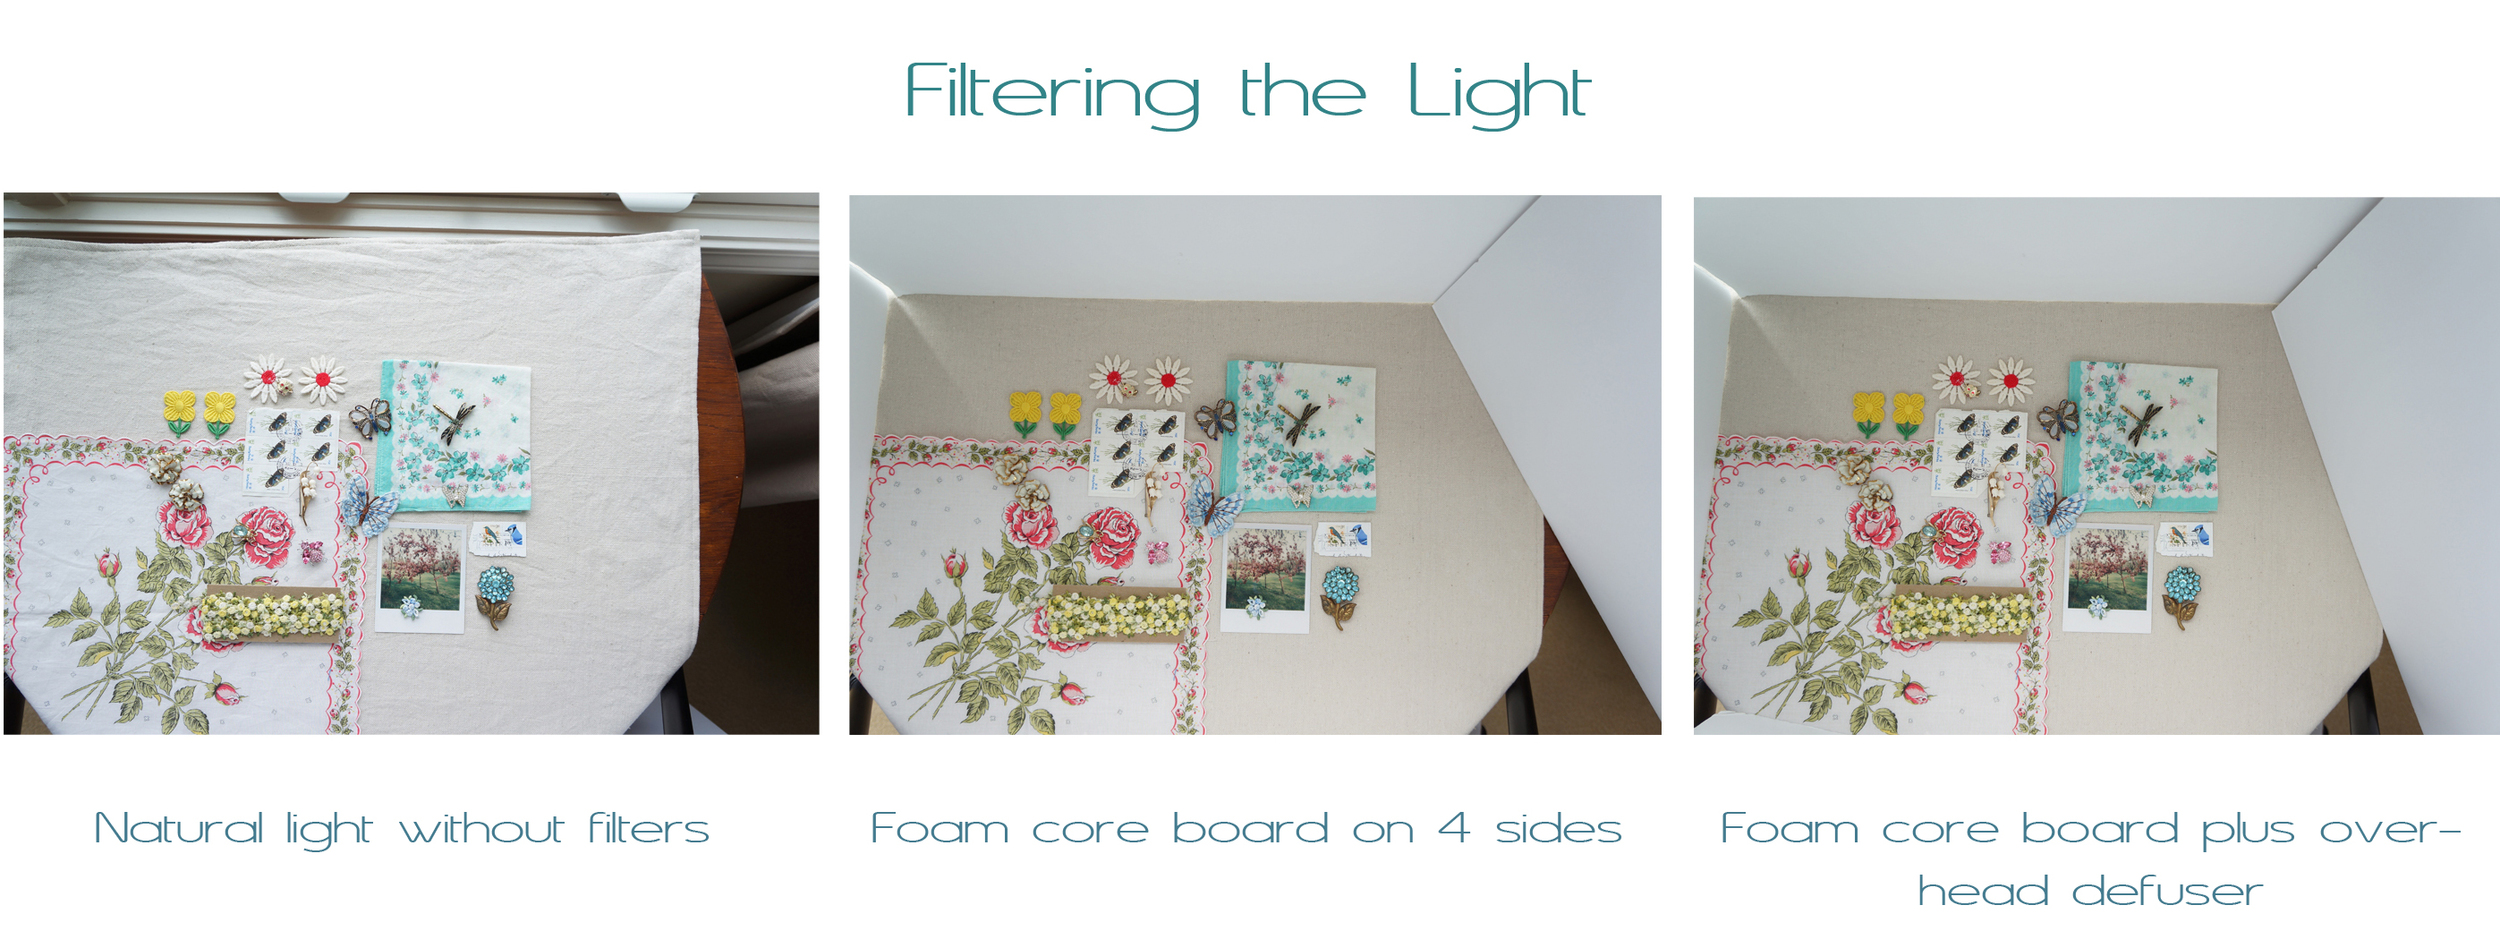
Above are examples of filtering the light source. Note: The top left corner of my white boards should have been either butted up to stop that light from leaking through or taped to block light. the last image is subtle but an overhead use of the diffuser softened the shadows and produced the final shot for this flat lay.
EDITING
Up until now you've done everything in your power to produce the best photo ever! But, alas, it's not enough. Rarely will you ever escape the need to photo edit. This includes cropping, adjusting the brightness, contrast, touch up, etc.
When working on my computer I use Photoshop to make my images sing. This is not something for everyone, I know. If you are using a phone to take images you are in luck because there are several extremely amazing photo editing apps available for free! The three I use the and listed in order of preference are: Snapseed, PS Express, and ColorStory. They can do just about anything you'll need if more robust editing is not an option for you.

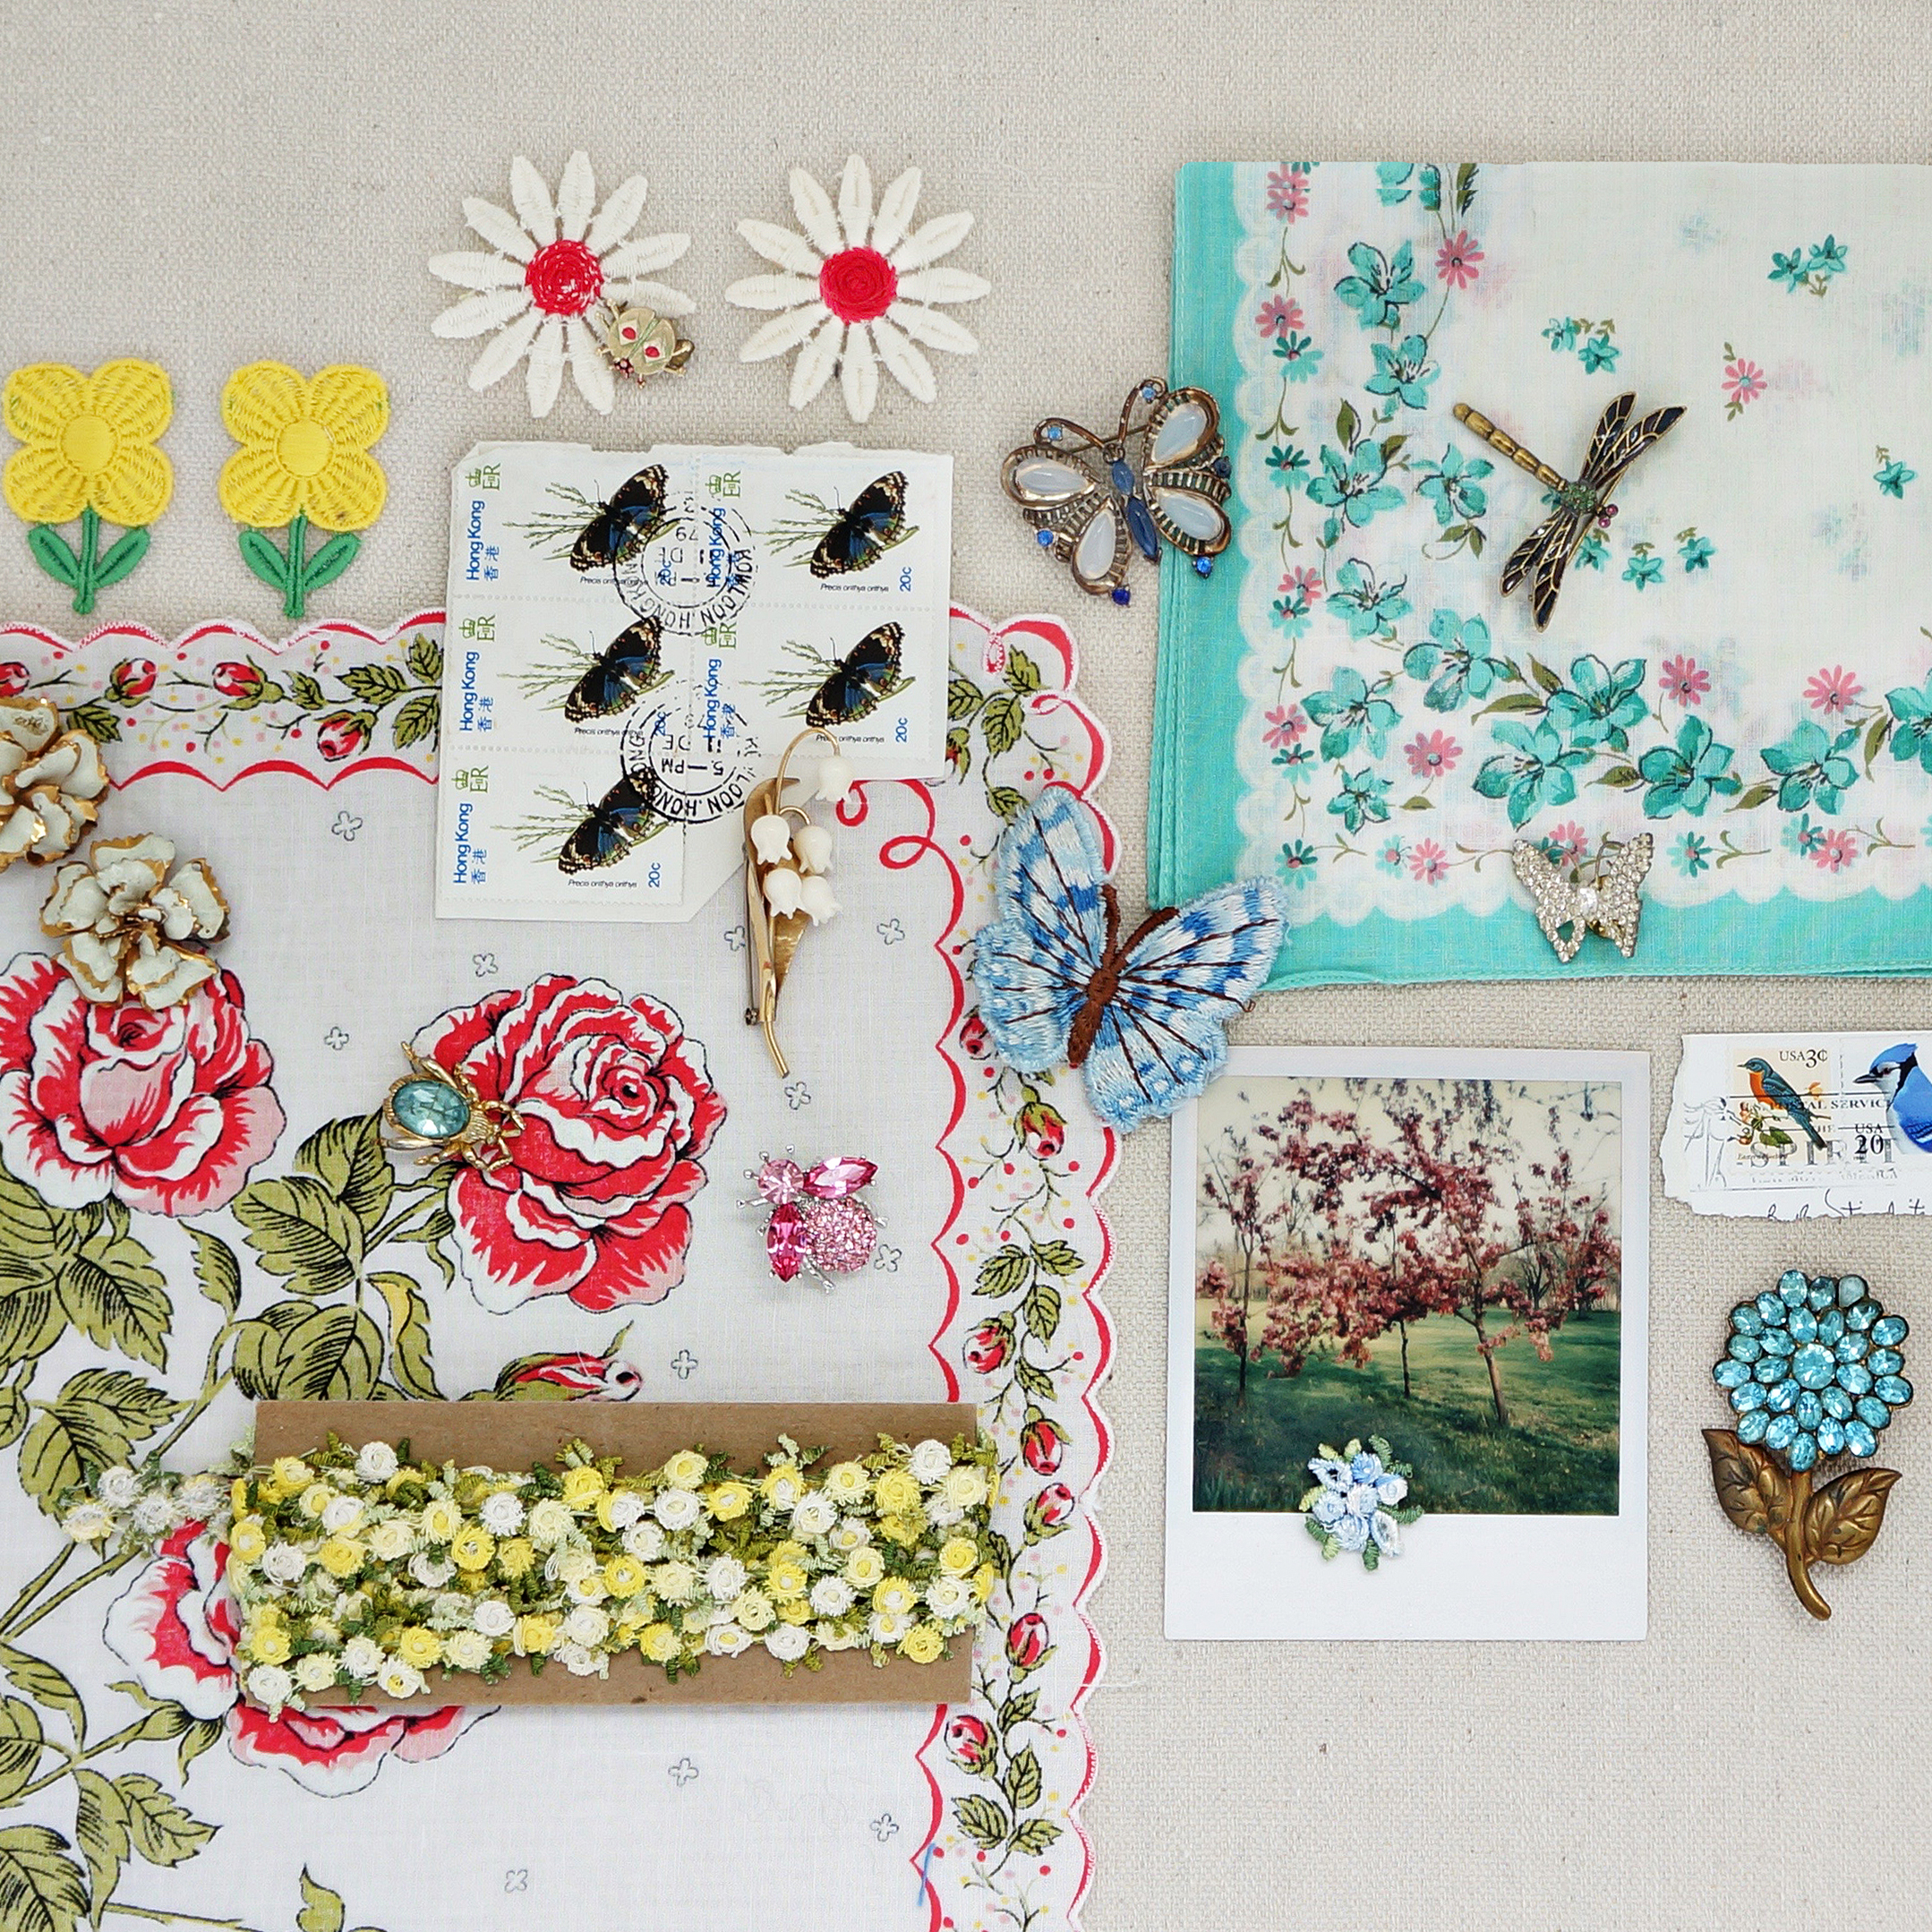
I took this photo with my iphone and embraced the shadows as part of the mood of the image. Depending upon what I am shooting for and how much time I have to spend on a shot I move between DSLR and phone camera. The best way to learn is to practice taking lots of shots, read blogs, and tap into the immense amount of online resources that are available on the subject of flat lay photography.