
Community Sampler Week #15

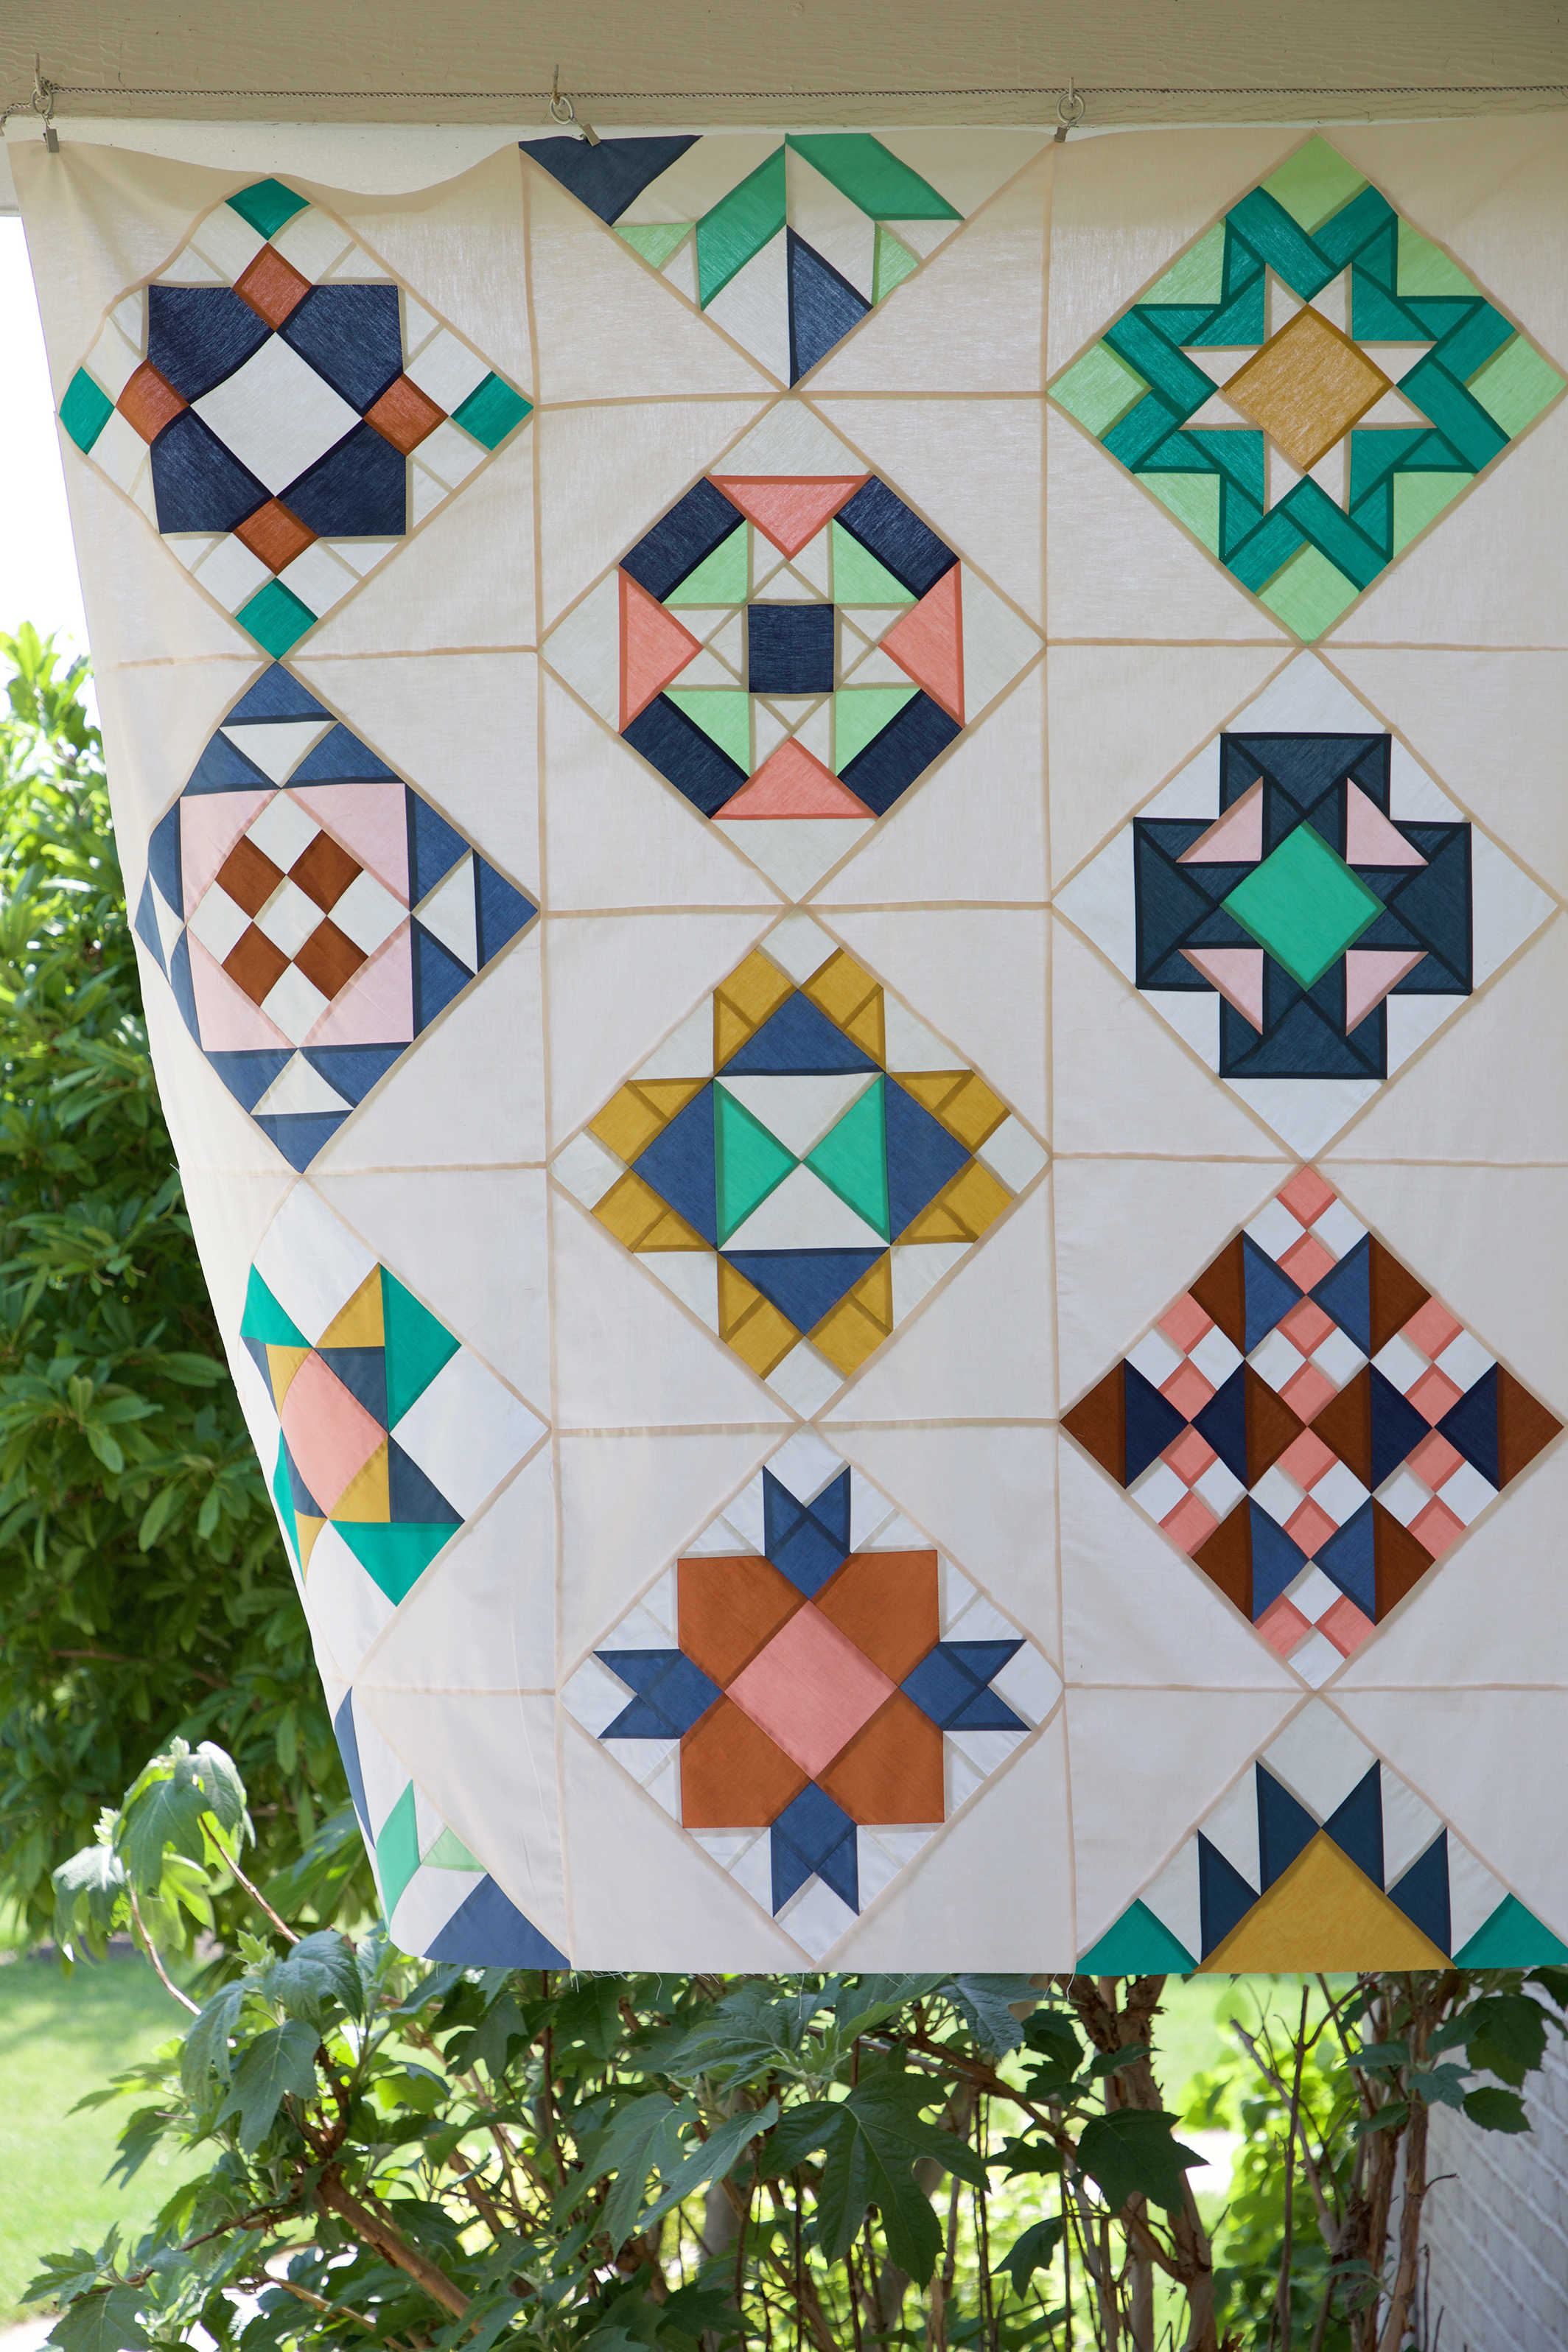
You've done it! You're top is pieced and now it's ready to be quilted. My co-host and sister Art Gallery Fabrics designer Maureen Cracknell and I are so happy to have you sewing with us and can't wait to see your finished quilts.
Surprisingly we still have a few new Makers joining our sew along at this late point. If you are just joining us, pick up the Introduction PDF on the Sew Along page and you'll get a material list along with coloring pages so you can get started planning your quilt. Then, work your way through the first Community Sampler post to the present and take advantage of the in-blog tutorials for the different patchwork techniques used throughout the Community Sampler. Both Maureen and I will leave all the Community Sampler downloads up on our blogs for you to download long after this event is done. Also, check out the #Community Sampler hashtag on Instagram, you'll see an amazing array of beautiful blocks as inspiration overload! Soon, you'll be seeing finished Community Sampler quilts too!
Finishing

Time to quilt and finish your Community Sampler! Download the free PDF on the Sew Along page.

The Finishing PDF download will give you cutting and yardage requirements for a Community Sampler quilt with and without borders. If you've modified the pattern by enlarging the size of your quilt you will need to recalculate the number of binding strips needed, backing, and batting yardages.
- Add 6''- 8'' to the finished dimensions of a quilt (3''- 4'' extra inches on all sides) for backing and batting needs.
- To figure binding: Add all four sides of the quilt plus an additional 12'' for seams. Divide that number by 42'' (the width of typical fabric) and the result is the number of strips needed. Round up if necessary.

For my Community Sampler quilt I've pieced my top in Art Gallery Fabrics Pure Element solids. But, for the back it's time to add a print! My newest Art Gallery Fabrics collection, Signature is now available at your local quilt shops and online. I chose the Untamed Beauty Daybreak print from my collection because the background has the same soft peach/pink as the Sweet Macademia Pure Elements solids background on the front of the quilt and picks up the coral, honey yellow, and kelly green solid colors throughout the blocks.
To be honest I've not figured out my binding yet but I do know it will be a solid and may just depend on material I have left from the top--maybe a scrappy one!
Rather than reinvent the wheel, I'm directing you to the blog post for Finishing that was originally posted during last year's Sewcial Bee Sampler sew along. There's where you'll find all the tutorial information for spray basting, quilting, and binding your Community Sampler. The sizes have changed but the concept for basting, quilting, and binding your quilt are the same. As stated in that post, there are many ways to finish a quilt and I am blogging about how I finish my quilts. If you have a preferred method, please do it the way you're comfortable with. If you intend to send your top off to be professionally quilted, discuss with your long-arm quilter how they'd like you to prepare your quilt top and backing for being quilted.
Quilting
I'm not a professional quilter by any means. I get by and call my quilting style "organic" because it's not perfect and lines are not straight. Since I've not quilted my Community Sampler at the time of writing this post I cannot say with certainty how I plan to quilt it yet. I have an idea to do a loopy clamshell sort of quilting (see first illustration) but until I sit down to my mid arm machine I really am not sure.

Use your coloring book page from the first PDF download with a tracing paper overlay to test out various quilting options.
I do have a tutorial on my Tutorials page for how to quilt a Baptist Fan pattern that is one of my favorite patterns. You can find tons of quilting pattern inspiration online or through the professional quilters resources I listed earlier. The type of quilting design that appeals to you is the best one to choose. Keep in mind the complexity and your skill level when choosing, so you don't get frustrated.

Another great option that always looks good is a grid pattern. You can run the grid horizontally and vertically or on the diagonal.
Keep in mind that different batting types have different properties and quilt spacing requirements. Read the packaging recommendations and plan your quilting accordingly.
I know this is not possibly enough to answer all your questions on how to finish a quilt. Use the internet, books, and other quilters to help fill in the gaps I've not covered here. I've only written about the steps I use to finish my quilts and there are many other ways to achieve the same end results--find what works best for your skill level and needs.
Next week will be the full reveal of mine and Maureen's quilts and of course our grand finale giveaway prize!
COMMUNITY SAMPLER SPONSORS

My co-host Maureen Cracknell and I are continually amazed by the joy and excitement each of you bring to our virtual community. Thank you for making this sew along so special. Please visit Maureen's blog and see the progress she's making on her sampler quilt, using her beautiful AGF fabrics Love Story collection. Be sure to use the #CommunitySampler hashtag when posting your blocks to Instagram and tag both my @sharonhollanddesigns and @maureencracknell so we don't miss any of your beautiful work! But, please be patient with both Maureen and I over the next few weeks if we don't comment back. Both Maureen and I are preparing sewing samples for our new spring collections and there's just not enough hours in the day (or energy) to get it all done!
Don't forget that this Friday's a Giveaway Friday on the Community Sampler sew along. Maureen and I will take turns hosting a giveaway each week where one of our generous sponsors will be featured and offering amazing prizes both here on our blogs and also on Instagram. Maureen will be hosting the giveaway this Friday and you'll be instructed how to enter at that time.
Happy sewing!