Heart Quilt Sew Along - Week 2

Heart Quilt Sew Along - Week 2

Sharon Holland Spirited fabric Hearts .jpg

Welcome back for the second week of the Heart Quilt sew along hosted by myself and Maureen Cracknell! If you’re just joining us, you’ll want to get up to speed by reading last weeks post announcing the sew along. If you’re already making heart block or at the point to start adding the sashing and borders—this post is all about getting that top pieced!

Heart Quilt Graphics D-01.jpg

The design for the heart block comes from Allison Harris of Cluck Cluck Sew. For this sew along we have Allison’s permission to use her block and we’ve selected and designed a quilt using an 8” square block, sashing, and border layout to make a 52’’ x 61’’ throw-size quilt. You’ll find a free download for our quilt layout, coloring sheet, and fabric requirements on the Sew Along page.

You may want to design a different layout for your heart blocks or follow Allison’s quilt tutorial from her site—Feel free to be creative! This is a casual sew along and perfect as a customizable project! Just be aware that the material list and cutting information on our sew along handout may not work if you’re changing the block size and layout. These sew along blog post support the sew along PDF handout.

We’ve not included piecing instructions in our free download because the Heart Block tutorial at Cluck Cluck Sew will cover what you’ll need to know about making the heart blocks. However, I’m adding some quick tips and tricks on cutting and piecing in the form of videos to my Stories on Instagram. You’ll also find these same videos archived in my Highlights under the #agfLOVEquilt circle.

Sharon Holland Designs Instagram Feed

Sharon Holland Designs Instagram Feed

Be sure to follow along with Maureen on her Instagram page as she makes two heart quilts using new Art Gallery Fabrics from Amy Sinabaldi’s MayFair and the new Foresta Fusion collections.

Find quilt kits and bundles for the fabrics used in Maureen’s quilt at Lady Belle Fabric.

Maureen Cracknell Instagram Feed

Maureen Cracknell Instagram Feed

Adding Sashing and Borders

Once all your blocks are pieced it’s time to add the sashing and borders to complete the quilt top.

I’ve not given any instructions in the PDF for adding the sashing and borders other than material lists and cutting information. This blog post and supplemental Stories videos on my Instagram feed will be the pattern support and tutorial for piecing together the quilt top.

Heart Quilt Assembly Diagram

Heart Quilt Assembly Diagram

Start by adding one 1-1/2” x 8-1/2” horizontal sashing strip to all 30 blocks. Note that I’ve added the horizontal sashing to the tops of the block to hold the tiny flipped corners down for easier assembly.

Arrange your single-sashed blocks into 5 vertical rows of 6 blocks each. Add the last 5 horizontal sashes to the bottom 5 blocks.

Join the sashed blocks into five vertical block rows of six blocks each as shown on the above Quilt Assembly Diagram.

Adding Sashing on Heart Quilt-3.jpg

Now it’s time to add the long vertical sashing between the block rows. Here’s where you’ll use those (9) 1-1/2” x 42” strips held in reserve. We’ll be sewing those reserve strips into one long strip and then sub cutting them to make the vertical sashing needed for the top.

You can, of course, simply sew the long strips right sides together on the short ends to get the desired sashing lengths but I have a nicer way to make your sashing and here’s how I prefer to do it:

Make One Long Strip

  1. Place (2) 1-1/2” x 42” strips right sides together at right angles. Sew with a diagonal seam as shown in the illustration below.

  2. Continue adding strips in the same manner to make one long strip.

  3. Trim seams to 1/4” and press seams open.

Making long strips with diagonal seams-01.jpg

By creating a diagonal seam you will make a stronger seam because of its longer surface area and the seam will be less noticeable on the quilt. Pressing the seams open helps the seam to lay nice and flat.

Cut Sashing to Size

  1. Measure the vertical block rows and average those number to determine the vertical sashing length. Note: If you’ve sewn your blocks true-to-size up to this point your vertical sashing rows size will measure 55-1/2’’ long but everybody sews differently so measure first to check the size you’ll need for your quilt.

  2. Cut 6 strips from the long strip to your measurement. Tip: Cutting from one continuous strip helps to stagger where the seams will land on the quilt and give a nicer overall appearance.

  3. Sew the vertical sashing strips alternately with the block rows.

Adding Sashing on Heart Quilt-2.jpg

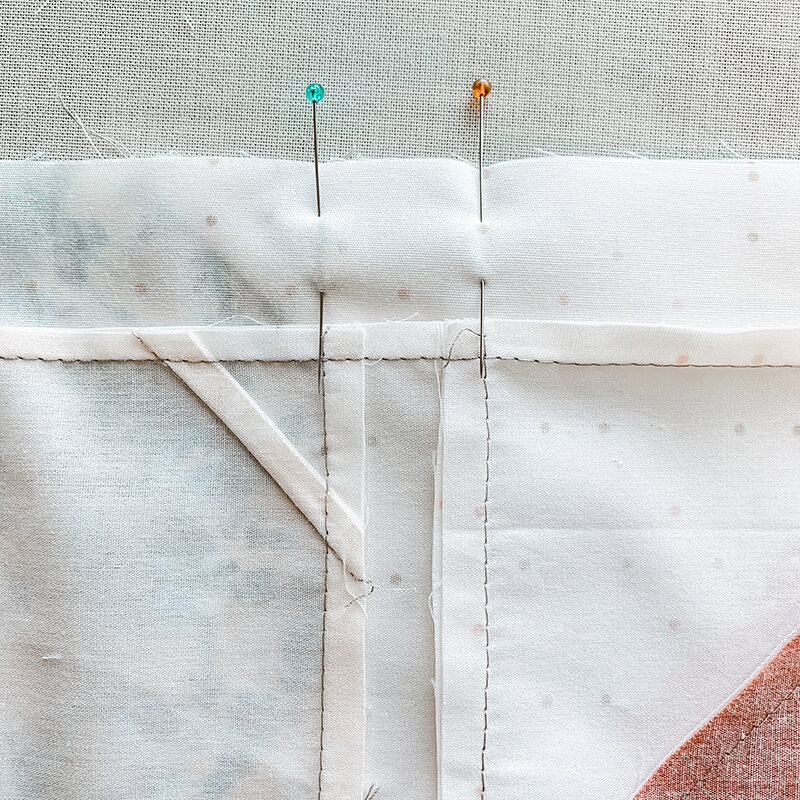
Tip: When attaching sashing to your vertical block rows, use the previous block rows to help keep everything lined up. Notice how I’ve pinned at the horizontal sashing seam line and lined up those seams with the sashing of the row next to it.

Pressing is your friend! Press every step of the way when assembling your quilt top for better results.

Adding Sashing on Heart Quilt-1.jpg

Adding Borders

  1. In the same manner as making the vertical sashing, sew the (6) 3-1/2” x 42” strips together to make one long strip.

  2. Measure the two sides of the quilt and average those numbers. Cut 2 strips to this size. Note: If you’ve sewn your top true-to-size up to this point your vertical border (for the sides) will measure 55-1/2’’ long but everybody sews differently so measure first to check the size you’ll need for your quilt.

  3. Stitch to the sides of the quilt.

  4. Measure the top and bottom of the quilt including the border. Average those numbers and cut 2 strips to this measurement. Sew to the top and bottom of the quilt. Note: If you’ve sewn your top true-to-size up to this point your horizontal border (for the top and bottom) will measure 52-1/2’’ long but everybody sews differently so measure first to check the size you’ll need for your quilt.

Sharon Holland Heart Quilt.jpg

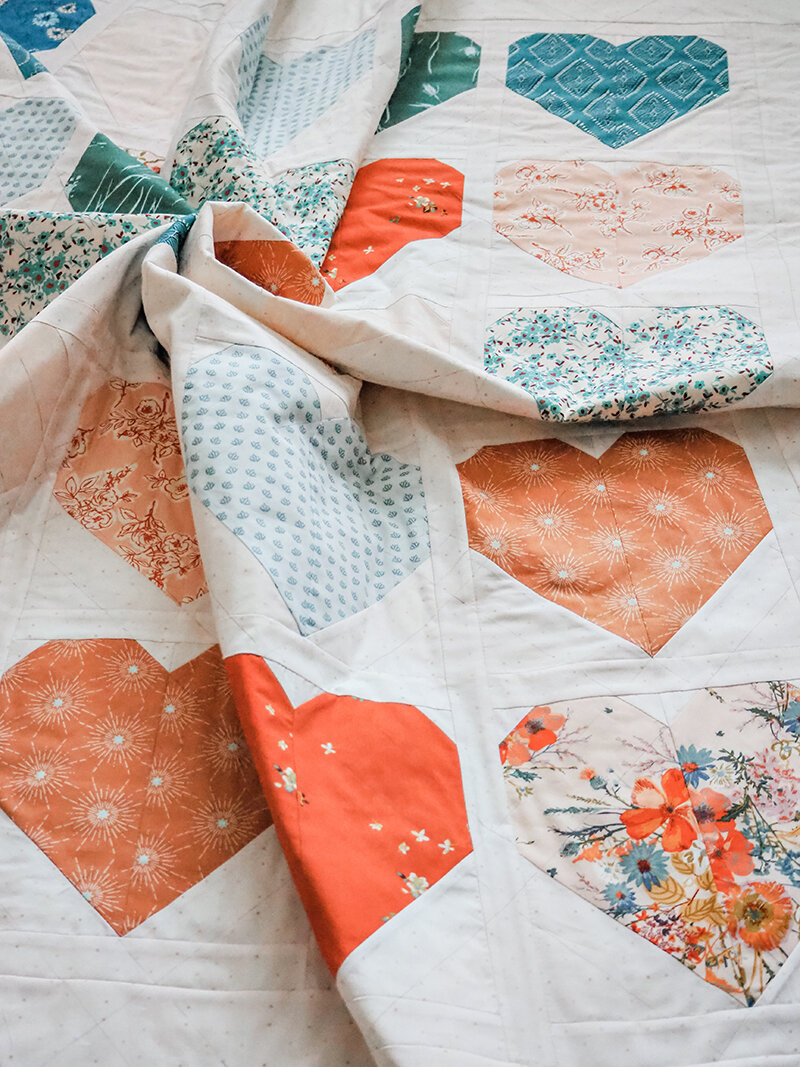
Congratulations, you just completed your Heart Quilt top!!!! Next Wednesday we’ll go over how to make the quilt sandwich, quilt with a quilting diagram of how I will quilt my top, and binding of your quilt along with the full reveals of our quilts.

Meanwhile, both Maureen and I’ll be posting our progress on Instagram and we encourage you to follow along and share your fabric pull and block progress as well. When posting your quilt to Instagram use the sew along hashtag of #agfLOVEquilt and be sure to tag @sharonhollanddesigns @maureencracknell and @cluckclucksew so we can see your progress! If you’re sewing with Art Gallery Fabrics don’t forget to tag them too as they love to see what Makers are making with @artgalleryfabrics !

I am an Amazon Associate site and earn from qualifying purchases on the products I’ve linked below. The helpful products selected are the same or similar to materials used to make the project(s) in this blog post or related items I think you may enjoy.

Community Sampler Week #10

Community Sampler Week #10

BG0A5337.jpg

Welcome to week #10 of the Community Sampler sew along where we not only work on our patchwork piecing techniques but also share our makes on Instagram and have fun with a like-minded community of quilters. My co-host and sister Art Gallery Fabrics designer Maureen Cracknell and I are so happy to have you sewing with us and look forward to seeing your sampler quilt come together.

CS Promo banner 2.jpg

We're coming down the home stretch with making our blocks and this is number nine out of eleven. 

Each Wednesday will be a new PDF block release or finishing step for the quilt. If you are just joining us, pick up the Introduction PDF on the Sew Along page and you'll get a material list along with coloring pages so you can get started planning your quilt. Then, work your way through the first Community Sampler post to the present.

Many of the patchwork units (like Quick-Corner, Flying Geese, Half-Square Triangle, and Square-in-Square units) used in this year's sampler have already been oversized to allow for trimming and squaring of units before assembling your block. Please cut your pieces EXACTLY as given in each of the PDF instructions because bumping up the size of the pieces from the measurements give will not bring great results in some cases. Take advantage of my in-blog tutorials for each of the different quilting techniques used in our sampler.

Accurate cutting and use of a true 1/4'' seam allowance is a must for successful patchwork piecing. All your blocks will measure 12-1/2'' square (unfinished). Review how to cut strips, sew with a true 1/4'' seam allowance, and other helpful piecing tips on my "Are You Ready to Sew" post.

Download the free PDF on the free Double-T block from my Sew Along page and let's get sewing!

BG0A5674.jpg

Our block this week is all review as far as piecing techniques. I'm sure you can do this in your sleep by now but if you need a refresher, use the following link for review how to make Half-Square Triangle (HST) units and No-Waste Flying Geese units that we've already used in earlier Community Sampler blocks. Accuracy is always our goal so make sure all cut pieces are true to size as you work and maintain an accurate 1/4" seam allowance when sewing and the pieces will go together beautifully.

If you're wanting to use directional prints for either the HST units or the Flying Geese units you may want to check out my tutorial for controlling directional prints that was posted during the Sewcial Bee Sampler sew along. 

BG0A5477.jpg

I kept my block real simple this week and love how these Art Gallery Fabrics Pure Element solids look together. If you're curious as to the exact colors I've used I'm including the fabrics name and sku number so you can easily get the same look.

BG0A5382.jpg
 
BG0A5529.jpg

Other fabrics of interest included in my photos this week are the Splendid Fusions prints from Art Gallery Fabrics (now is shops) that include reprints of my Petally and Woodblock prints (first two from right to left on the above photo). Also, under my Double-T block I used my Mudcloth Blue print from Tapestry as a backdrop. It's hard not to include some pattern in my posts! :)

Be sure to stop over at Maureen's blog to see her lovely blocks being made from her Art Gallery Fabrics Love Story collection. 

COMMUNITY SAMPLER SPONSORS

My co-host Maureen Cracknell and I are continually amazed by the joy and excitement each of you bring to our virtual community. Thank you for making this sew along so special. Please visit Maureen's blog and see the progress she's making on her sampler quilt, using her beautiful AGF fabrics Love Story collection. Be sure to use the #CommunitySampler hashtag when posting your blocks to Instagram and tag both my @sharonhollanddesigns and @maureencracknell so we don't miss any of your beautiful work!

Don't forget that this Friday's a Giveaway Friday on the Community Sampler sew along. Maureen and I will take turns hosting a giveaway each week where one of our generous sponsors will be featured and offering amazing prizes both here on our blogs and also on Instagram. I will be hosting the giveaway this Friday and you'll be instructed how to enter at that time.

Happy sewing!

Sewcial Bee Sampler Finale

Sewcial Bee Sampler Finale

This is it, the finale week of the Sewcial Bee Sampler (SBS) and time for Maureen and I to reveal our finished sampler quilts! The last 27 weeks have been incredible. The response and participation to the Sewcial Bee Sampler sew along has been more than my co-host Maureen Cracknell and I could ever imagine. So many new friendships have been formed through the SBS Instagram community and I love hearing how your patchwork sewing skills have been improving through our sewing techniques and tutorials. Thank you for making this so successful.

Surprisingly we still have a few new Makers joining our sew along at this late point and will continue to as they see your beautiful finished quilts being posted. If you're just finding out about us, be sure to take advantage of the in-blog tutorials for the different patchwork techniques used throughout the Sewcial Bee Sampler. Pick up tips and block variations beginning with the first blog post The Start of Something Sewcial. Both Maureen and I will leave all the SBS downloads up on our blogs for you to download long after this event is done. Also, check out the #SewcialBeeSampler hashtag on Instagram, you'll see an amazing array of beautiful blocks and quilts as inspiration overload! 

Before I get to showing you my finished quilts I want to remind you one last time about our Sewcial Bee Sampler Survey. The survey will only remain open one more week, until August 9th, 2017. To help us better understand what you're looking for in a future sew along, Maureen and I have prepared an 8 question survey. This quick questionnaire is completely anonymous and your answers will give us better insight into serving your needs as a quilter. To ensure the most accurate results, please only take the survey once. Many thanks to the 472 SBS Makers who've already participated in the SBS questionnaire! If you've not yet had a chance to take the survey, please do using this link provided. The link is the same on both Maureen's and my blog and goes to the same survey. So, if you access the questionnaire from either Maureen's site or mine, your answers are compiled to the same place.  

Quilt 1: Bountiful 

Originally I only planned to make one sampler quilt but very early into the sew along I could see I wanted to play with more fabric and color options and decided to make two to better show the variety that can be achieved in a project like this. I think each of my quilts has it's own personality as each and everyone of the SBS samplers have a unique point of view from the makers fabric choice, block assembly, and final layout arrangement. That's what makes a project like this so much fun.

My original quilt is made with fabrics from my newest Art Gallery Fabrics (AGF) collection called Bountiful. I also added in some coordinating AGF Pure Element solids.

I decided to keep the sashing fabric the same as the block frames to make the blocks float on the white background. 


The batting for my Bountiful SBS sampler is Hobbs Tuscany Wool. This is an exceptionally fine product and makes for a lightweight quilt with extra loft than a cotton type batting. It is a little different machine quilting on wool because of the added loft and takes a little bit of getting used to handling but needle quilts with ease. I chose to do a very simple free motion stitching on this quilt to give it a modern touch. 


Photo courtesy of Alexis Wright

Photo courtesy of Alexis Wright

Visit my Shop Fabrics page to find online quilt shops that carry Bountiful.

Quilt 2: Tiny Dancer

For my second SBS sampler quilt I decided to use fabrics from my first four Art Gallery Fabrics collections with the addition of the new Fusion reprints of my prints. I call my mixed group Tiny Dancer after the Sketchbook fabrics dandelion print by the same name.

On my second quilt I used my Sketchbook fabrics Speckled Lapis print for the block frames and a medium blue Mudcloth Blue print from Tapestry for the sashing. 

Since this quilt had a decidedly feminine quality to it with the colors and floral prints, I chose to stitch a dense, meandering floral machine quilting on it. The batting is the exquisite Hobbs Tuscany Silk batting. Truly the best batting I've ever had the pleasure to work with and works and handles much like a cotton batting.


To find shops that carry fabrics from my Gossamer, Sketchbook, Coastline, and Tapestry collections, use the links provided on my Shop Fabrics page

It was so much fun finally putting these blocks together and I love how they both turned out! My daughter helped me photography these over the weekend and I believe she has her eyes set on the Bountiful quilt for her guest bed (it's her favorite fabric collection to date). My year and a half year old granddaughter loved the Tiny Dancer mixed prints quilt and would point out the flowers and butterfly prints. I think someday when she's ready for a big girl bed, that will be her quilt. 

This Friday we still have another Giveaway Friday and it's going to be a big one! Maureen will be hosting the giveaway from her blog and I will be hosting the Instagram giveaway. Everything will be run as normal with the exception of the giveaway being slightly different in the two social media platforms. More about that on Friday!