Community Sampler Week #4

Community Sampler Week #4

BG0A4809.jpg

Welcome to week #4 of the Community Sampler sew along where we not only work on our patchwork piecing techniques but also share our makes on Instagram and have fun with a like-minded community of quilters. My co-host and sister Art Gallery Fabrics designer Maureen Cracknell and I are so happy to have you sewing with us and look forward to spending the next few months with you.

CS Promo banner 2.jpg

There are eleven blocks in our quilt and each Wednesday will be a new PDF block release or finishing step for the quilt. If you are just joining us, pick up the Introduction PDF on the Sew Along page and you'll get a material list along with coloring pages so you can get started planning your quilt. Then, work your way through the first Community Sampler post to the present.

Many of the patchwork units (like Quick-Corner, Flying Geese, Half-Square Triangle, and Square-in-Square units) used in this year's sampler have already been oversized to allow for trimming and squaring of units before assembling your block. Please cut your pieces EXACTLY as given in each of the PDF instructions because bumping up the size of the pieces from the measurements give will not bring great results in some cases. Take advantage of my in-blog tutorials for each of the different quilting techniques used in our sampler.

Accurate cutting and use of a true 1/4'' seam allowance is a must for successful patchwork piecing. All your blocks will measure 12-1/2'' square (unfinished). Review how to cut strips, sew with a true 1/4'' seam allowance, and other helpful piecing tips on my "Are You Ready to Sew" post.

Let's start sewing our third block--Ribbon Star. Download the free PDF on the Sew Along page.

Triple-Square Triangle Units

I love how you can put squares together to come out with intricate patchwork units like this Triple-Square Triangle (TST). All the cut sizes have already been sized up for trimming and squaring. I'm using the 6'' HST Bloc-Loc ruler to help me keep my units square. You can see some great video from the Bloc-Loc site to better explain how to use their tools. 

If you're wanting to use directional prints for either of the following patchwork techniques you may want to check out my tutorial for controlling directional prints that was posted during the Sewcial Bee Sampler sew along. 

TST 1.jpg

Draw a diagonal line on the wrong side of the lighter fabric of your 6" squares.

Place a marked square right sides together with a same-size square. Sew a 1/4" seam on each side of the drawn line. 

TST 2.jpg

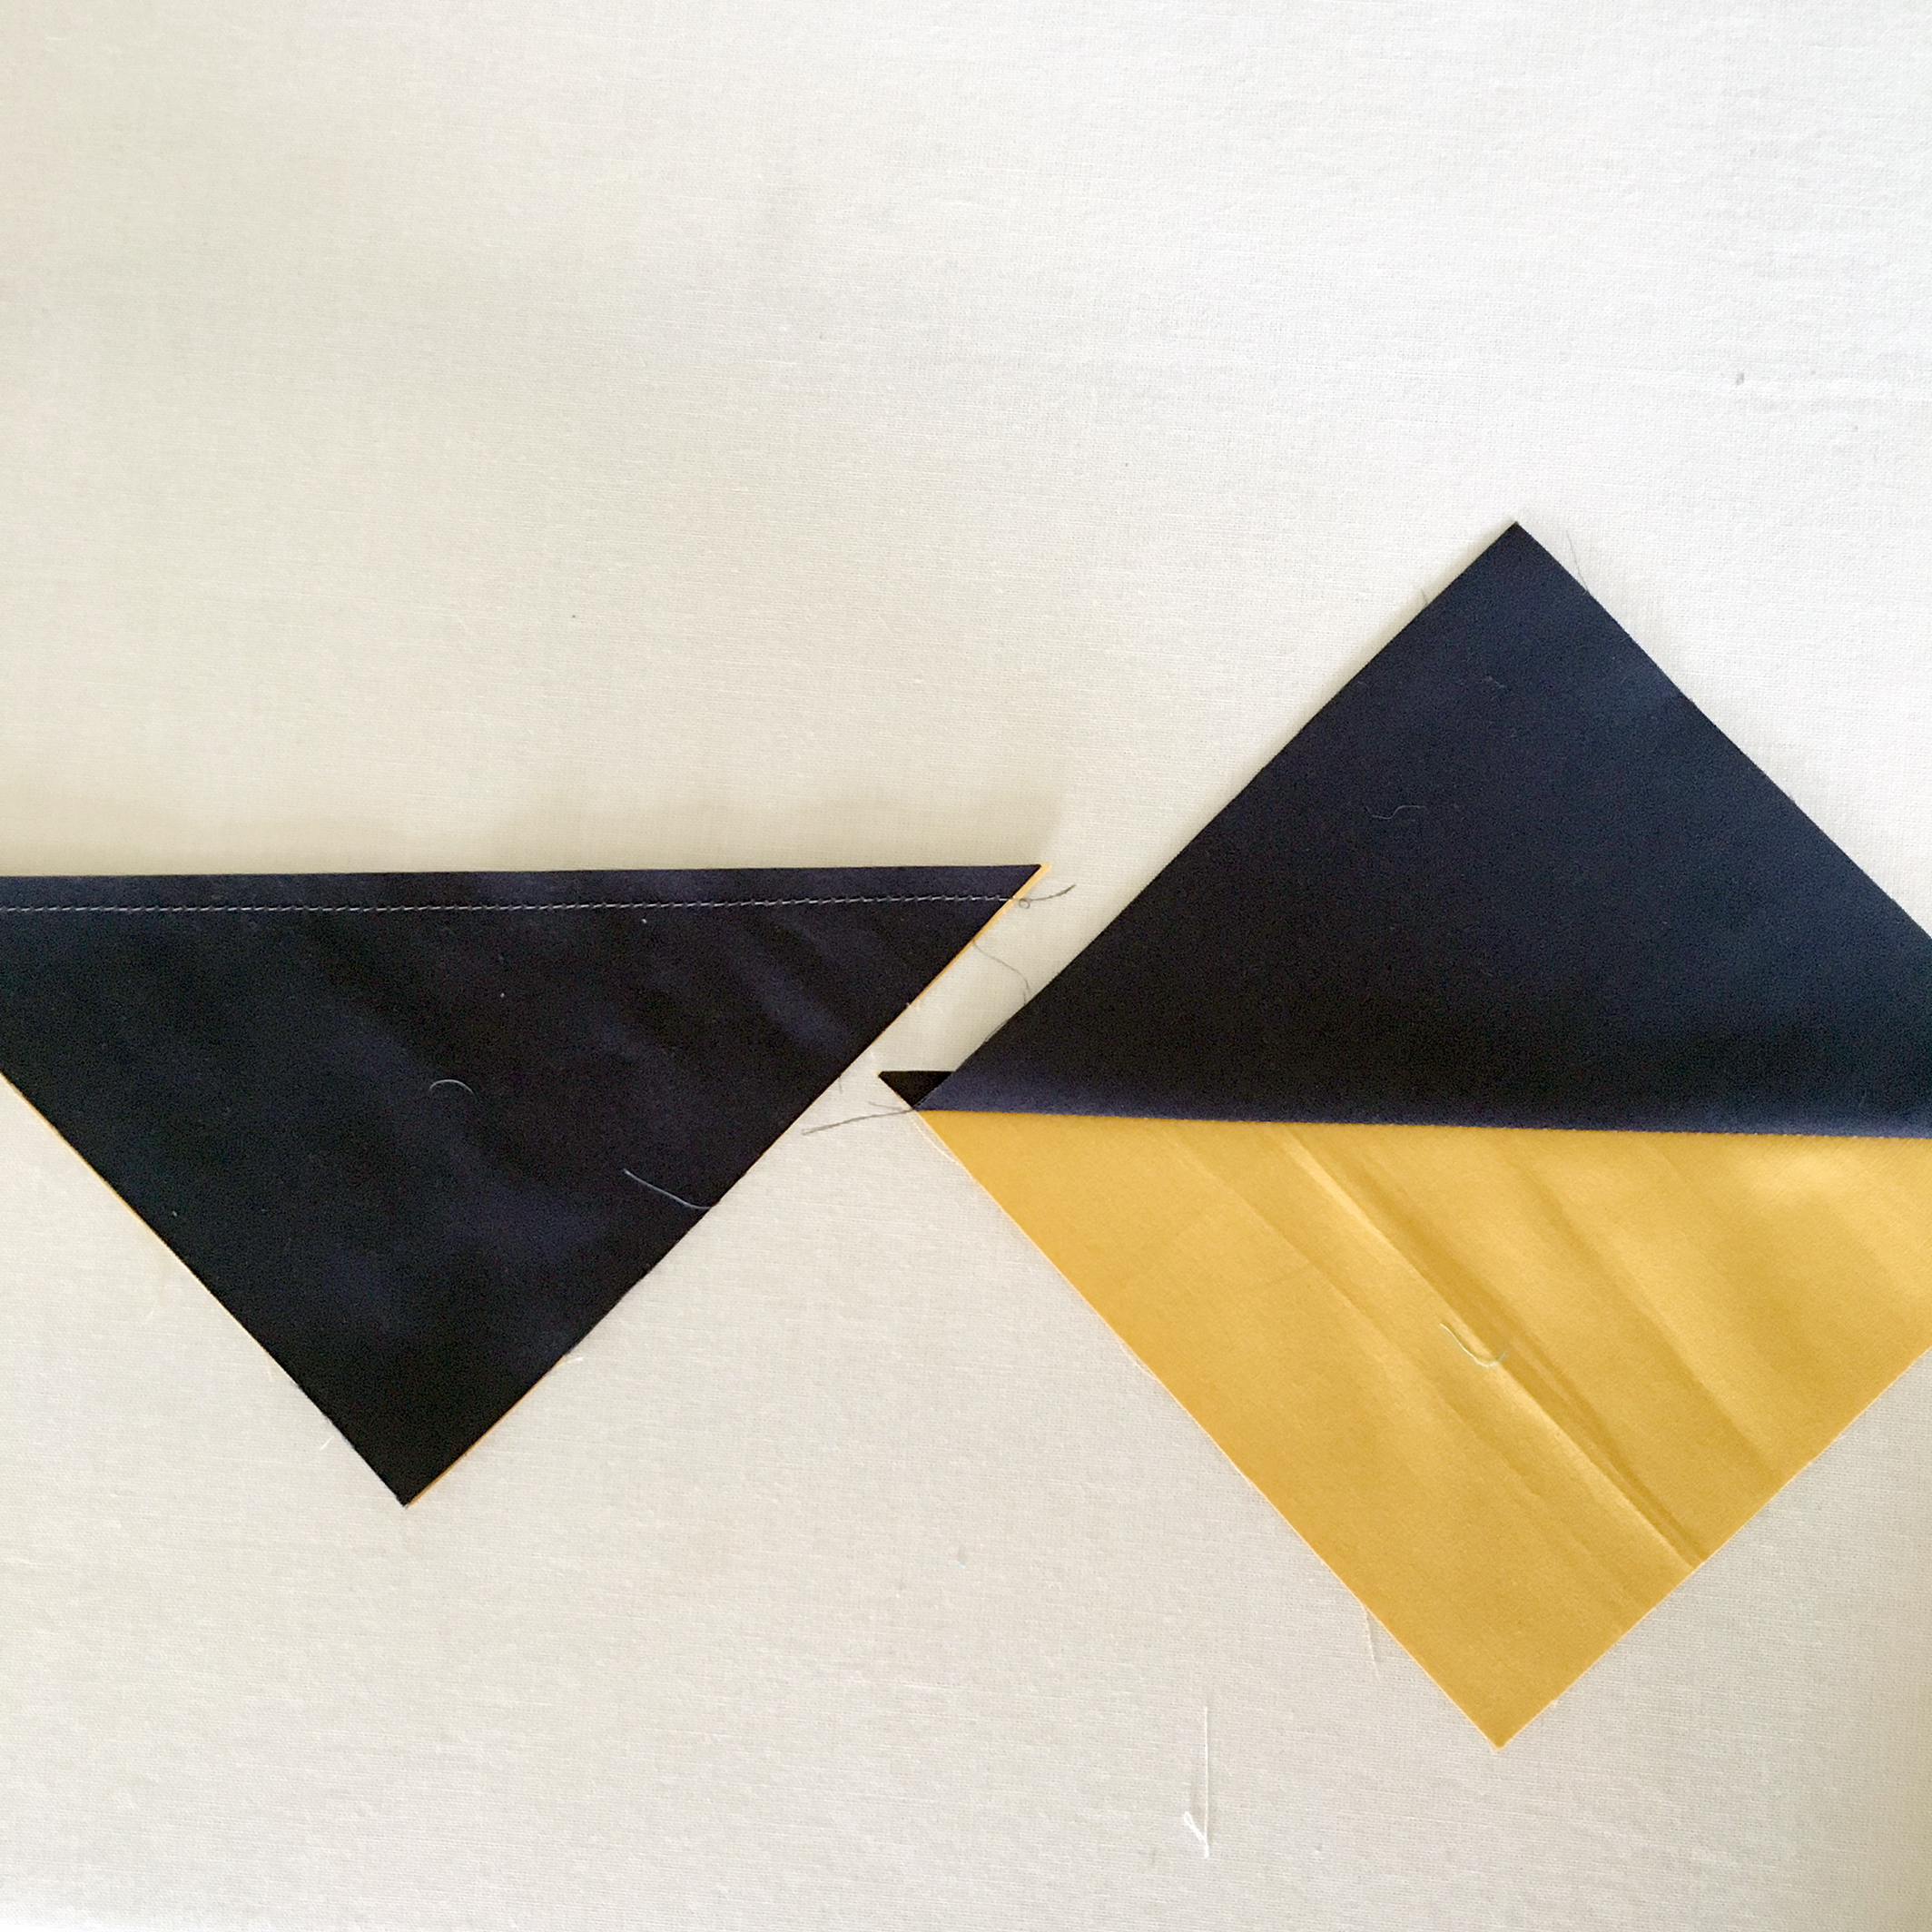
Press to flatten. Cut apart on the line to make two Half-Square Triangle (HST) units. 

TST 3.jpg

Press open toward the dark print. I press my seams in one direction. Read more about pressing seams open on Maureen's blog post for the Ribbon Star block. Tip when pressing seams in one direction: Place the fabric you want to press toward face up on the ironing board. When you open to press the seam will automatically be pressed toward the desired fabric. 

TST 4.jpg

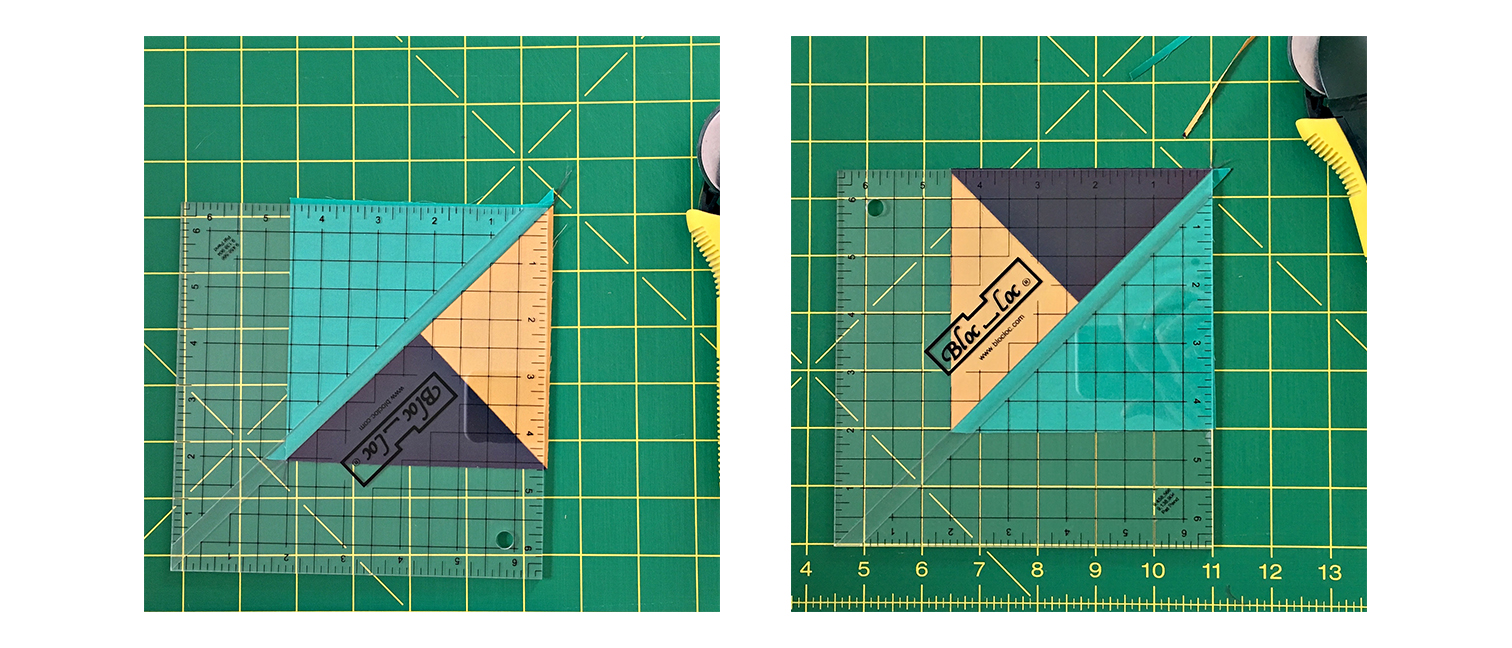
Trim units to 5" square. Since these HST units are oversized, the first trimming pass will cut off about an half an inch on the right side and top for a right hander. If you're left handed you will be trimming the left side and top. Notice the Bloc-Ruler is using the diagonal line to square the unit and the two sides not being trimmed on this first pass will still need squaring up as the 5'' marks of the ruler does not align with the outside edges.

Rotate the unit 180° and trim about 1/8" off the two remaining side to square to 5" square. Repeat on the remaining (untrimmed) HST unit. 

TST 5.jpg

Draw a diagonal line on each of the 5" squares. Pair a 5" square with a HST unit right sides together and the drawn line perpendicular to the seam line of the HST so the seams make an "X" (see first image below). 

Sew a 1/4" seam on each side of the marked line. 

TST 6.jpg

Press to flatten (you can see the seam line orientation of the HST unit creates an "X" in the pressing photo).

Cut apart on the line. Open and press toward the large triangle. Makes two, mirror image Triple-Square Triangle (TST) units. Make a total of four. Note: Be sure to pay attention to orientation of the TST units when assembling your block! 

TST 8.jpg

Trim the TST units in the same manner as you did with the HST units, using the diagonal seam line as a guide and taking care that all the points stays sharp. Trim only about 1/8" or less off the sides to trim to 4-1/2" square. Make a total of four TST units. 

BG0A4809.jpg

For my sampler quilt I'm using Art Gallery Fabrics Pure Elements solids. Using all solids is a personal challenge for this pattern designer and is not without it's own set of additional challenges. See my first week Community Sampler post for the inspiration behind my color palette. I've already made a few of the blocks for this sampler to work ahead and have found that I really need to bring my A-game for piecing because solids are very unforgiving and show every little missed point. Again, this is a good challenge even for a quilter that's been doing this awhile and I will need to take extra care in my stitching!

BG0A4846.jpg

Thank you for making this sew along so special I love seeing all the blocks being posted. Please visit Maureen's blog and see the progress she's making on her sampler quilt, using her beautiful AGF fabrics Love Story collection. Be sure to use the #CommunitySampler hashtag when posting your blocks to Instagram and tag both my @sharonhollanddesigns and @maureencracknell so we don't miss any of your beautiful work!

Community Sampler Sponsors

Don't forget that this Friday's a Giveaway Friday on the Community Sampler sew along. Maureen and I will take turns hosting a giveaway each week where one of our generous sponsors will be featured and offering amazing prizes both here on our blogs and a second chance on Instagram. I will be hosting the giveaway this Friday and you'll be instructed how to enter at that time.

Happy sewing!

Community Sampler Week #3

Community Sampler Week #3

Welcome to the Community Sampler sew along! My co-host and sister Art Gallery Fabrics designer Maureen Cracknell and I are so happy to have you sewing with us and look forward to spending the next few months with you.There are eleven blocks in …

Welcome to the Community Sampler sew along! My co-host and sister Art Gallery Fabrics designer Maureen Cracknell and I are so happy to have you sewing with us and look forward to spending the next few months with you.

There are eleven blocks in our quilt and each Wednesday will be a new PDF block release or finishing step for the quilt. If you are just joining us, pick up the Introduction PDF on the Sew Along page and you'll get a material list along with coloring pages so you can get started planning your quilt. 

Many of the patchwork units (like Quick-Corner, Flying Geese, Half-Square Triangle, and Square-in-Square units) used in this year's sampler have already been oversized to allow for trimming and squaring of units before assembling your block. Please cut your pieces EXACTLY as given in each of the PDF instructions because bumping up the size of the pieces from the measurements give will not bring great results in some cases.

Accurate cutting and use of a true 1/4'' seam allowance is a must for successful patchwork piecing. All your blocks will measure 12-1/2'' square (unfinished). Review how to cut strips, sew with a true 1/4'' seam allowance, and other helpful piecing tips on my "Are You Ready to Sew" post.

Time to get to our second block, Dovecote. Download the free PDF on the Sew Along page.

Half-Square Triangle (HST) Units

Dovecote utilizes a couple basic patchwork techniques that we will be using over and over again in our sampler. The sizes of the pieces may vary from block to block but the technique remains the same and so does the need to cut pieces accurately and sew with a true 1/4" seam allowance.

If you're wanting to use directional prints for either of the following patchwork techniques you may want to check out my tutorial for controlling directional prints that was posted during the Sewcial Bee Sampler sew along. 

HST 1.jpg

Draw a diagonal line on the wrong side of the lighter square as directed in the instructions. Place the marked square right sides together with a same-size square.

Sew an accurate 1/4" seam on either side of the line. Tip: Use the 1/2" wide marking ruler to mark sewing guides on either side of the center line, if necessary. 

HST 2.jpg

After sewing on either side of the line, press the unit flat before cutting apart on the line. 

HST 3.jpg

Press the units open. I press toward the dark fabric. Trim units to 3-1/2" square. One of the wonderful sponsors in this year's sew along is Bloc-Loc. In the first image, I'm using my 6-1/2" HST Bloc-Loc ruler to trim and square my HST. First I align the seam with the diagonal center of the ruler and trim the top and right side (not shown well in my first image).

Second I flip the entire unit 180° and trim the top and right side again to make the unit perfectly square. Watch more on the Bloc-Loc video for using the Half-Square Triangle ruler. 

No-Waste Flying Geese Units

Saving time and material is the beauty of fast-piece patchwork techniques. Start with accurately cut pieces according to the instructions and take care to use a true 1/4" seam allowance and you'll be rewarded with sharp points to your geese.

FG 1.jpg

Draw a diagonal line on the wrong side of the four squares used for the geese background. Place a marked square right sides together on the corner of the fabric square designated for the goose. Place a second marked square (right side down) on the opposite corner, overlapping the squares in the center. 

Sew a 1/4" seam on each side of the drawn line. Press to flatten.

FG 2.jpg

Cut apart on the line. Open and press to make two Flying Geese sections.

Noting orientation of the drawn line and print direction if applicable, place a marked square right sides together on the section as shown. 

FG 3.jpg

Sew a 1/4" seam allowance on each side of the drawn line. Notice how the stitched lines start in the "V" created by the layered fabrics. Press to flatten.

FG 4.jpg

Cut apart on the line to make two Flying Geese units. Open and press. Repeat with the remaining section for a total of four Flying Geese units. 

FG 5.jpg

Trim units to a 3-1/2" x 6-1/2" rectangle, leaving a 1/4" seam allowance on each side. I've used my 3'' x 6'' Flying Geese Bloc-Loc ruler to trim the point and right edge of my unit and leave the perfect amount of 1/4'' seam allowance. I then rotate my unit 180° and trim the remaining two sides. Watch more on the Bloc-Loc video for using the Flying Geese ruler. 

IMG_5179.jpg

For my sampler quilt I'm using Art Gallery Fabrics Pure Elements solids. Using all solids is a personal challenge for this pattern designer because I love prints! If you follow me on Instagram @sharonhollanddesigns then you may have seen some of the Instagram Stories I've posted about taking better photos. So far I've been jumping around with topics and have covered a bit of information about taking photos of quilts in room settings and how to take better flat lay or close photography photos. Unfortunately, the Instagram Stories only last 24 hours so they're not something you can go back to reference. I only mention this because I do hope to make some dedicated blog posts to photography in the future and continue to make impromptu IG Stories as opportunities arise. Either way, keep watching here on my blog and Instagram as I will do more segments as time permits. 

BG0A4719.jpg

As I mentioned above, working in all solids is a personal challenge for me. I'm certain the finished quilt will be lovely but I'm craving to work with prints. So, a solution for me was to photograph this week's Dovecote block on a vintage Barkcloth drapery panel! After taking this photo I thought it would be fun to show a couple other flat lay (taking the photo from above) background options. For a detailed post about taking Flat Lay Photography, see an earlier post I put together just on that subject.  

BG0A4723.jpg

For the photo of the block on the vintage Barkcloth there was no need for any additional props. That beautiful fabric had enough going on to steal the show! For my second background option I chose a rustic wood panel as the backdrop and added a fresh cut flower and brass quail figurine. Here we know the block is the star and it shows it off well. The rough wood background and natural elements create a moodier nature-inspired scene. I also wasn't as concerned about eliminating all the shadows in this photo because in this case they added to the story. One thing to note when taking flat lays of objects of various heights is to decide where the camera will focus. Most cameras will focus on the object closest to the lens. In this case it was the brass quail. I wanted the block to be sharp so I had to make sure my camera was selecting that plane as the priority. 

BG0A4738.jpg

For each of these flat lay photos I had the block set up near a window for light source and used only natural lighting. That means no flash (gasp, never use a flash!) and no artificial light source. Only light from a window and an inexpensive white foam core board to bounce the light from the window back onto the subject. Doing this will reduce shadows and even out the look of the image.

BG0A4731.jpg

This last flat lay set up included a few sewing props on a simple linen background. I put the block on point to add extra interest and energy to the photo. All that I didn't want included in the photo was cropped out. Remember to use the grid guidelines on your phone or camera (can be turned on in the settings) to help you keep your camera squared up to your block. Any tilt of your camera will magnify in your flat lay photo and make your block look distorted and wonky. We didn't do all the sewing and squaring up for it to look wonky in our photos! 

Community Sampler Sponsors

Sponsors Graphic Use-01.jpg

Lady Belle Fabric  Omnigrid   Aurifil Thread  Art Gallery Fabrics 

Hobbs Batting  Dritz  Fat Quarter Shop  Bloc-Loc

My co-host Maureen Cracknell and I are continually amazed by the joy and excitement each of you bring to our virtual community. Thank you for making this sew along so special. Please visit Maureen's blog and see the progress she's making on her sampler quilt, using her beautiful AGF fabrics Love Story collection. Be sure to use the #CommunitySampler hashtag when posting your blocks to Instagram and tag both my @sharonhollanddesigns and @maureencracknell so we don't miss any of your beautiful work!

Don't forget that this Friday's a Giveaway Friday on the Community Sampler sew along. Maureen and I will take turns hosting a giveaway each week where one of our generous sponsors will be featured and offering amazing prizes both here on our blogs and also on Instagram. Maureen will be hosting the giveaway this Friday and you'll be instructed how to enter at that time.


Gather Round - Bountiful Holiday Blog Tour

Gather Round - Bountiful Holiday Blog Tour

BG0A2964.JPG

Today's my stop on the Bountiful Holiday Blog Tour and I'm excited to share the new Gather Round free pattern with you!

Bountiful Holiday Graphic RGB.jpg

Every year, Thanksgiving comes around and I wish I'd thought ahead to organized a holiday sewing blog tour. Well, this year I was on the ball and planned way ahead. In fact, this tour has been in the making since my spring Bountiful tour! Some of the makers on that spring tour are also taking part in our holiday tour with the addition of some new bloggers as well. It's been a spectacular tour so far and I love the variety of projects geared toward gift giving, decorating your home for the holidays, or fast and fun sewing projects for any time of the year.

BG0A2519.JPG

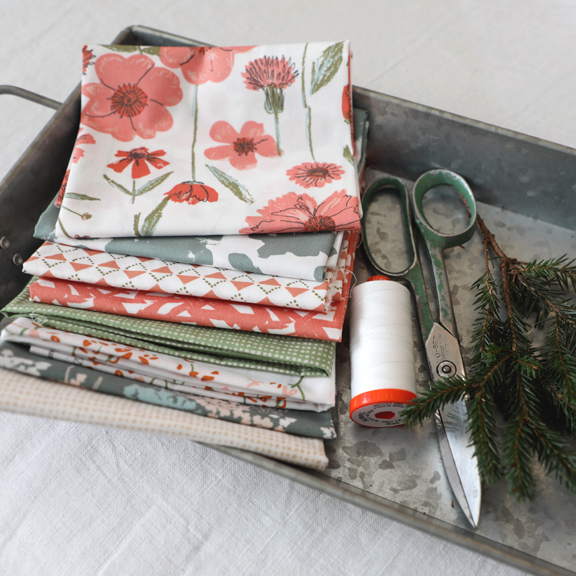
For my tour post and new free project, I selected Bountiful prints from both the Plant and Harvest color ways that create a winter Christmas feeling. For this project you will need fat quarters of 4 light and 4 dark prints, 1-1/2 yards backing, and (6) 18'' squares of Hobbs Thermore batting (affiliate link). The full material list with fabric sku numbers are listed on the PDF instructions.

I used 8 different prints in my placemats and mixed and matched for 6 different combination placemats. If you'd prefer a more unified look to your mats simply reduce the number of fabrics and up the yardage on each print so the total yardage is still the same. For example: To make 6 placemats you will need a total of 1 yard light print and 1 yard dark print. The backing and batting remain the same for 6 mats.

Download my free Gather Round pattern from my Free Patterns page. You'll find 24 free patterns there which are also great gift ideas for everyone on your sewing list.

BG0A3034.JPG

I must confess that the last few years I've not decorated for Christmas--life has just been too busy. The extent of my decorating is displaying the Christmas cards I receive from friends and family and switching out the quilted table runner from my fall runner to a more wintery looking runner. For me, I prefer to spend my time with my kids and cooking. 

BG0A2948.JPG

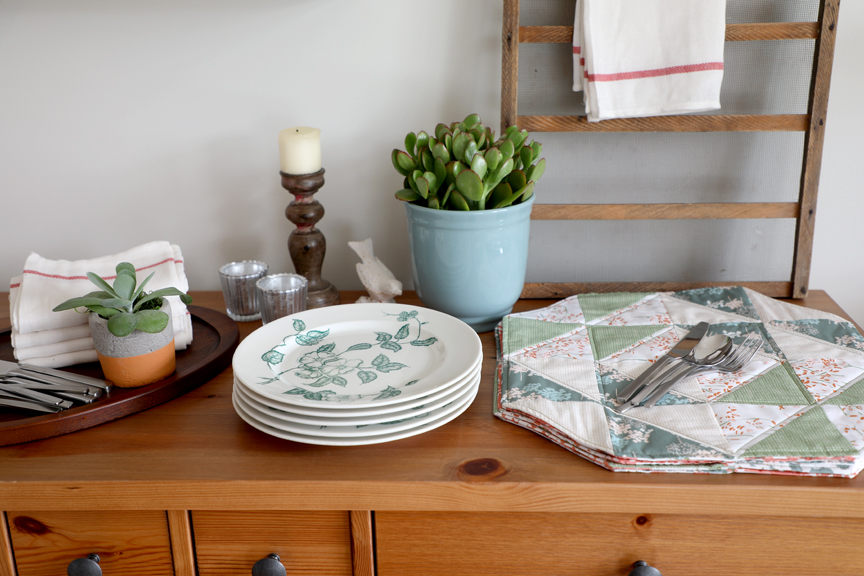
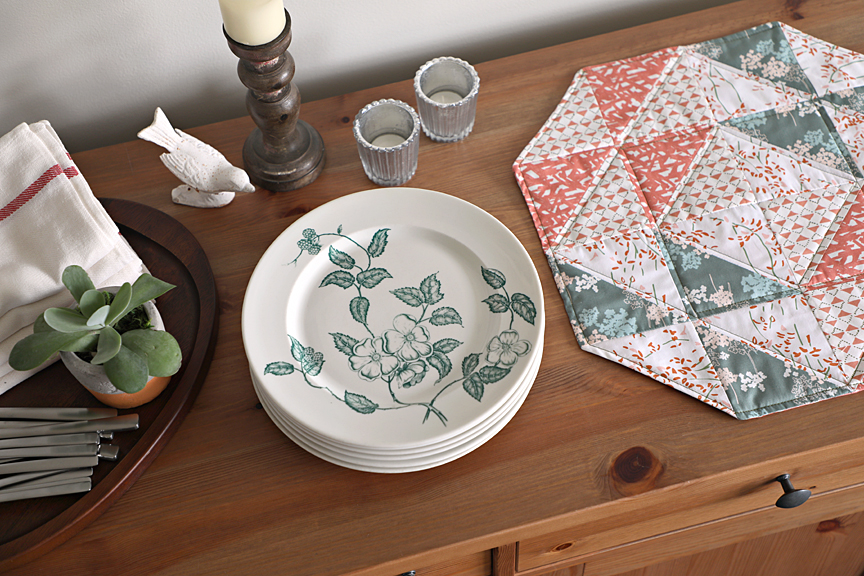
When I was thinking up what sort of project I wanted to share with you for my tour I wanted to make sure it would do not only double-duty for me, but for you as well. By making placemats, not only did I get a new look for my holiday table this year but we all get to enjoy a very useful (and quilty) project.

I like a round placemat because you can fit a lot of people around a table and not have mats edges overlapping. My Gather Round mat isn't round but is such a fun shape without messing with curves. Simple half-square triangles (HSTs) and a pillow case turned edge make these really fast to put together. I used a wonderful product from Hobbs Batting for the batting. It's called Thermore (affiliate link) and is perfect for placemats in many ways. The ultra-thin polyester fiber is not bulky at the seams and dishes won't rock or wobble. Because I turned the layers rather than bound the edges, it was nice not to have extra bulk at the seam and there's no need to clip the corners on this project when using this batting. Quilting can be 6-8 inches apart and the batting will still hold up in the laundry. It's very easy to quilt through by machine or by hand. This product would be great for T-shirt quilts, bags, clothing, and of course quilts like baby quilts that get a lot of use and laundering. 

BG0A2996.JPG

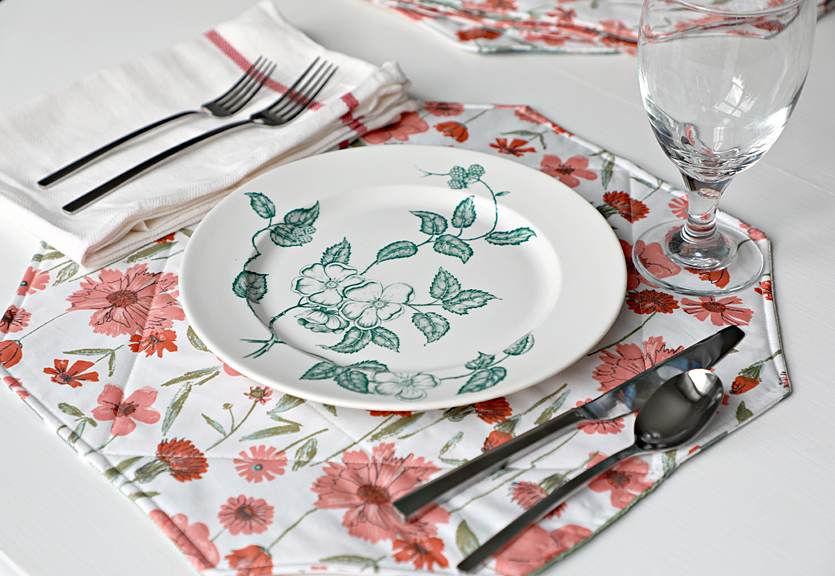
I decide to use my Perennial Renewal print from my Bountiful fabrics for the backing on all 6 mats. Now my placemats have a whole new (second) table setting option. I love how my vintage dishes look in this clean farmhouse table setting. I'm going to get a lot of use out of these next month!

BG0A3067.JPG

I chose to do minimal quilting on my mats. My top thread is the beautiful Aurifil 2887 green in a 28-weight thread so it really shows up on the front of the mat. I used a 50-weight 2021 white Aurifil thread in my bobbin to give the top stitch a little more definition between stitches and the white thread will blend in with the backing for a cleaner finished, whole-cloth look to the back of the mats.

BG0A2974.JPG

I had a lot of fun photographing these mats and now have a strong desire to do some holiday decorating! 

BG0A2984.JPG

I can't wait till my kids get home for the holidays and we can gather around our table (which is getting too small these days for the growing family) and share laughs, food, and time together. 

BG0A3046.JPG

Thank you for visiting my blog and all the love and support you've shown me (and my fabrics) this past year. I hope you're enjoying the Bountiful Holiday Blog Tour and pay visit to all the talented designers that have already shared their projects and the rest that will follow me. Peta Peace of She Quilts A Lot shared a fabulous free pattern yesterday to make a beautiful kitchen towel, mitt, and hot pad set that would be so difficult to give away so plan on making two sets! Friday Heather Andrus of Quilt Story will be hosting the tour and she's stitched up a must make for a little girl on your holiday sewing list. 

11-01  Mathew Boudreaux  Mister Domestic

11-02  AnneMarie Chany  Gen X Quilters

11-03  Brooke Sellmann  Silly Mama Quilts

11-06  Blair Stocker  Wise Craft Handmade

11-07  Silvia Sutters  A Stranger View

11-08  Peta Peace  She Quilts A Lot

11-09  Sharon Holland  Sharon Holland Designs

11-10  Heather Andrus  Quilt Story

11-13  Maureen Cracknell  Maureen Cracknell Handmade

11-14  Anjeanette Klinder  Anjeanettek

11-15  Alexis Wright  My Sweet Sunshine Studio

11-16  Katie Skoog  The Simple Life Company

If you're an Instagram user and follow my IG feed, I'll have daily postings and links to the Bountiful Holiday Blog Tour Makers and their projects and it will also be easy to follow along by searching the hashtag #BountifulHolidayBlogTour. I hope to see you following along on that platform as well as visiting and getting to know these amazing blog tour Makers. 

There will a giveaway at the end of the blog tour. My generous sponsor for this tour is the Fat Quarter Shop and they're giving away a 10-pc Bountiful Harvest colorway fat quarter bundle. On November 17th, 2017 I'll post the final weekly recap post along with all the details on how to enter into the Bountiful Harvest fat quarter bundle giveaway. You'll have a chance to enter right here on the blog (on the that final post, so be watching for that) and also on Instagram.

Every time you share a tour image along with the #BountifulHolidayBlogTour hashtag, to your public Instagram account, you'll automatically have your name put into the hashtag pool and automatically be entered into the drawing. So share and repost those Instagram images by the Bountiful Holiday Blog Tour Makers often and use that hashtag (hint, hint)!

A blog winner and an IG winner will be drawn on Monday November 20th. All this information will be given again at the end of the tour but thought you'd like a head's up :)

HarvestBountiful-FQB-Front.jpg

For more Bountiful fabrics project inspiration, check out the Art Gallery Fabrics virtual Look Book!

Cover Quilt

Cover Quilt

Used with permission from Quilts and More™ magazine. ©2018 Meredith Corporation. All rights reserved.

Used with permission from Quilts and More™ magazine. ©2018 Meredith Corporation. All rights reserved.

Yup, that's my quilt in the large photo with the chair on the cover of Quilts and More magazine! Not only is my quilt on the cover of this issue but I have two quilts in this Quilts and More Winter 2018 magazine. 

Both of the quilts are made using my Bountiful fabrics for Art Gallery Fabrics and both are super easy to make. 

Used with permission from Quilts and More™ magazine. ©2018 Meredith Corporation. All rights reserved.

Used with permission from Quilts and More™ magazine. ©2018 Meredith Corporation. All rights reserved.

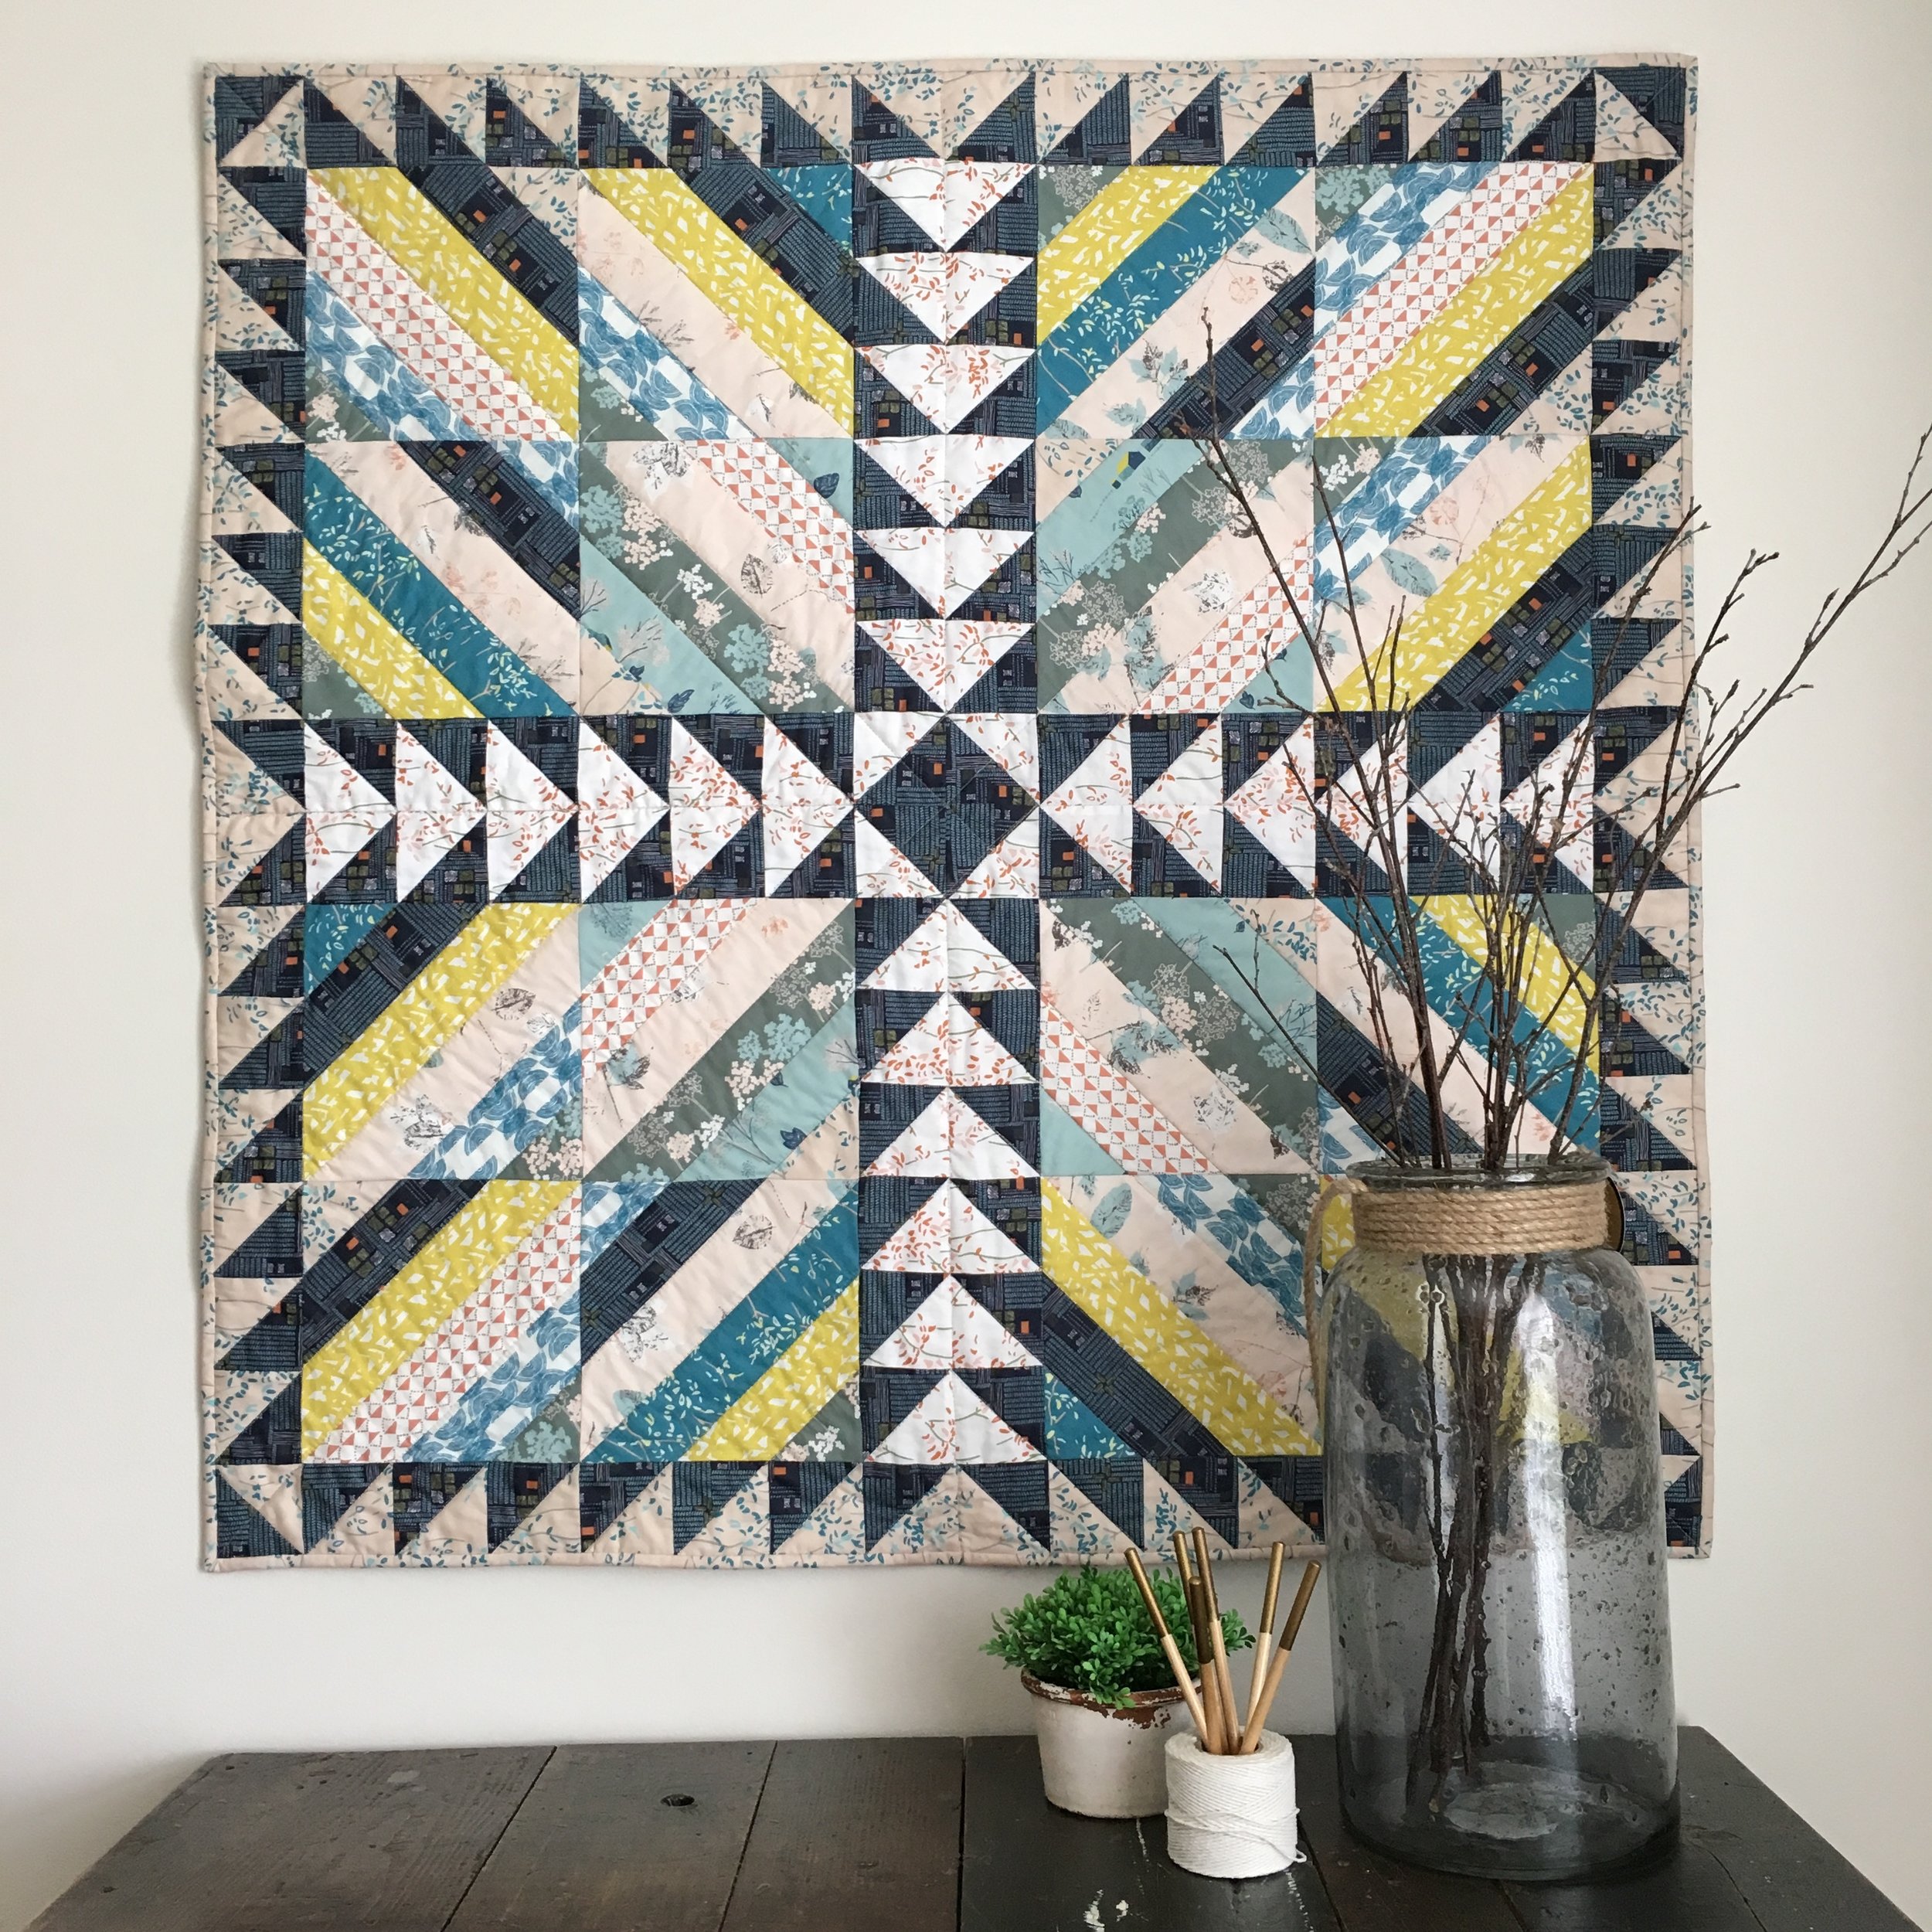
The cover quilt is a mix of simple foundation paper-piecing (FPP) and traditional patchwork. I had originally called this quilt Barnstorm because the diagonal FPP sections made me think of barnwood panels. The radiating design has so much energy and makes for a graphic quilt. In the magazine this project has been renamed (editors do that) to: Bursting with Energy.

Photo and quilt by Sharon Holland

Photo and quilt by Sharon Holland

The second quilt in this same issue is also made using Bountiful fabrics with the addition of Art Gallery Fabrics natural linen and Shannon fabrics faux rabbit minky. This projects is technically not a quilt but a throw because it has no batting and is tied instead of quilted. The drape on this piece is absolutely amazing and the faux rabbit makes it so luxurious and a high end designer piece. 

Used with permission from Quilts and More™ magazine. ©2018 Meredith Corporation. All rights reserved.

Used with permission from Quilts and More™ magazine. ©2018 Meredith Corporation. All rights reserved.

I made both these quilts for Spring Quilt Market to display in my Bountiful booth. I was thrilled when the All People Quilt editor snatched them up for their publications. It's so hard having to wait to share my makes and it feels like all my work since spring is now coming out at once. 

This was a purely for fun project and something completely different than I've ever done before. I wanted to showcase my hide print from Bountiful but interject texture and Farmhouse-style into the project. The answer was the faux fur and pompom ties!

Used with permission from Quilts and More™ magazine. ©2018 Meredith Corporation. All rights reserved. Photo by Sharon Holland

Used with permission from Quilts and More™ magazine. ©2018 Meredith Corporation. All rights reserved. Photo by Sharon Holland

This project has it all and could actually be one to get the kids involved in. Truth be told, I'm not sure how well this project would launder. But I do suggest using tapestry wool for the pompom as it's very hard wearing and I would launder by hand if needed. But who cares, right? This is such an amazing tactile throw blanket and talk about wow power--you just have to make one!

I was so thrilled that Meredith Corporation (All People Quilt publisher) bought all my pompom step out photos for this project. I had so much fun making, writing, and photographing this one and then to have the validation of being paid for the photography is a big deal for this gal. So, when you see the article, take note of my name there in the photo credits :)

BG0A2798.JPG

I'm heading off to Houston tomorrow to attend Quilt Market. There I'll be having a trunk show of quilts from my book at a Schoolhouse session 1:55-2:25 on Friday and three book signings:

Saturday - 11:00 - 11:45 in the Hobb's Batting booth #347

Saturday - 3:00 -3:30 in the Landauer Publishing booth #2040

Sunday - 10:00 - 10:30 in the Brewer booth #734

I hope you'll stop by and say hi if you're planning on attending.

The All People Quilt booth with have both of my quilts on display so I will snap some pics and show you those on my Market Review post when I get back. Otherwise, be watching my Instagram feed @sharonhollanddesigns for postings while I'm at Market. 

Bountiful Holiday Graphic sq-01.jpg

Looking ahead: Starting November 1st I will be hosting the Bountiful Holiday Blog Tour and have lined up some super talented Makers that will be bringing you fast, fun, and fabulous sewing projects for the holidays, gift giving ideas, and home decor sewing. Plus I will have a Harvest colorway fat quarter bundle giveaway at the end of the tour courtesy of the Fat Quarter Shop. 

Stop back soon, there's so much more to share with you!