Signature Look Book

Signature Look Book

Spontaneous quilt designed by AGF Studio (free pattern)!

Spontaneous quilt designed by AGF Studio (free pattern)!

It's such an exciting day when Art Gallery Fabrics publishes the Look Book for a fabric collection and even more exciting when it's my Signature fabrics!

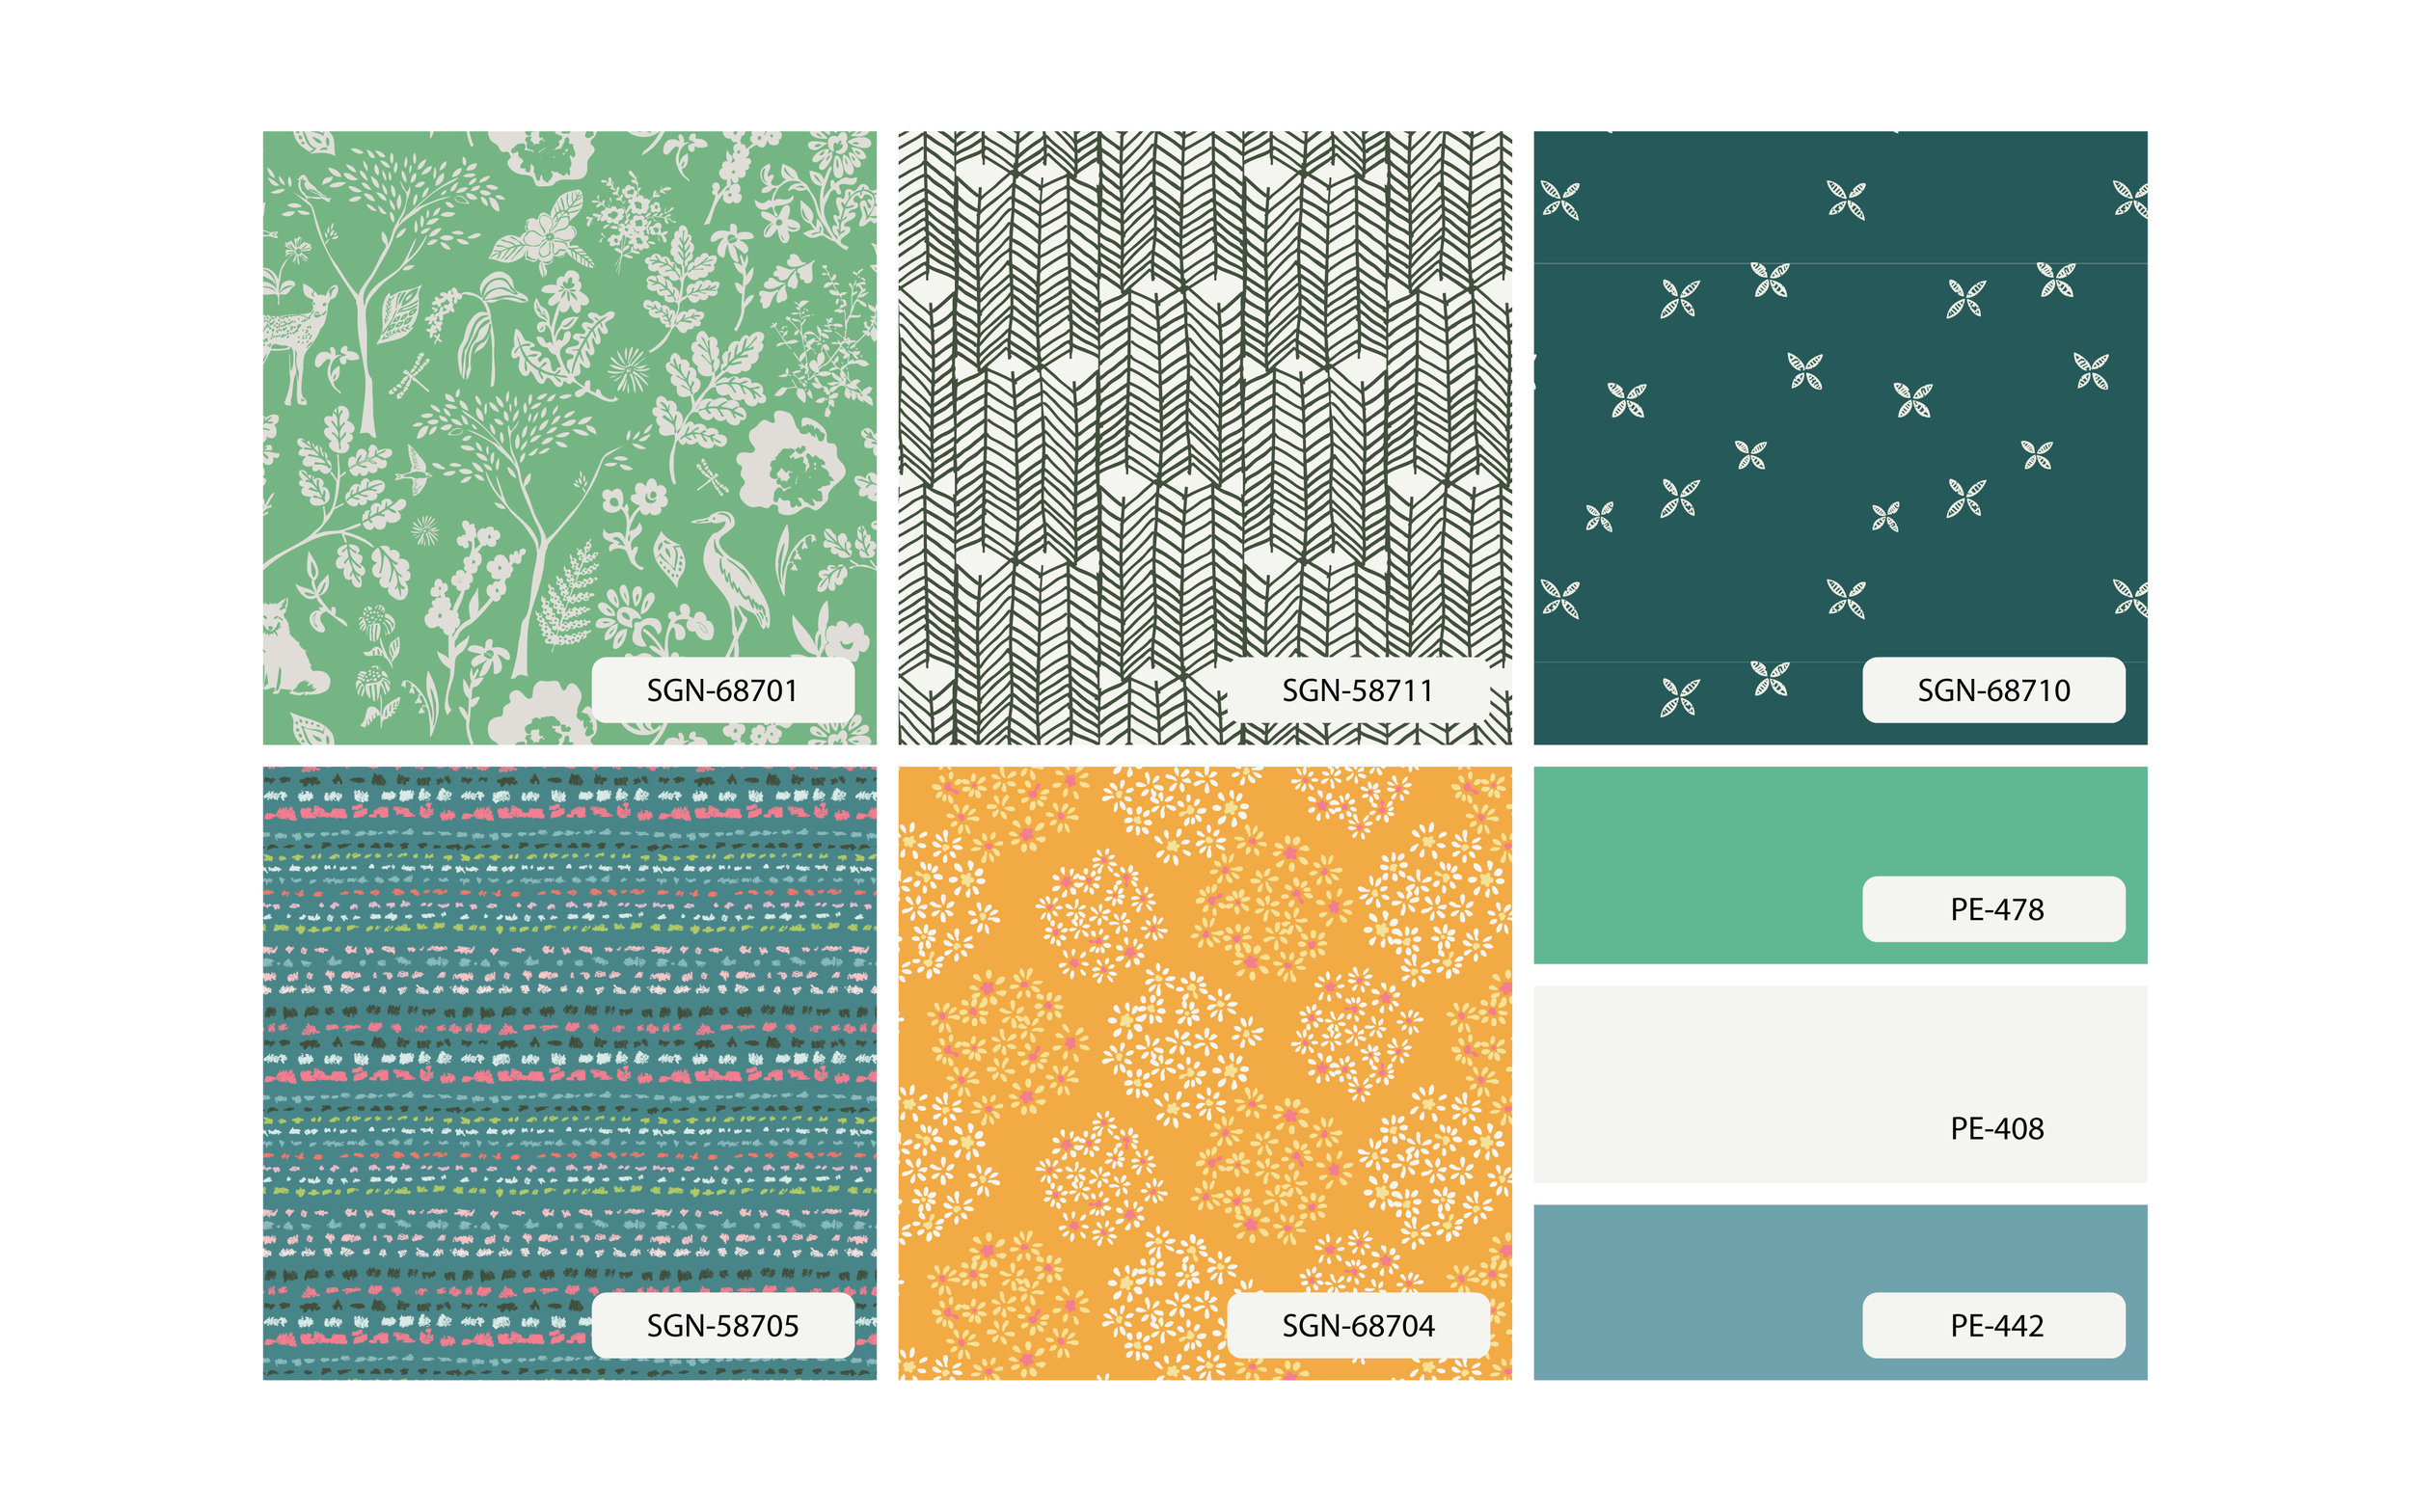
Signature fabrics can be found at your local quilt shop (or if not, be sure to ask for them to be stocked!) and online fabric shops like the ones listed on my Fabrics page

Find sewing inspiration within the 68-page Signature Look Book filled with beautifully curated projects and images.

Image courtesy of Art Gallery Fabrics

Image courtesy of Art Gallery Fabrics

Floral summer dresses for that comfortable yet always put together look are a fashion must this year!

Discover cute bag and tote ideas and show off your Signature style!

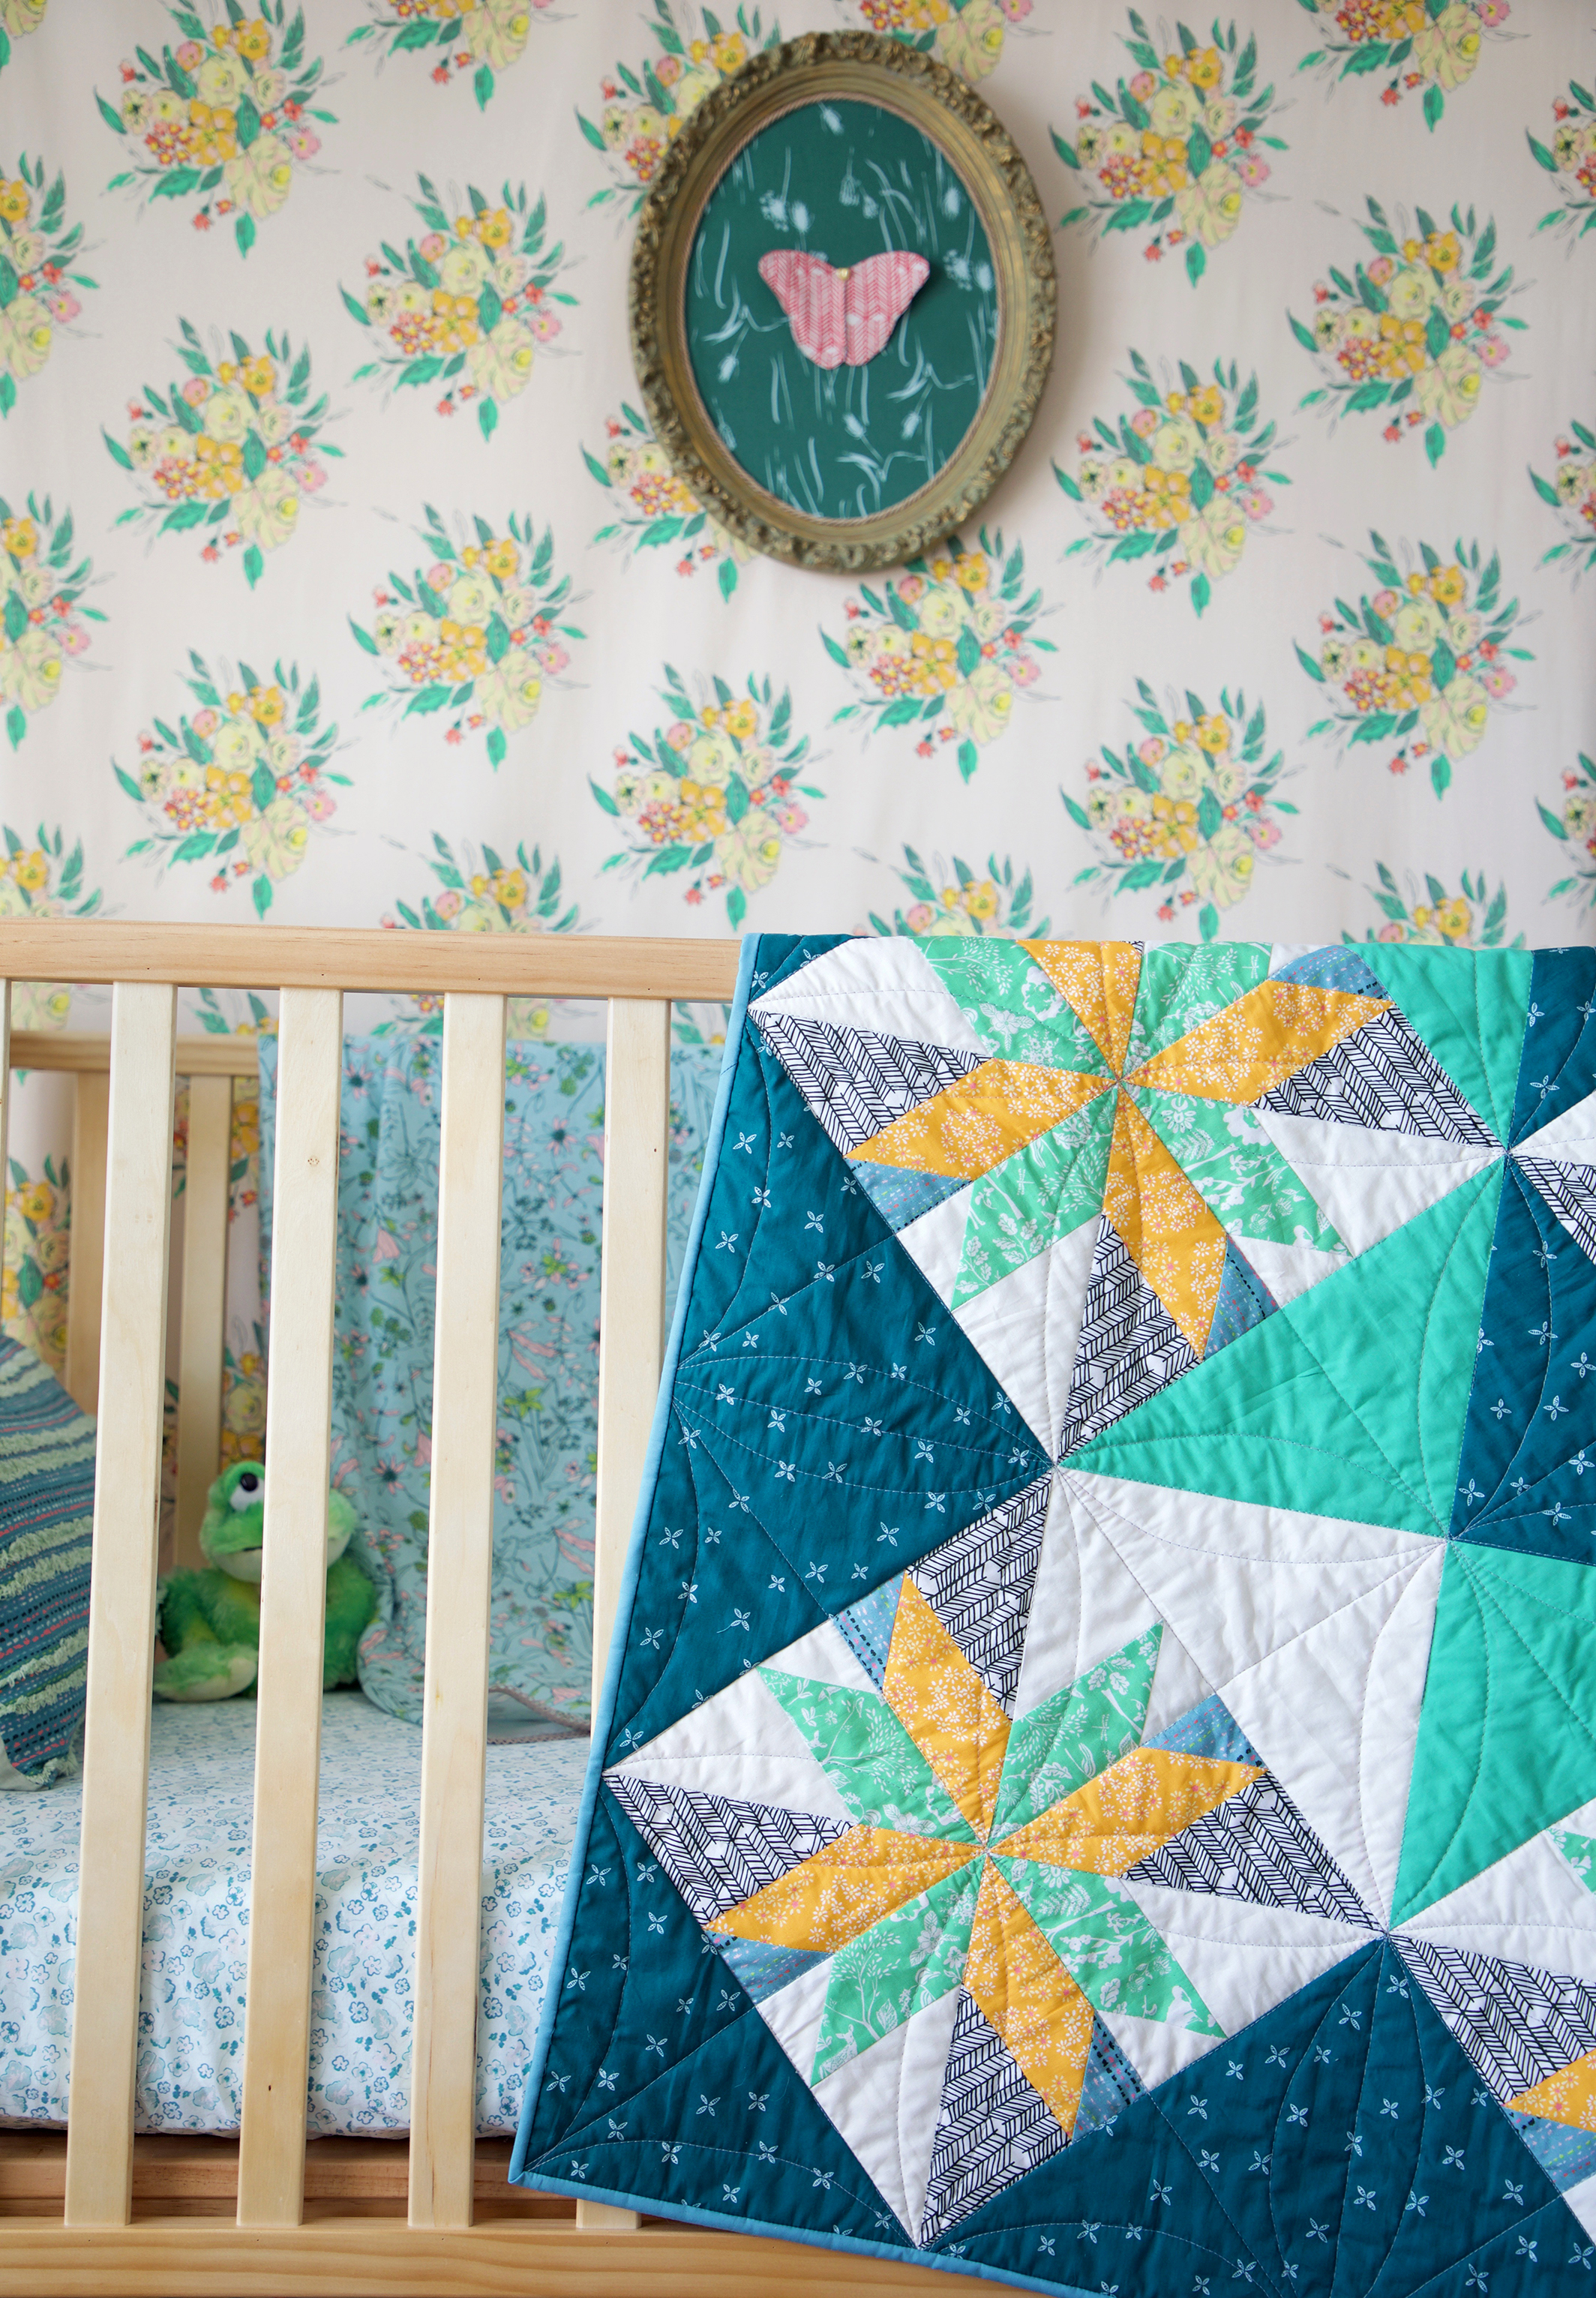
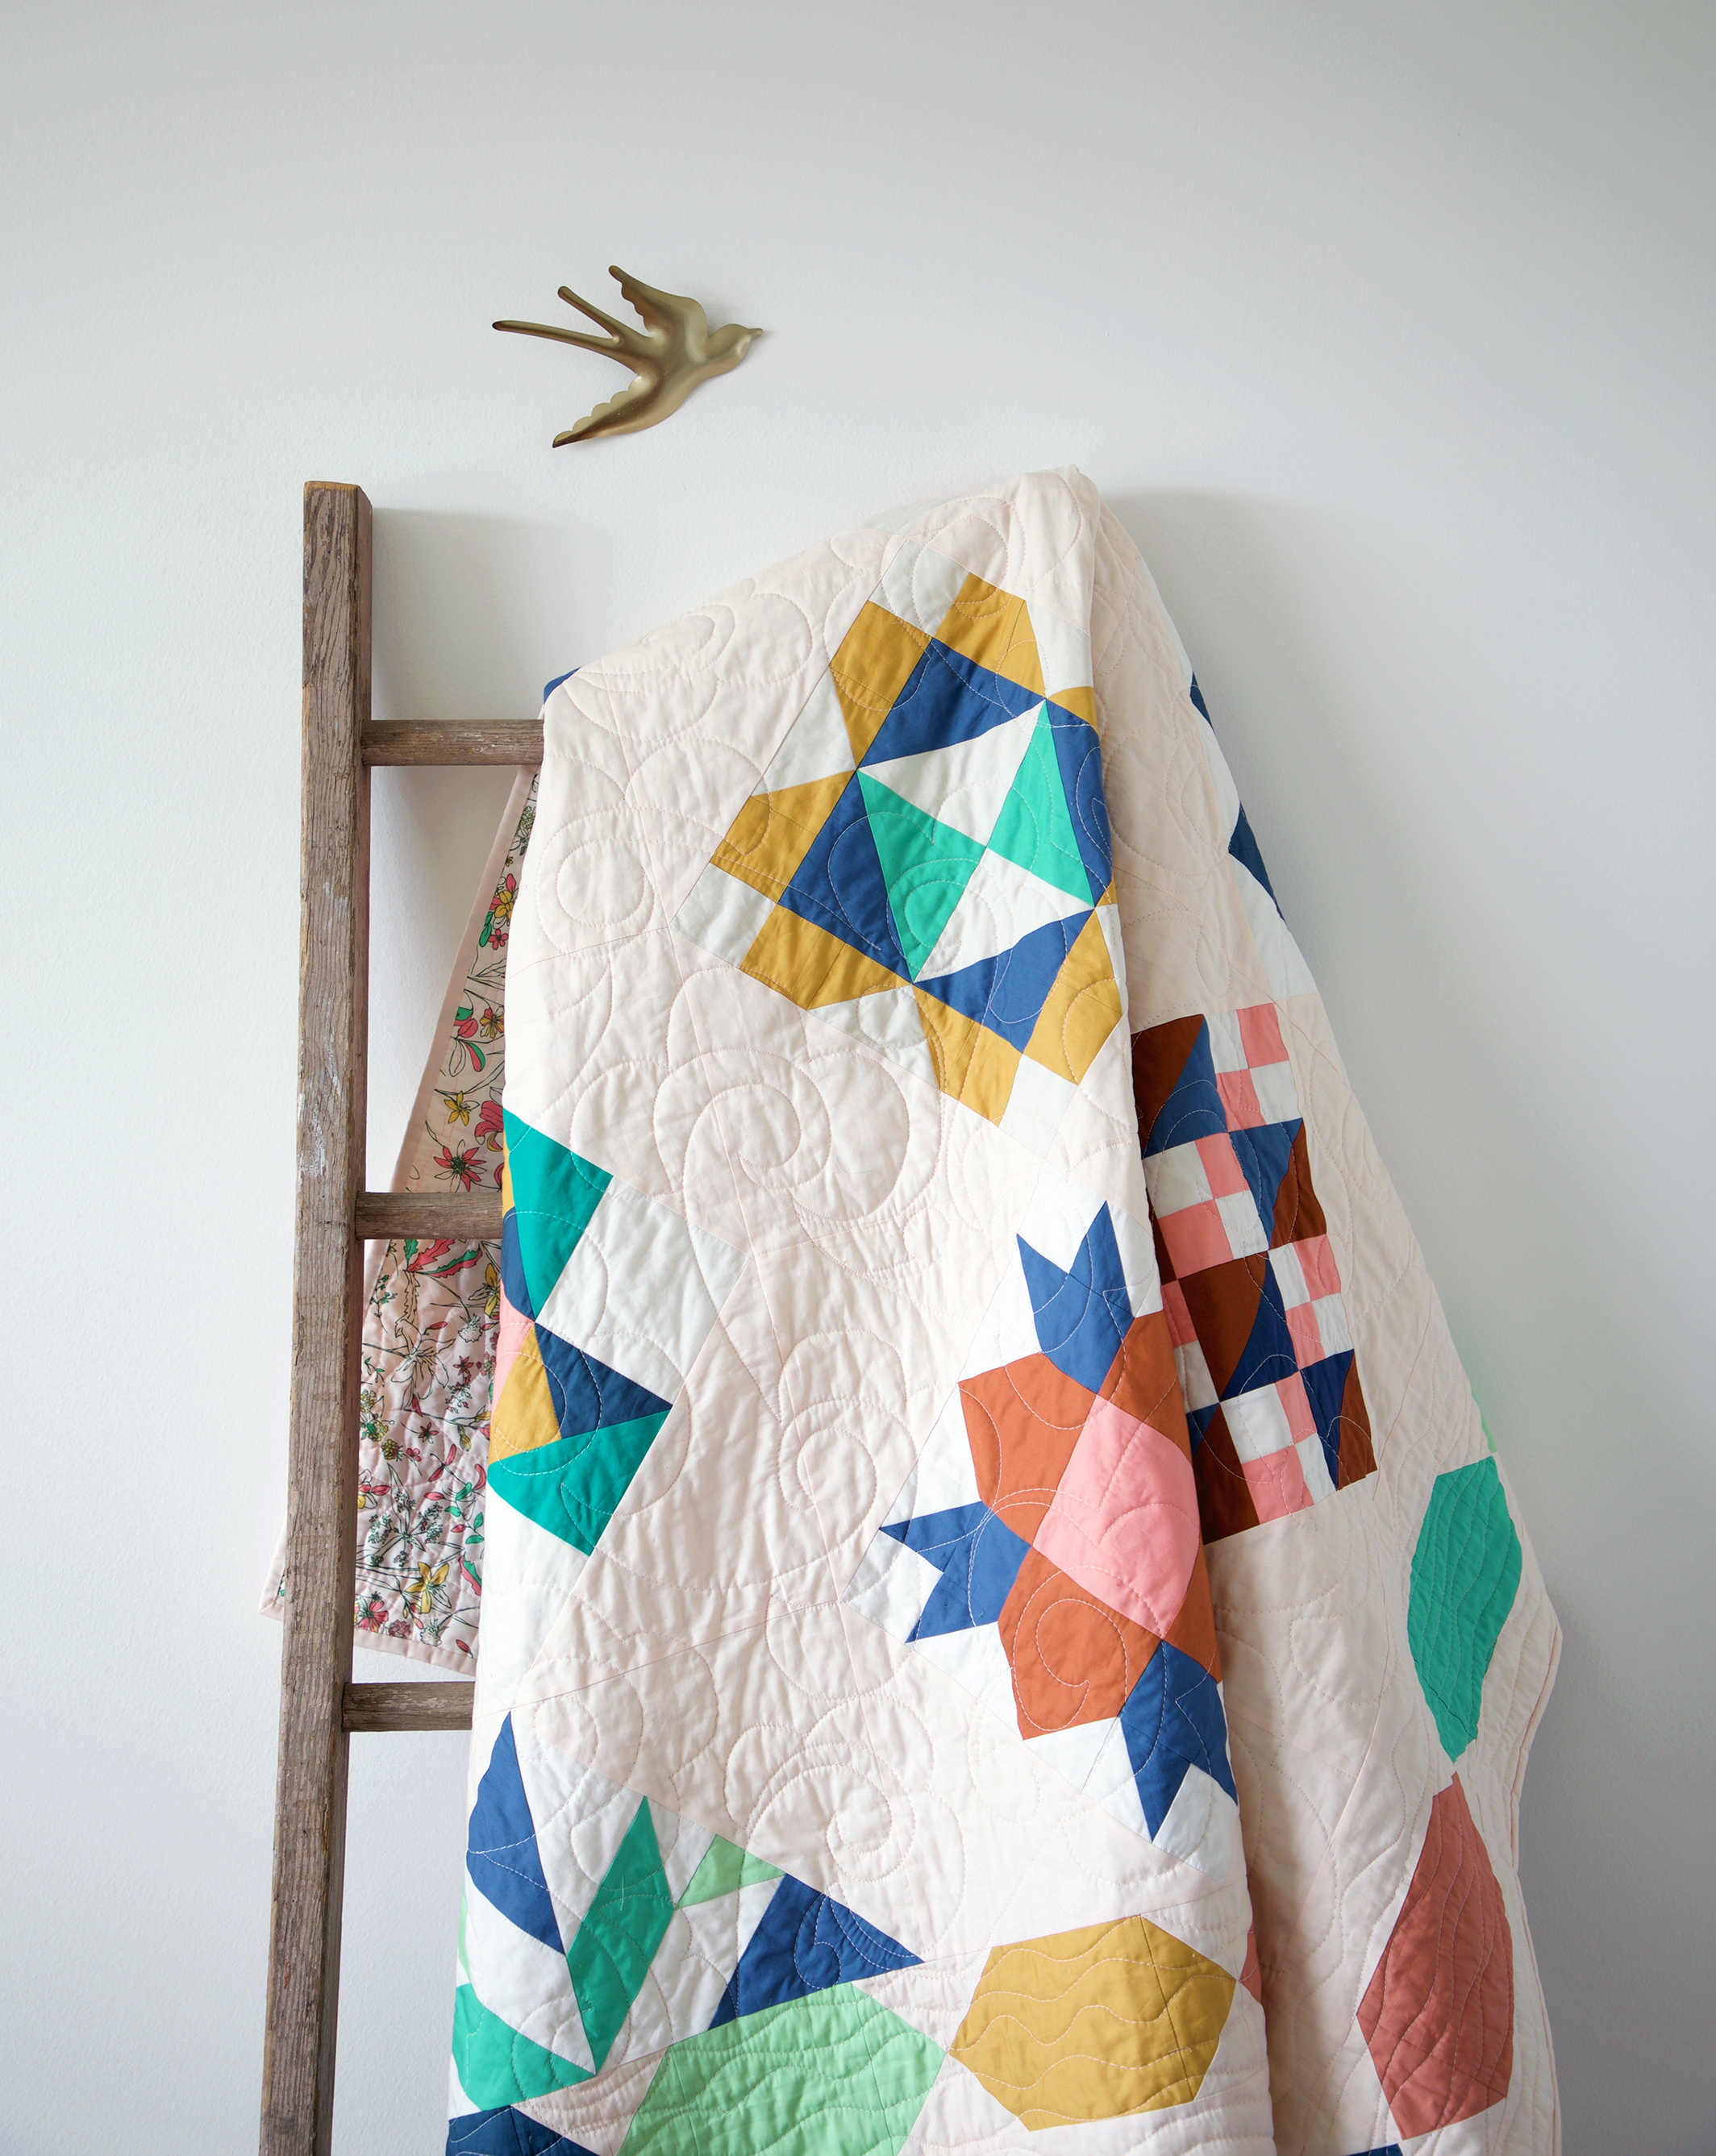
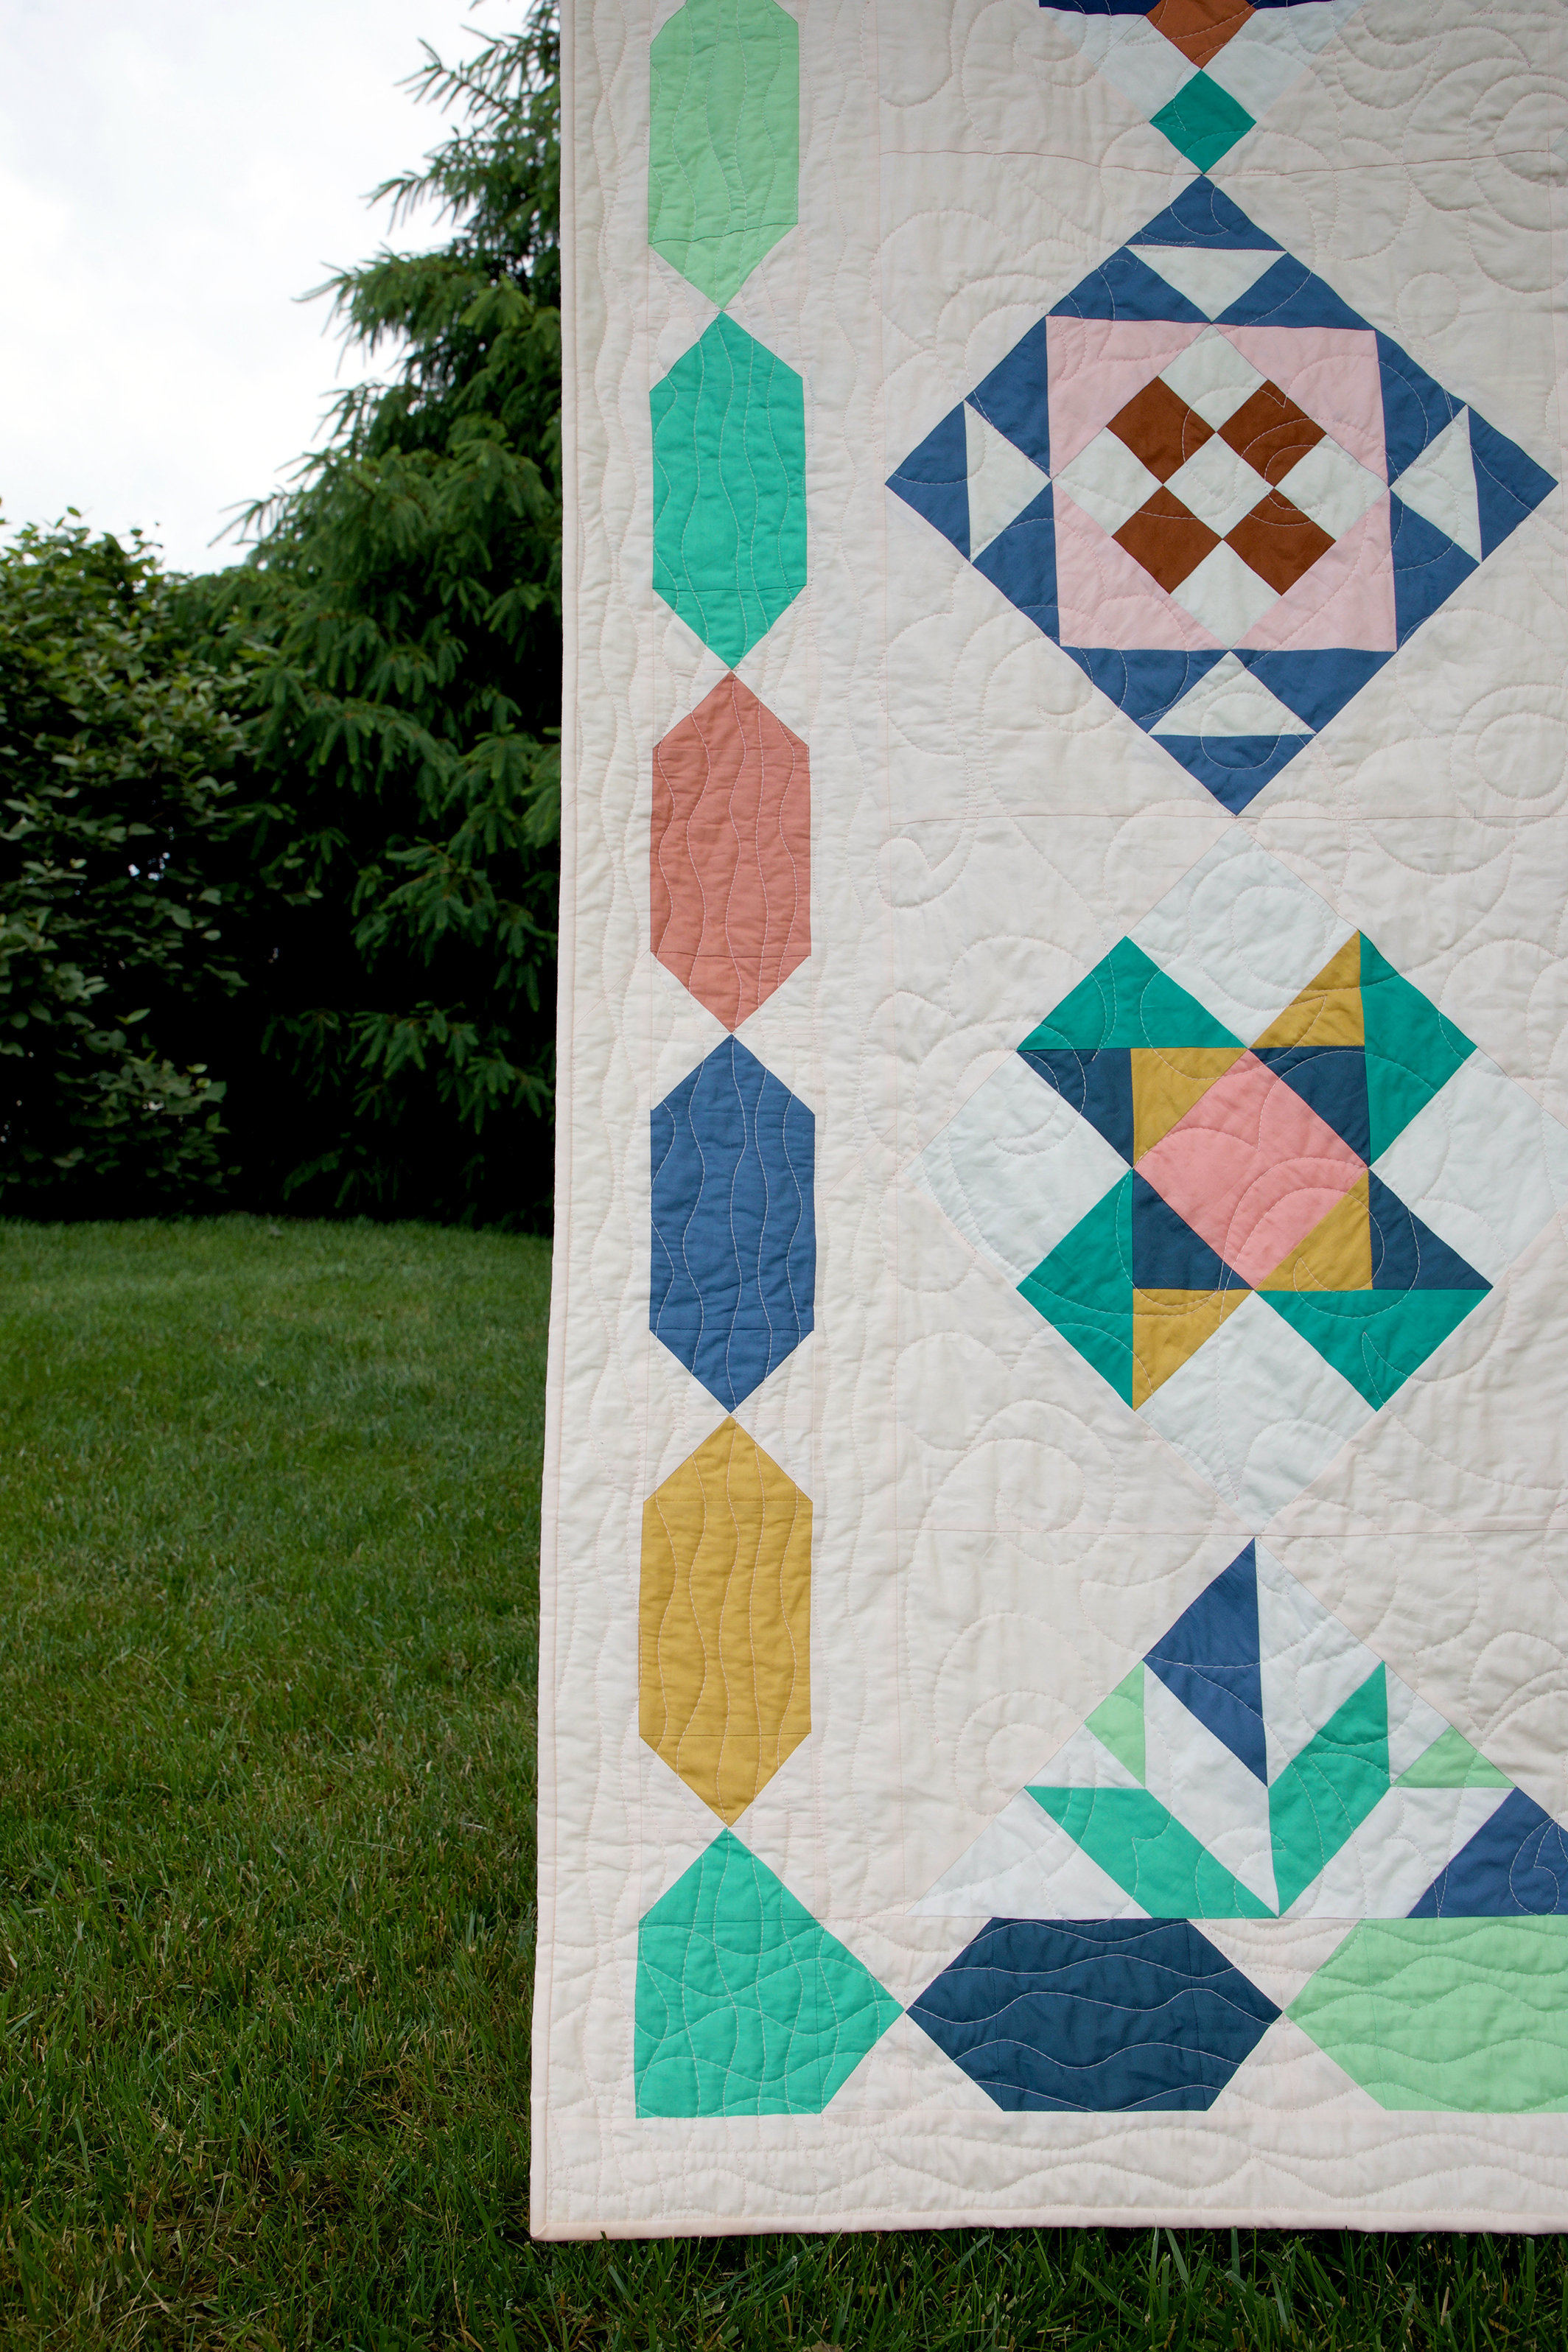
Let's not forget the quilts! Download the free Sunflower quilt I designed for this collection or the gorgeous Spontaneous quilt designed by AGF Studio. 

My Signature Sampler Graphics Sq.jpg

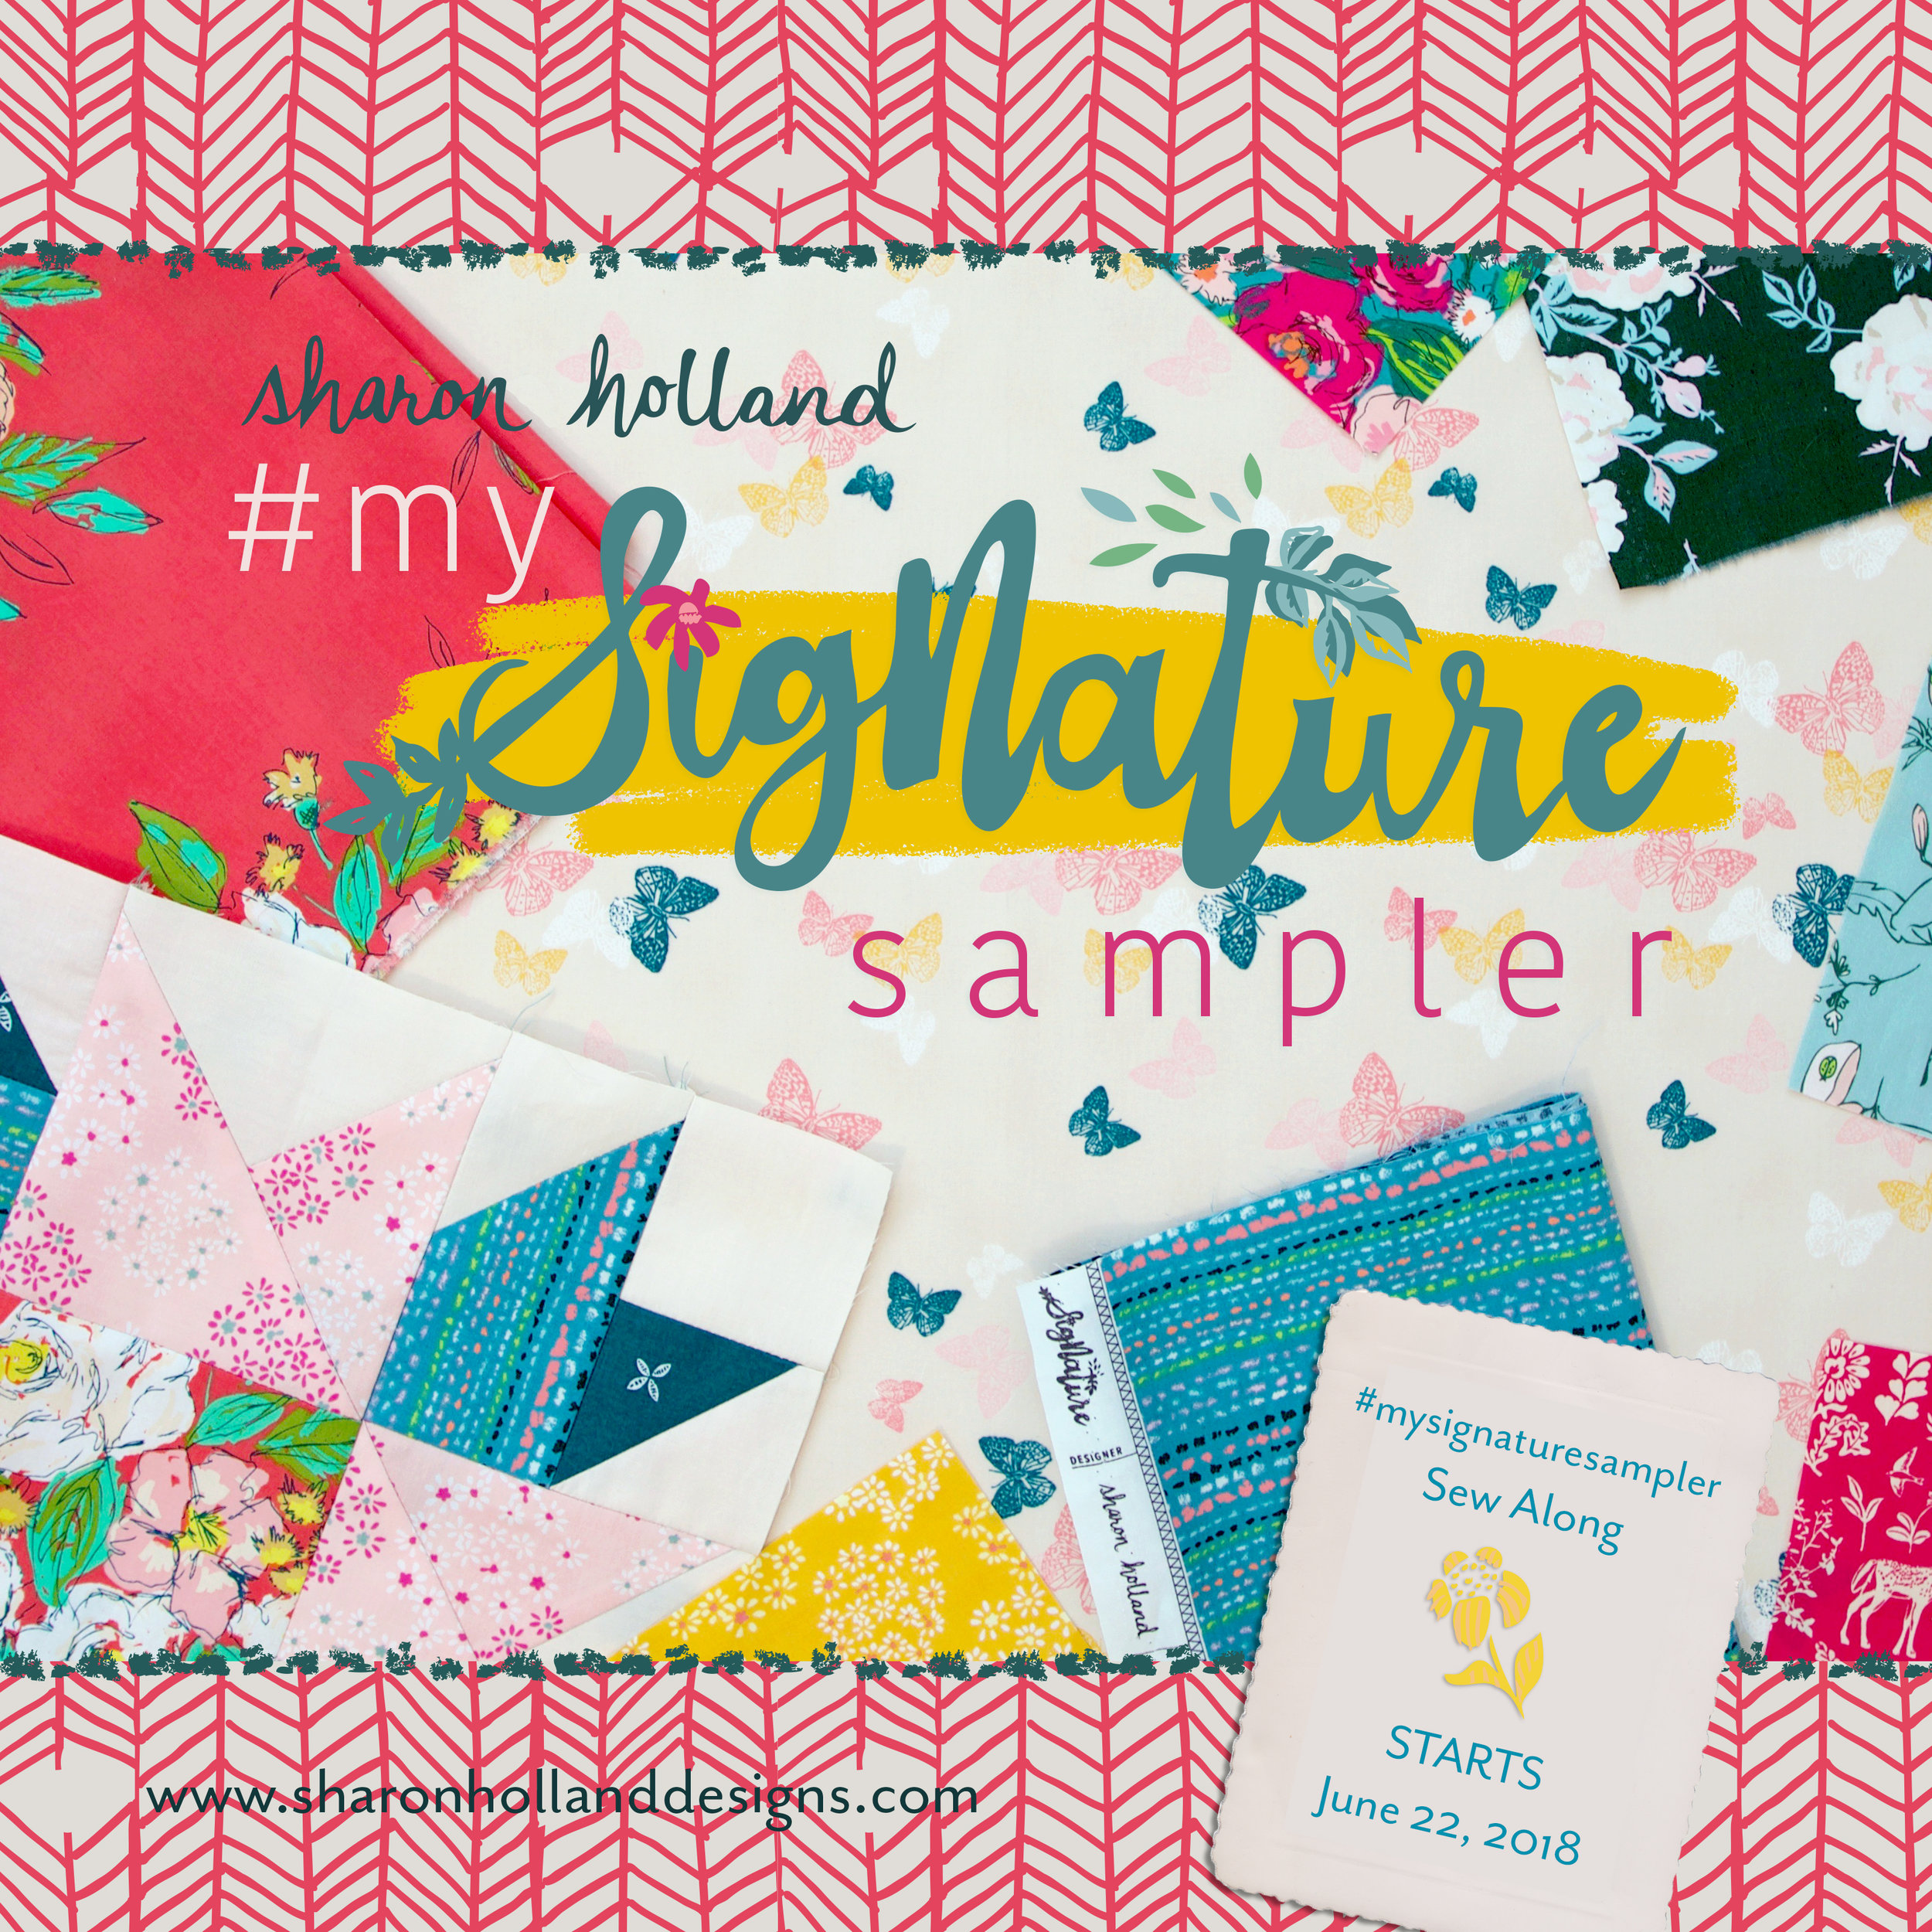
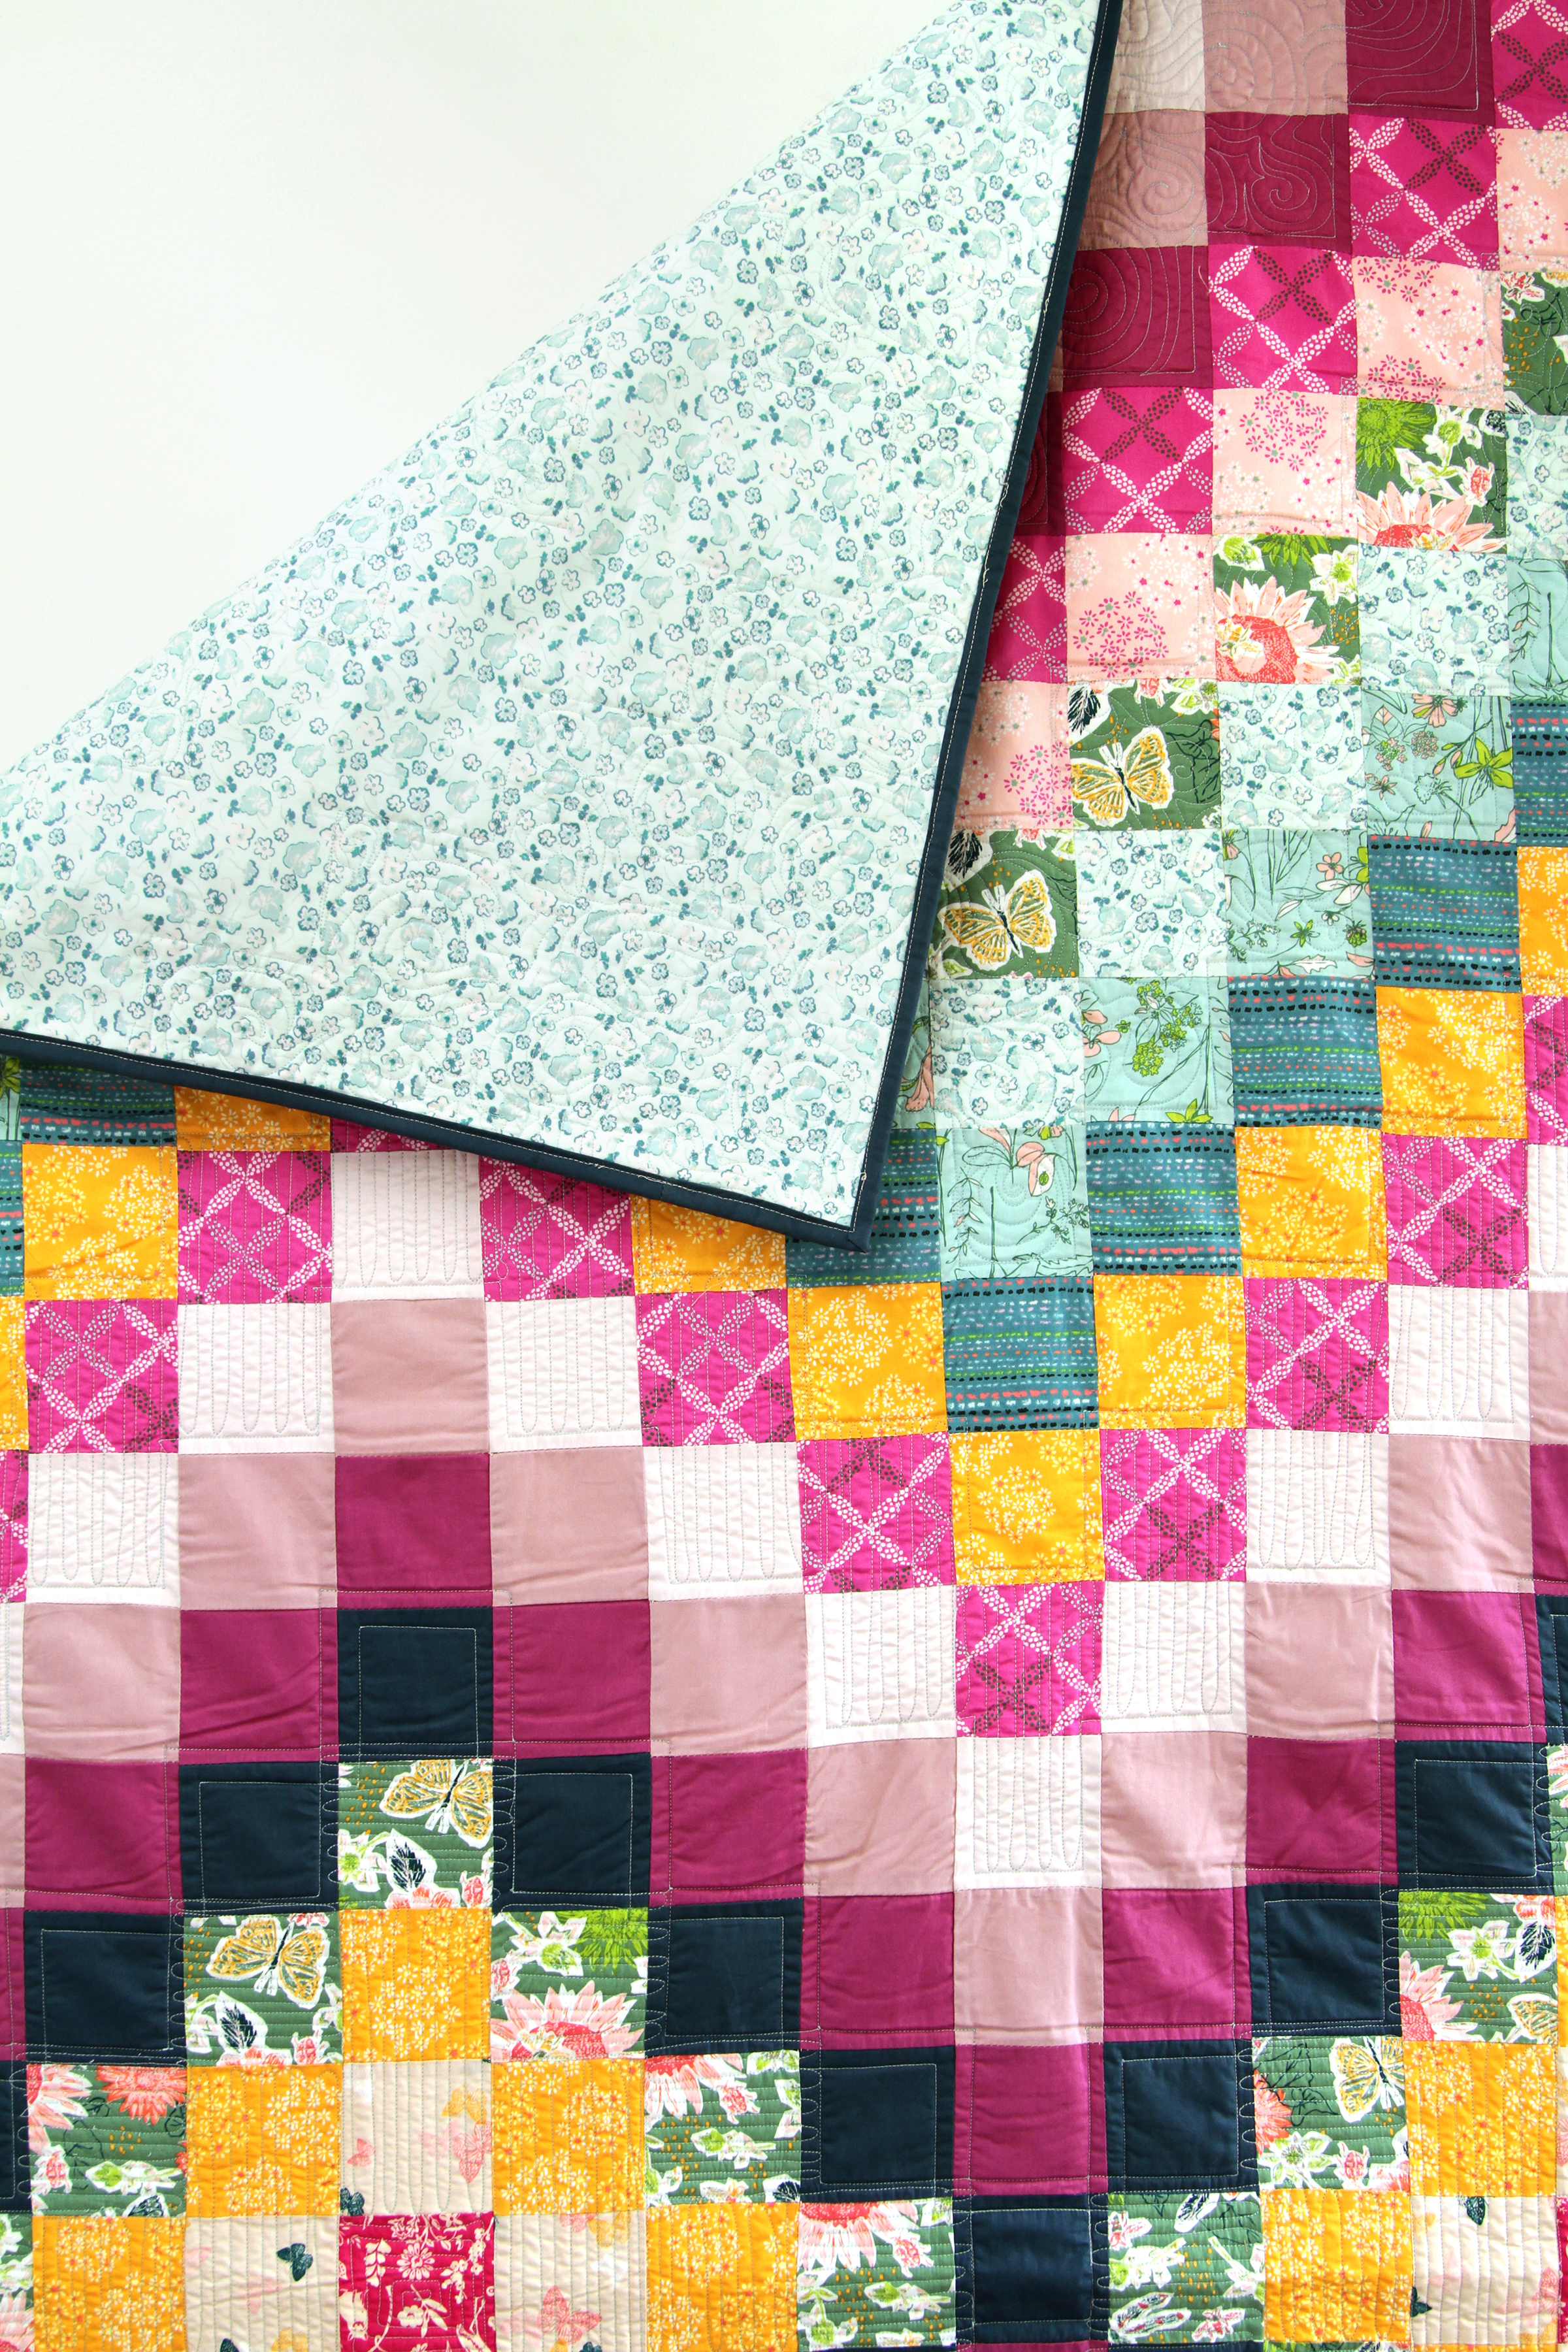
I've been wanting to sew a second sampler with my Signature fabrics ever since my pretty bolts arrived and have come up with an idea for a low-pressure, summer to fall sew along that will be as fun for me as it will be for you. 

Starting this Friday for 17 weeks, I will host the My Signature Sampler sew along. Every Friday will be show and tell of a block plus the weekly giveaway all in one post. More details this Friday June, 22nd. If you want to get a jump on the Instagram hashtag pool, share the above sew along graphic along with the #mysignaturesampler hashtag. Follow me on Instagram @sharonhollanddesigns for inspiration and IG giveaway information. 

For a chance to win a bundle of Signature fabrics, visit the AGF Blog and enter to win!

Star Light Quilt

Star Light Quilt

Star Light quilt on crib.jpg

The very first time I made this star block was for the Community Sampler Cactus block and knew then and there I wanted to eventually make a quilt using just this block.

When sewing for my new Art Gallery Fabrics collection called Signature I designed projects around themed rooms and one of the rooms was to be a baby room which would be the perfect look for the Star Light quilt born from the Cactus block!

Star Light sq web.jpg

This gender-neutral design is perfect for any baby and is a generous 50'' square finished size. I consider this an intermediate project but with my tutorial on piecing the star block and other tutorials of Quarter-Square Triangle Units and working with directional prints, I feel even a beginner could make this quilt with a little extra attention paid to accurate seam allowances and cutting and a care with the trickier aspects of this design.

materials-01.jpg

For my nature-loving baby I selected Signature prints and Pure Elements solids in a green, teal, and golden yellow palette that made me think of being outdoors on a summer's evening, chasing fireflies and looking at the stars. 

BG0A7036.jpg

This week Art Gallery Fabrics will be virtually publishing the Signature fabrics Look Book and it will be packed full of beautiful projects made with my Signature collection. To celebrate the Look Book and collection I've added this Star Light baby quilt pattern to my Free Patterns page

Download the free PDF pattern for full instructions and illustrations for piecing this large baby quilt. I've also included a Quilting Diagram for how I machine quilting my quilt. This is a nice size for quilting on a domestic machine. 

I used Hobb's Tuscany Silk Batting to fill my quilt and I love the lightweight, sumptuous drape it gives a quilt. Silk batting handles and launders just like cotton with very little shrinkage. 

Tip for machine quilting like I've done is to stitch all the stitch-in-the-ditch diagonal, vertical, and horizontal lines first then go back in and stitch the oval leaf shapes last.

banner_237.jpg

Be watching later this week for the Art Gallery Fabrics release of the Signature Look Book! If you're sewing with Signature and posting to Instagram, be sure to tag me @sharonhollanddesigns and use the hashtags #artgalleryfabrics #Signaturefabrics and #agfsignature so I don't miss any of your makes!

Community Sampler Week #16

Community Sampler Week #16

Community Sampler 2.jpg

It's finale week for the Community Sampler. I know many of you will not have your tops finished or quilted this week but both Maureen and I will be watching for you to post pictures of the finished quilts in the weeks and months ahead. Many are still posting their finished Sewcial Bee Samplers from last year's sew along so it's never too late to complete a quilt.

Be sure to use the #CommunitySampler hashtag when posting your Community Sampler blocks and quilts to Instagram and tag both my @sharonhollanddesigns and @maureencracknell so we don't miss any of your beautiful work!

It's been a real pleasure to co-host the Community Sampler. We've seen many returning makers from our last years Sewcial Bee Sampler and loads of new friends joining in this year's sew along. I hope you've learned some new patchwork skills or are continuing to improve upon what you already know. All the blocks and quilts I've seen are so well made and have beautiful fabric selection. Thank you so much for sewing with us!

CS Promo banner 2.jpg

Surprisingly we still have a few new Makers joining our sew along at this late point. If you are just joining us, pick up the Introduction PDF on the Sew Along page and you'll get a material list along with coloring pages so you can get started planning your quilt. Then, work your way through the first Community Sampler post to the present and take advantage of the in-blog tutorials for the different patchwork techniques used throughout the Community Sampler. Both Maureen and I will leave all the Community Sampler downloads up on our blogs for you to download long after this event is done. Also, check out the #Community Sampler hashtag on Instagram, you'll see an amazing array of beautiful blocks as inspiration overload! Soon, you'll be seeing finished Community Sampler quilts too!

Community Sampler Week #16 Finale-01.jpg

There's nothing new to download this week and no tutorials--this week's post is purely show and tell for me to blog about my finished sampler and the design inspiration behind how a chose to machine quilt my sampler. 

Community Sampler Back.jpg

Last Wednesday's post showed how I had my top pieced and my backing fabric of Untamed Beauty Daybreak from my new Signature collection for Art Gallery Fabrics all selected and cut. The following day (Thursday) my husband and I took off for a trip to New York to visit our youngest son. 

We had a wonderful time visiting the city and packed an unbelievable amount of sight seeing into four days. We averaged 8 miles a day on foot and I've no idea how many more miles we traveled each day by subway, bus, Uber, or boat. We were Uptown, Downtown, and all around that town!

The Cloisters in New York City

The Cloisters in New York City

On Sunday we visited the Cloisters (a branch of the Metropolitan Museum of Art), which is a medieval castle housing exclusively art from the Middle Ages. Situated overlooking the Hudson River in northern Manhattan, it's a specular place to visit. 

The Judy Black Garden in the Cuxa Cloister

The Judy Black Garden in the Cuxa Cloister

I loved the building and the amazing artifacts from the Middle Ages. We were lucky to visit the Metropolitan Museum of Art (The Met) and the Cloisters while the Heavenly Bodies: Fashion and the Catholic Imagination exhibit was in progress and I found the garment design so imaginative and inspiring.

The Bonnefont Cloister Herb Garden 

The Bonnefont Cloister Herb Garden 

But my most favorite part of the Cloisters were the serene courtyard gardens.

Garden at the Cloisters

Garden at the Cloisters

I didn't realize it at the time but the Cloisters courtyard gardens were to be the inspiration for the quilting on my Community Sampler quilt... 

We returned home just before lunchtime on Monday and we had already put in a long day because we'd needed to get up at 3 am to get to the airport in time for travel and check-in.

First thing I had to do once home was jump in and get my sampler quilted so I could work on binding that evening and photograph it Tuesday in order to put together this post. While I was spray basting I was thinking of how to quilt it. I sometimes feel like a Quilt Whisperer because I always let the quilt tell me how it should be quilted. 

Community Sampler 3.jpg

With my trip still fresh in my mind, I thought about those peaceful medival courtyards and thought how the sampler quilt reminded me of a walled garden and the blocks represent how every column had different relief carvings in their capitals.

Thinking of the quilt as an aerial view of the castle, I decided to treat the border and center of the quilt with two different quilting designs.

On the border I did a simple, wavy parallel lines that represent the woven twig fencing seen in the herb gardens.

Community Sampler 4.jpg

The center of my quilt is a free-form, stylized organic design to represent the flowers seen in the Cuxa Cloister gardens. I love how my Untamed Beauty print on the back looks right at home in this idea of a garden.

Community Sampler Finale 1.jpg

The batting used in my quilt is my favorite, Tuscany Silk Batting from Hobbs Batting. The drape and feel is incredible and it's as easy to handle and quilt as cotton but with much improved properties over cotton. 

I chose to bind my quilt in the same Art Gallery Fabrics Pure Elements solid Sweet Macademia as I used for the background of my quilt. This keeps the quilt looking clean on the edge and that soft peach/pink color is the same as used in my Untamed Beauty print. By the binding coordinating with the print on the back, it now becomes a whole cloth look of printed fabric if I wanted to flip the quilt around for multiple looks. 

Community Sampler.jpg

Please visit Maureen's blog to see the beautiful Community Sampler quilt she's making from her gorgeous Art Gallery Fabrics Love Story collection.

COMMUNITY SAMPLER SPONSORS

Don't forget that this Friday's the final Giveaway Friday on the Community Sampler sew along. Because the finale is so big, Maureen and I handle this last giveaway differently than the previous weeks. Maureen will be hosting the blog giveaway with a special grouping of prizes and I will be hosting the Instagram giveaway with a grouping of special prizes. Our posts on Friday will include all the details for prizes and how to enter.

Happy sewing!


Fabric Fringe Wallhanging

Fabric Fringe Wallhanging

Signature Fabric Wallhanging.jpg

We've all seen beautiful macrame and fringy wall art pieces in stores and on Pinterest and wished we could afford or make something like that. Well, now you can! 

Fabric Fringe Wallhanging by Sharon Holland Designs.jpg

Fabric Fringe Wallhanging Tutorial

This is a great beginner project or one to involve your kids in for a summer craft. They'll love being able to customize the look for their room!

This tutorial is based on a wallhanging that measures appoximately 36'' x 36''. See below for customizing the size of the strips. Read through all instructions before beginning.

Here's what you'll need:

  • One 3/4'' x 36'' stick or dowel rod
  • Spray paint (optional)
  • 2-3/4 - 3 yards total assorted cotton fabric
  •  Dritz Twist Cord
Signature Wallhanging Closeup.jpg

The fabrics used in my Fabric Fringe Wallhanging are from my new Signature fabrics collection for Art Gallery Fabrics. Because I wanted this wallhanging to have a more sophisticated look I spray painted my stick gold and finished all the edges of my strips so no raw edges showed.

I don't normally have wall decor like this in my house because as someone with allergies it's a dust catcher in my mind but...because all the edges on the strips are finished this hanging could be easily disassembled and laundered!

Assembly

Fabric Fringe Hanging-01.jpg

For a wallhanging the size of this sample: Cut appoximately (24) 4'' x 42'' strips. I varied the length of my strips from around 21'' long down to 6'' long. You'll need about 975'' total length of 4'' wide strips. 

Place ends of strips right sides tougher at a 90° angle and stitch on the diagonal as shown above. Keep adding varied lengths strips in the same manner to make one long strip that measures approximately 975''. Trim seam allowance to 1/4". Press seams open.

Cut Fringe Length

The stick I used is about 36'' long so that's the length my center fringe will hang down. Because we use a double length to loop the fringe over the stick, all measurements will be doubled plus an additional inch for hemming. 

Cut the following from the long strip.

  • (3) 73'' long strips
  • (4) 67'' long strips
  • (4) 61'' long strips
  • (4) 55'' long strips

NOTE: If customizing your wall hanging use the following formula to determine the cutting length for fringe. 

Customize your Fabric Fringe Wallhanging to any size stick or dowel rod by using the length of the stick (or rod) as the length of the longest fringe strips in the center of the wallhanging. Each subsequent step of the strips that create the "V" shape of the wallhanging are made in 6'' step-up increments. Note: If using a very skinny stick or rod the width of the starting strip should be narrowed to keep the fringe scale in proportion to the stick. 

  • Length of stick times 2 = Center fringe length 
  • Center fringe length plus 1'' (for hemming) = Center fringe cut length
  • Center fringe cut length minus 6'' then add 1'' (for hemming) = First step fringe cut length
  • First step fringe cut length minus 6'' then add 1'' (for hemming) = Second step fringe cut length
  • And so on for as many steps you want to add
Fabric Fringe Hanging-02.jpg

Once all lengths have been cut from the long strip it's time to finish the raw edges of the fringe. 

Fold a fringe strip lengthwise in half with wrong sides together and press. 

Open the fold then press a short end over 1/2'' to the wrong side. Repeat for the other short end. 

Press the long raw edges in toward the center fold. Refold on the center crease, encasing the raw edges. 

Sew around all four sides of the fringe close to the edge. 

In the same manner, finish the remaining fringe strips.

Fabric Fringe Wallhanging assembly.jpg

Starting from the center with the longest fringe, fold a fringe strip in half to form a loop. 

Place the loop behind the stick and bring the ends of the fringe over the stick and through the loop.

IMG_6551.jpg

Pull the ends through the loop to tighten fabric to the stick. Fluff and adjust the strip as needed to lay flat. Continue adding additional strips to either side of center working from the longest to shortest strips to create a "V" shaped wallhanging.

Fabric Fringe Hanging.jpg

Use Dritz cording in desired color to hang your creation. Simple loop and knot can be adjusted as needed for handling and easily removed. The length of cord hangin below the stick can be a design feature. Knot the ends of the cord to keep from unraveling. 

I had extra cording so I added two fringes of cording in the center of the wallhanging.

Signature Wallhanging Strips.jpg

Be as creative as you want and add other embellishments like yarn, feathers, leather strips, or ribbon to make your own decorator statement!