My Signature Sampler Week #5

My Signature Sampler Week #5

MSS Broken Dishes.jpg

I've had a good and productive week, how about you? I actually finished sewing ALL the blocks for my sampler! I even got so far as to photograph all the blocks, but not so far as to get them all set in the setting triangles--next week, hopefully. That's a good feeling to have my work stockpiled for me and know I'm that much ahead--that's the beauty of this sew along, you can work at whatever pace fits your time and schedule. 

The good news is that because I've been able to sew ahead I came up with a brilliant idea for an optional border treatment I can't wait to share with you next week. You're going to love it--I sure do!

My Signature Sampler Banner copy.jpg

Since this event is built off past sew alongs I've co-hosted with Maureen Cracknell with the addition of other published block resources you can and are encouraged to work at a pace that feels right for you. Each week when I make a Friday post, I'll provide links to the various blocks I put into my sampler along with any variations to the original block instructions. 

Block instructions from the Sewcial Bee Sampler (SBS), Community Sampler (CS), AGF Quilt Block Collection (AGF), and the blocks from the Quilter's Planner 2018 magazine (QP) will be used in this sampler. If you have your favorite blocks and would rather sew different blocks than me, please feel free to make this sampler your own. 

If you're just joining in on the fun, take a look at my first post for this sew along and pick up the quilt layout and color book page to start planning your sampler!

Remember, you can always refer back to the Sewcial Bee Sampler and Community Sampler blog post tutorials the accompanied each past sew along block by using the search bar at the top of this blog. There you will get additional information on how to piece each block or technique. 

If you need extra help with your patchwork or would like to learn how to control the direction of your prints in half-square triangle units and other piecing techniques, visit my Tutorials page for lots of great tutorials all in one place. Don't forget our blocks will be set on-point so if you have a fussy cut center, cut it on-point for best results.

Note: I don't recommend cutting any other pieces of the blocks other than a center square on-point because it will create bias edges along the outside of the block and increase chances of distortion. Keep any bias edges in the center of the block.

MSS Broken Dishes.jpg

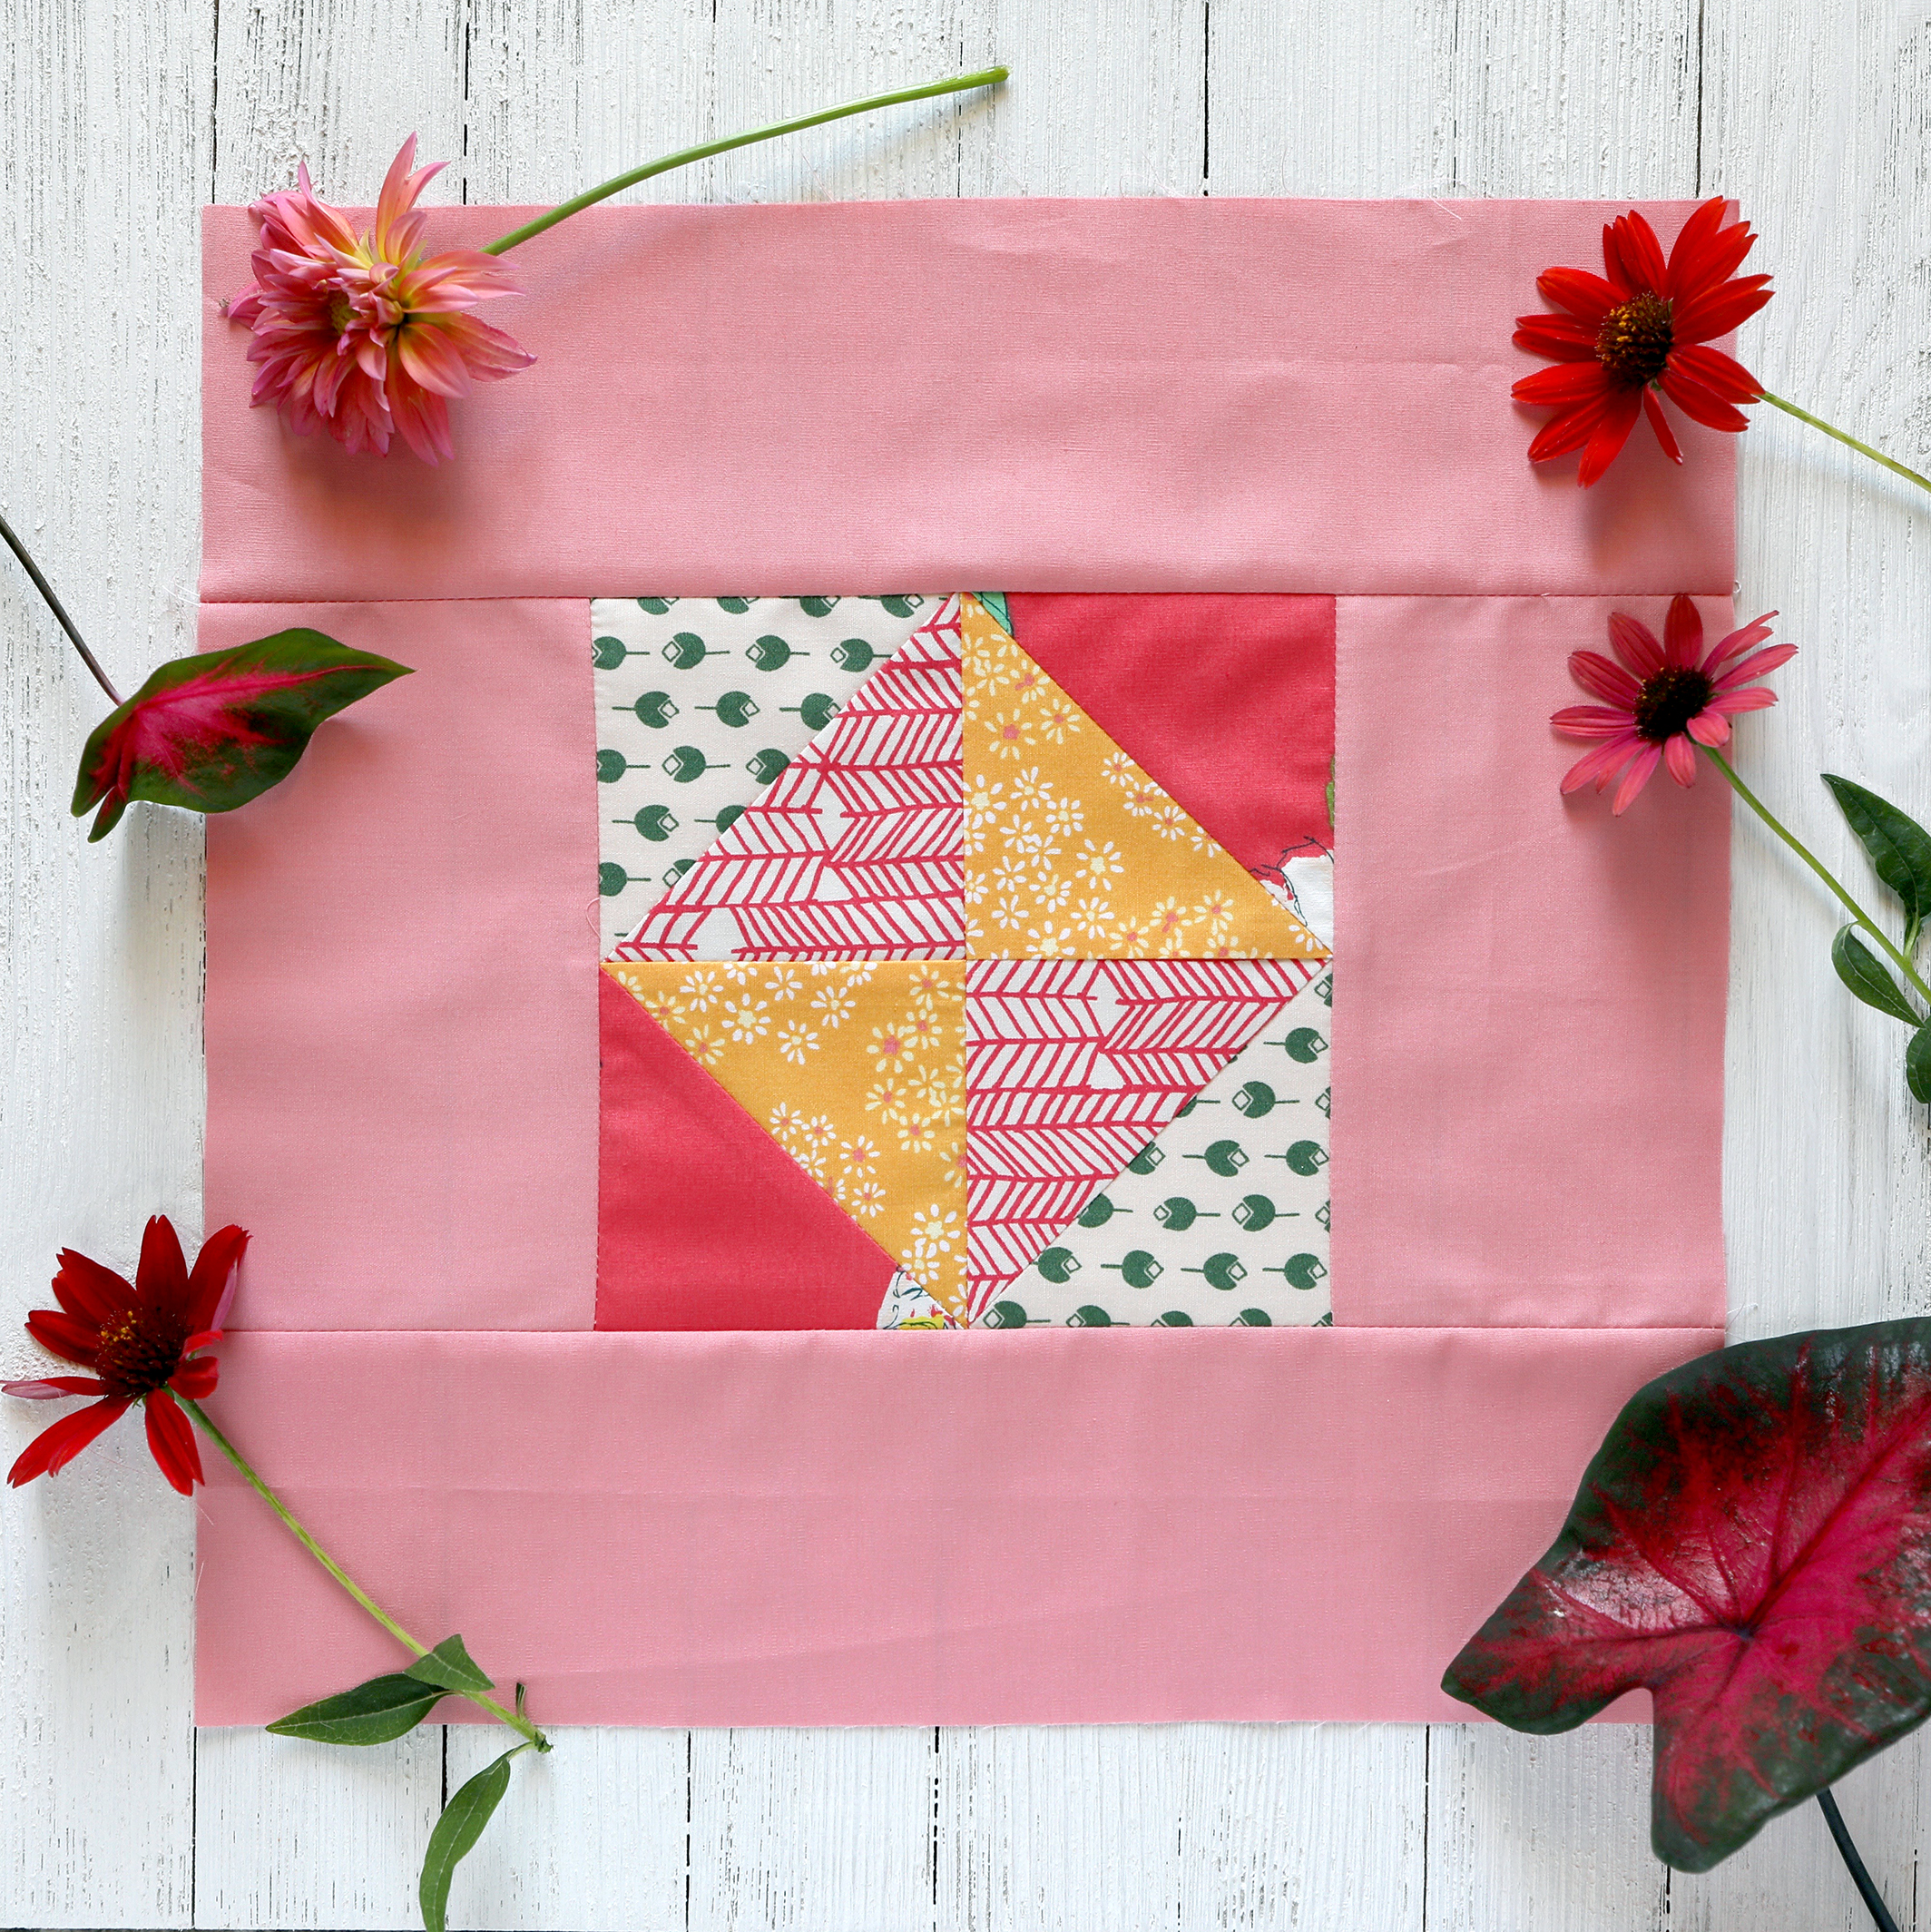
For week #5 of the My Signature Sampler, I've chosen to sew the Broken Dishes block from the Sewcial Bee Sampler sew along I co-hosted with Maureen Cracknell last year. 

I've used prints from my Signature fabric collection from Art Gallery Fabrics and AGF Pure Elements solids for my blocks. This fabric collection and sampler quilt has me feeling like I'm in my garden when I'm sewing and I'm loving each new block more than the last.

For stock lists of online shops that carry my Signature and other AGF collections, visit my Fabrics page or the Where to Buy page on the Art Gallery Fabrics site.

For a tutorial and link to this block, follow along on the original blog post HERE. If you're wanting to sew with half-square triangle (HST) units that can be trimmed down to the desired size, then check out the SBS Extras post with HST cutting charts and tips for rounding up for larger pieces. 

Broken Dishes with Setting Tiangles.jpg

To help me to remember to remind you that these blocks will be set on-point AND to get ahead on things I've decided to start adding my setting triangles to my finished blocks. I'm using a combination of my Perennial print from Printemps Fusions and Untamed Beauty Daybreak from Signature as the background setting of my quilt. 

The setting triangles are made by cutting a 9-1/2'' square on the diagonal to make two setting triangles. Be mindful of print direction, if applicable. See Community Sampler Week #13 for block setting instructions. 

Coneflower Study by Sharon Holland

Coneflower Study by Sharon Holland

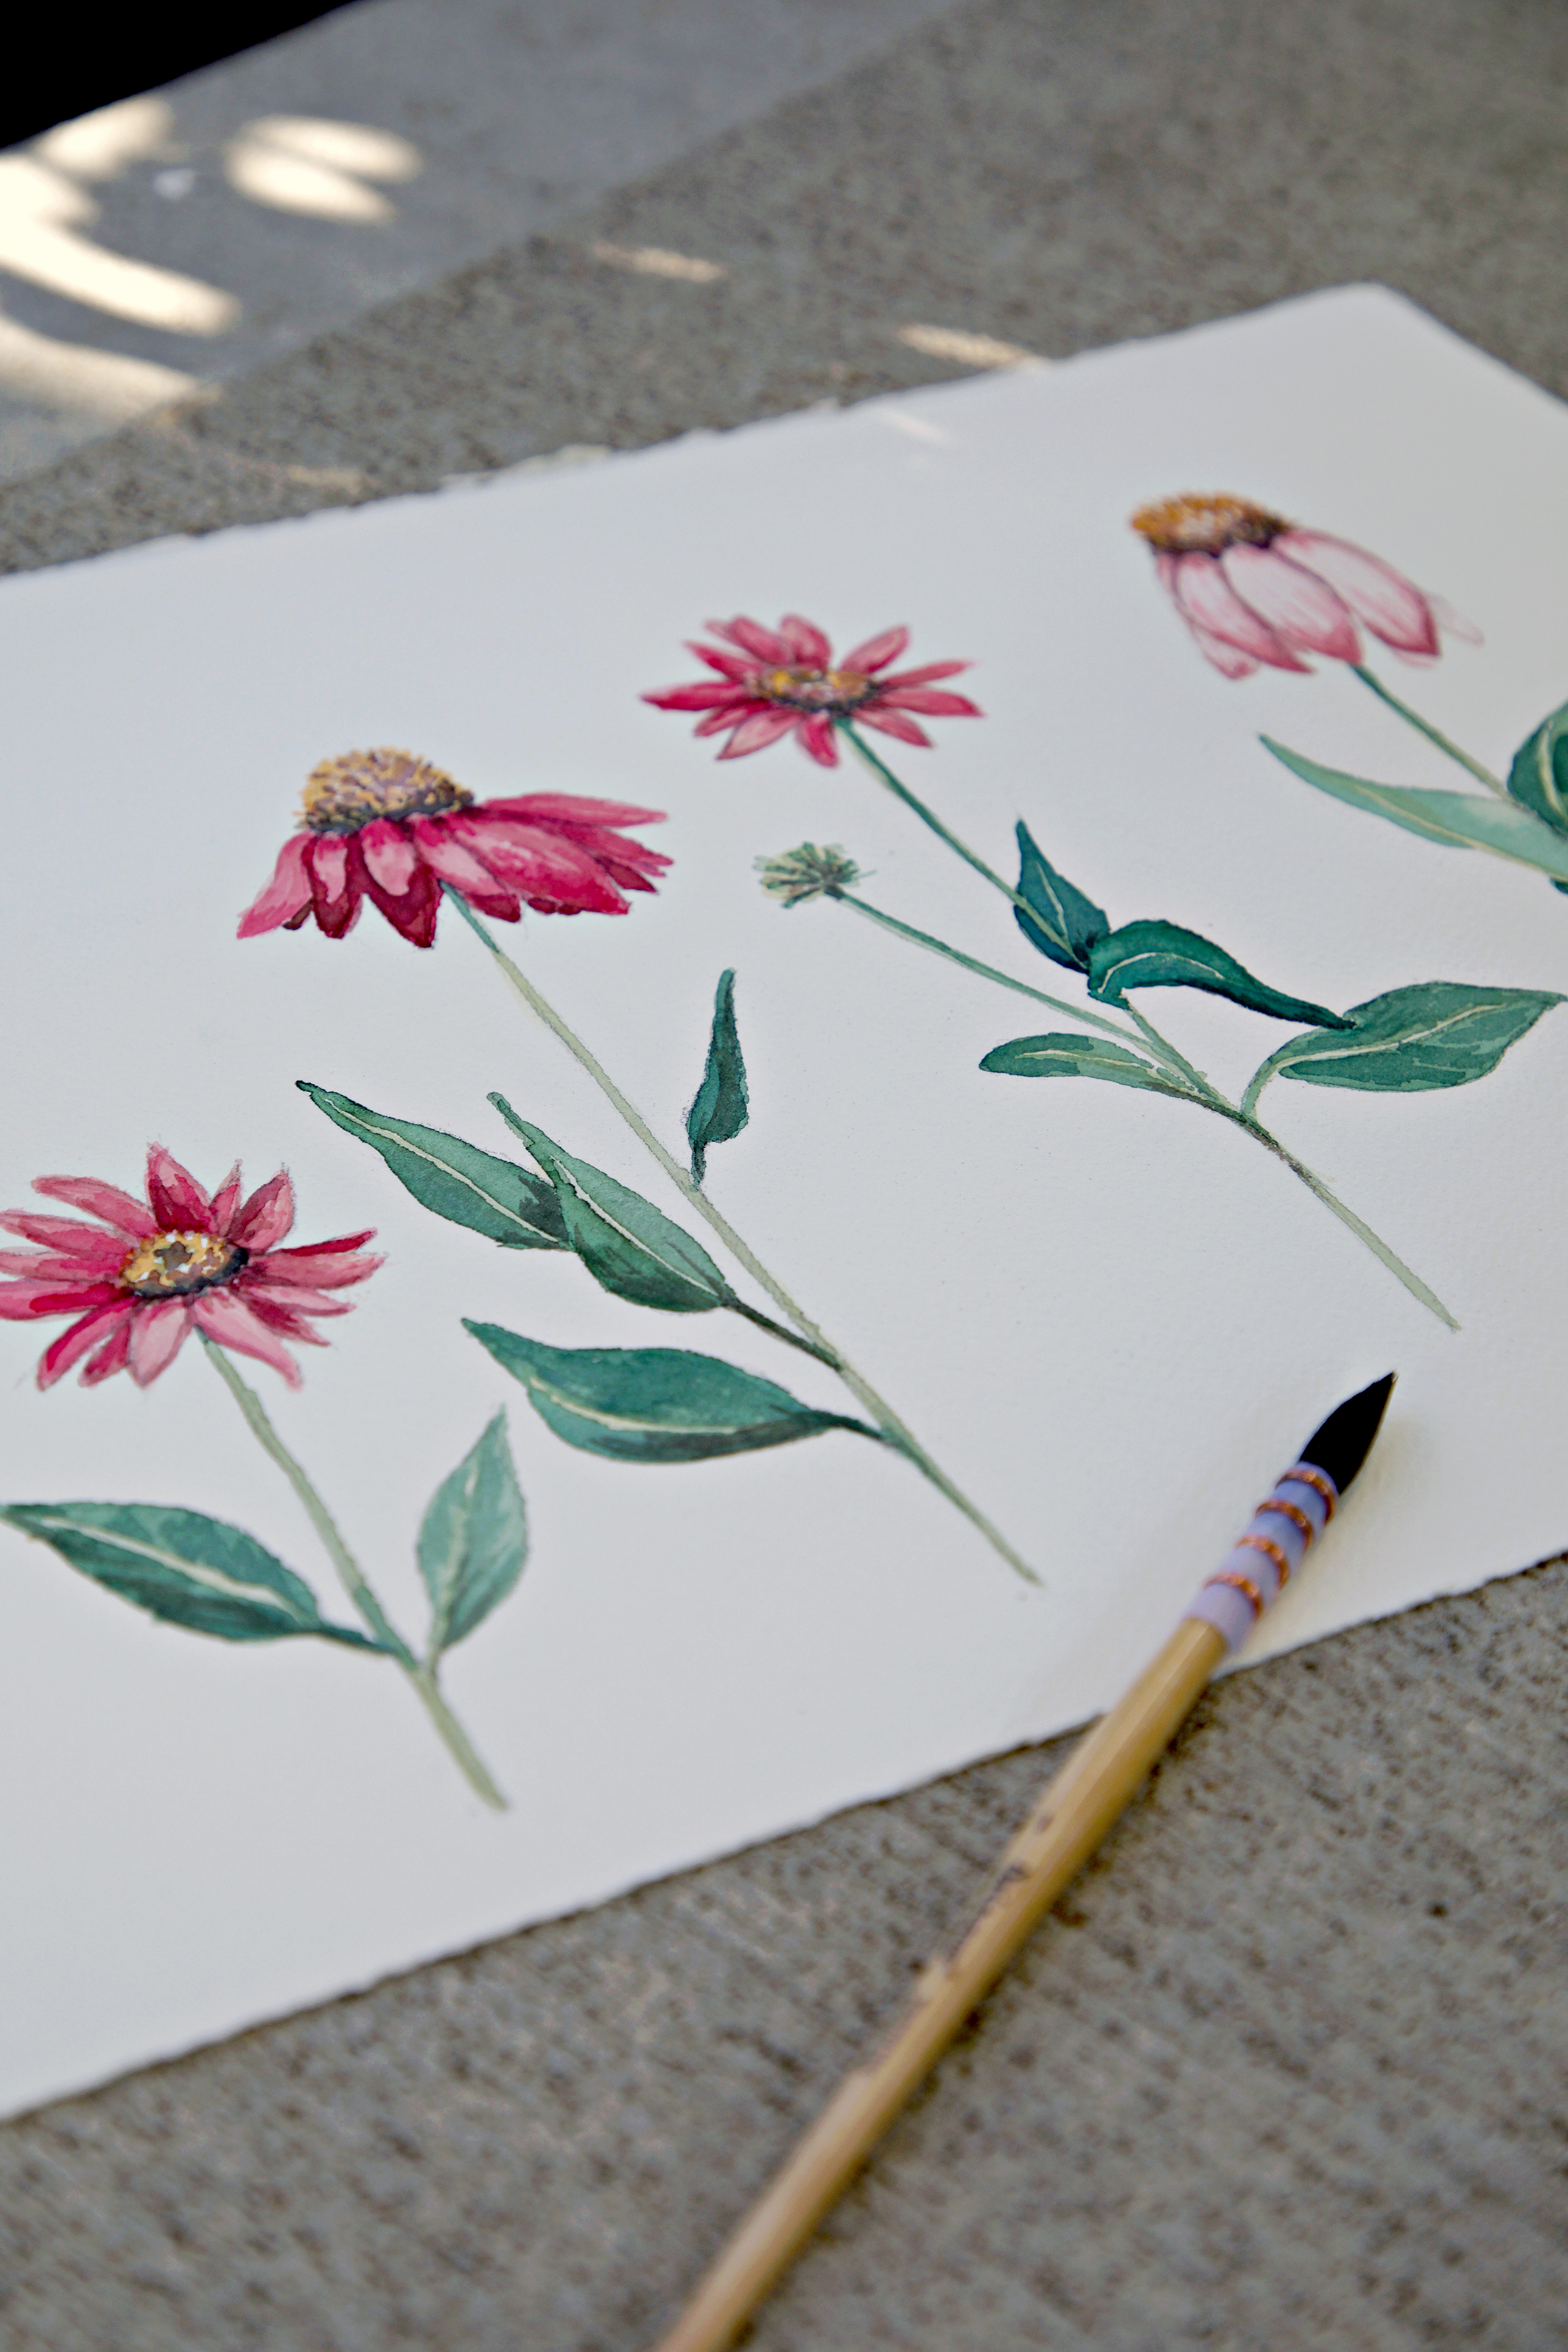
The real reason I didn't get all the blocks set into the setting triangles was because I took time away from sewing to paint! I've been waiting all year to get back to painting and my schedule is finally freeing up (because I've not taken on new projects out side of my own to-do list) and want to devote my undivided attention to artwork.

Clover Study by Sharon Holland

Clover Study by Sharon Holland

Who knows, maybe we can all be sewing with fabrics from these botanical studies sometime next year! 

GIVEAWAY

Every Friday when I reveal a new block to My Signature Sampler, I'll also be posting the weekly giveaway. This sew along is being sponsored by the most amazing companies and have generously donated incredible prizes to share with you. 

OUR SPONSORS

THIS WEEK'S GIVEAWAY SPONSOR IS: Bloc_Loc

Bloc Loc Logo.jpg

Bloc_Loc was created by husband and wife team, Paul and Janna. Paul, an Australian, was an aircraft maintenance engineer and Janna, and American, is a quilt designer and author of Courtship Quilts; Inspired by the Victorian Language of Flowers, published by Martingale & Co 2005. Now based in Loveland, Colorado, Bloc_Loc manufacturers, distributes, and sells their own patent pending products which are new and innovative. Their rulers are made of the highest quality materials by the old-fashioned standard of making products and are built tough enough to last from one generation to the next!

 Shop Rulers * Follow on Facebook * Follow on Instagram 

WE HOPE YOU ENJOY VISITING BLOC_LOC RULERS

For this week's My Signature Sampler Giveaway, Bloc_Loc is offering the winner a set of two rulers that coordinate with the sizes of units used in most of our blocks. This week's prize will be a set of Half-Square Triangle rulers consisting of the useful 2-1/2" and a 4-1/4" square sizes. Be sure to visit Bloc_Loc for wonderful video tutorials on how to use all their products. 

Bloc_Loc HST Ruler.jpg

Giveaway Now Closed. Congratulations to Denise!

Note: This giveaway is open to EVERYONE! If you're a "no reply" or anonymous commenter, please remember to include your email address in your comment--you can't win if I can't get a hold of you!

1. Simply leave a comment here under this post for your first comment entry.

2. Follow Bloc_Loc on any of their social media platforms (see links above). Just let me know that you did by making a separate comment here to record that entry. (Separate comment-second entry). 

3. My followers get a third entry! If you follow me via subscribing to my posts, on Pinterest, and/or Instagram, just let me know by making a separate comment here to record that entry. (Separate comment-third entry).

4. Help spread the word!! I know that many of you already do, so I thought it would be nice to add that as another way to enter! Spread the word about the My Signature Sampler sew along on YOUR instagram, Facebook, Twitter, or on Pinterest by pinning any of my pretty images in this post. (Separate comment-fourth entry) 

That’s FOUR possible entries! Enter now through Monday, July 23rd! The winner will be picked at random around 4pm Eastern. I will post the name of the winner on this post once they've been notified and responded to my email.

*Don't forget to enter into this same giveaway on Instagram by posting images of your sampler inspiration, sampler fabric pull, or blocks. Use the official #mysignaturesampler hashtag every time you post your My Signature Sampler makes (to a public account) and you're automatically entered into the weekly IG drawings as well! See my Instagram giveaway posts @sharonhollanddesigns for full details. 

Happy sewing!

Sharon

Signature Butterflies

Signature Butterflies

Signature Shadow Box Butterfly.jpg

When I was planning my projects for my new Signature fabrics collection for Art Gallery fabrics I created rooms and looks, then designed my sewing around what would fit into those rooms. 

One of the looks is what I'm calling the Signature Baby Room. I wanted a gender-neutral room for a baby or young child that loves nature. Using my granddaughter as my model toddler, I knew there had to be butterflies, because she LOVES butterflies!

Signature Butterflies 2.jpg

My original inspiration for making butterflies using fabric came from Kim of Go-Go Kim. Kim has a great tutorial for gluing fabric to paper to hang butterflies in shadow boxes. I wanted to make a bit sturdier butterfly with all fabric and came up with a hybrid of sorts...

Materials Needed for Making Signature Butterflies:

  • Signature Butterfly Templates
  • Fabric scraps at least 1/4'' larger around than template size
  • Heat n Bond Lite iron-on adhesive or similar product like Pellon EZ-Steam one-sided pressure sensitive fusible web (optional, see next item on list)
  • Pellon TP970 Thermolam Plus Sew-in fleece (Note: If using a fleece with an adhesive side, omit iron-on adhesive product from the line above)
  • Iron and pressing cloth
  • Coordinating thread
  • Scissors
  • Air-solvable marking tool
  • Spray paint (optional)
  • Frame or shadow box

Making Butterflies

Download the Signature Butterfly Templates and print out at actual size. Check for accuracy using the 1'' reference square on the PDF. Cut out butterfly shapes. Tip: For a more durable template, print onto card stock paper. 

IMG_6264.jpg

On the Pellon Thermolam Plus Sew-in fleece, trace around desired butterfly shapes, leaving at least 1/8'' between shapes. Note: There's no right or wrong side to sew-in fleece but if using a fleece with an adhesive side then draw on the non-adhesive side. 

Following the manufactuer's instructions, adhere the iron-on adhesive (Heat n Bond or EZ-Steam type product) to the unmarked side of the fleece. Omit if using a fleece with an adhesive backing.

My butterflies only have fabric on one side and those wishing to do the same can move onto the next step noting that my tutorial images reflect only one side with fabric. But, if you're planning on fabric backing both the front and the back of your butterflies then adhere iron-on adhesive to the marked side of the fleece as well before moving to the next step, leaving the paper backing on until ready to adhere to fabric.

IMG_6265.jpg

Cut out butterfly shapes.

IMG_6266.jpg

Following the manufacturer's instructions, fuse the adhesive side(s) of the fleece butterfly shape to the wrong side of desired fabric(s). 

IMG_6268.jpg

Cut out butterfly shape using the edge of the fleece as your guide.

IMG_6269.jpg

To add even more durability to your butterfly, add decorative stitches around the shape, add details like body shape, or embellish as desired. 

IMG_6270.jpg

I always love playing around with materials and thinking outside the box. Because I wanted to add a bit of bling to my butterflies and include some metallic elements I decided to try spray painting the backs. 

Using a piece of cardboard and pin to hold the butterfly in place while I sprayed it I was very pleased how the gold spray paint took on the fleece backing. It didn't change the feel of the fleece and gave a nice gold tipped edge to my creations. 

IMG_6276.jpg

After the spray paint dried, I could go back in and add more dimension to my butterfly by folding and sewing very close the the folded body edges. 

IMG_6277.jpg

Let Your Imagination Soar!

Once know this technique for fusing fabric to fleece and making butterflies, the sky's the limit to what you can create. 

Signature Butterfiles.jpg

My largest butterfly became an unique piece of art when I hand stitched it to the center of a rush placemat from Target. 

IMG_6287.jpg

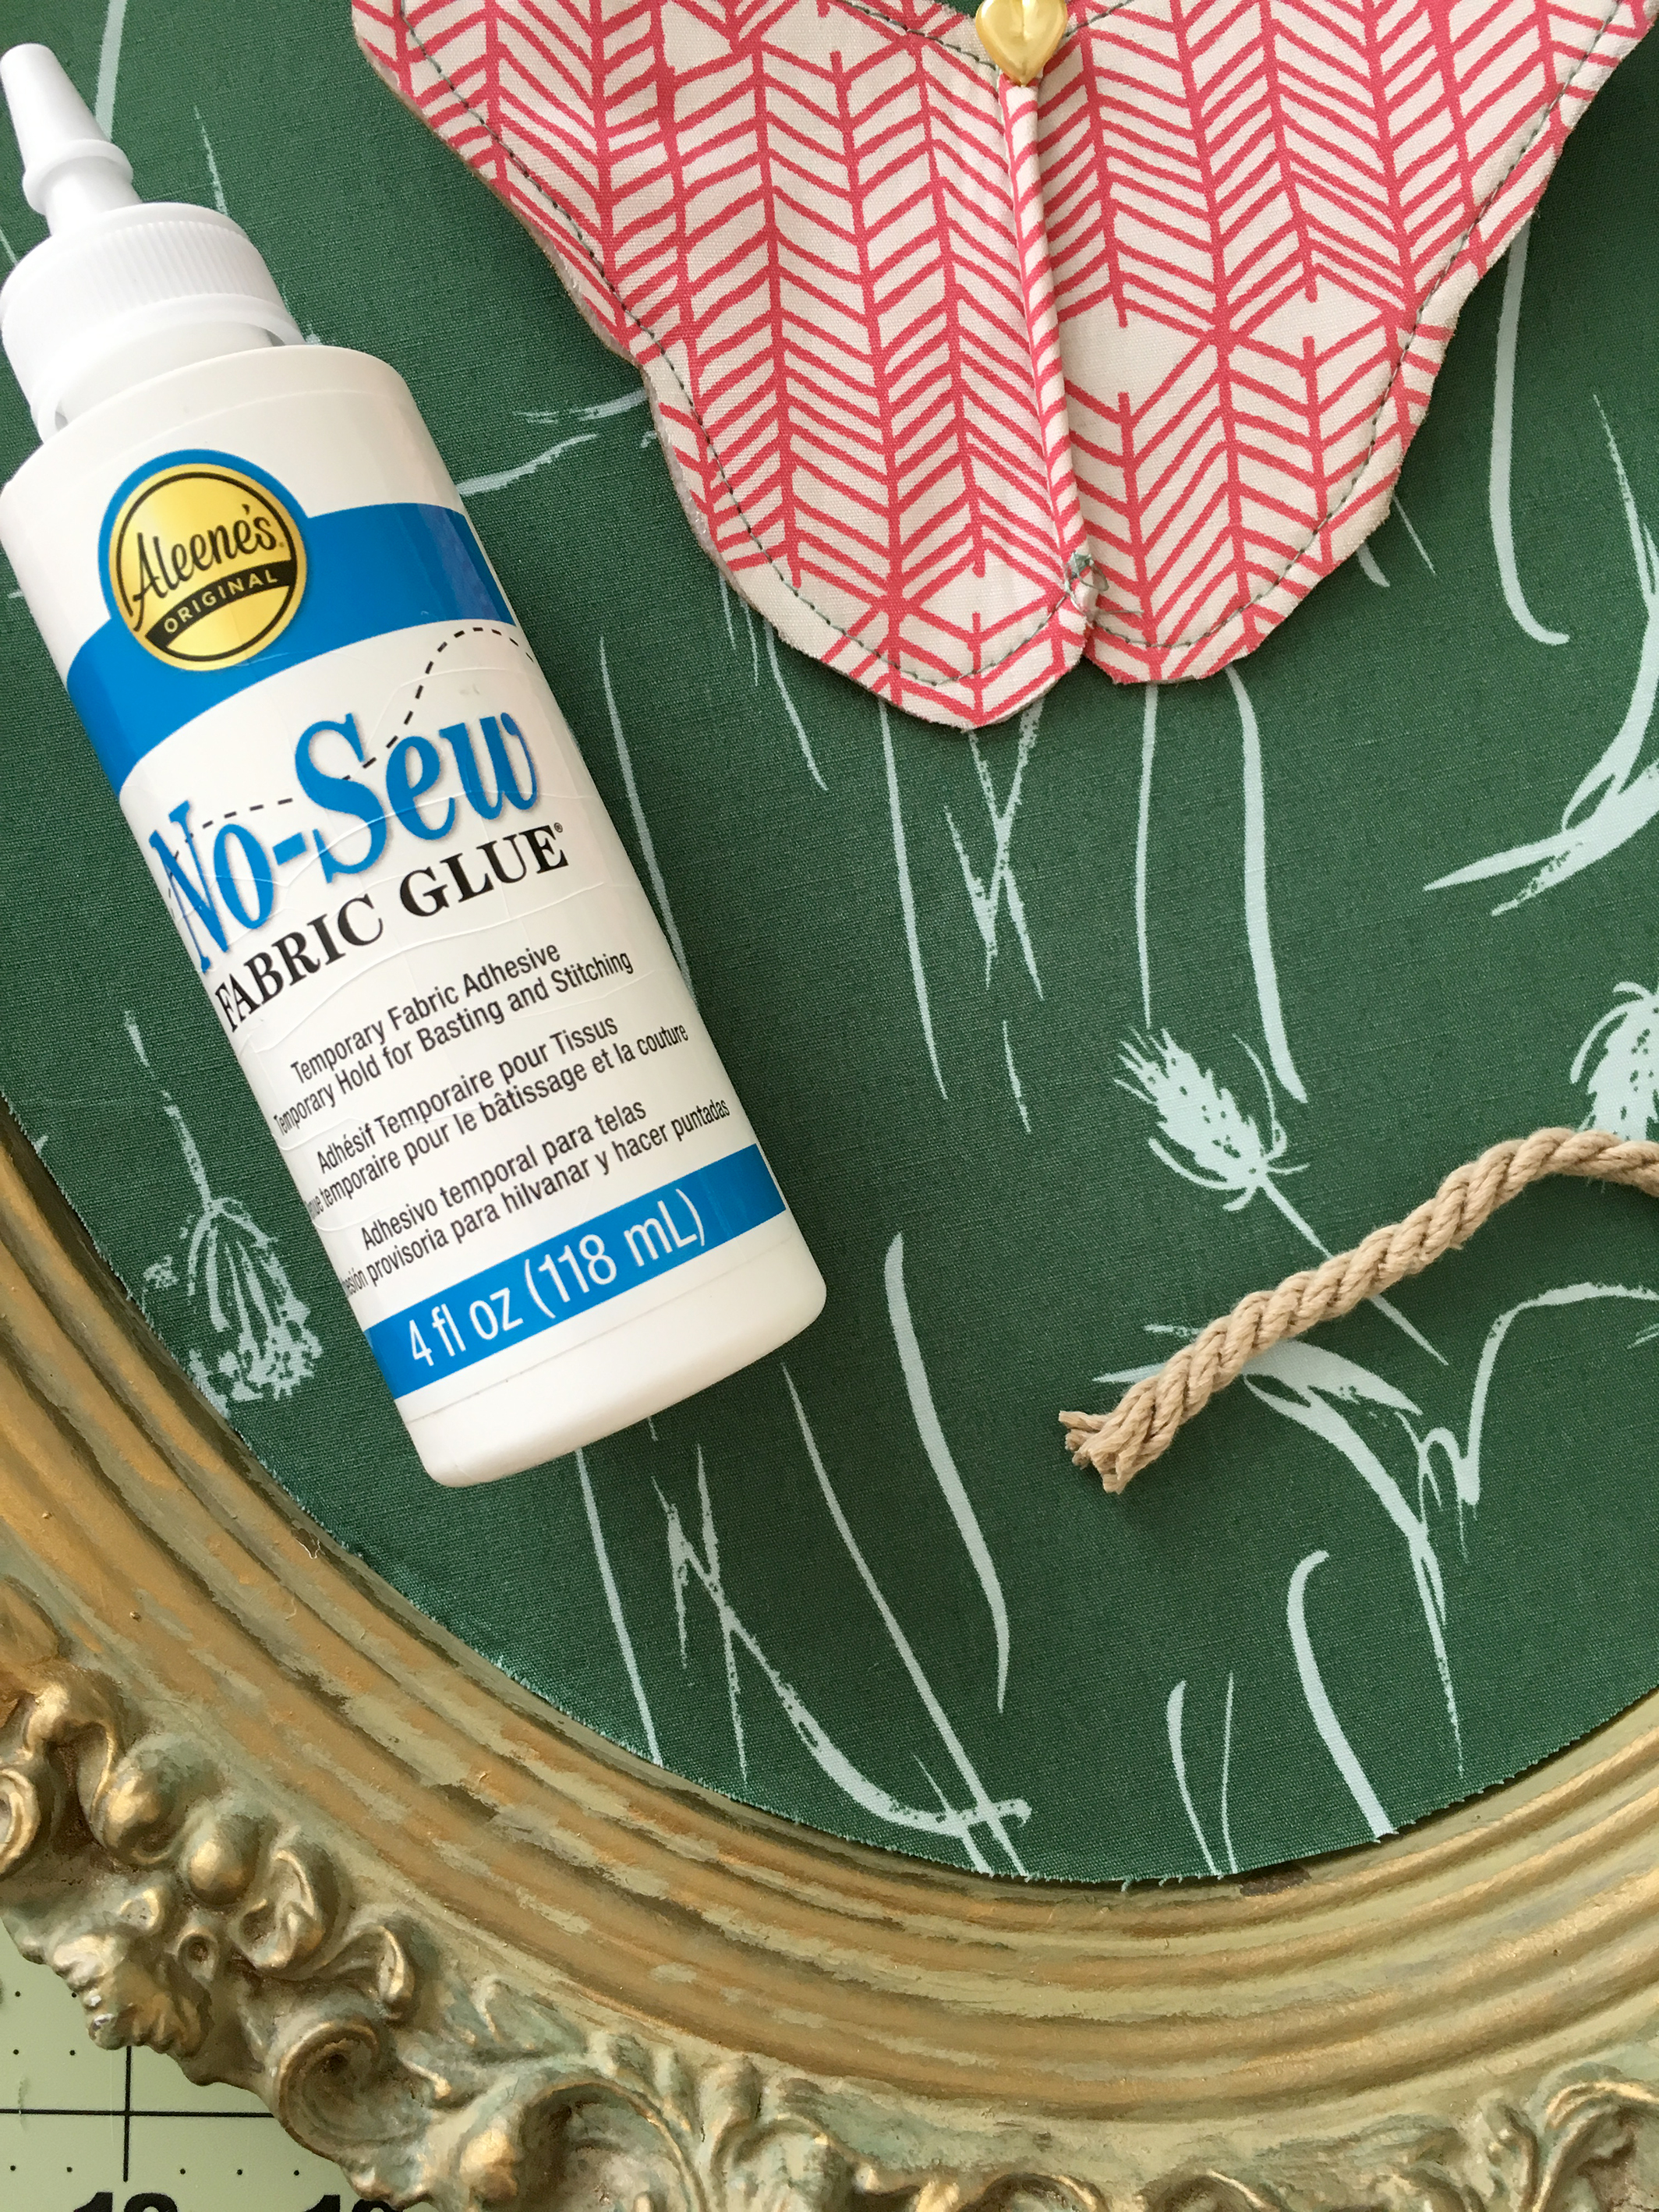
I used this technique to cover a mirror with fabric faced fleece and simply glued the fleece in place with Aleene's No-Sew Fabric Glue so it's non-permanent and can easily be removed with water in the future. 

IMG_6284.jpg

To fill the gaps between my mirror backing and the frame I used fabric glue to attach some Dritz natural-colored Twist Cord to act like decorative molding. 

Siognature Baby Room Wall Art.jpg

A 3-D butterfly was simply pinned with a decorative straight pin directly to the fabric backing. 

Signature Shadow Box.jpg

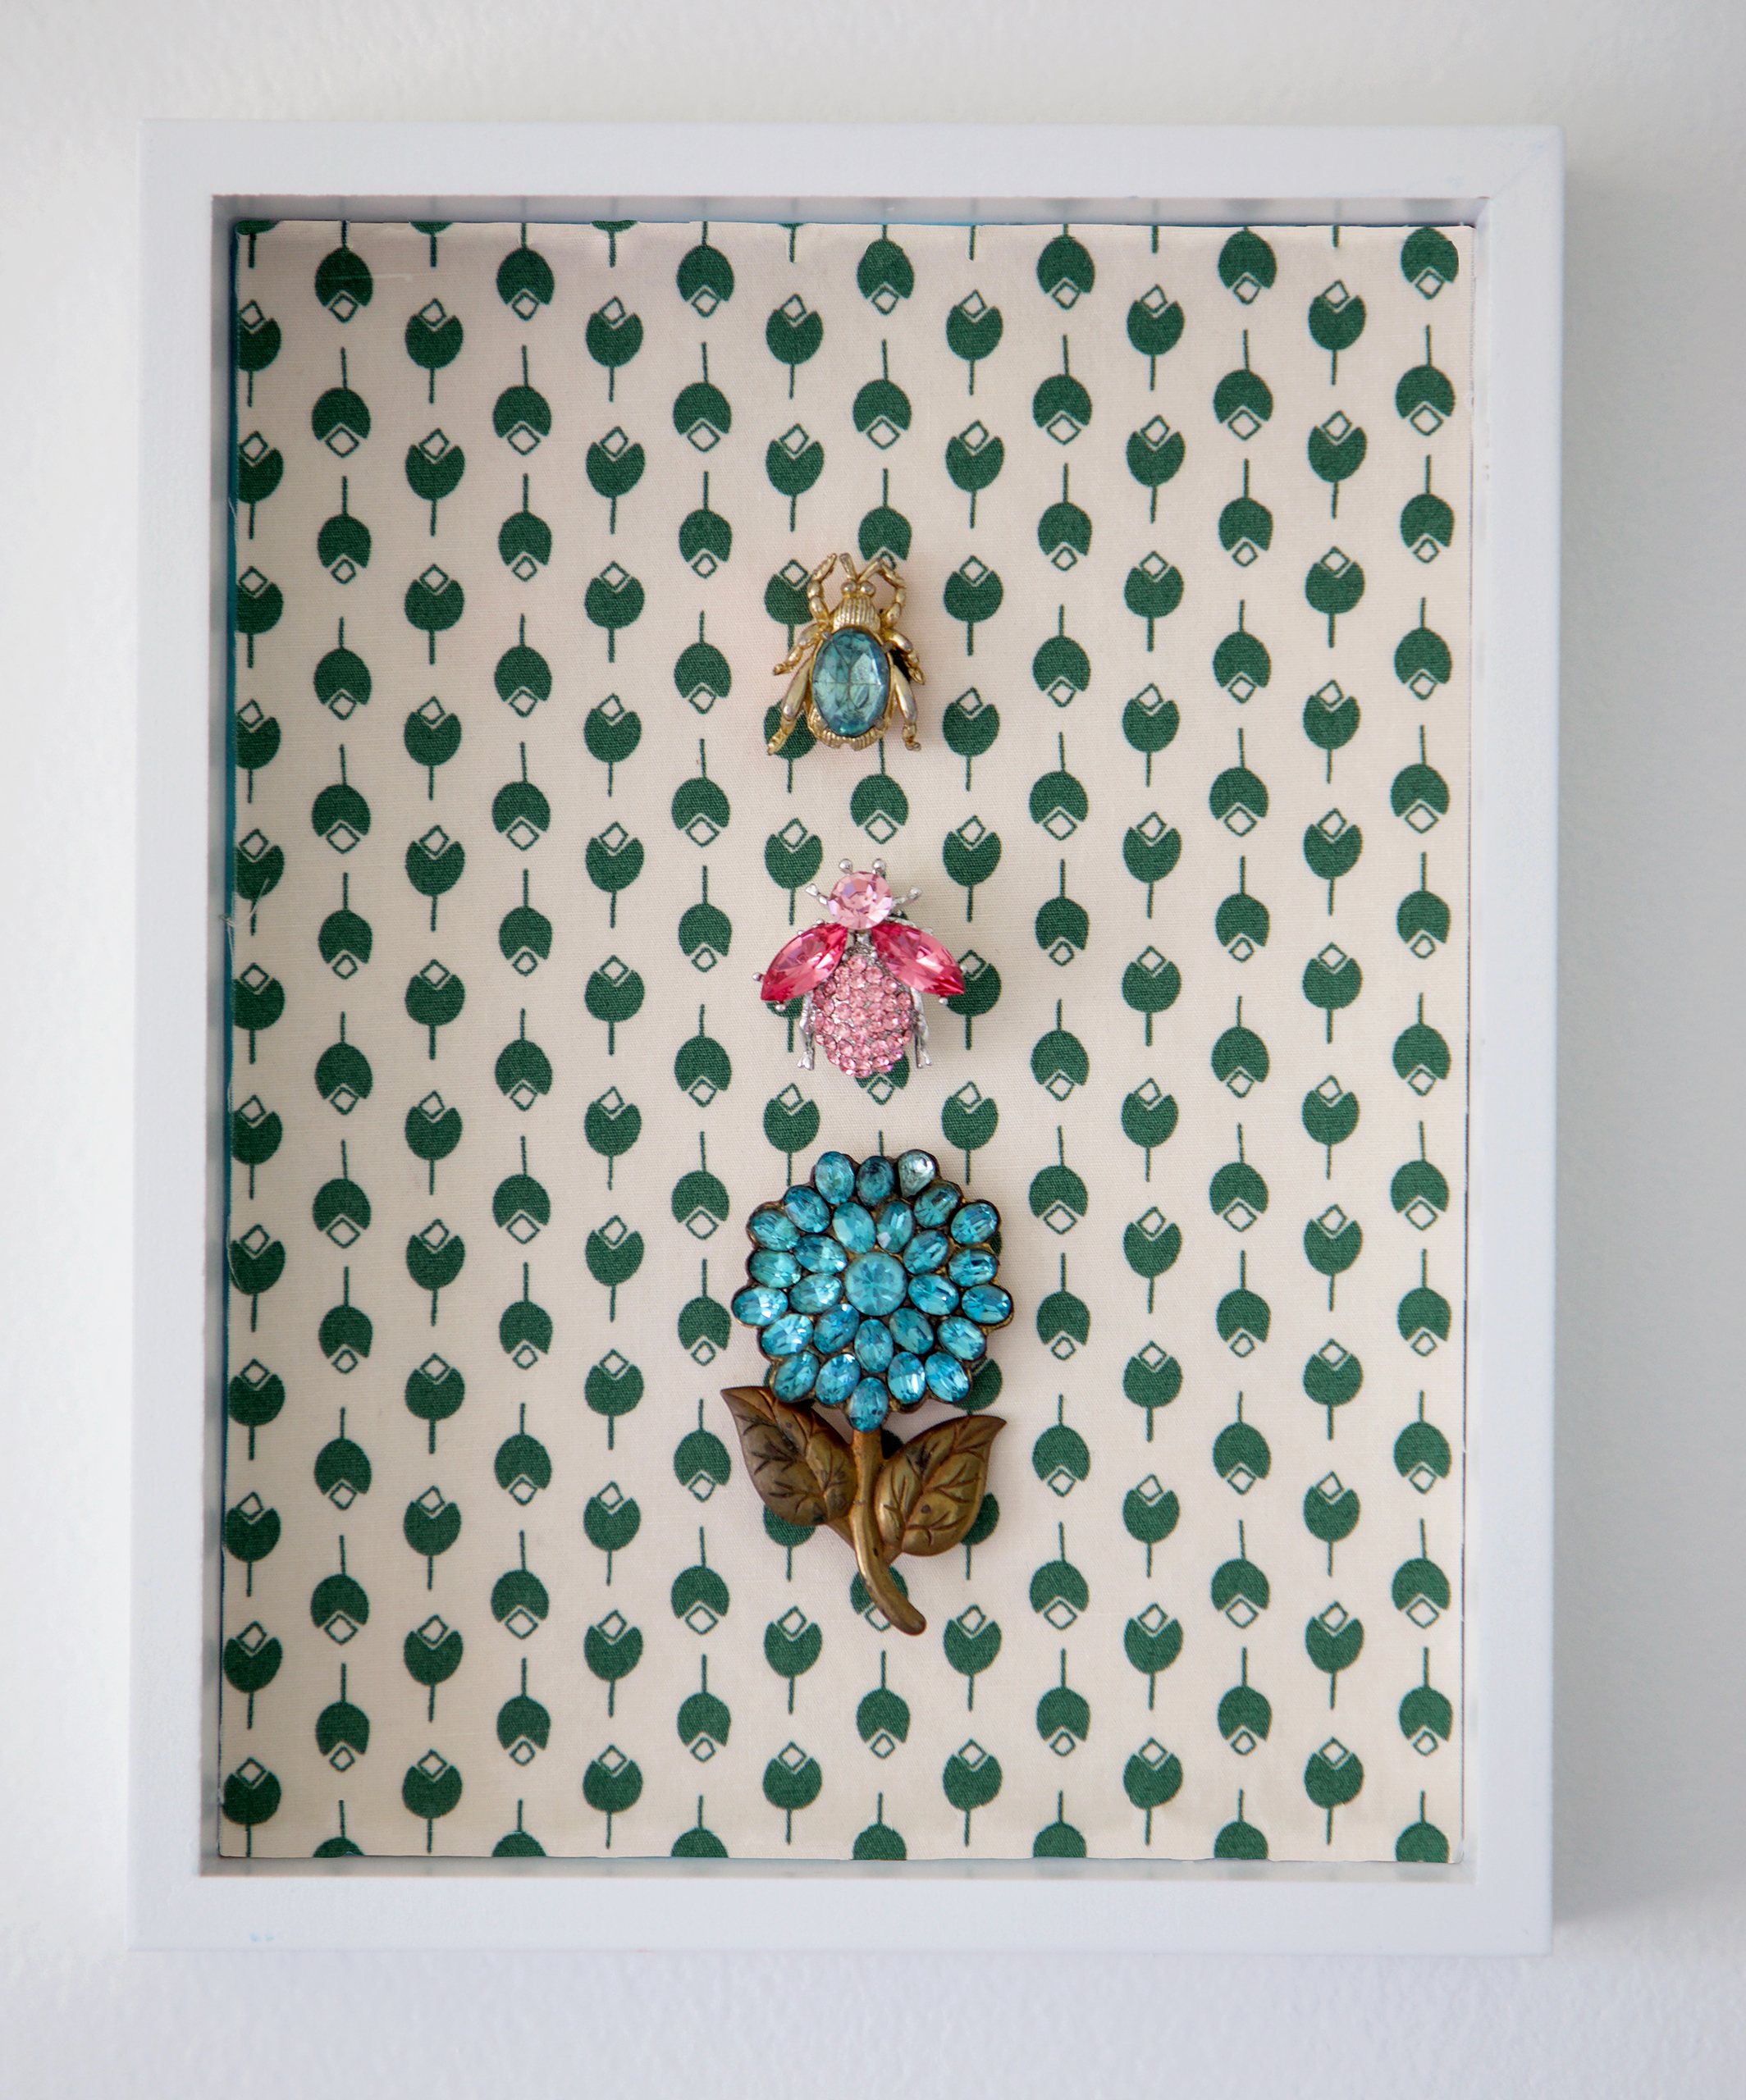
For this bejeweled shadow box I fleece backed fabric in the same technique as in the above projects and cut a backing size to fit a dollar store shadow box frame that had a saying printed on the backing. The opaque quality of the fleece blocked out the saying on the picture. Before hot gluing the fleece back fabric to the frame I pinned vintage brooches to the fabric for a one-of-a-kind, nature-inspired wall art. 

Hoop Art

Signature Needle Work.jpg

For a more traditional way to create art for your walls and bring nature inside is to use prints from my Signature and embellish them with embroidery and appliqué. For my Hoop Art I fussy cut a bouquet from my Extempore Celebration print and appliquéd a dragonfly, bee, and butterfly from the Small World Sprightly print. 

Small World Signature fabrics.jpg

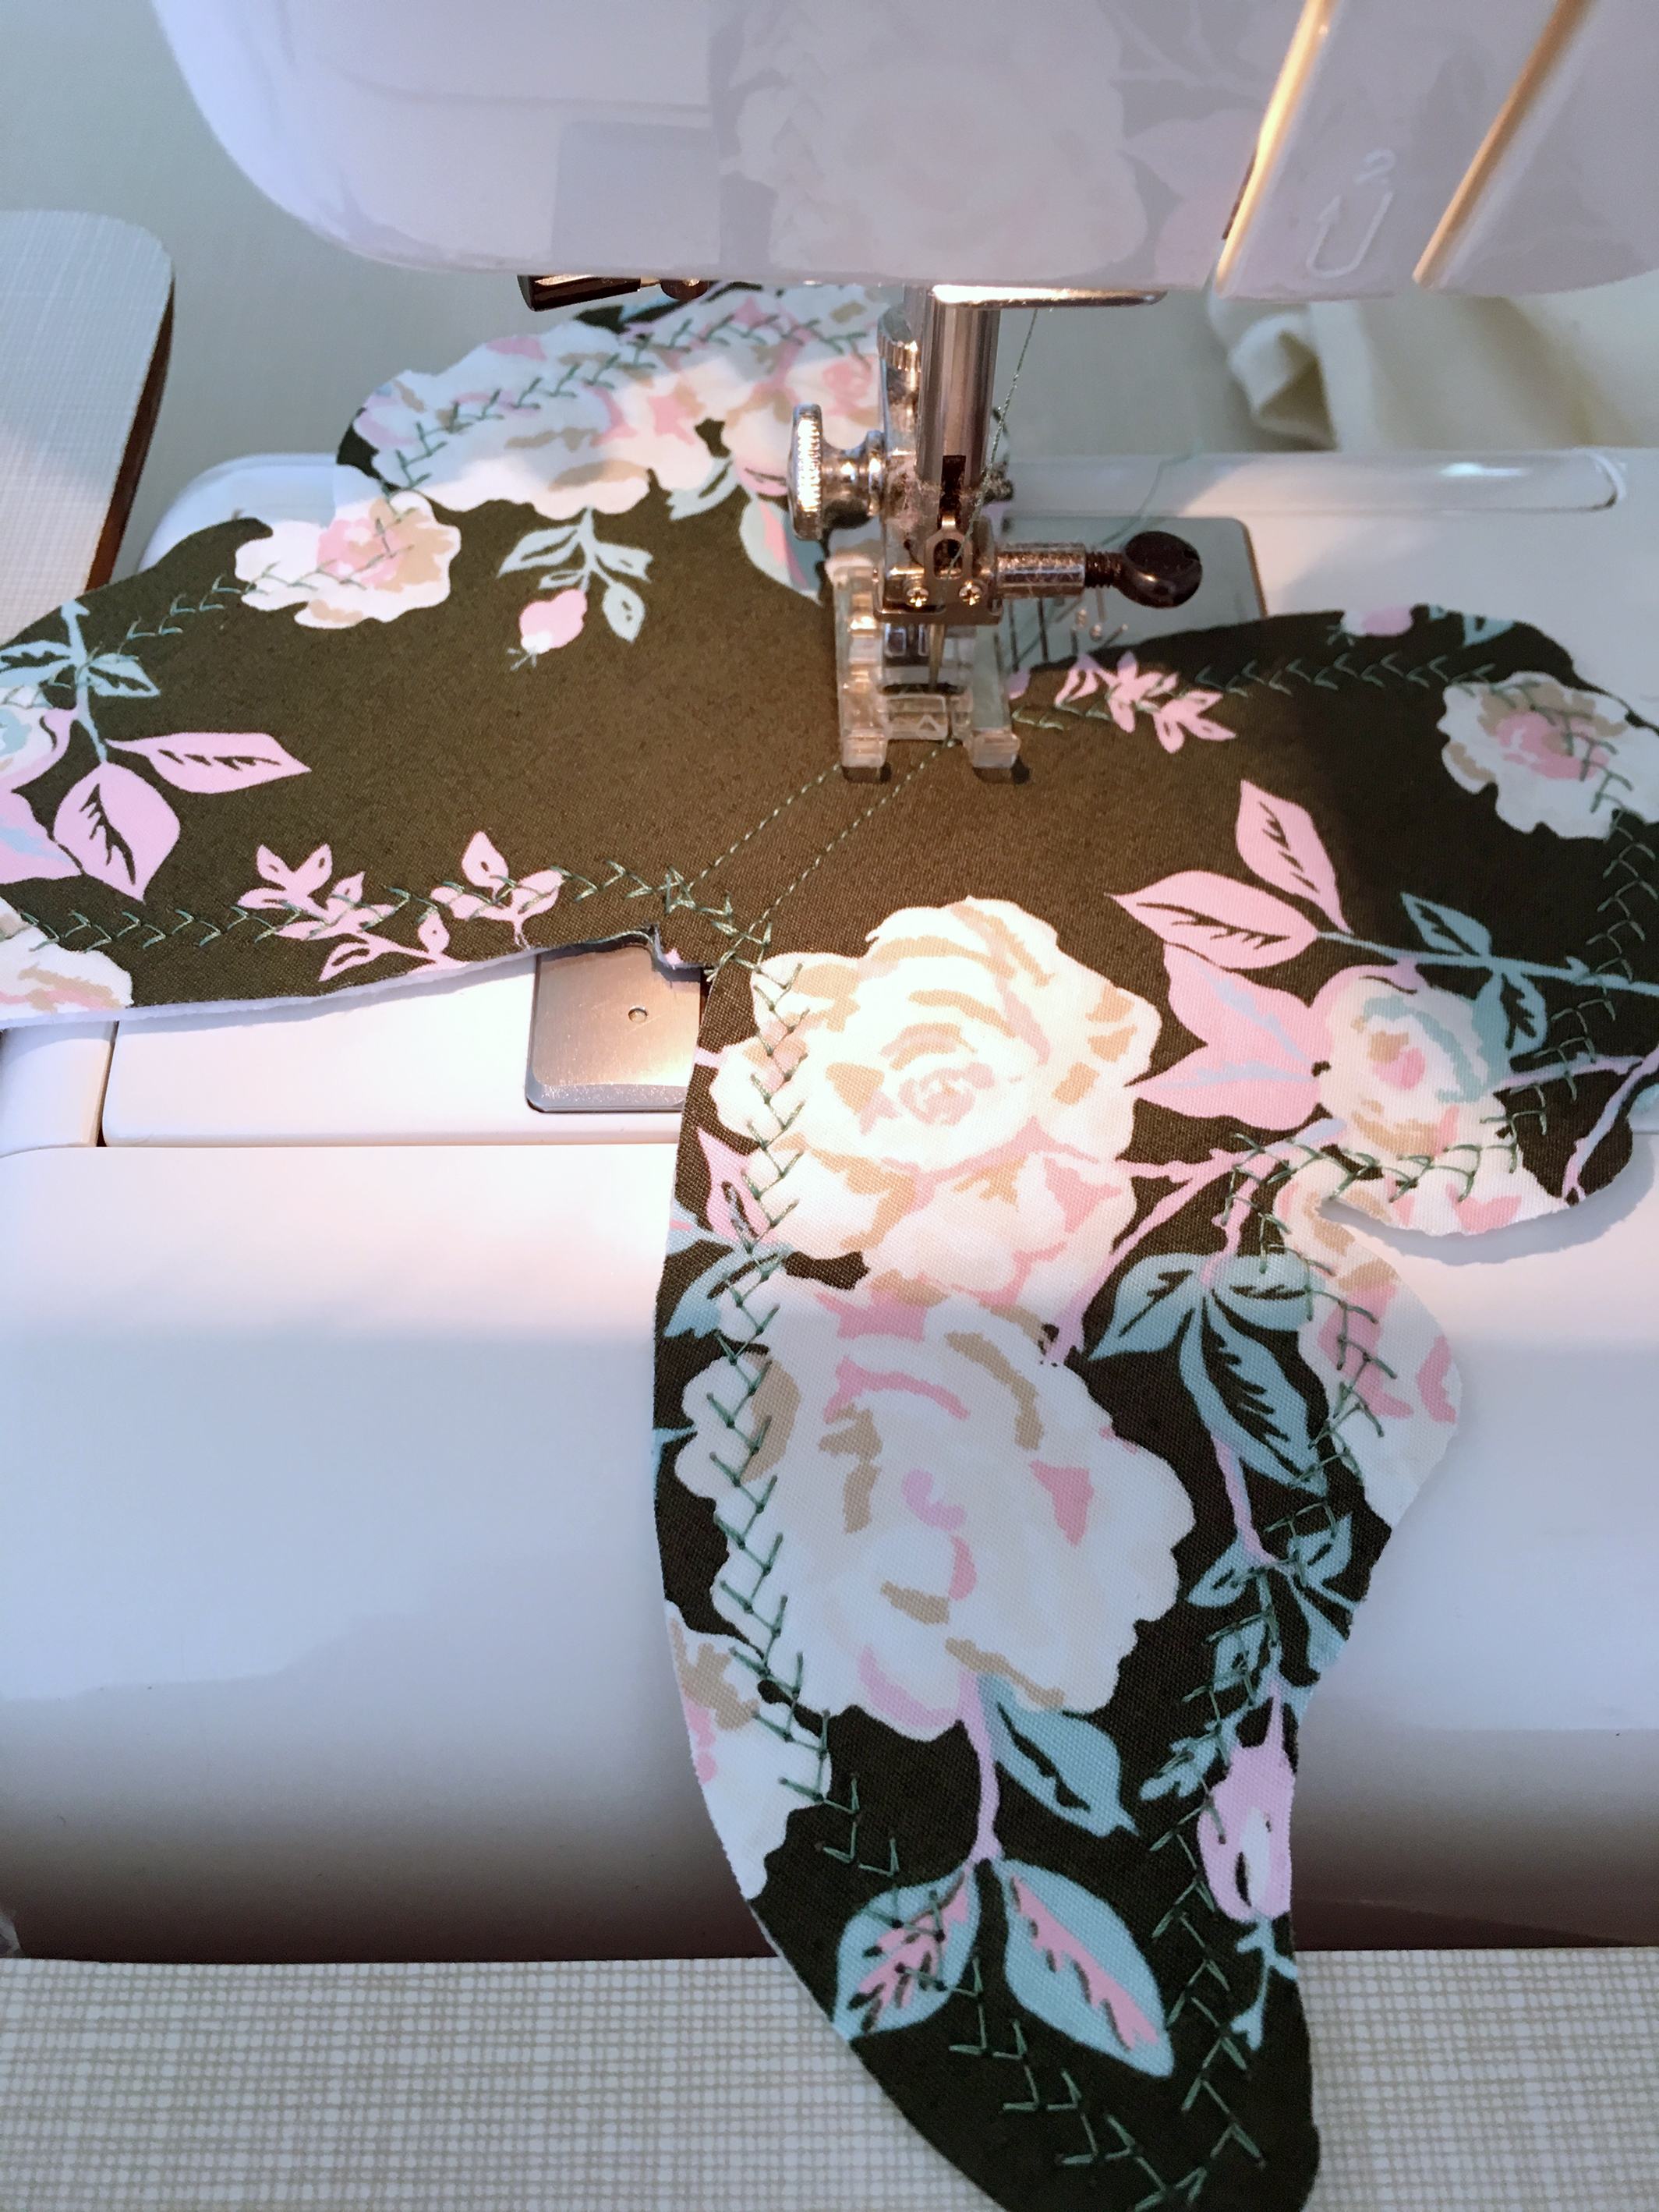
Starting with an over-sized square each I sandwiched the following materials: Extempore Celebration right sides up on top, Hobb's Tuscany Silk batting in the center, and a Pure Element solid right side out on the back. I embellished the main print with embroidery and quilting stitches then added needle turn appliquéd cut outs from the Small World Sprightly print with blanket stitch edge detail. 

Once all the needle work was done, I re-stretched the art in the hoop, secured it tightly with the screw at the top, then trimmed the edge of the fabrics even with the edge of the hoop. 

Signature Wallhanging 2.jpg

I hope this gives you some new ideas for how to customize and create art for your home. So many more things can be done with these techniques--I hope you'll give it a try!

October

My Favorite Month

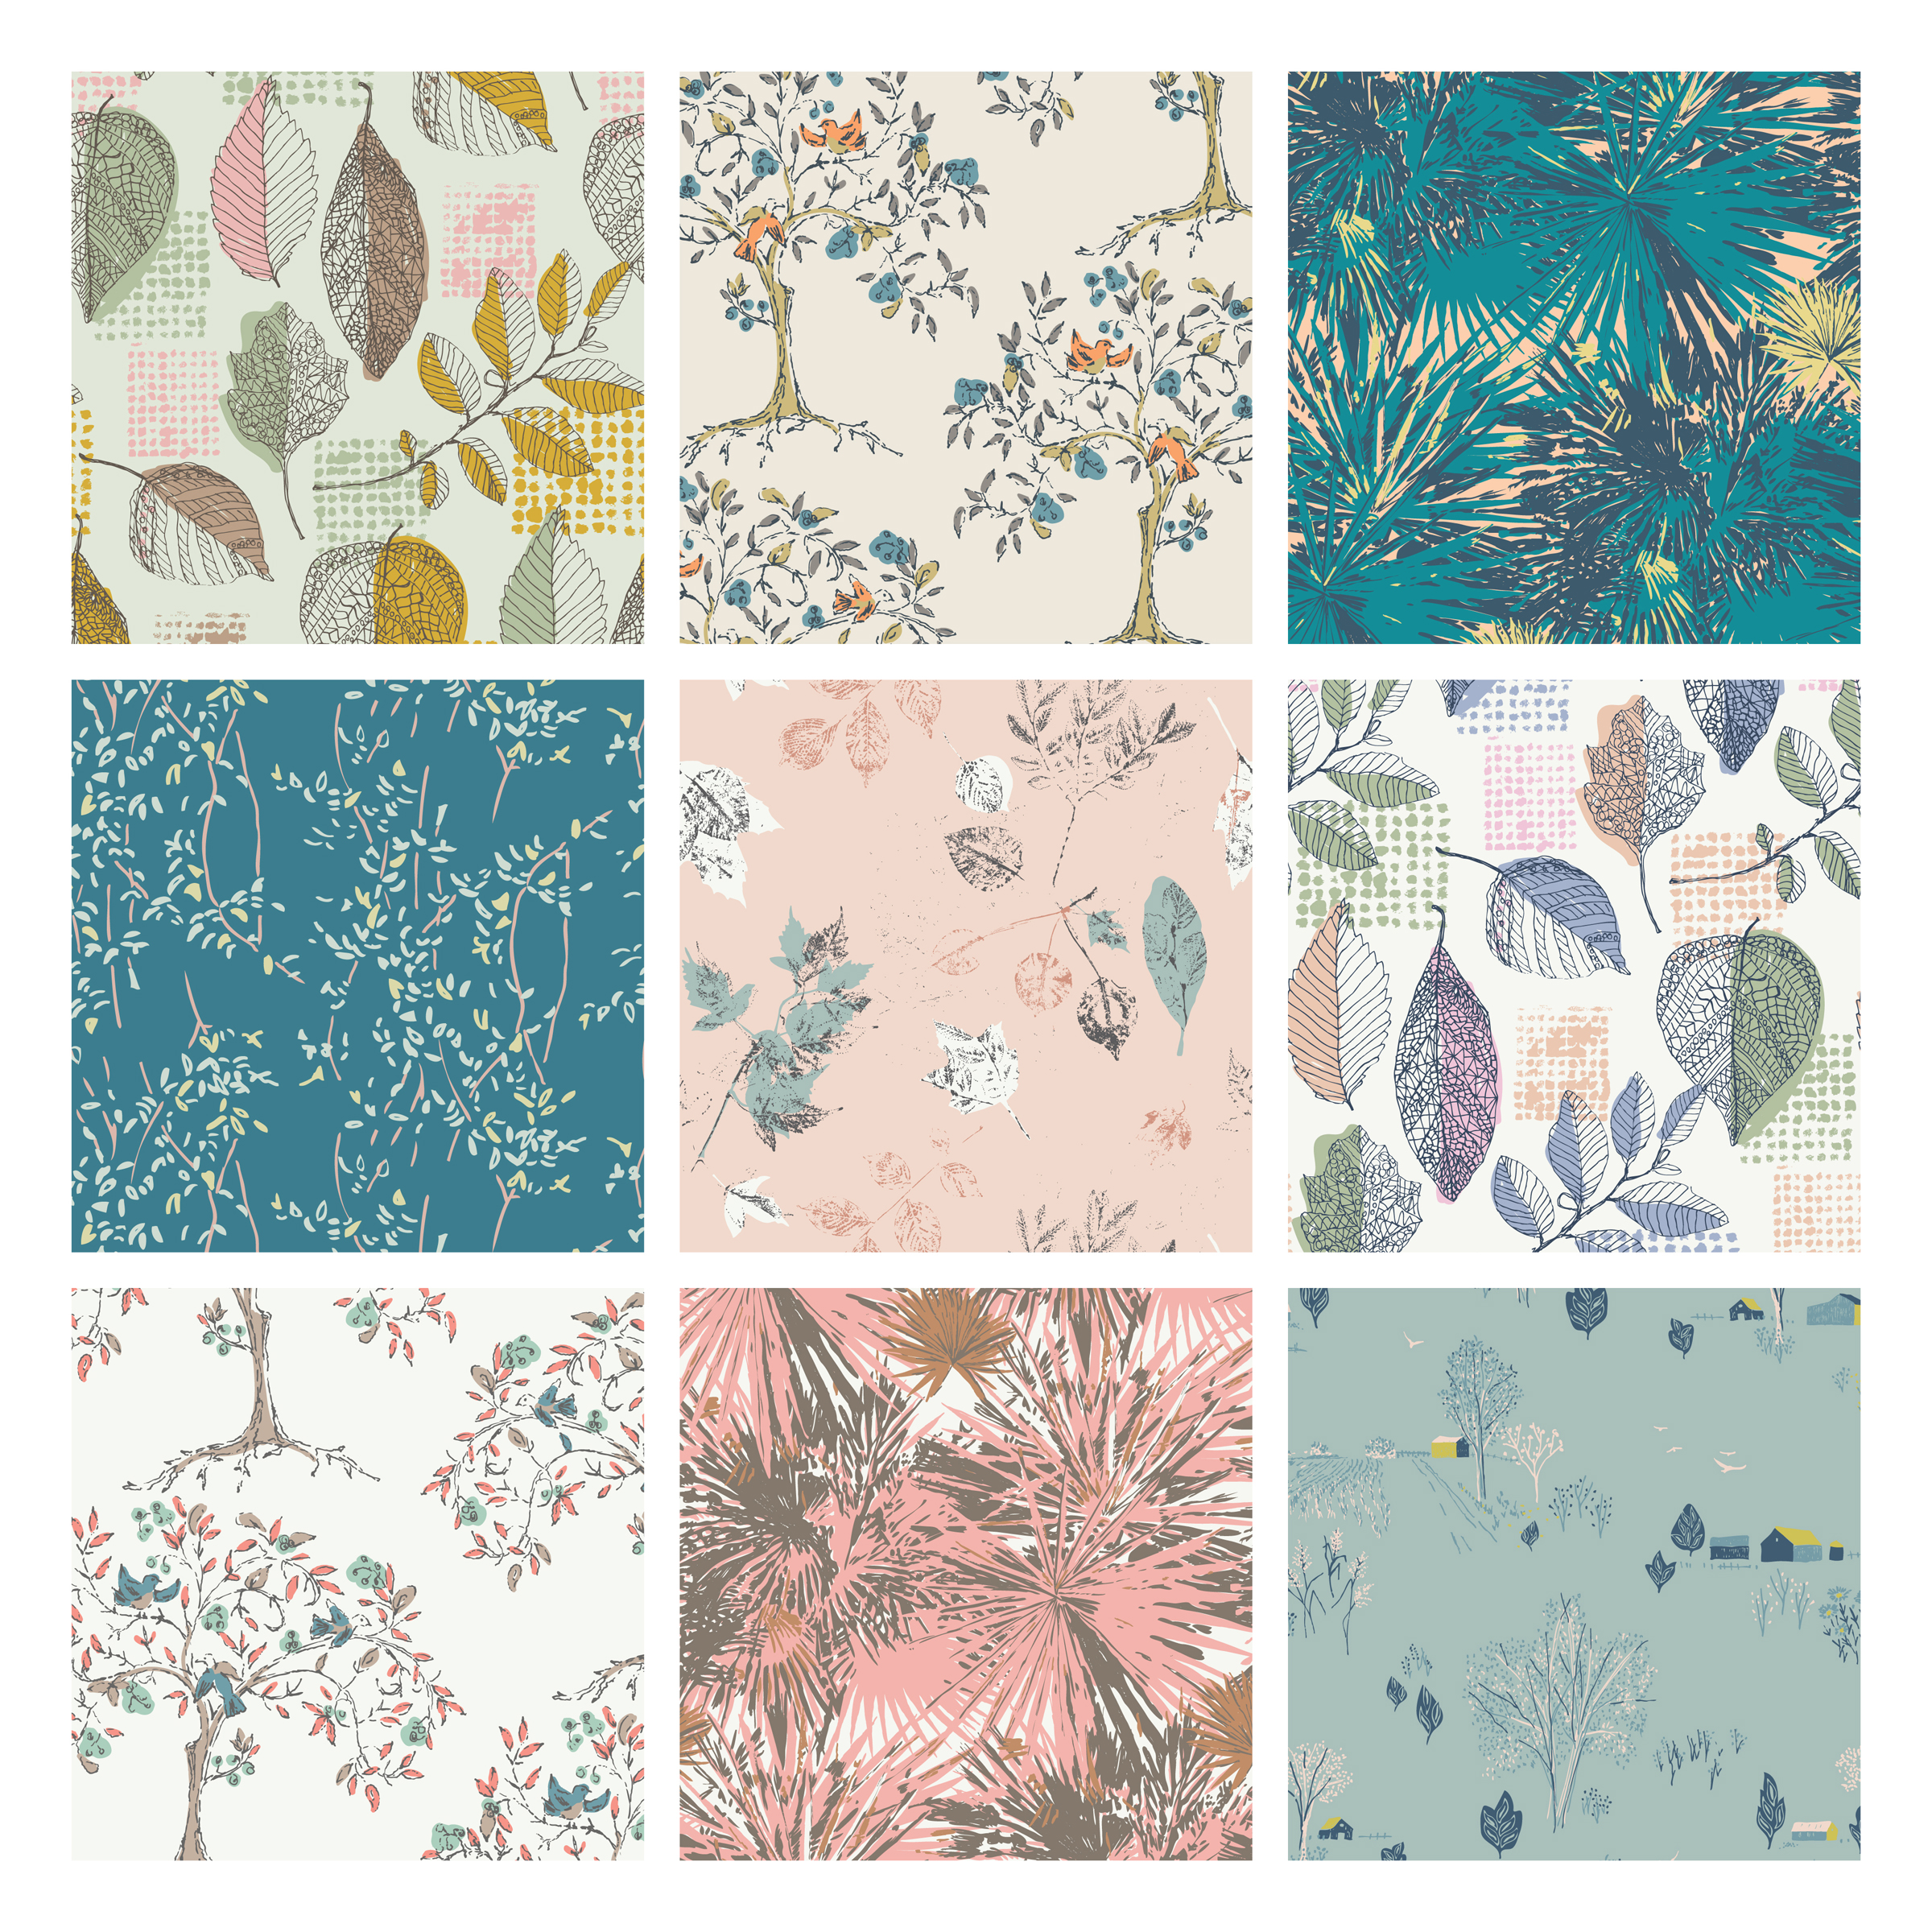
Leaf prints by Sharon Holland for Art Gallery Fabrics

Leaf prints by Sharon Holland for Art Gallery Fabrics

Fall is my favorite time of year and October (being my birthday month) is my favorite month of the year. I have always loved trees and tend to draw and paint them a lot. Many of my fabric collections contain some sort of leaf print:

Top row - Sketchbook Framework, Tapestry Eternal, and Coastline Tropical

Middle row - Bountiful Vine, Bountiful Arborescent, and Sketchbook Framework

Bottom row - Tapestry Eternal, Coastline Tropical, and Bountiful Scenic. 

This year the weather here in Ohio has been all over the place and our growing season seems a bit turned around. The plants and trees got an early start due to a mild winter but a hot spring slowed growth so spring and summer flowers were not very showy. Although the plants in my yard are still not full, we are experiencing some second blooms on plants like Coneflowers, Black-eyed Susans, Coreopsis, and of course Mums, Autumn Joy, and Sunflowers are seasonally now in bloom. I don't normally have this much color in my yard this late in the season and it makes one think summer might last forever. 

BG0A2682.JPG

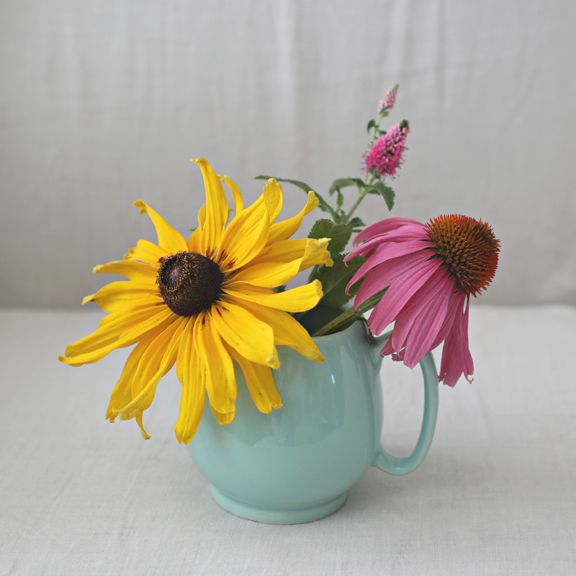
In the past I've painted predominantly landscape paintings and landscapes with barns. I've been wanting to get back to my canvases for some time now but it never seems to fit into my schedule. I've been taking photos of flower bouquets to have a reference for painting later when I have time to paint and want to try my hand at still life painting this next time around. I wish I could stop and paint while the flowers are fresh but my days seem to always be full of other priorities. These photos will have to do when I'm ready to paint and I love that the flowers and branches came from my yard. 

BG0A2431 2.JPG

I did have a chance at the end of September to get out my oil paints and relearn how to paint. It has been too long between sessions and I feel very rusty. In fact, I am so rusty that my first attempt paining this creamer with flowers I grabbed some tubes of acrylic paint (which I though were oils) and painted with a mix of oil and acrylic. Needless to say it was not a great experience and I couldn't figure out why the paints didn't act like I was used to them handling. 

BG0A2499.JPG

This very clumpy painting is okay but left much to be desired. I decided to redo the same image the next day so I could concentrate on mixing colors better, working with only oils (hee hee, that was a big improvement right there!), bolder and looser strokes.

BG0A2533.JPG

Much improved but still a long ways to go to get to where I want to be. This is something that will take time and because I love the process of learning as much as I like doing it will be a fun challenge. I still want to loosen up my strokes but once I have reacquainted myself with the basic techniques of painting with oils I wont have to concentrate on those so much and can work on style and strokes next. 

IMG_4438.JPG

Last week my husband and I had a great time in Phoenix, Arizona celebrating his father's 89th birthday. It always blows my mind seeing the desert landscape and I cannot help but feel I've stepped onto a different plant! I have no idea if the plants in AZ normally bloom this time of year or if they're also experiencing a second bloom season but I was pleasantly surprised to find so many blooming plants there this visit. I do love all the texture and the small leaves on the trees. 

I did come away with a pattern idea from our trip that I intend to explore this week and see if anything comes from it. My only hint is it's not from the plants and is inspired by something man-made and natural at the same time. Although the desert plants are really beautiful I don't feel a deep connection to them as I do the plants native to the Midwest so I will leave those to photography at this time. 

Photo cortesty of Quilter's Planner

Photo cortesty of Quilter's Planner

Looking ahead October will fly by. Quilt Market is only a week and a half away! The 2018 Quilter's Planner calendar will be available soon and this year it's packed with goodies. A separate magazine will have quilt patterns and it also comes with 4 pages of planning stickers by Alison Glass! To see all what the 2018 Quilter's Planner has to offer read more here (affiliate link).

Photo courtesy of Quilter's Planner

Photo courtesy of Quilter's Planner

Enjoy the beauties of October and soak in the last warm rays left-over from summer!