
Here we are with Week 4 of the Goose Goose Sew Along — the week when you join all the Goose and Heart blocks with the setting pieces and sashing to bring everything together and create the full quilt top!
If you missed the start of the sew along, take a look at the Goose Goose SAL Week 1 post, then come back here when you’re caught up and ready.
HOW THE SEW ALONG WORKS
During the 5-week sew-along, we’ll break the pattern into manageable, bite-sized tasks so you still have plenty of time for summer activities and other commitments. You’re welcome to sew ahead at your own pace, or follow each week’s blog post prompt and complete just the steps needed for that week. I’ll be using this blog to post helpful tips and handy tricks for making this quilt, and the blog will also be the place where the weekly giveaways are hosted.
There’s no signup for this event. Simply purchase the Goose Goose PDF pattern from my website SHOP and follow along, sewing with me each week at your own pace. For the giveaways, instructions will appear each week explaining how to leave comments on the relevant blog posts to enter for that prize; names will be drawn from the comment pool on each specific post—see this week’s giveaway at the end of this post.
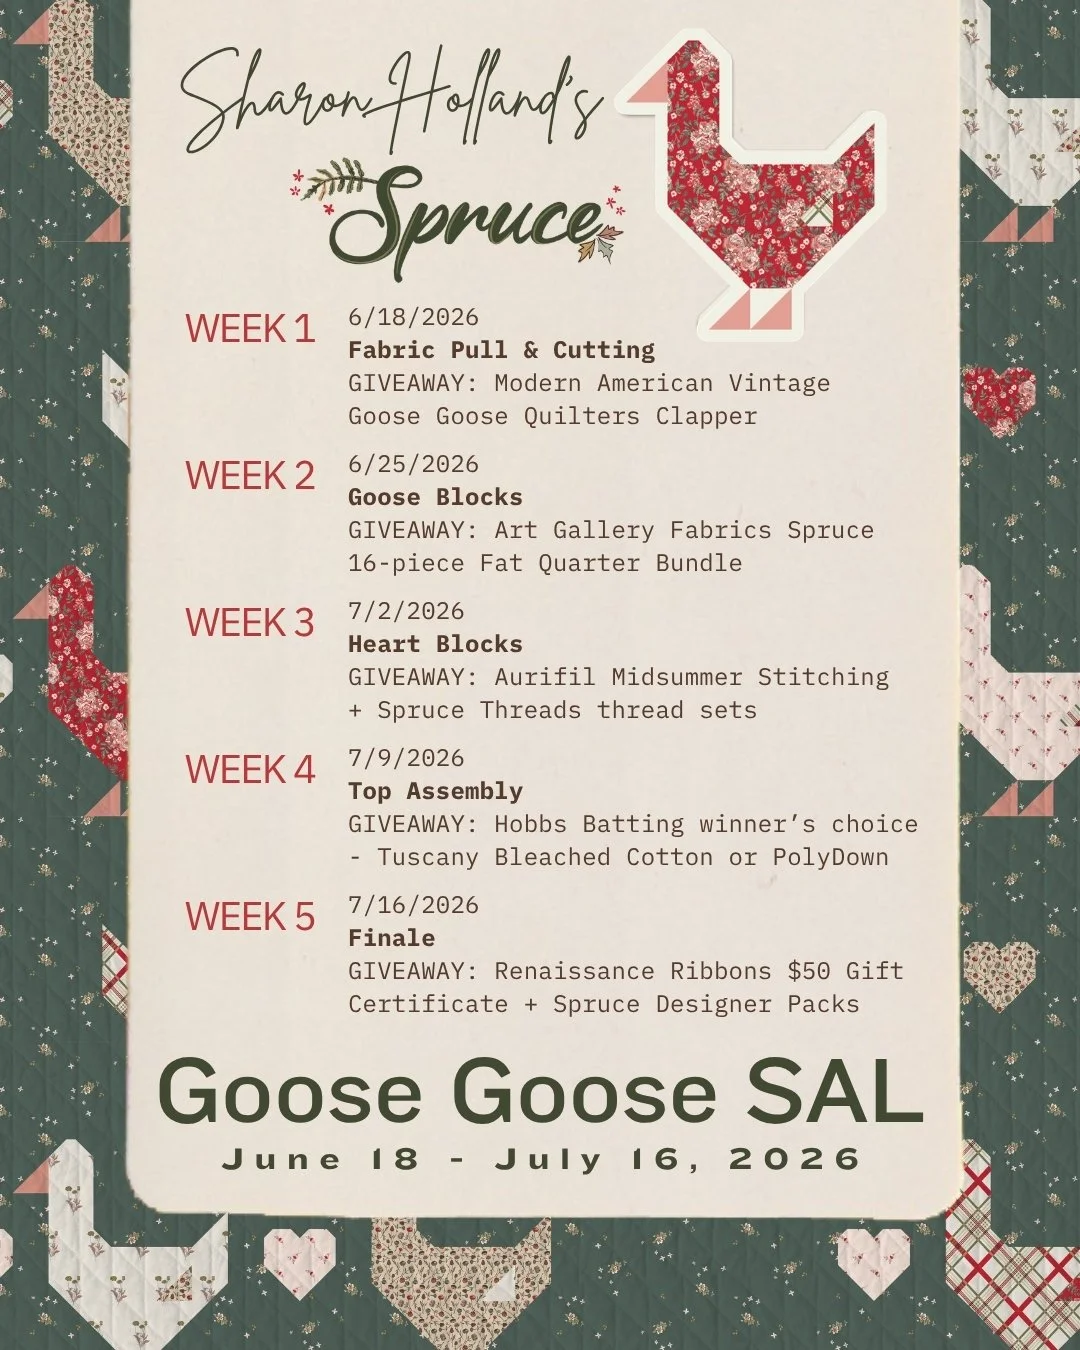
Above is the SAL schedule for what I’ll cover each week and the exciting giveaways! Be sure to read to the bottom of this post for how to enter into the Week 4 giveaway where 5 lucky winners will win their choice of a queen-size batting of either Hobbs Batting Polydown batting or Hobbs Batting Tuscany Bleached 100% Cotton batting!
**** Cindy Webb, please check your email or spam inbox for a message from me about being drawn as one of the winners in last week’s giveaway, RSVP ASAP! ****
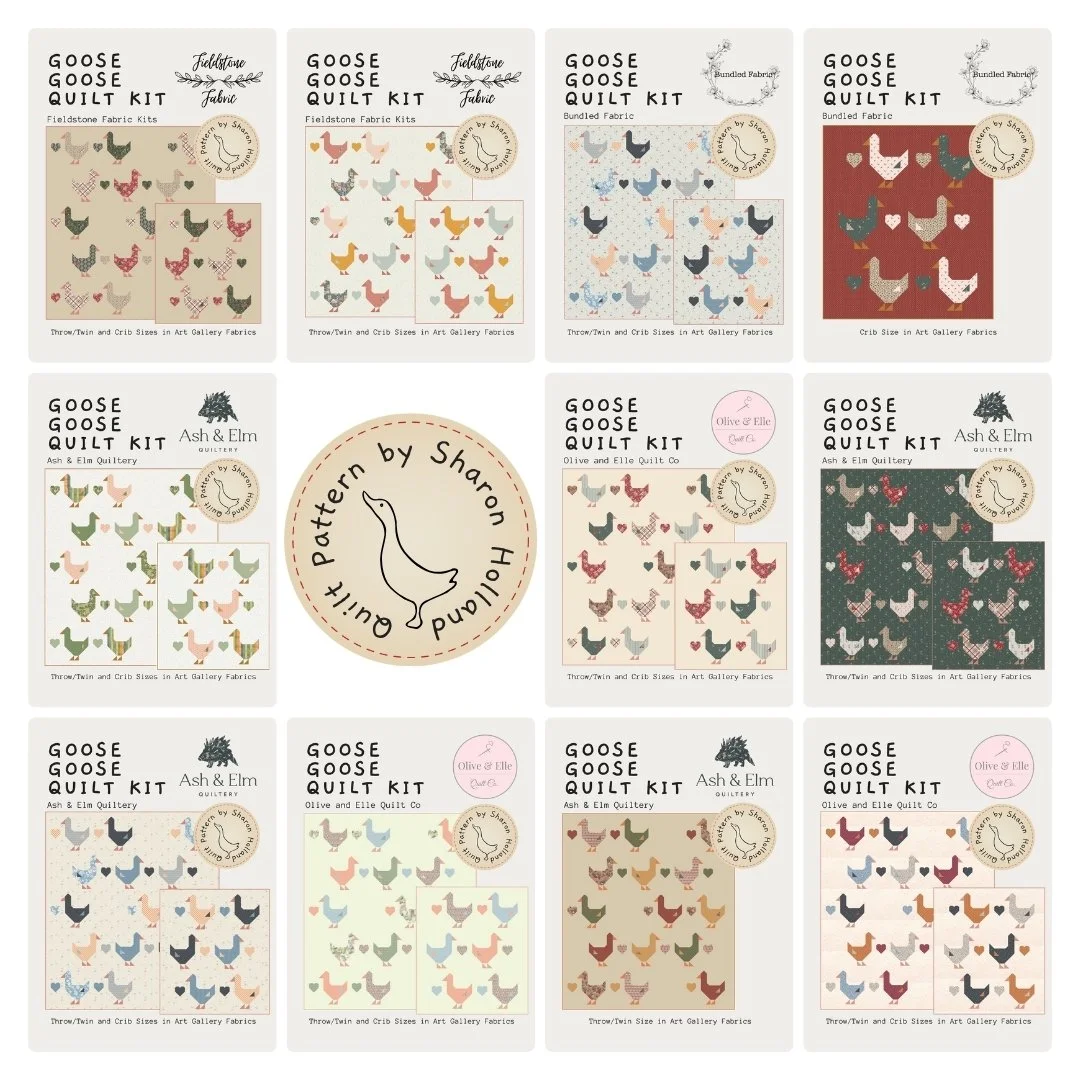
I’m collaborating with several shops to bring you Goose Goose quilt kits in both crib and throw/twin sizes, so you’ll have options if you don’t want to source the fabrics on your own. All their Goose Goose kits are made with Art Gallery Fabrics and the pattern is sold separately from my website SHOP.
GOOSE GOOSE KITS
Ash & Elm Quiltery (US) - Several Goose Goose version options plus the Spruce Goose Goose kit to match my SAL quilt
Bundled Fabric (CA) - Pattern cover quilt option and a Spruce version
Fieldstone Fabrics (US) - Size a version options
Olive and Elle Quilt Co (US) - Several Goose Goose version options and sizes
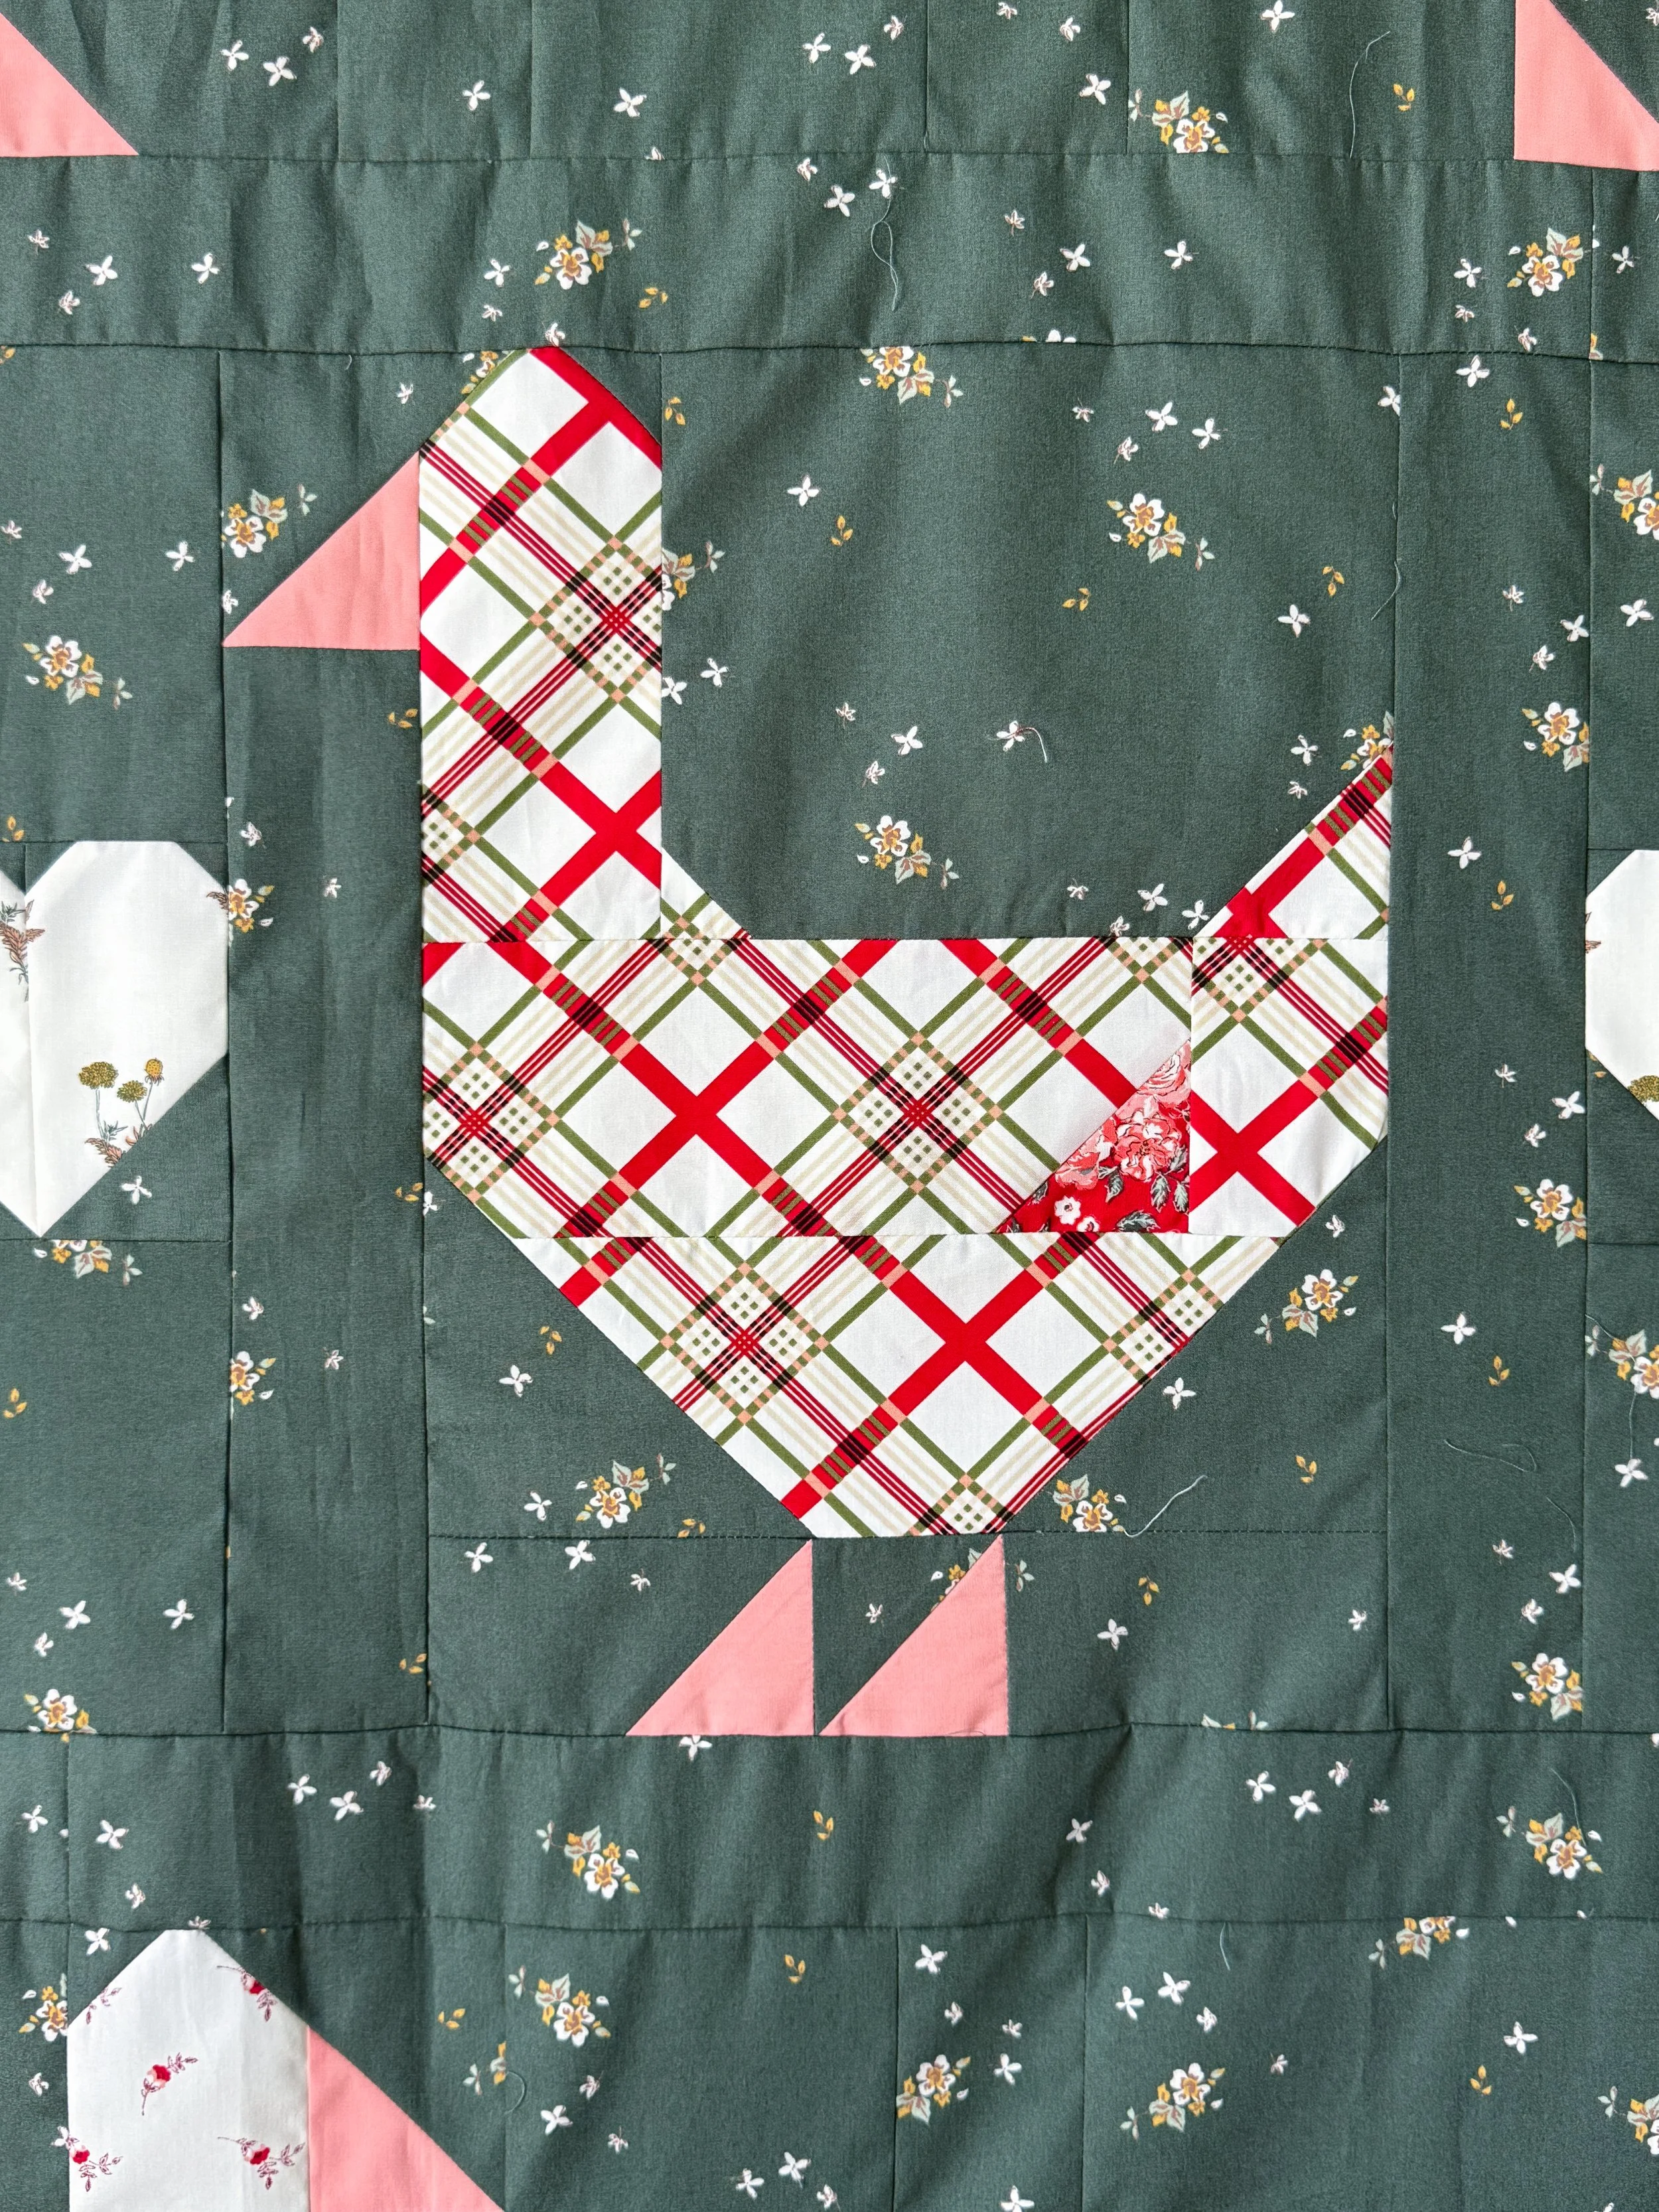
WEEK 4 - Top Assembly
Let’s jump right into your assignment for this week. Remember, you’re encouraged to work at your own pace and feel free to sew ahead if you’d like.
SOME TIPS FOR SEWING THE quilt top
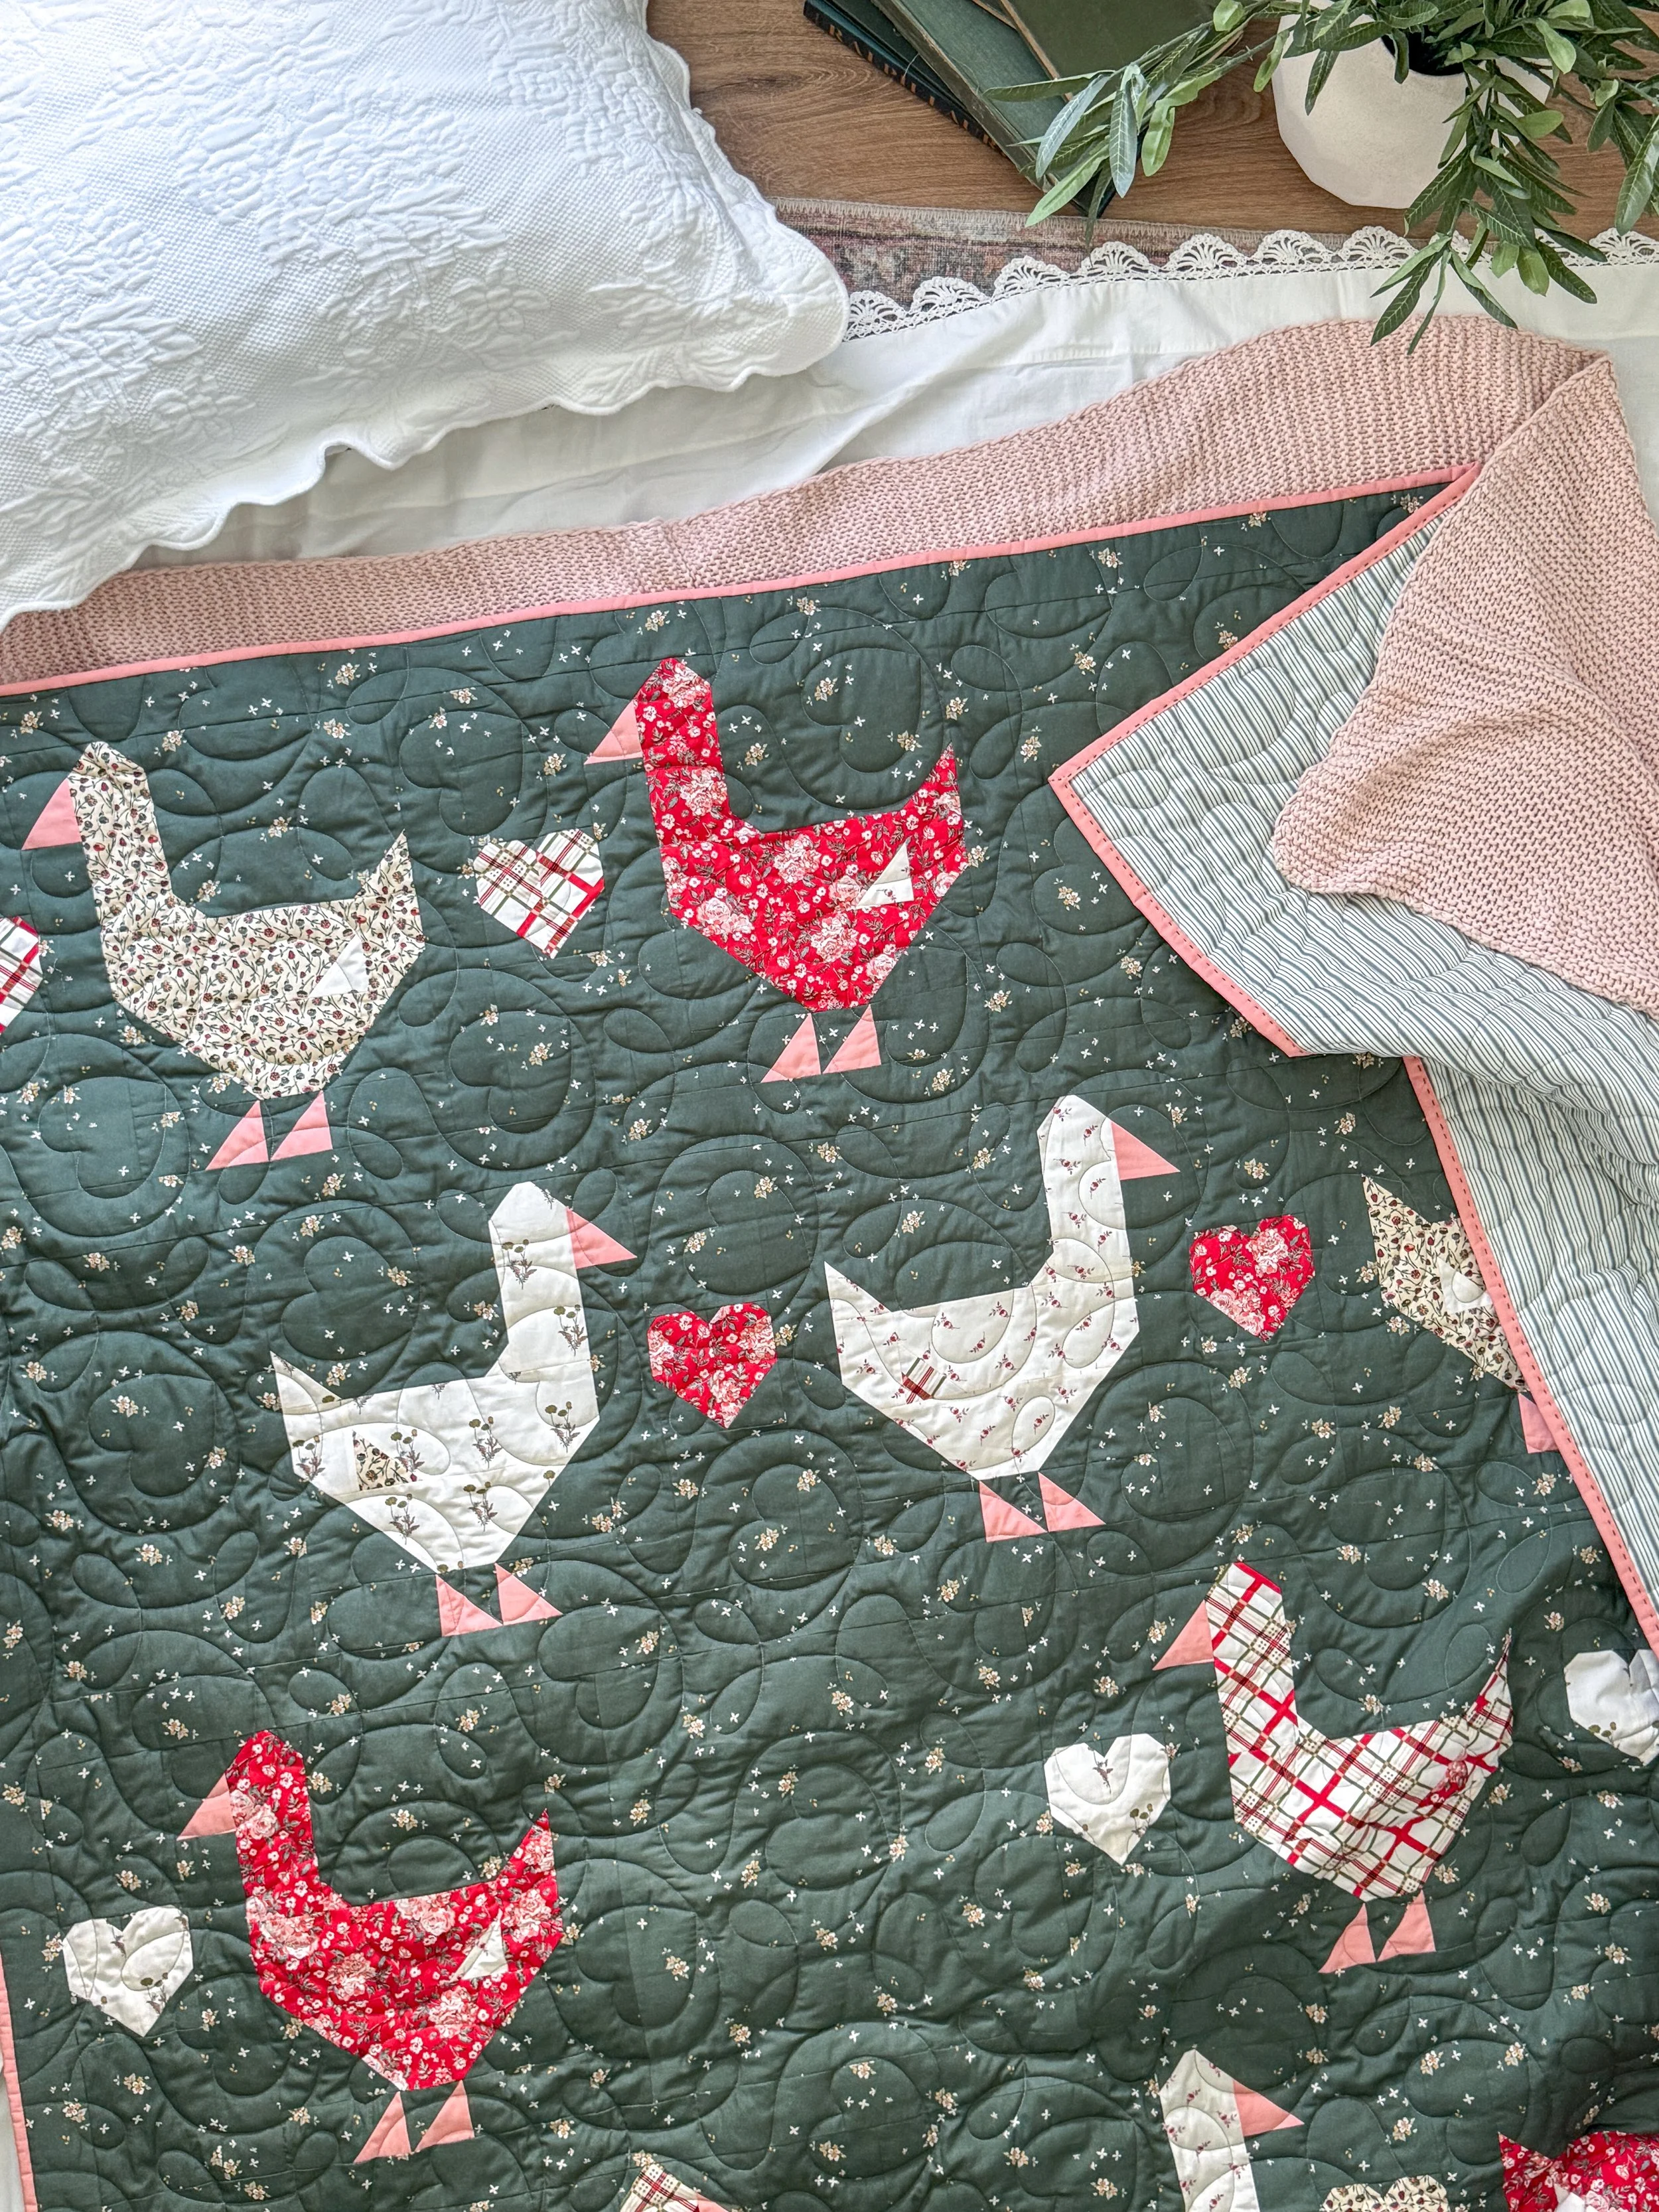
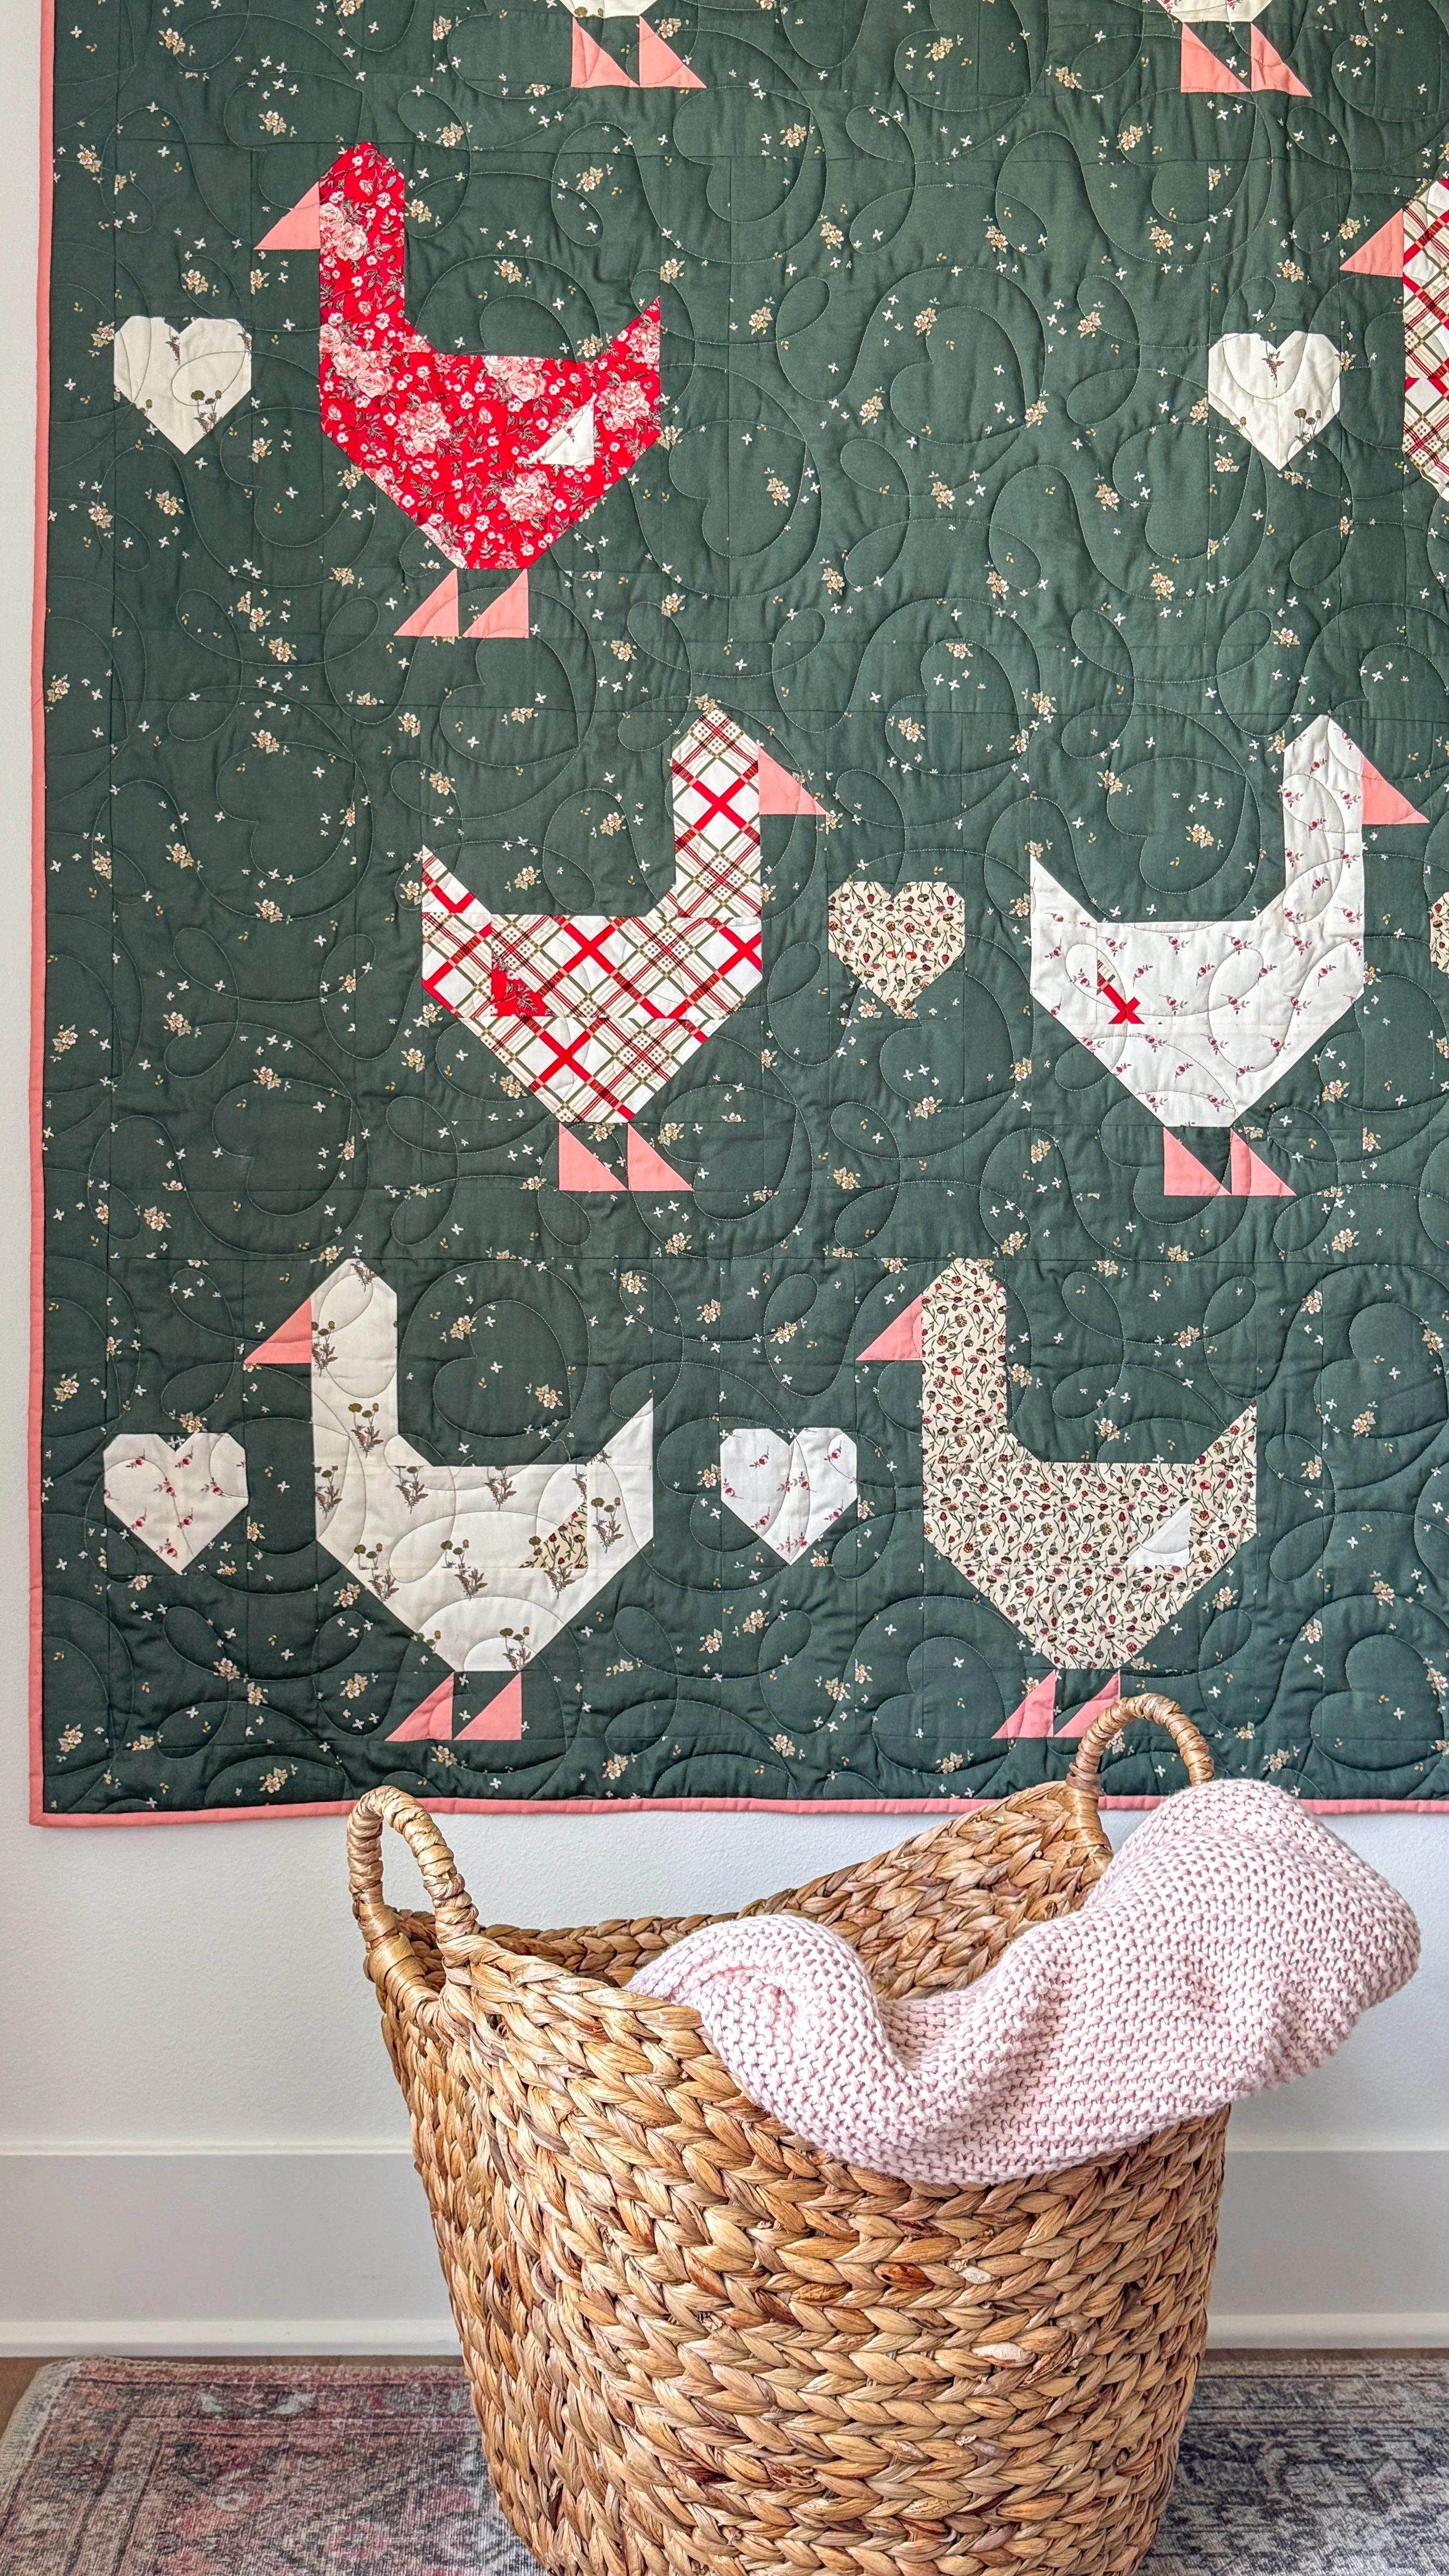
If you have a design wall, it’s a wonderful way to view your quilt top layout before you begin piecing. If you don’t have a design wall, a large floor space or a big bed laid out with your blocks works well as an alternative. I like to arrange my pieces and then take a photograph of the layout. This does two things: first, it helps you keep track of which blocks go where when you move from layout to the sewing machine—positions can easily get flipped or shifted. And second, looking at a photo makes it much easier to spot mistakes in piecing, block placement, or the overall balance of the quilt. I sometimes take several photos of different arrangements and “audition” them by scrolling through my camera roll to pick the version I like best.
Other Ways to Decide on Block Arrangement
If you bought a quilt kit from one of my collaborating quilt shops, you would have received a pattern supplement printout showing the quilt kit mockup, which you can use as a guide for placing your blocks. Or perhaps you used the coloring page in the back of the quilt pattern and colored in your Goose Goose quilt, giving you a clear idea of how you’ll assemble the quilt top. Whichever method you prefer — the supplement, the coloring page, or your own arrangement — choose what works best for you. However you decide to arrange your blocks, your Goose Goose quilt will be charming and your new favorite quilt!
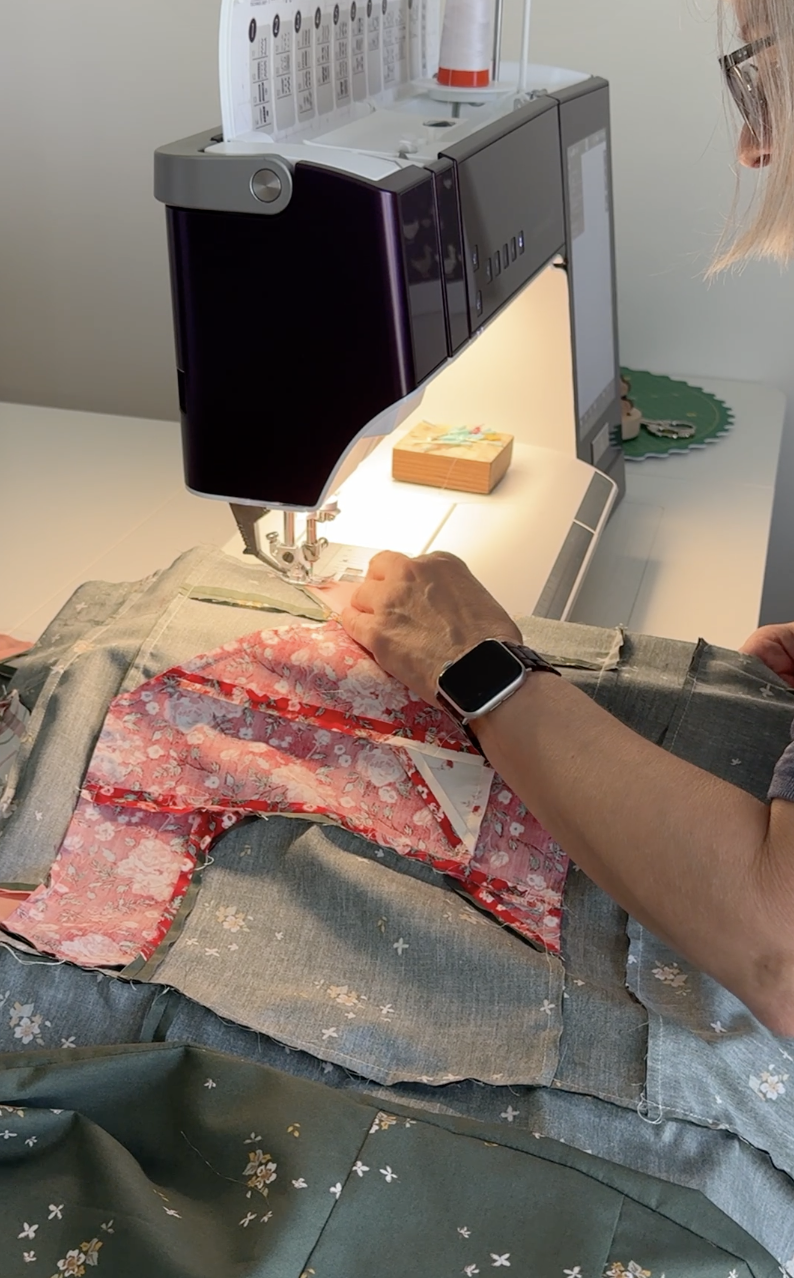
I highly recommend having all your blocks pressed before assembling your top, and pinning as you sew the blocks into block rows and again when you sew the block rows and sashing rows together. Pinning helps keep seam points sharp and ensures everything stays exactly where it needs to be as you wrestle with larger and larger sections of the top. Pin at junctions where the seams match up. I also press my seams after each block row is made and again after a block or sashing row has been added to the top to keep everything neat and flat.
WEEK 4 GIVEAWAY!
Each of the five weeks of the sew along I’ll share helpful tips to guide you through that week’s sewing assignment and also announce the new giveaway prize. Some weeks I’ll select a single winner from the comments on that blog post, while other weeks there may be multiple prizes so several lucky readers will be chosen—each week brings a fresh opportunity to win something (whether you’re sewing along or not) that you’ll genuinely enjoy adding to your sewing studio.
HUGE THANK YOU TO Hobbs Batting FOR THIS WEEK’S GENEROUS GIVEAWAY PRIZE!
Hobbs Quilt Batting has manufactured high-quality batting for hobbyist, commercial, art and show quilters since 1978. They're proud to come from a family of quilters and are committed to providing the same quality Hobbs batting that provide to their own family of quilters. At Hobbs Batting, they never forget that quilts are gifts from the heart - an expression of love, commitment and caring for a specific recipient - or an expression of artistry and skill- artistry and that's submitted and judged in quilt shows and events around the word - or both! At Hobbs they're committed to doing their part to enhance our #JoyofQuilting!
Hobbsbatting.com * Blog * Instagram * Facebook * We hope you visiting Hobbs Quilt Batting!

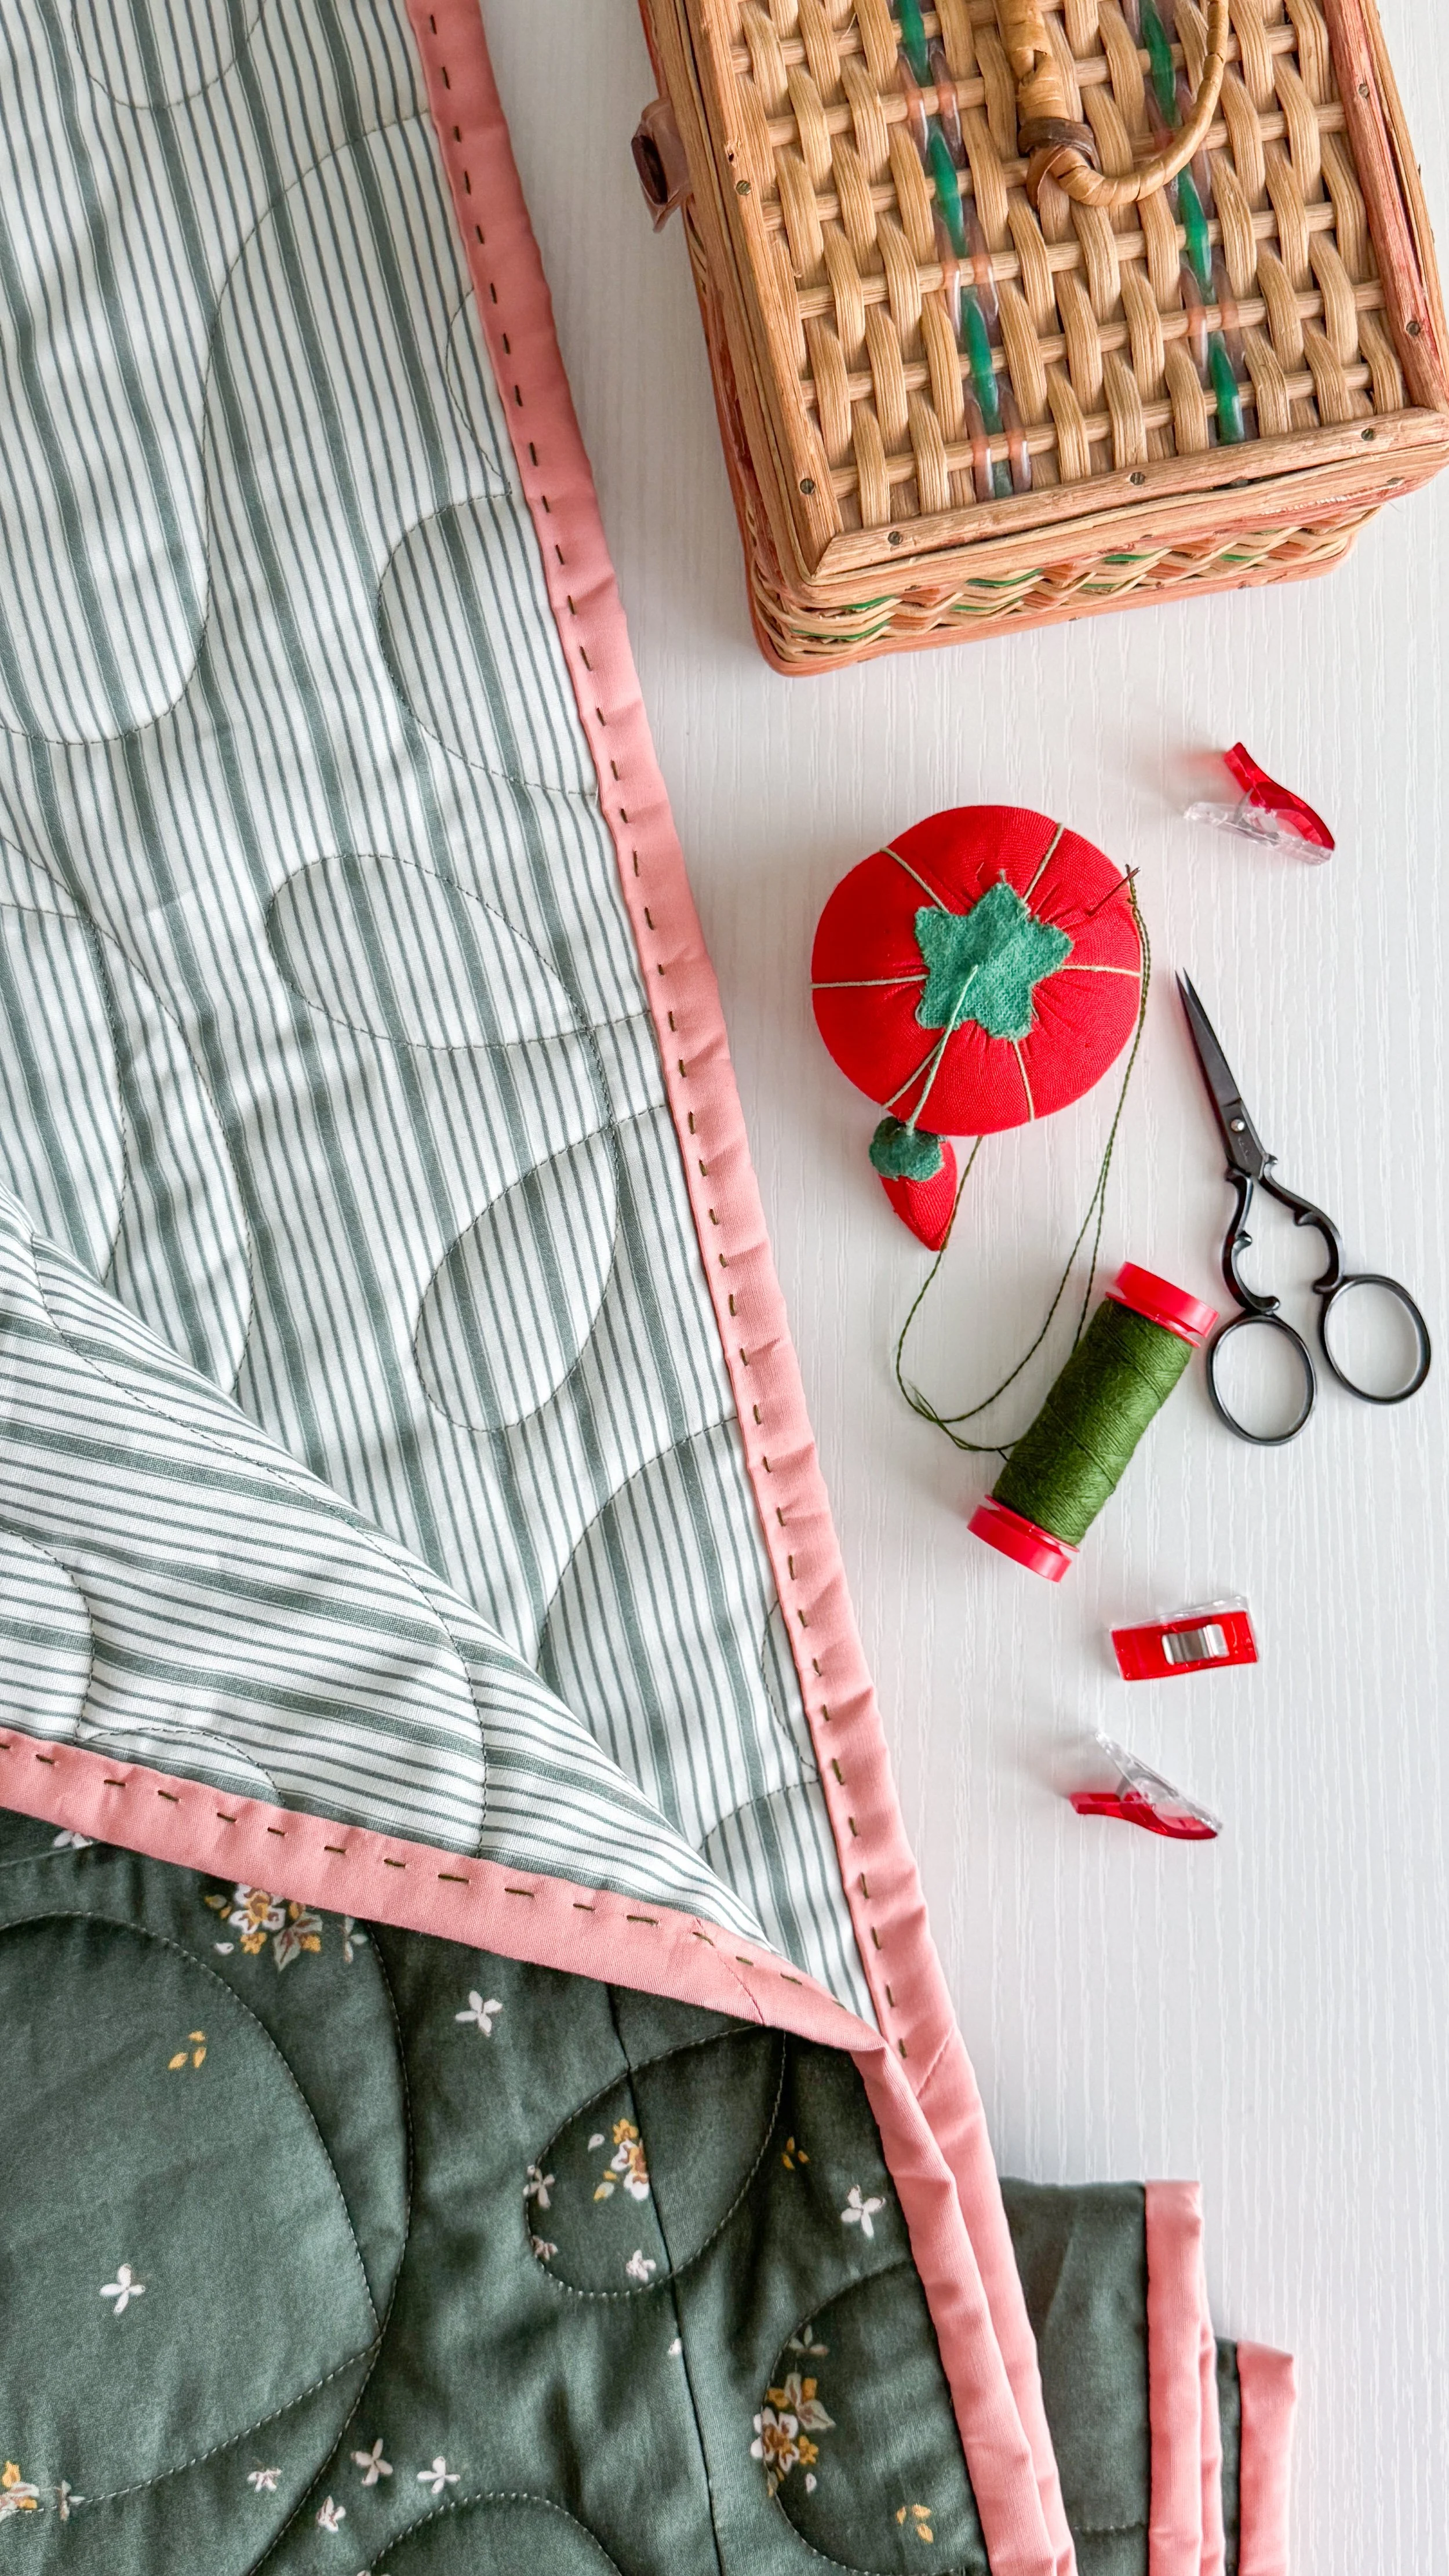
Hobbs Batting is giving five lucky winners the chance to receive a queen-size batting of their choice: either Hobbs Polydown (one of my personal favorites for a puffy quilt — the same batting I used in my Spruce Goose Goose quilt) or Hobbs Tuscany Bleached 100% Cotton batting for a luxurious, traditional feel and elegant drape.
I have been using Hobbs Batting for years now and truly love all of their products. It’s easy to overlook how much batting contributes to the overall look, feel, and long-term performance of a quilt, but it makes a significant difference. To provide a deeper look at batting options, I interviewed Stephanie Hackney in 2021 — she is the Director of Sales and Marketing for the Hobbs Craft and Retail Division — in an informative Q&A covering the range of battings Hobbs Bonded Fibers offers. In that conversation we explore the distinct properties of different batting fibers, which battings work best for specific types of projects and end uses, and practical tips for getting the best results from your quilt by choosing the right materials to put inside it. Take the mystery out of what goes inside your quilt and watch the interview on the Sweet Home QAL Tutorials page.
PLEASE NOTE: The lead time for sending out the winning batting is approximately 5–6 weeks after I have contacted Hobbs with the winners’ names and batting choices. Please be aware that they do not ship to PO Boxes, so you will need to provide a physical U.S. address in order to receive your prize.
Giveaway now closed, congratulations to Wendi W., Esther, Kimberly S., Darcie, and Linda C.!
*Note: This giveaway is open to US addresses only, sorry no international shipping. If you're a "no reply" or anonymous commenter, please remember to include your email address in your comment--you can't win if I can't contact you!
1. Simply leave a comment in the comments section (below) on this Week 4 post and tell me if you’re sewing along with us! (Counts as a separate entry number (1) one.)
2. Leave a comment and tell me if you’ve ever used Hobbs Batting in your sewing projects and/or what’s your favorite type of batting. (This comment counts as a separate entry number (2) two).
3. Be following me (Sharon) on Instagram @sharonhollanddesigns and/or be signed up for my blog post newsletters AND be following Hobbs Batting at @hobbsbatting on Instagram or on Facebook (counts as your number (3) three separate entry) when you let me know you’re following us in a comment.
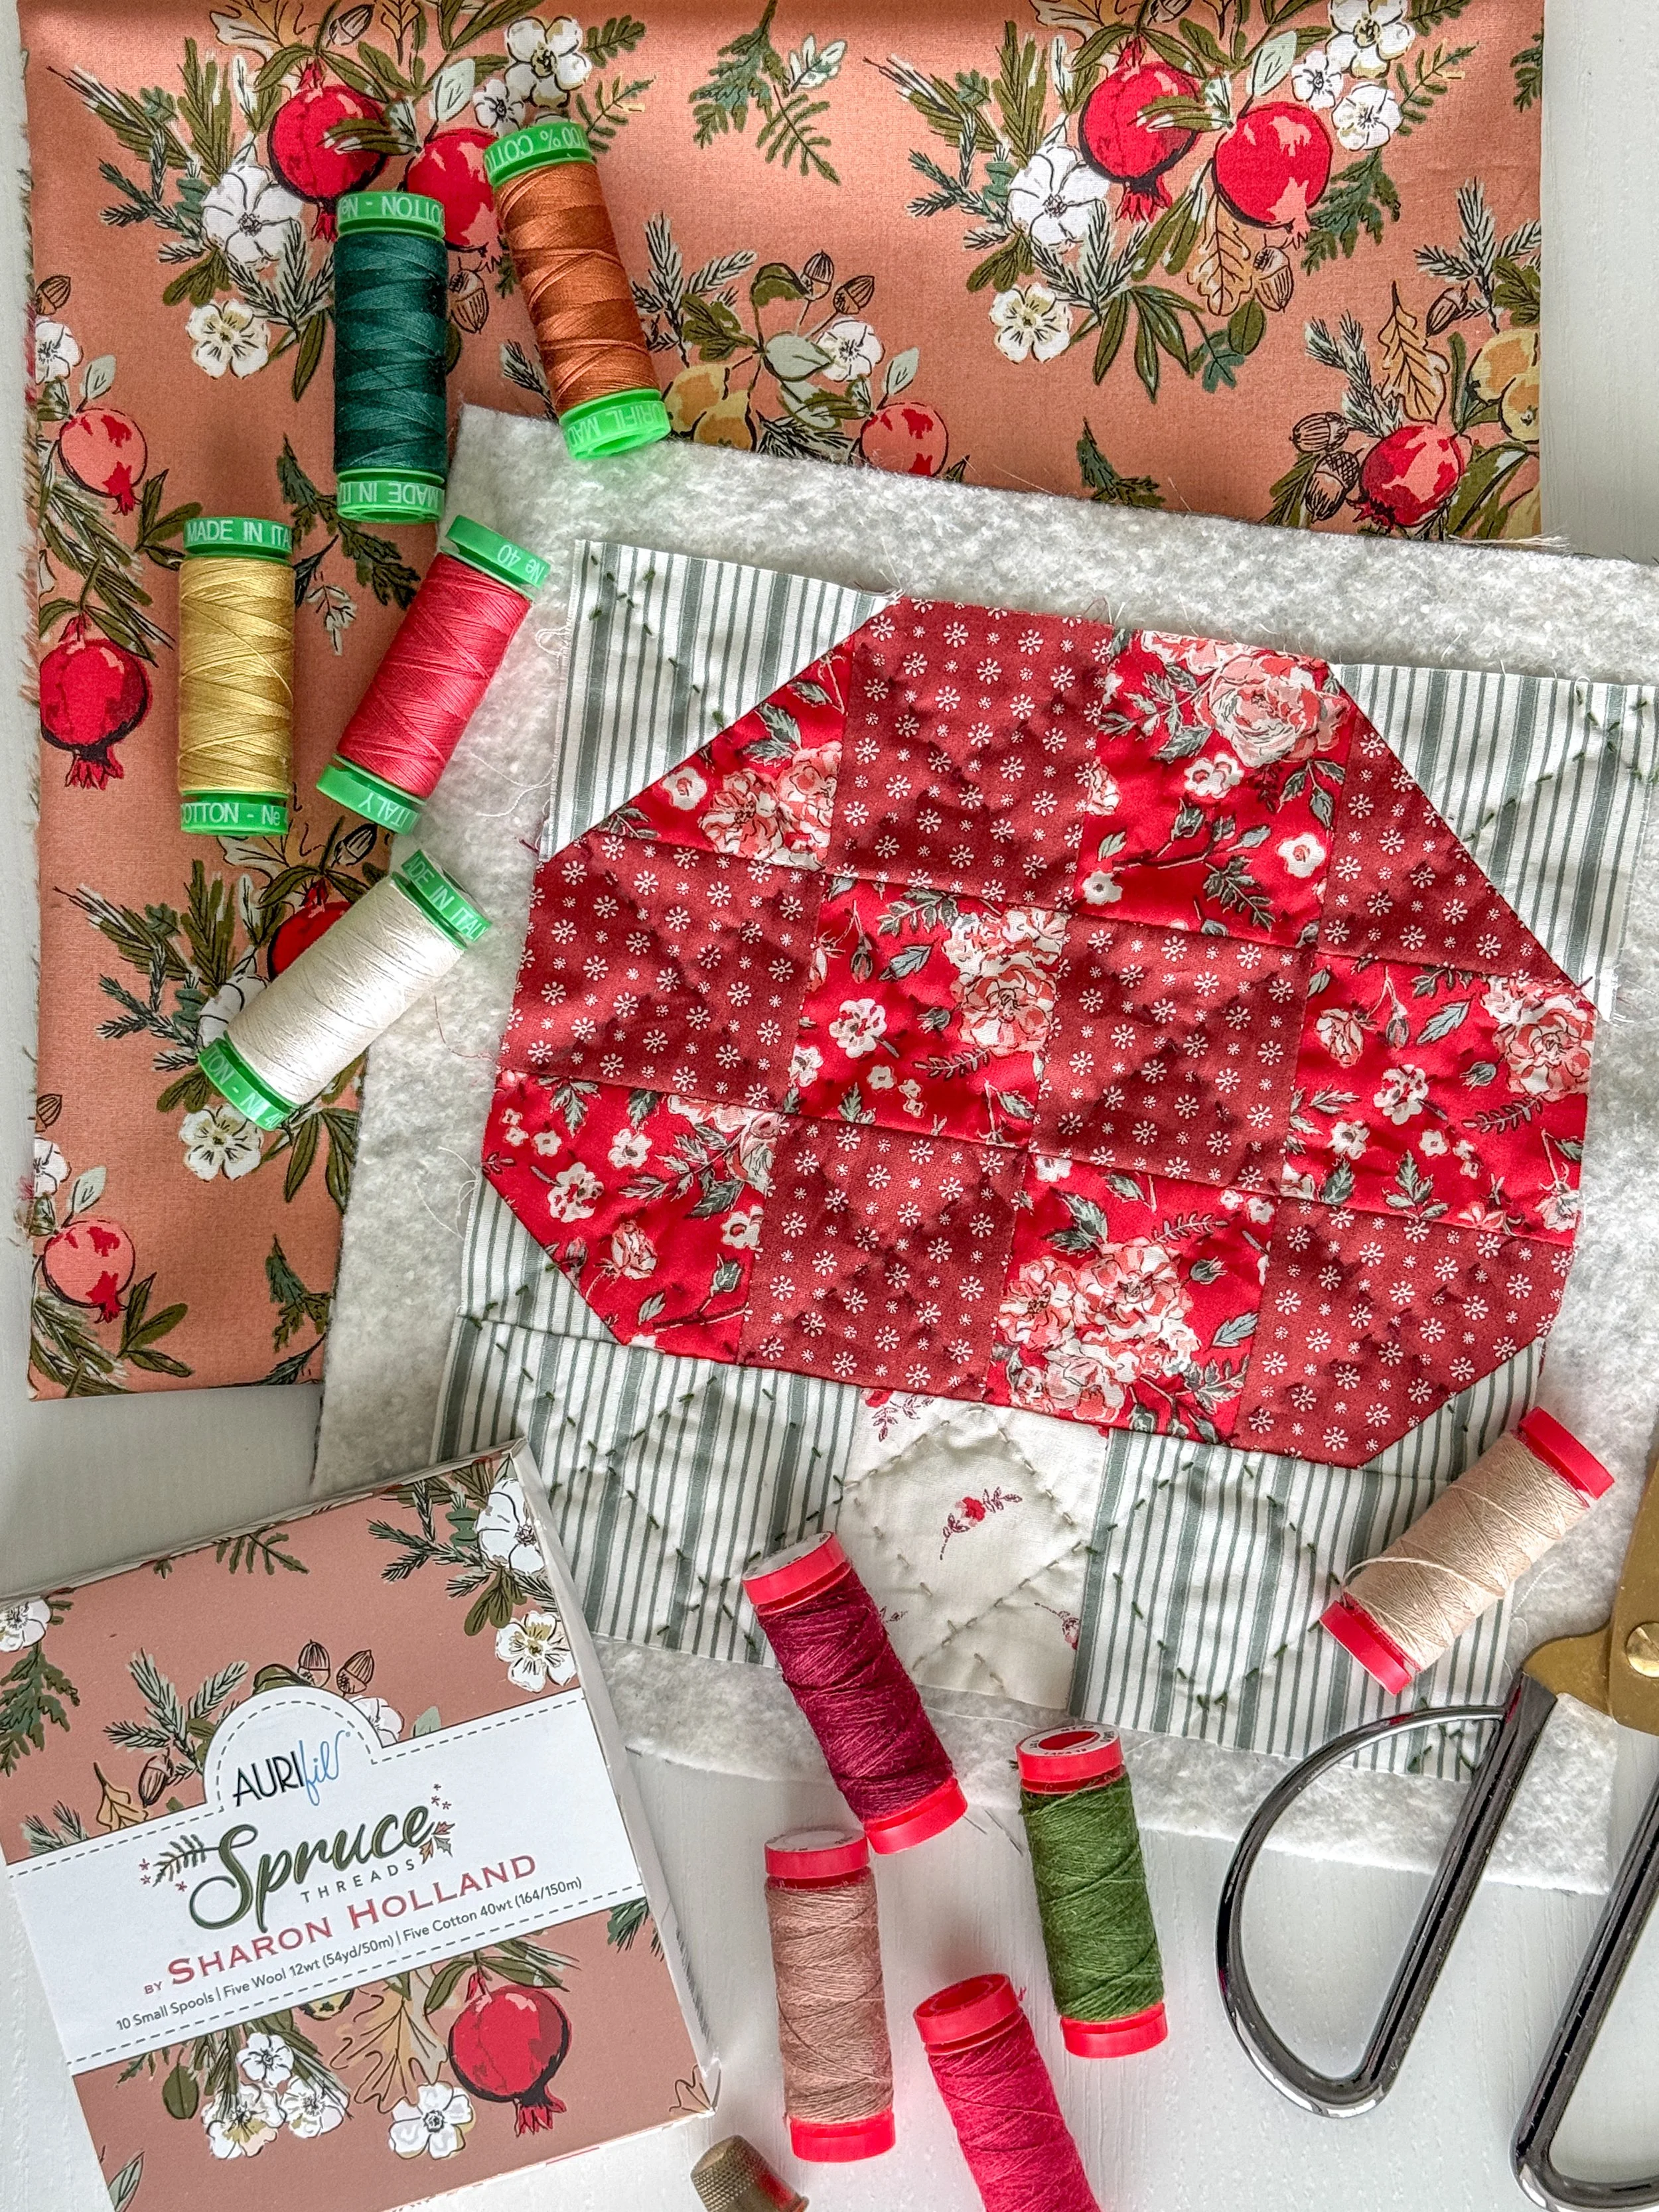
That’s THREE possible entries and up to three chances to win one of two Aurifil Thread thread sets! Enter now through Monday, July 13, 2026. I’ll draw two lucky winners from the comments pool on this post. The winning comments will be picked at random around 4 pm Central on Monday. I’ll post the name of the winners on this post once they've been notified and have responded back to my email.