Behind the Signature Look Book Projects Part 1 - Baby Room

Behind the Signature Look Book Projects Part 1 - Baby Room

Signature Baby Room full.jpg

There's so much yet to share about my new Signature fabric for Art Gallery Fabrics. It's such a fun collection I want to take extra time and a more intimate look at my projects that went into the AGF Signature Look Book (plus the ones that never got their time to shine on the virtual pages). 

Hexie Turtle.jpg

First, the Hexie Turtle, come on, how adorable is this!!!! 

Hexie Turtle 2.jpg

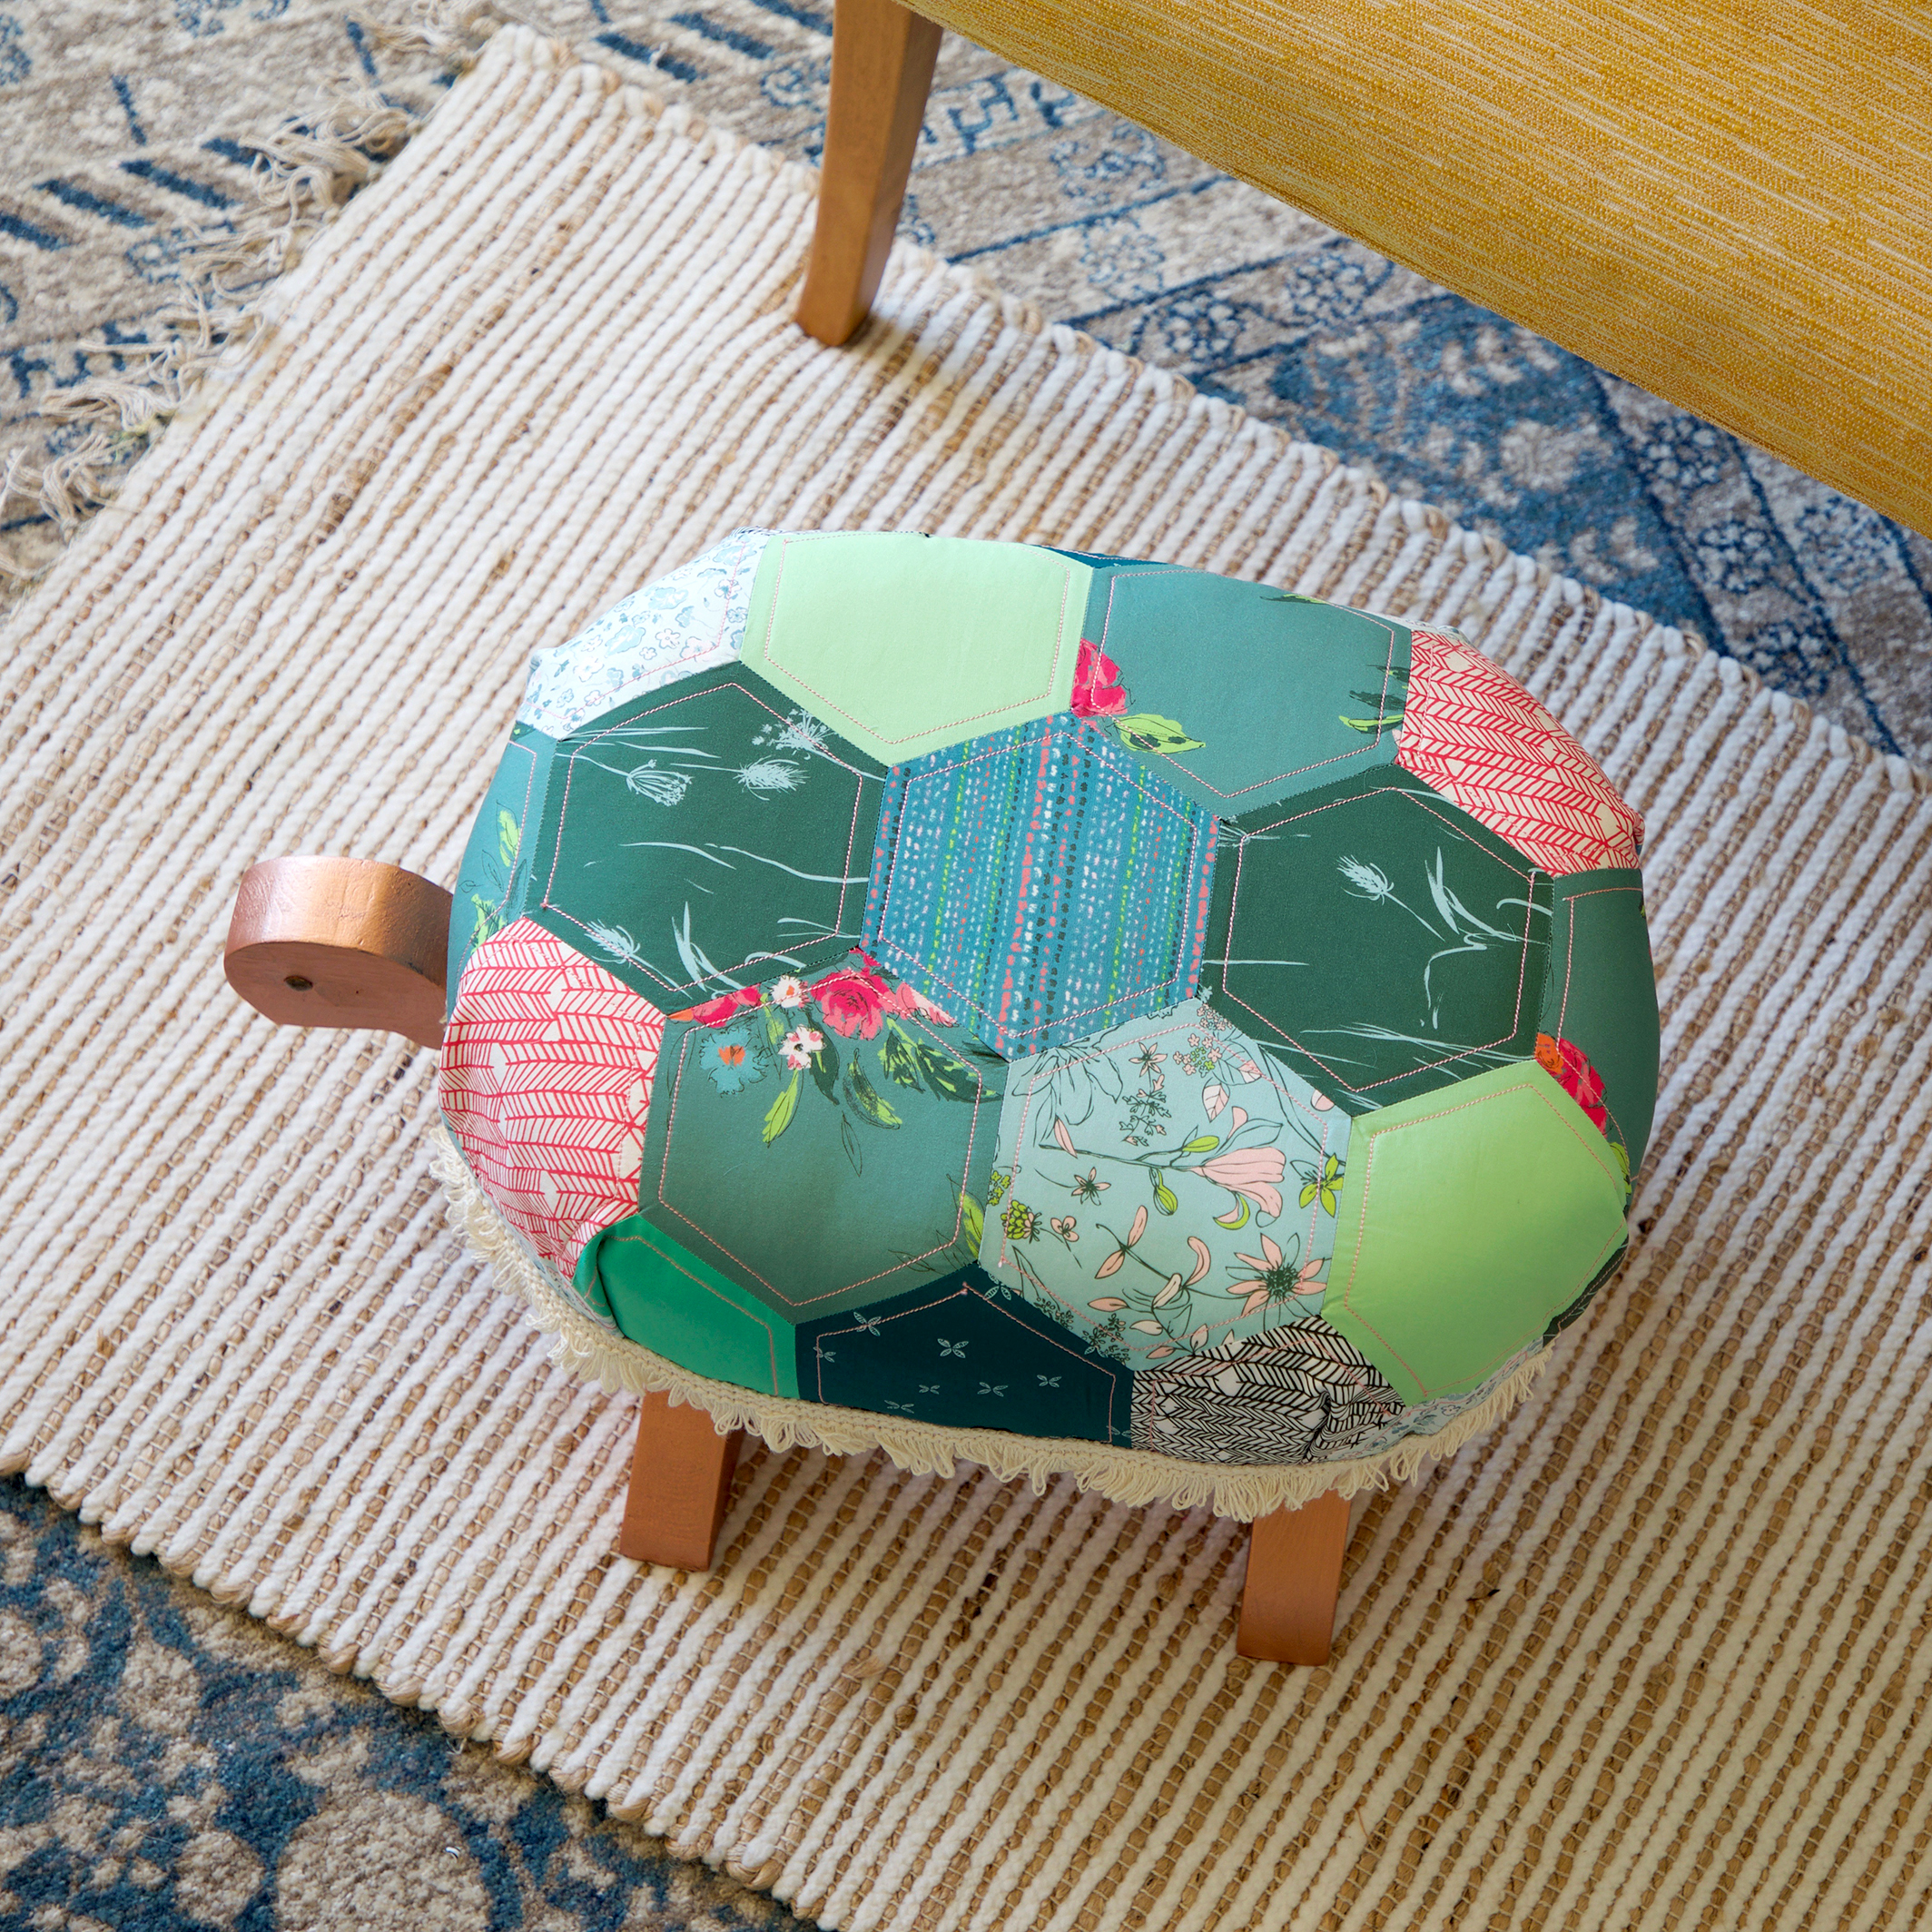
I picked up this homemade footstool at a garage sale. This footstool was really pretty ugly when I first saw it and actually left the garage sale without it only to think about it more and return later to still find it there. Once I thought about making a hexagon patchwork cover for the stool THEN I could see it's value! 

After taking off all the UGLY upholstery and heavy fringe, I spray painted the brown painted wood copper for a little bling. I used Red Pepper Quilts Hexagon Tutorial for how to sew hexagons together and made a large enough patchwork to cover my turtle.

A little bit of vintage fringe in a more appropriate scale for the stool and the results are nothing less than magical!

Signature Footstool 1.jpg

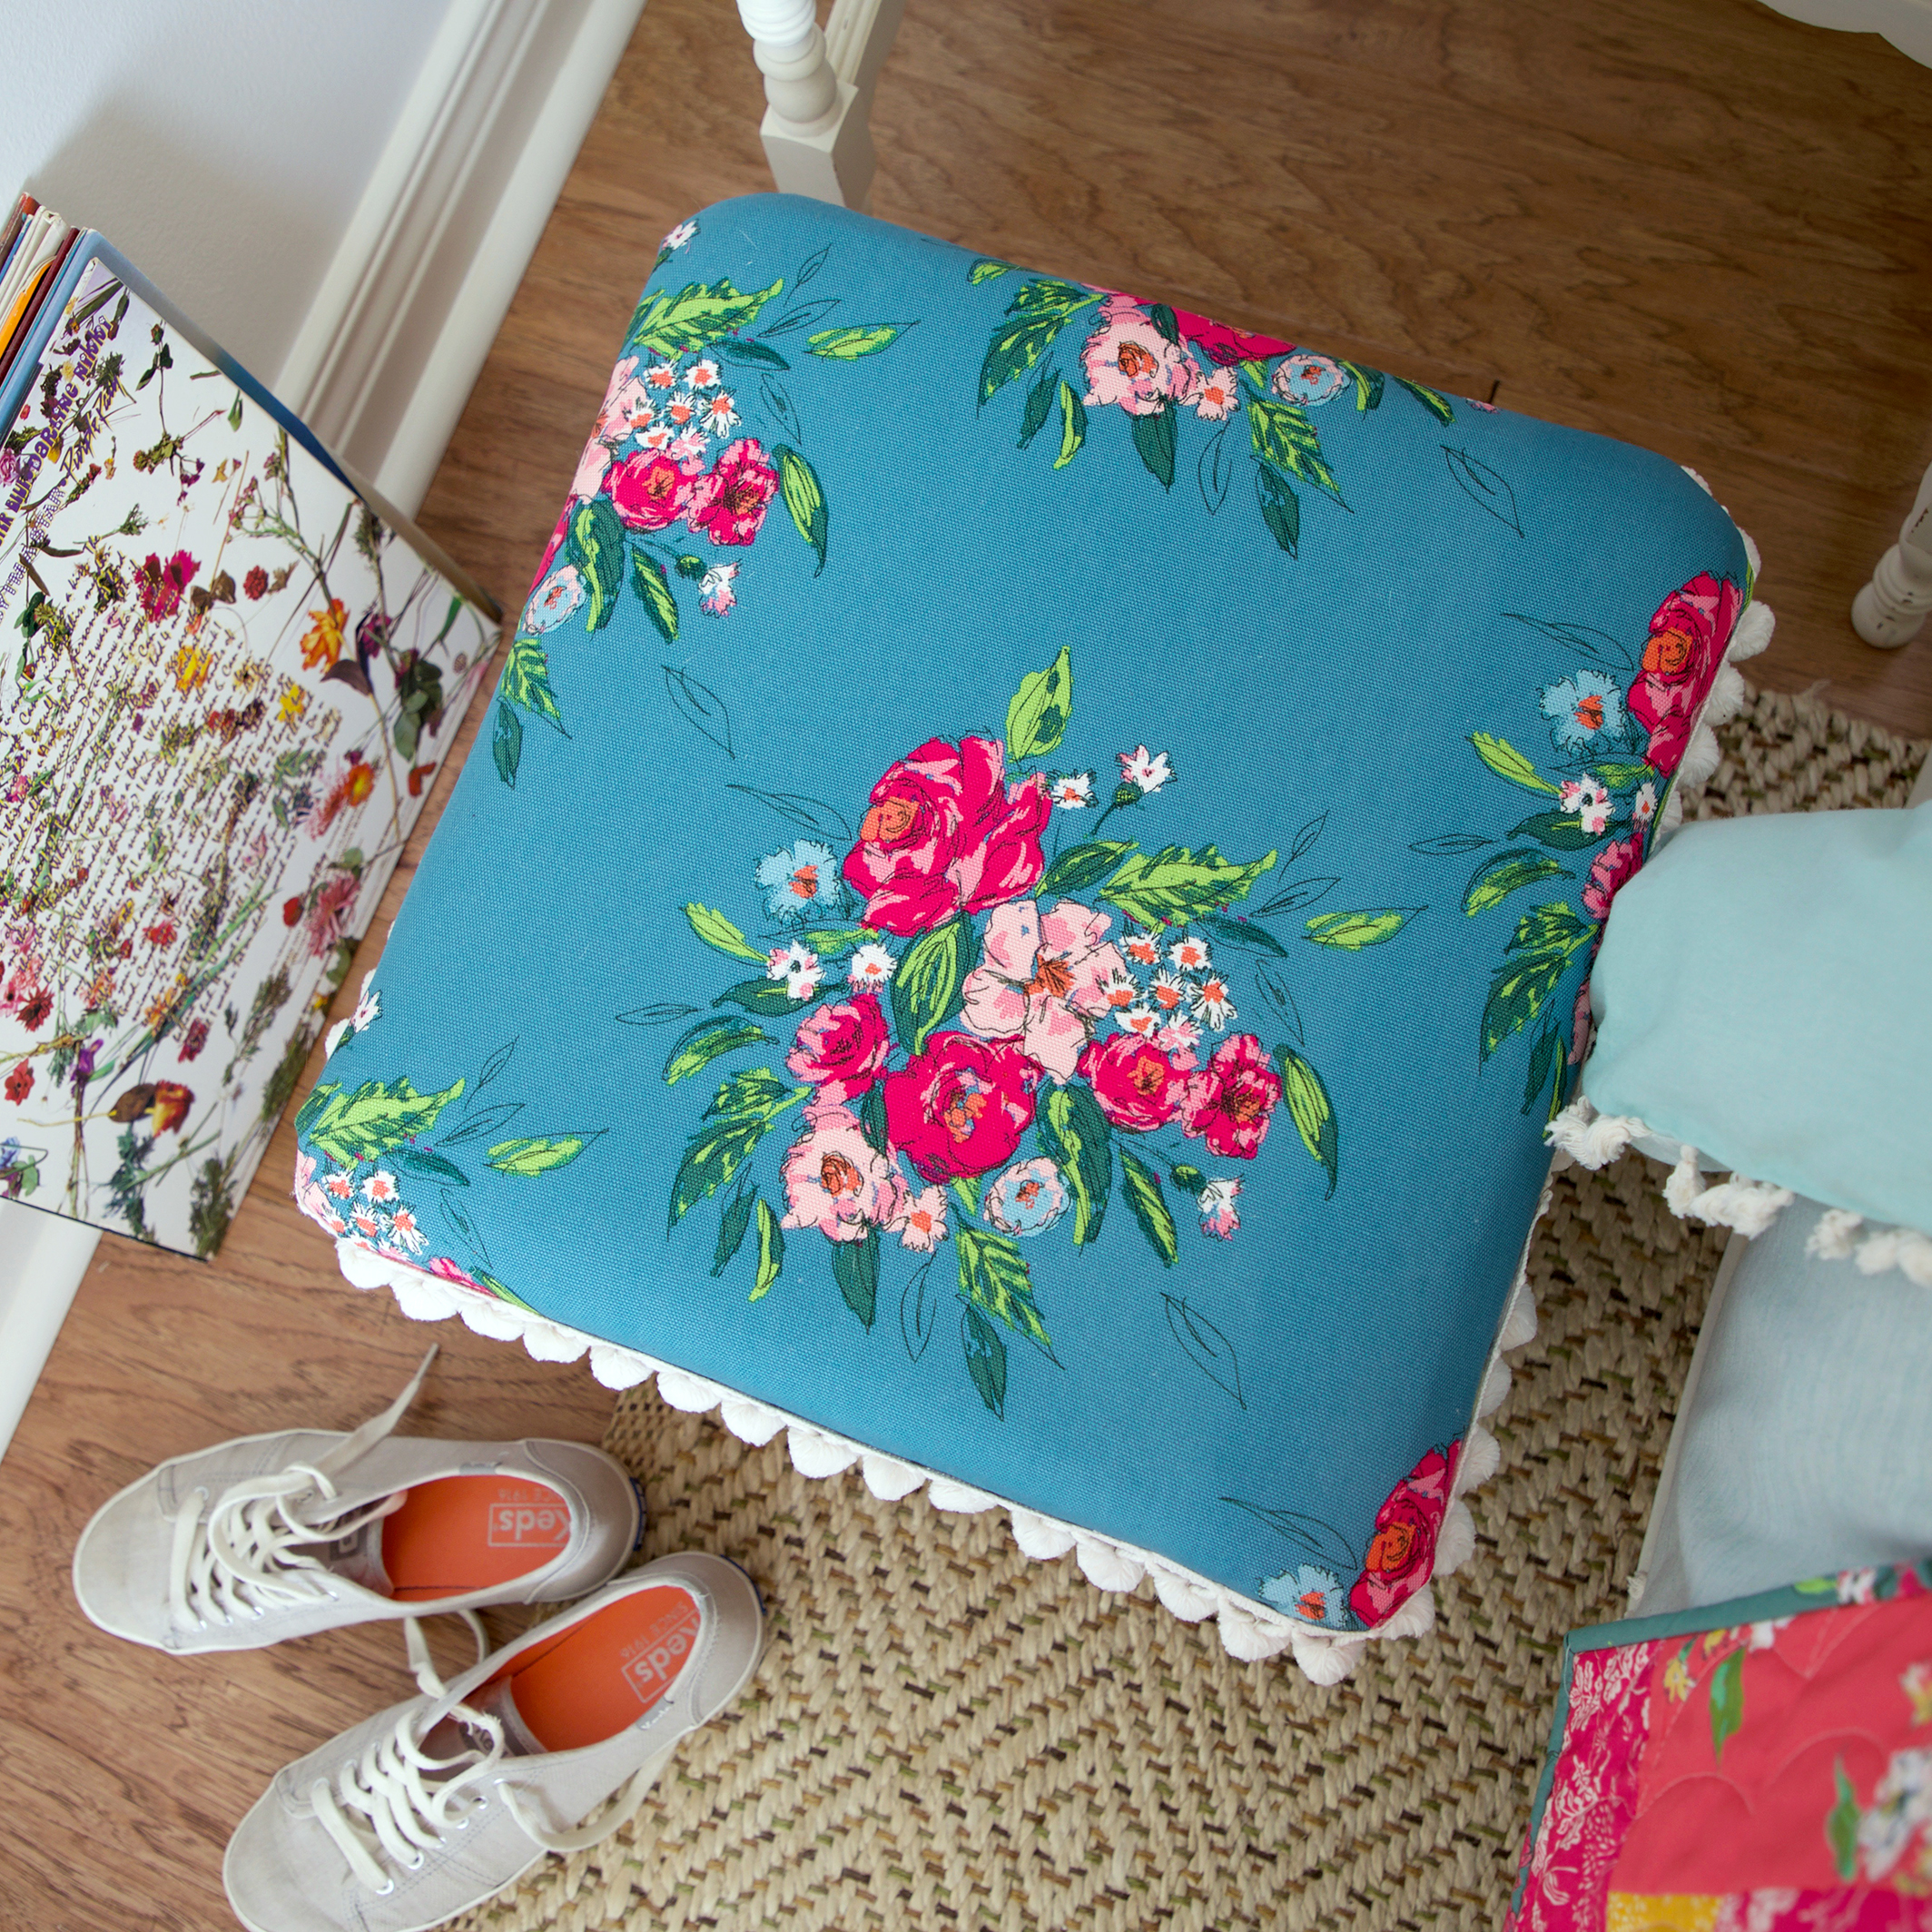
Another footstool makeover happened to a piece I already had around the house. It too is a vintage, homemade stool I picked up at a yard sale years ago. It's now looking fresh and new with it's Signature Extempore Gala canvas top and vintage pompom fringe.

Signature Fabrics Canvas footstool.jpg

Cute, huh?!!! For a tutorial on how to make the Hoop Art hanging above the chair, see my Signature Butterflies post.

Signature Fabrics Baby Room 2.jpg

You may have noticed the fun floor lamp with the Flora and Fauna Hidden fabric lamp shade? Yup, I recovered a vintage lampshade for the most adorable coordinate for this baby room. 

BG0A5570.jpg

This is my second time recovering this shade and it's even more special this time being finished in my own print. For an idea of how I made a new cover for this shade, visit the Craft Stylish tutorial.

Signature Fabrics Floor Lamp.jpg

What a great way to customize the look of a room!

Dritz Tote.jpg

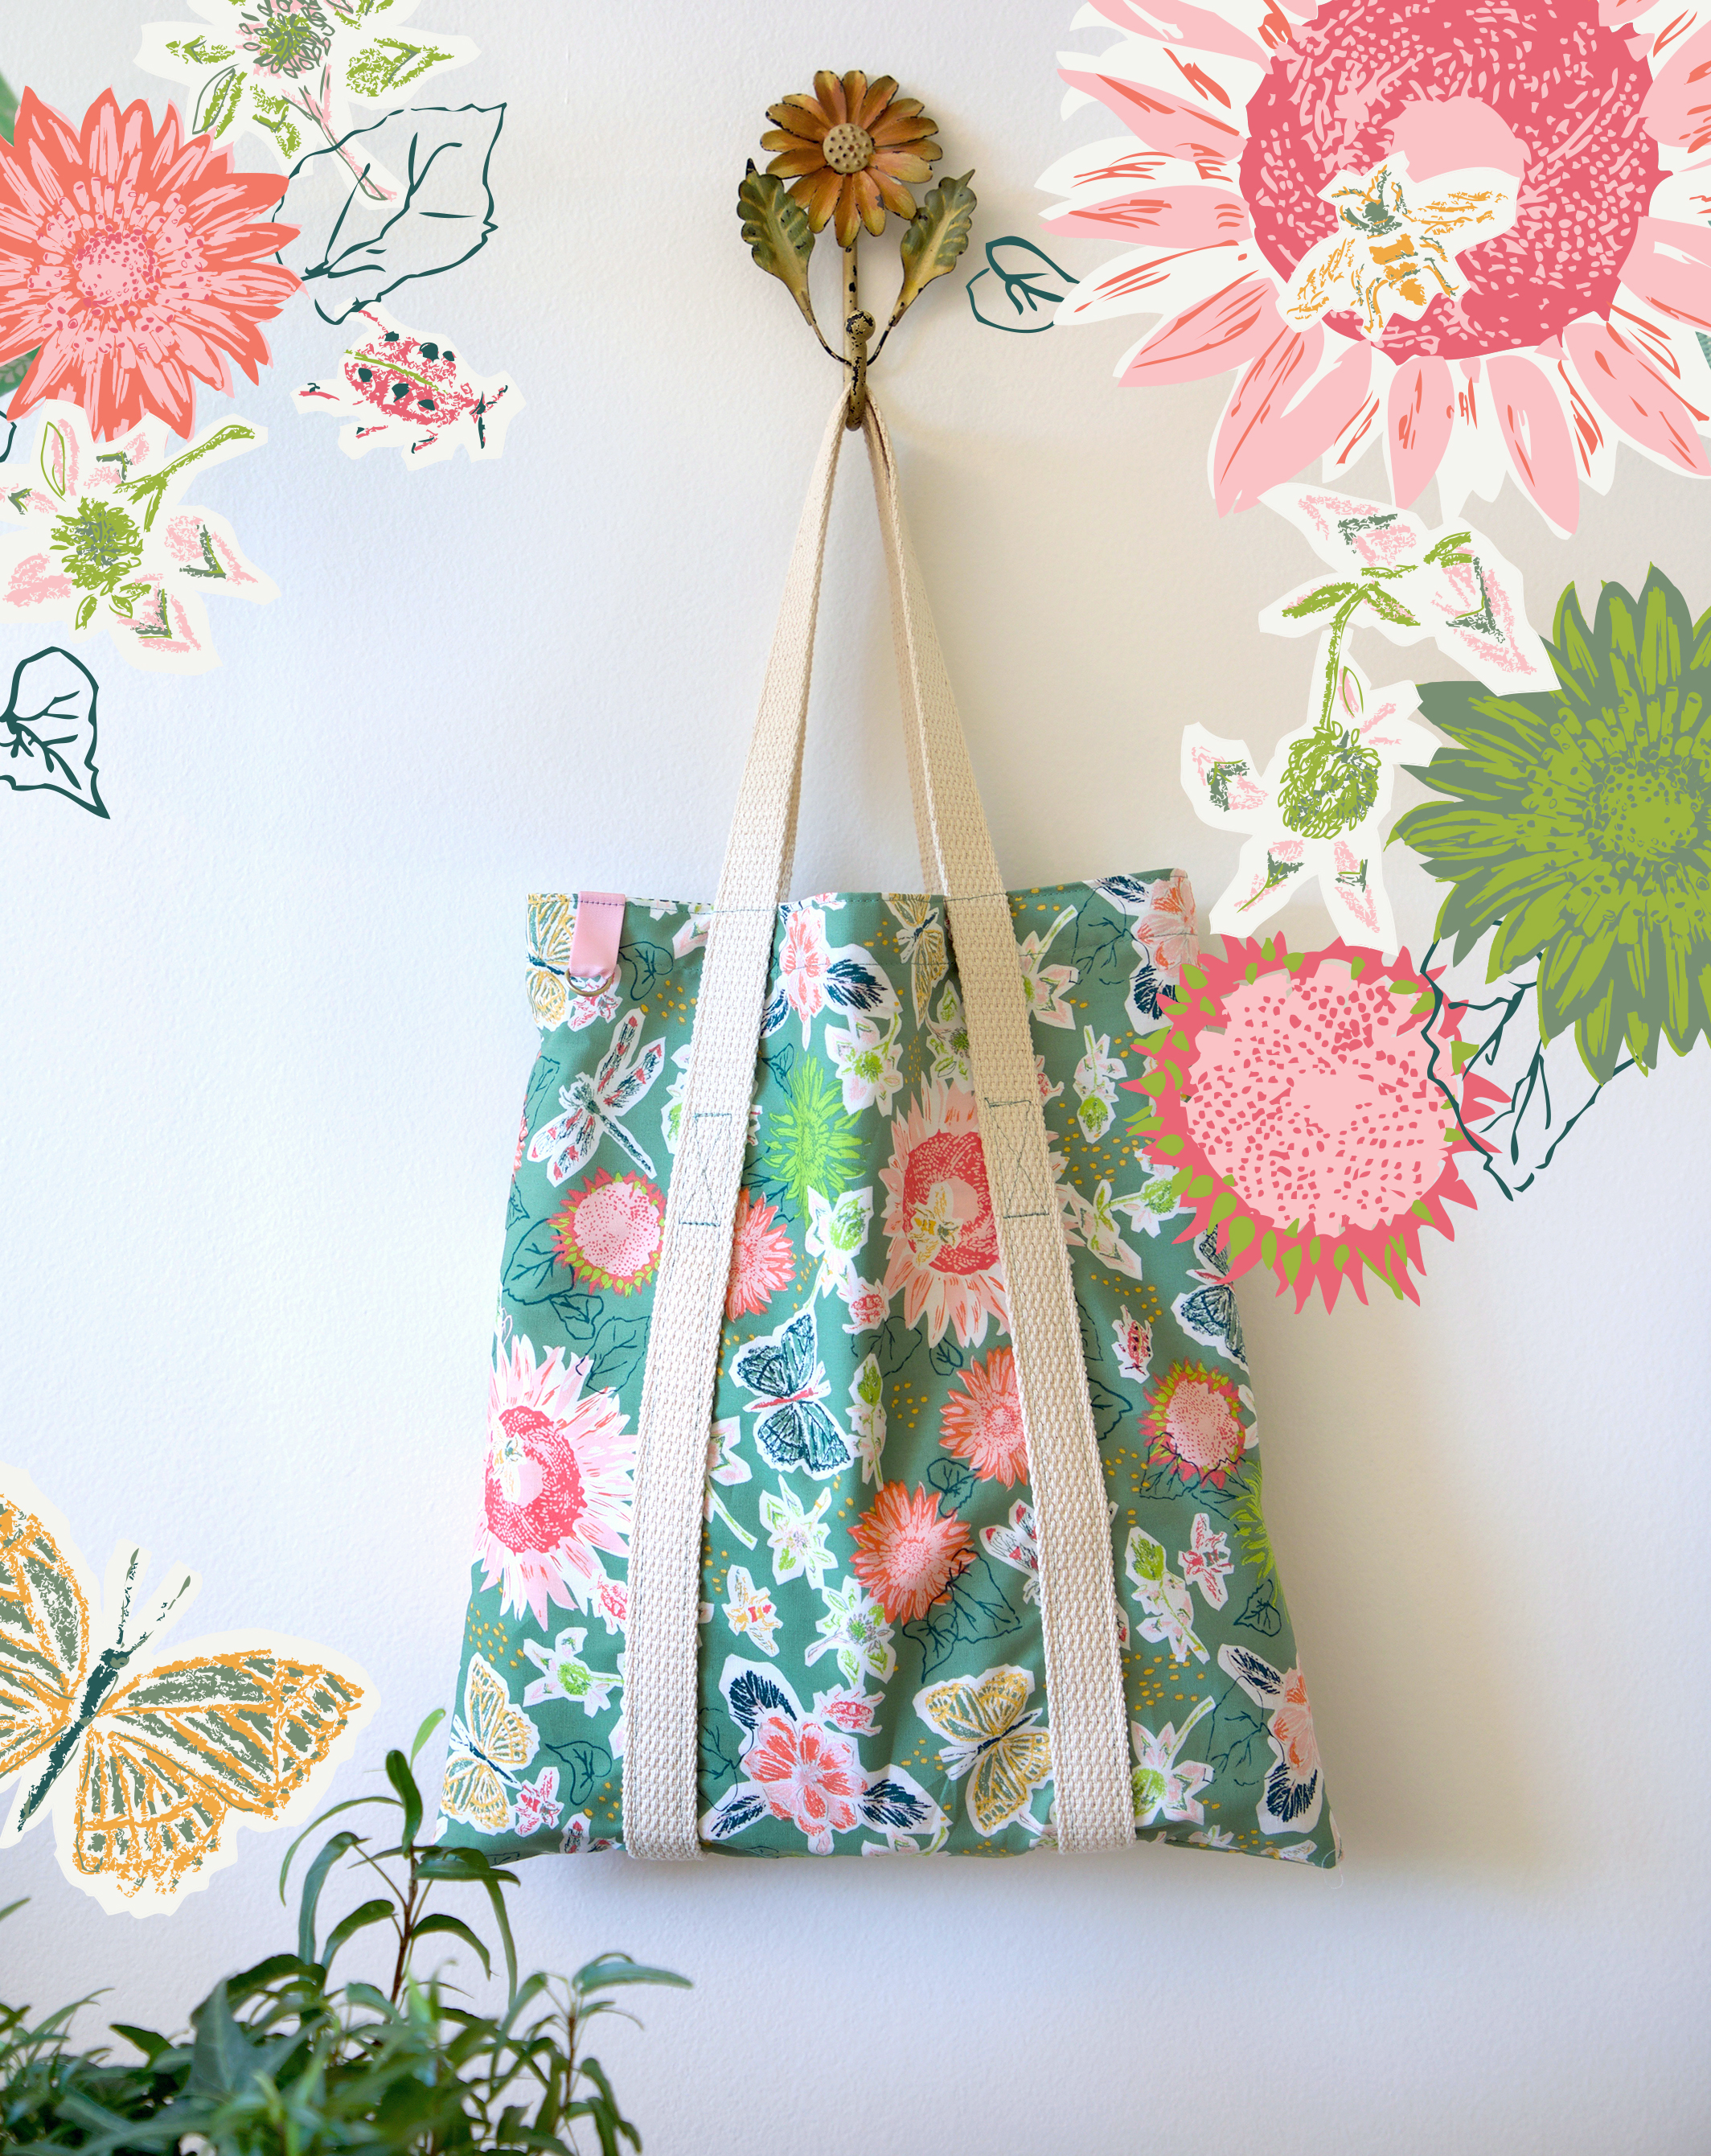
This adorable tote bag made in Small World Sprightly print from Signature is a free pattern from Dritz Sewing. My bag is based on one of 20 different ways Dritz has used a basic tote bag and jazzed it up with their incredible assortment of bag hardware and Dritz sewing accessories. 

Discover oodles of amazing projects on the Dritz blog. I'm so honored they have featured my free Bucket Bag pattern on their Make Something Dritz blog: Favorite Finds: Bucket Bag Sewing with Signature Fabrics from Sharon Holland.

I'm so pleased that Dritz and Omnigrid will both be sponsors of the My Signature Sampler sew along!

Tote and Pencil Pouch by Sharon Holland.jpg

Instead of using the canvas from my collection I sewed my tote with quilt-weight cotton. To give the bag more body I made two exterior bag shapes per the Dritz tutorial and used one for a lining which I added a big pocket before assembling into a lined bag. I simply slipped the lining, wrong sides together into the exterior, added a ribbon loop with Dritz D-ring to the upper edge and sewed the seam allowance turned-under edges to close. 

Signature Pencil Pouch.jpg

The fun coordinating Pencil Pouch is a free pattern on my Free Patterns page. It's the perfect size for supplies and fits into a 3-ring binder with the Extra-Large Eyelets from Dritz Sewing. I love their antique brass finish! For even more fun, add a tassel with the easy-to-use Tassel Cap, also from Dritz. 

Photo by Sharon Holland Best Children's Books.jpg

There's more Signature Baby's Room to share by I'll save that for next week's Part 2. 

Signature Stack 2.jpg

If you're wanting to sew with Signature fabrics ask for them at your local quilt shop or shop online. Hawthorne Threads just restocked their supply and has the full collection plus bundles available. Other favorites like Fat Quarter Shop and Needle in a Fabric Stash also carry the full line. Find these fine shops and more listings on my Fabrics page.

See you Friday when I post my next block in the My Signature Sampler and announce the next great giveaway!

Yo-Yo Pillow

Yo-Yo Pillow

Signature Yo-yos Pillow.jpg

The final installment in my pillow series is this fun Yo-Yo Pillow. Yo-yos and pillows made from yo-yos are nothing new but it's something I've not seen done for awhile and there may be lots of new sewers out there that don't know how to make them.

Making Yo-yos.jpg

Yo-yos are hand stitched from circles of fabric. I used a 6'' diameter circle to make mine but you can use whatever size you'd like. The smaller the starting circle, the smaller your finished yo-yo will be. They shrink considerably once stitched up and my finished yo-yos measured around 2-1/2'' across.

Yo-Yo Pillow

Materials needed to make an 18'' square finished pillow

  • For front foundation and backing: Two 18-1/2'' squares for 1/4'' seams Lapped Zipper Back or two 19'' squares for 1/2'' seams Hidden Zipper back
  • For yo-yos: Sixty-four 6'' diameter fabric circles
  • One 14'' invisible zipper
  • Aleene's No-Sew Fabric Glue
  • One package 1/4'' -wide Dritz Wash Away Wonder Tape
  • Zipper foot attachment
  • Needle and thread
  • Embroidery thread and needle
  • Marking tool and ruler
yo-yos pink-01.jpg

Knot the end of a length of thread. Hiding starting knot on the wrong side of the fabric, turn circle edge 1/4'' under to wrong side while hand basting a running stitch 1/8'' from edge. Leave thread in needle and do not knot end when basting stitch reaches the starting knot. 

Pull loose thread end to gather, forming a yo-yo. The gathered edge will be pulled to the center. 

yo-yos pink-02.jpg

Flatten the yo-yo, centering the gathered closure. Secure thread with a double knot and hide thread inside the yo-yo. Make a total of 64.

signature yoyos.jpg

There's a few ways you can connect your yo-yos for a pillow top. One way would be to stitch the yo-yos together with tiny stitches along the edges at four points like a compass then attach the connected circles to the pillow top. 

Another way would be to blanket stitch the yo-yos to the pillow foundation (leaving the appropriate 1/4''-1/2'' seam allowance around the edges of the foundation for pillow assembly.

I chose a middle road and "X" stitched my yo-yos directly to the foundation at four points. 

Signature pillow assembly.jpg

Since I only had an 18-1/2'' square piece of Art Gallery Fabrics Apricot Sunrise Smooth Denim I needed to take care not to stitch my yo-yos in the 1/4'' seam allowance area. I used the 1/4'' mark on my Omnigrid ruler as a guide. 

Since my yo-yos aren't perfectly sized and I wasn't sure if the amount made would fit my pillow foundation I wanted to have all the yo-yos in place before I started sewing. To keep my yo-yos in place without pinning, I put a dab of Aleene's No-Sew Fabric Glue on the back of each yo-yo and worked from the outside edges of the foundation in toward the center.

Signature pillow assembly 1.jpg

Once all in place and working on a flat surface, I hand stitched the yo-yos to the foundation with 3-ply strands of Aurifloss embroidery thread. Tip: Leave the side of the yo-yo nearest the foundation raw edge unstitched until after pillow is assembled. By leaving these sides free, the edge yo-yos can be folded in toward the center of the pillow durning assembly and stay free of the seam allowance area.

yo-yo Signature fabrics.jpg

Stitch at four points and secure on back with double knots. 

hand stitching.jpg

Assemble the pillow using either my Lapped Zipper Back or Hidden Zipper tutorials.

I finished my pillow with a lapped zipper back in Signature fabrics Extempore Gala canvas.

Lapped Back Zipper.jpg


After the pillow has been assembled, go back and finish hand stitching the edge yo-yos to the pillow. Insert an 18'' square pillow form.

Signature Yo-yo Pillow 3.jpg

Hand stitching yo-yos is a great take along pastime and perfect for lazy summer days of relaxing, mindless sewing on the go or just sitting at home. 

Signature Yo-yo Pillow 2.jpg

I hope you enjoyed these pillow projects. I've still more projects to post here before the Signature Look Book is published so come back and visit real soon for more summer sewing ideas. 

Hello 2018

Hello 2018

Bobbin quilt from Utility-Style Quilts for Everyday Living by Sharon Holland

Bobbin quilt from Utility-Style Quilts for Everyday Living by Sharon Holland

To be honest, I've done way more work on my computer this year than sewing. I've started at least 6 different projects and all are in a varying states of completion. That's not normally how I like to work. I prefer to start one project, fully immerse myself in it, and finish it before moving on to the next. But for some reason, it's working well this year to be jumping back and forth between projects and I don't feel overwhelmed or feel I'm loosing time switching gears. The nice thing is they will all be finished around the same time and then is will rain stuff to post about!

Until then, here's some fun things happening in the sewing and quilting world you may want to check out!

Utility-Style Quilts for Everyday Living by Sharon Holland as seen in Curated Quilts magazine.

Utility-Style Quilts for Everyday Living by Sharon Holland as seen in Curated Quilts magazine.

It was so exciting to see my new book featured in issue 2 of the fabulous Curated Quilts magazine. The write up for my book was so nice--thank you Curated Quilts!

BG0A3982.jpg

The second issue of Curated Quilts is all about Log Cabin blocks. It's a fascinating issue and packed with incredible inspiration. Utility-Style Quilts for Everyday Living (affiliate Amazon link) has three quilt projects inspired by Log Cabin blocks because I've always been drawn to the graphic, timeless appeal of that type of quilt. 

I want to thank all the quilter's out there you have already bought my book and who are posting their makes on Instagram. I cannot tell you how exciting it is to see the stunning quilts you're all making. We've been using the hashtag #UtilityStyleQuiltsforEverydayLiving and you can use that hashtag to view all the makes in one place. Did you know that IG now has the feature where you can follow hashtags?! It's one of their better "improvements" and by following a hashtag it will now show up in your feed just as if it were an individual you were following. It's a great way to stay connected to what's going on out there. 

20 Best Tote Bags by Dritz

20 Best Tote Bags by Dritz

It's a great day when your favorite notions company teams up with your favorite fabric company! Dritz and Art Gallery Fabrics have collaborated on a tote bag tutorial showing off the amazing assortment of Dritz bag hardware and the beautiful AGF canvas.

Photo courtesy of Dritz

Photo courtesy of Dritz

Photo courtesy of Dritz

Photo courtesy of Dritz

Okay, I'm pretty obsessed with all the bags. Just look at the cool details on the two totes above using my Arborescent Seasons canvas and Bari j's Magnolia Study Fresh print.

Photo courtesy of Dritz. Arborescent canvas by Sharon Holland for Art Gallery Fabrics.

Photo courtesy of Dritz. Arborescent canvas by Sharon Holland for Art Gallery Fabrics.

Photo courtesy of Dritz. Sand Bar canvas by Sharon Holland for Art Gallery Fabrics.

Photo courtesy of Dritz. Sand Bar canvas by Sharon Holland for Art Gallery Fabrics.

Photo courtesy of Dritz

Photo courtesy of Dritz

That was just a look at three of the bags. Be sure to visit Dritz to view all the other fun ways to dress up your totes AND...

Image courtesy of Dritz

Image courtesy of Dritz

If you'd like a chance to win all this Dritz hardware and eight 1/2 yard cuts of Art Gallery Fabrics canvas...visit Dritz on Instagram for all the details on how to enter into the drawing. Drawing runs from 9 am EST on Tuesday, January 30th until 9 am Wednesday, January 31st so don't delay!