Sweet Home Quilt + Fabric Giveaway

Photo courtesy of Fabric Stork
Hello friends. I’m back with more Sweet Home quilt news as well as a brief review of my personal growth since my last post.
National events such as COVID-19, George Floyd’s wrongful death, the Black Lives Matter movement, and educating myself on the injustices to Black rights in this country have been upper most on my mind these last few weeks. You can follow my day-to-day journey of discovery and learning on these issues along with my regular quilt, fabric, and artwork posts in my Instagram feed @sharonhollanddesigns so I won’t get into any of that here and reserve this space for what you signed up for—quilting and sewing.

This week I added over 100 new fabric masks to my Fabric Masks shop page and will be adding additional masks over the next couple weeks because I’ll be donating 50% off all my masks sales sold from June 7 through July 7, 2020 to the United Way of Greater Cincinnati. Because equity and justice is part of the mission of UWGC I’ve chosen this organization close to home to contribute to on a local level.

Along with 50% of mask sales durning this one month period, I’m donating 100% of my PDF pattern sales as well to the United Way of Greater Cincinnati as well. If you’ve been eye-balling some patterns, this is a great time to make a purchase!
“COVID-19 is a long-term problem that requires our long-term commitment. We will help our Greater Cincinnati community respond, recover and revitalize over the next two years. But there is another “pandemic” we have been fighting for years, and this requires more from us, a greater, longer-term response. That pandemic is related to racial equality and justice.” —UWGC
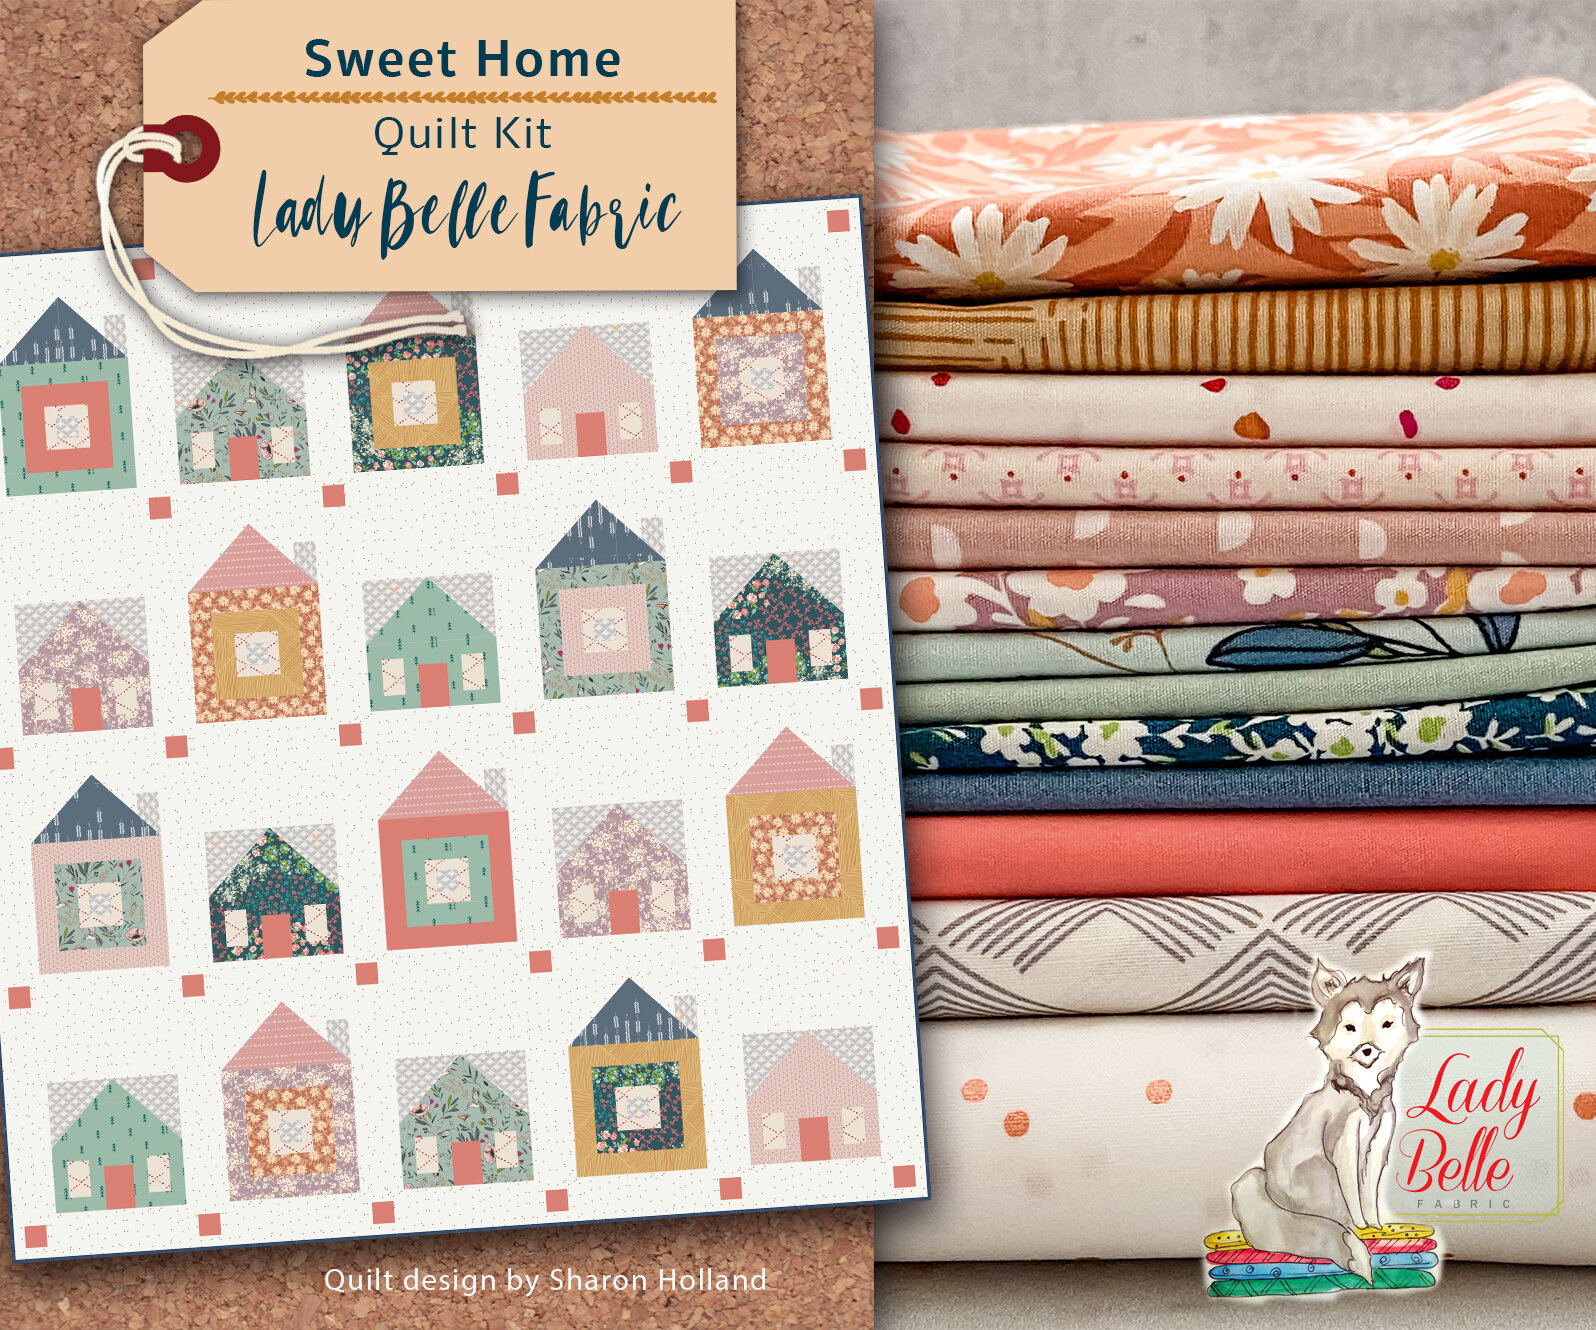
Fabric Stork Sweet Home Quilt Kit

I’m so excited to announce a collaboration with Nuria Elkins of Fabric Stork in bringing you this colorful and playful Sweet Home quilt kit. Nuria has curated a beautiful bundle of Art Gallery Fabrics prints and Pure Solids for this kit. Find the kit in her Etsy shop HERE and the pattern in my SHOP here. Order early because these are sure to go fast!

Photo courtesy of Fabric Stork
Prints in this quilt are designed by many of your favorite Art Gallery Fabrics designers including myself (Sharon Holland), Maureen Cracknell, Amy Sinibaldi, Bonnie Christine, and AGF Studio.
Photo courtesy of Fabric Stork
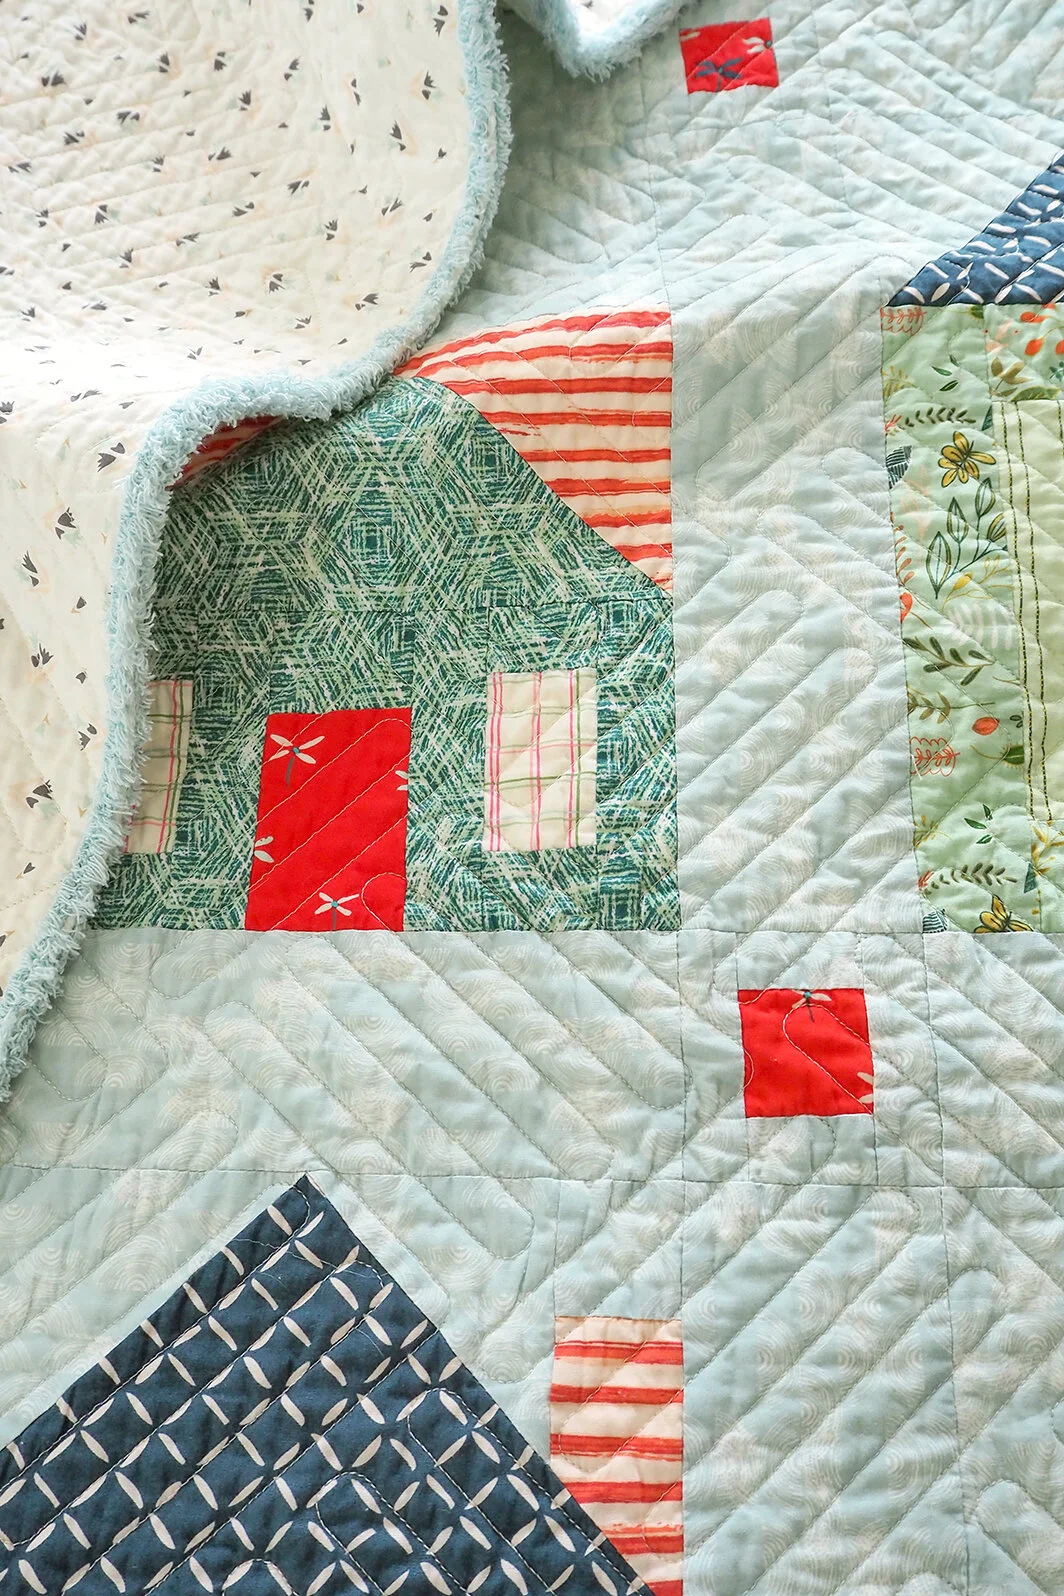
How perfect is that binding!!??? It’s so good! The print used for the binding is a diagonal stripe by Amy Sinibaldi so it gives a bias look from regular WOF (width of fabric) binding strip cuts—brilliant!

Photo courtesy of Fabric Stork
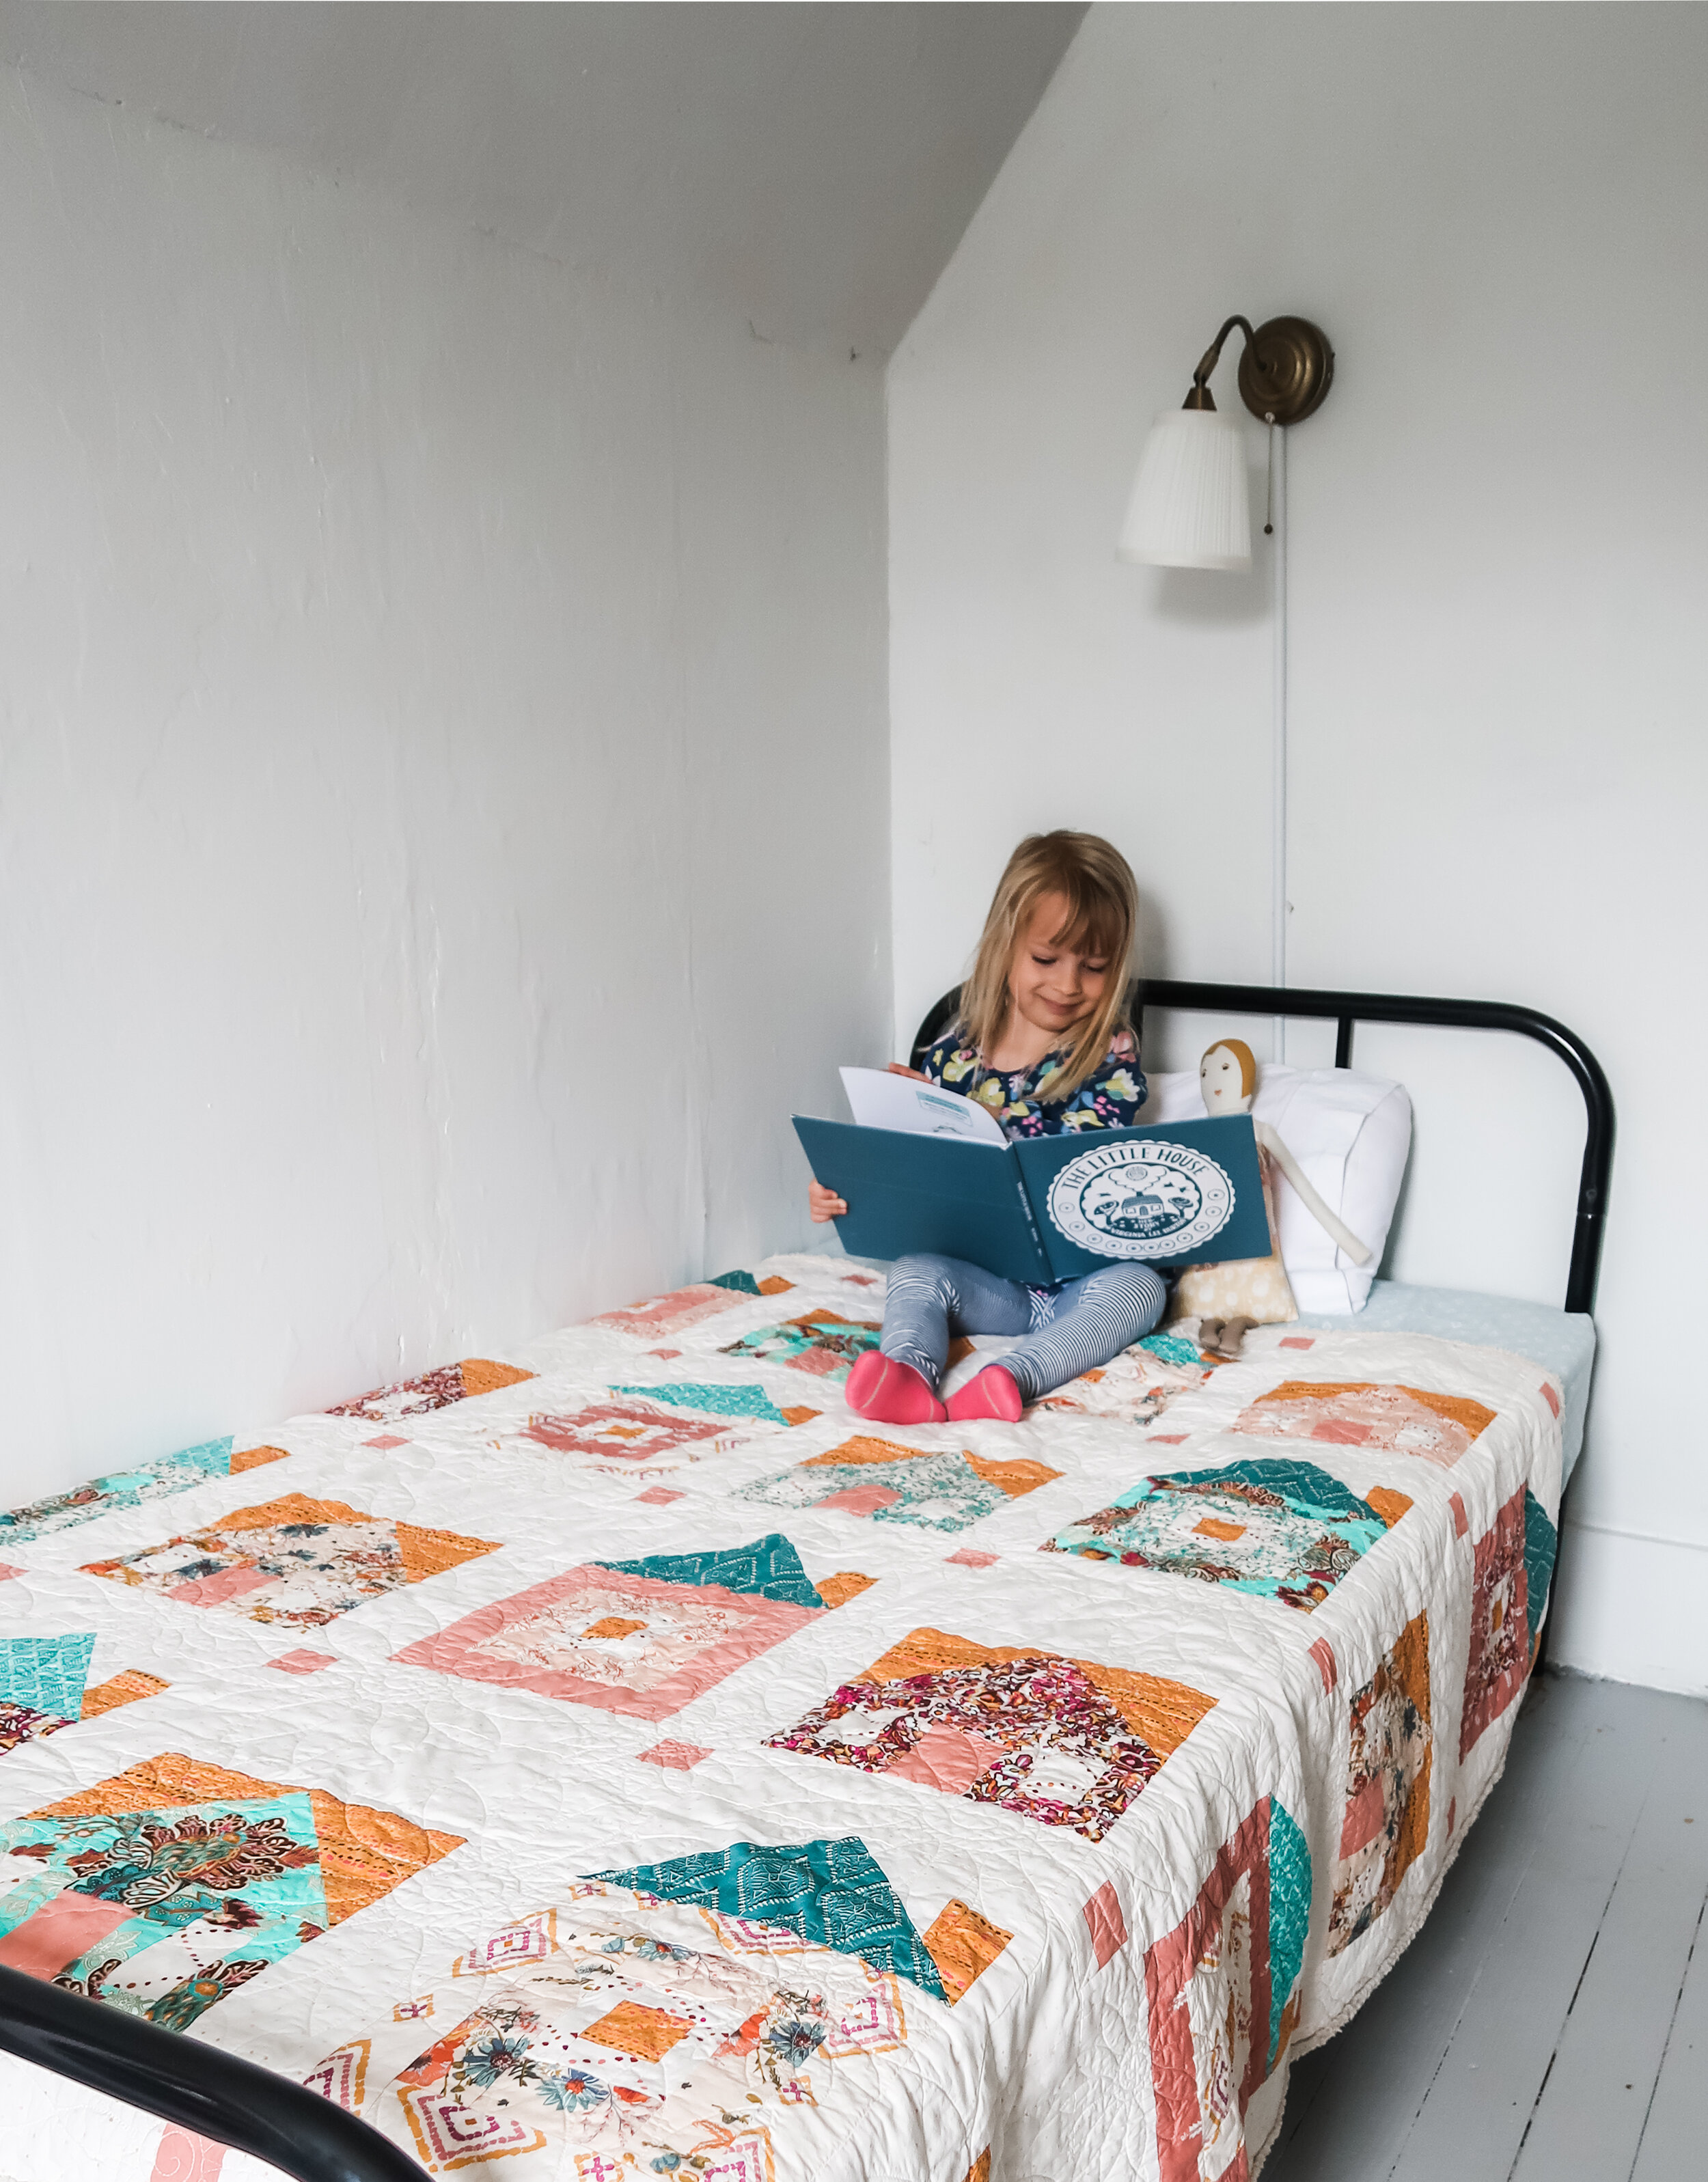
Nuria has already made a sample quilt from her kit and here’s the full view of this adorable neighborhood—I love it and it makes me smile just looking at this photo! This quilt design inspires new meaning for me with every quilt I see made!
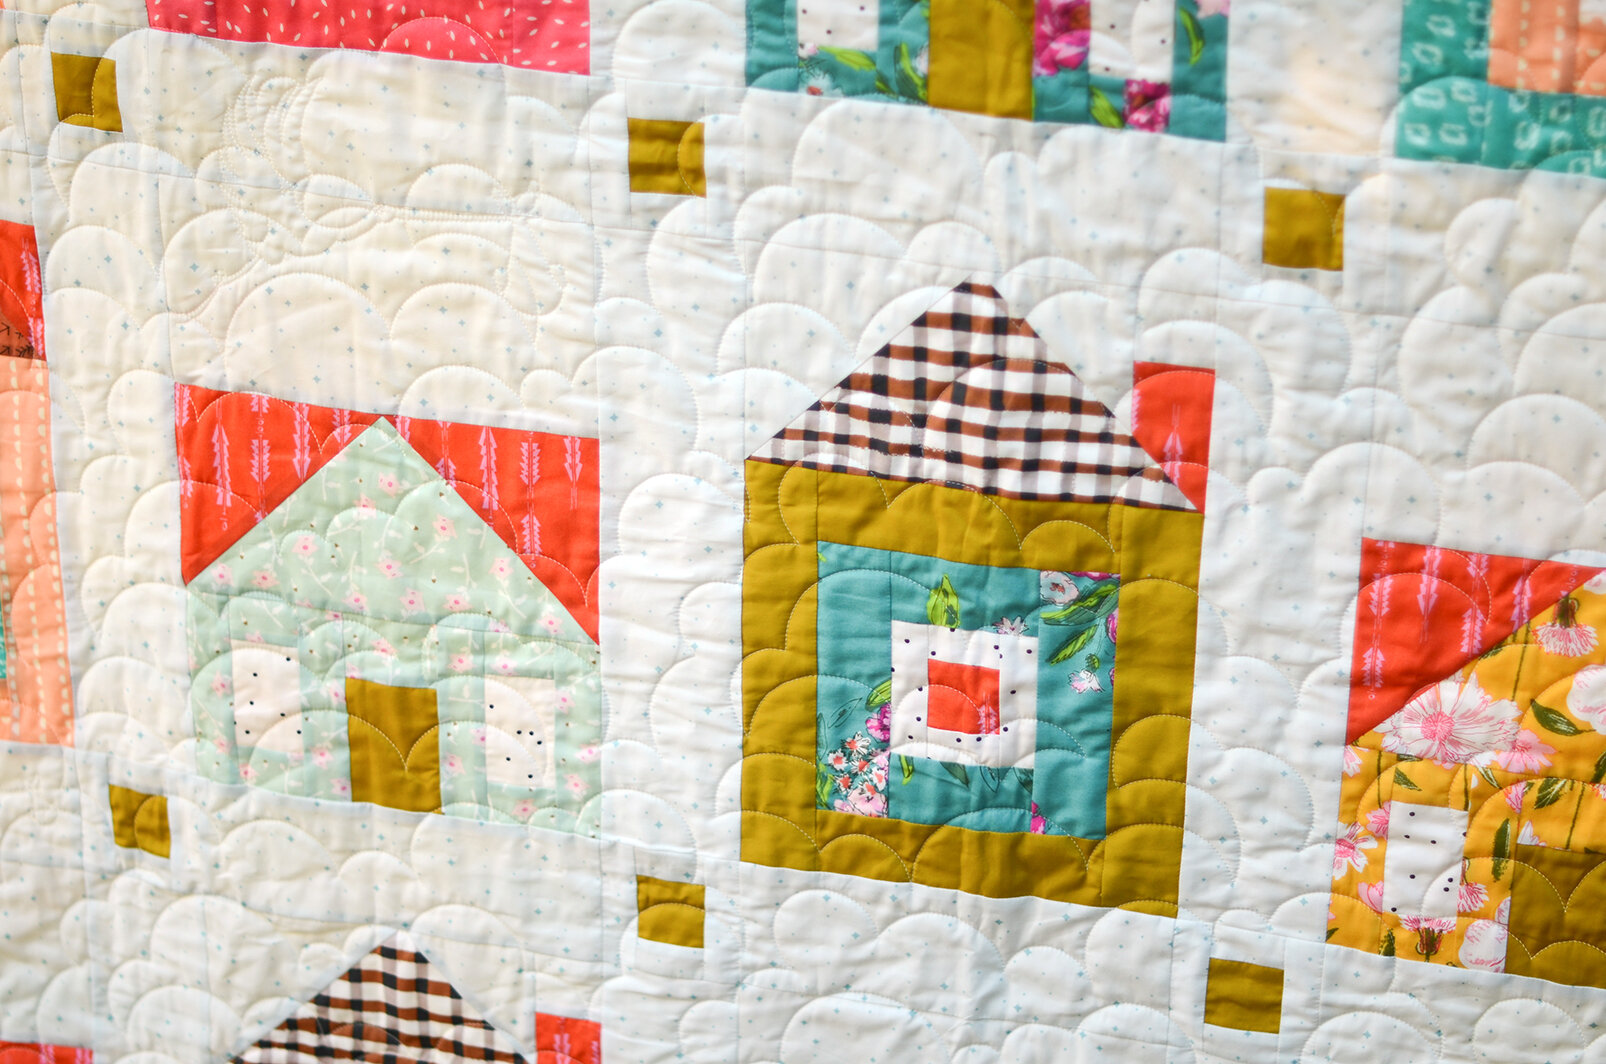
Photo courtesy of Fabric Stork
The fun quilting design of clouds and storks (upper left corner) is spot on for this quilt and expertly stitched by Tawny Oland. Find Tawny on Instagram at @tawnyoland and consider her for your next long arm quilting needs!
Fat Quarter Bundle Giveaway!

The generosity of small business owners like Nuria is astounding and as part of our collaboration, Fabric Stork is giving away a 10-piece fat quarter bundle to match the 10 fat quarters used in this quilt kit. That’s a great addition to your stash or puts you well on your way to having most of the fabrics needed to make a Sweet Home quilt the the one made by Nuria—either way, you’ve got to love a fabric giveaway!
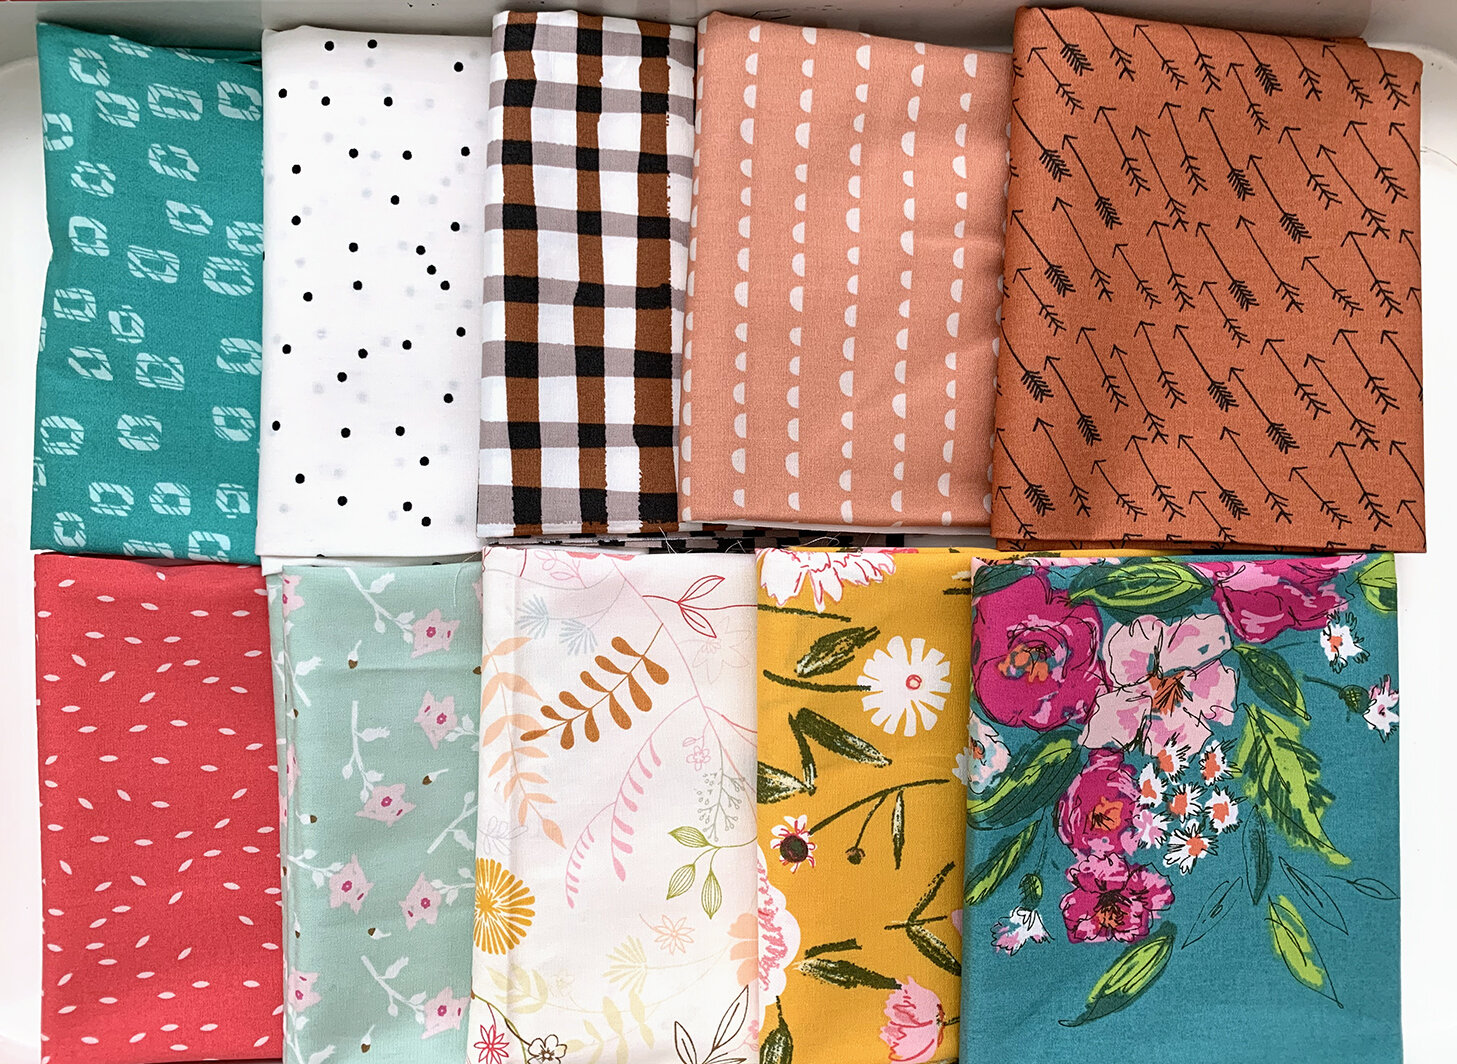
The giveaway for this pretty bundle of prints will be held on my Instagram account @sharonhollanddesigns. Just look for the June 12th post with the beautiful Sweet Home quilt made by Fabric Stork and qualify for chances to win by leaving a comment and following both my feed and @fabricstork feed on Instagram.

Thanks for stopping by my blog! Don’t forget to head over to my Instagram feed @sharonhollanddesigns for a chance to win a 10-piece fat quarter bundle from Fabric Stork. Follow the easy entry steps given in my Friday, June 12, 2020 Instagram post. International entries welcome. Enter often to up your chances of winning!
The winning comment will be randomly selected around 4pm Eastern on Monday, June 15th. Winning entrant’s IG handle will be posted on the IG giveaway post once the giveaway closes.
I am an Amazon Associate site and earn from qualifying purchases on the products I’ve linked below. The helpful products selected are the same or similar to materials used to make the project(s) in this blog post or related items I think you may enjoy.