Heart Quilt Sew Along - Week 3

Heart Quilt Sew Along - Week 3

Sharon Holland Heart Quilt Cozy SQ.jpg

It’s the final week in the Heart Quilt sew along. This fast and fun sew along has been hosted by myself and Maureen Cracknell with special thanks to Allison Harris of Cluck Cluck Sew for allowing us to use her Heart Block in our quilt layout.

If you’re just joining us, you’ll want to get up to speed by reading first weeks post announcing the sew along. If you’re already making heart block or at the point to start adding the sashing and borders—check out week 2 HERE.

This last post is dedicated to turning that top into a quilt plus I’ve added an extra bonus project for all those left over half square triangles from trimming the large flippy corners off the hearts!

Sharon Holland Heart Quilt Finished-5.jpg

Quilting

Rather than reinvent the wheel, I'm directing you to the blog post for Finishing that was originally posted during the Sewcial Bee Sampler sew along. You'll find all the tutorial information for spray basting, quilting, and binding your quilt. The sizes have changed but the concept for basting, quilting, and binding your quilt are the same. As stated in that post, there are many ways to finish a quilt and I am blogging about how I finish my quilts. If you have a preferred method, please do it the way you're comfortable with. If you intend to send your top off to be professionally quilted, discuss with your long-arm quilter how they'd like you to prepare your quilt top and backing for being quilted. 

IMG_6074.jpeg

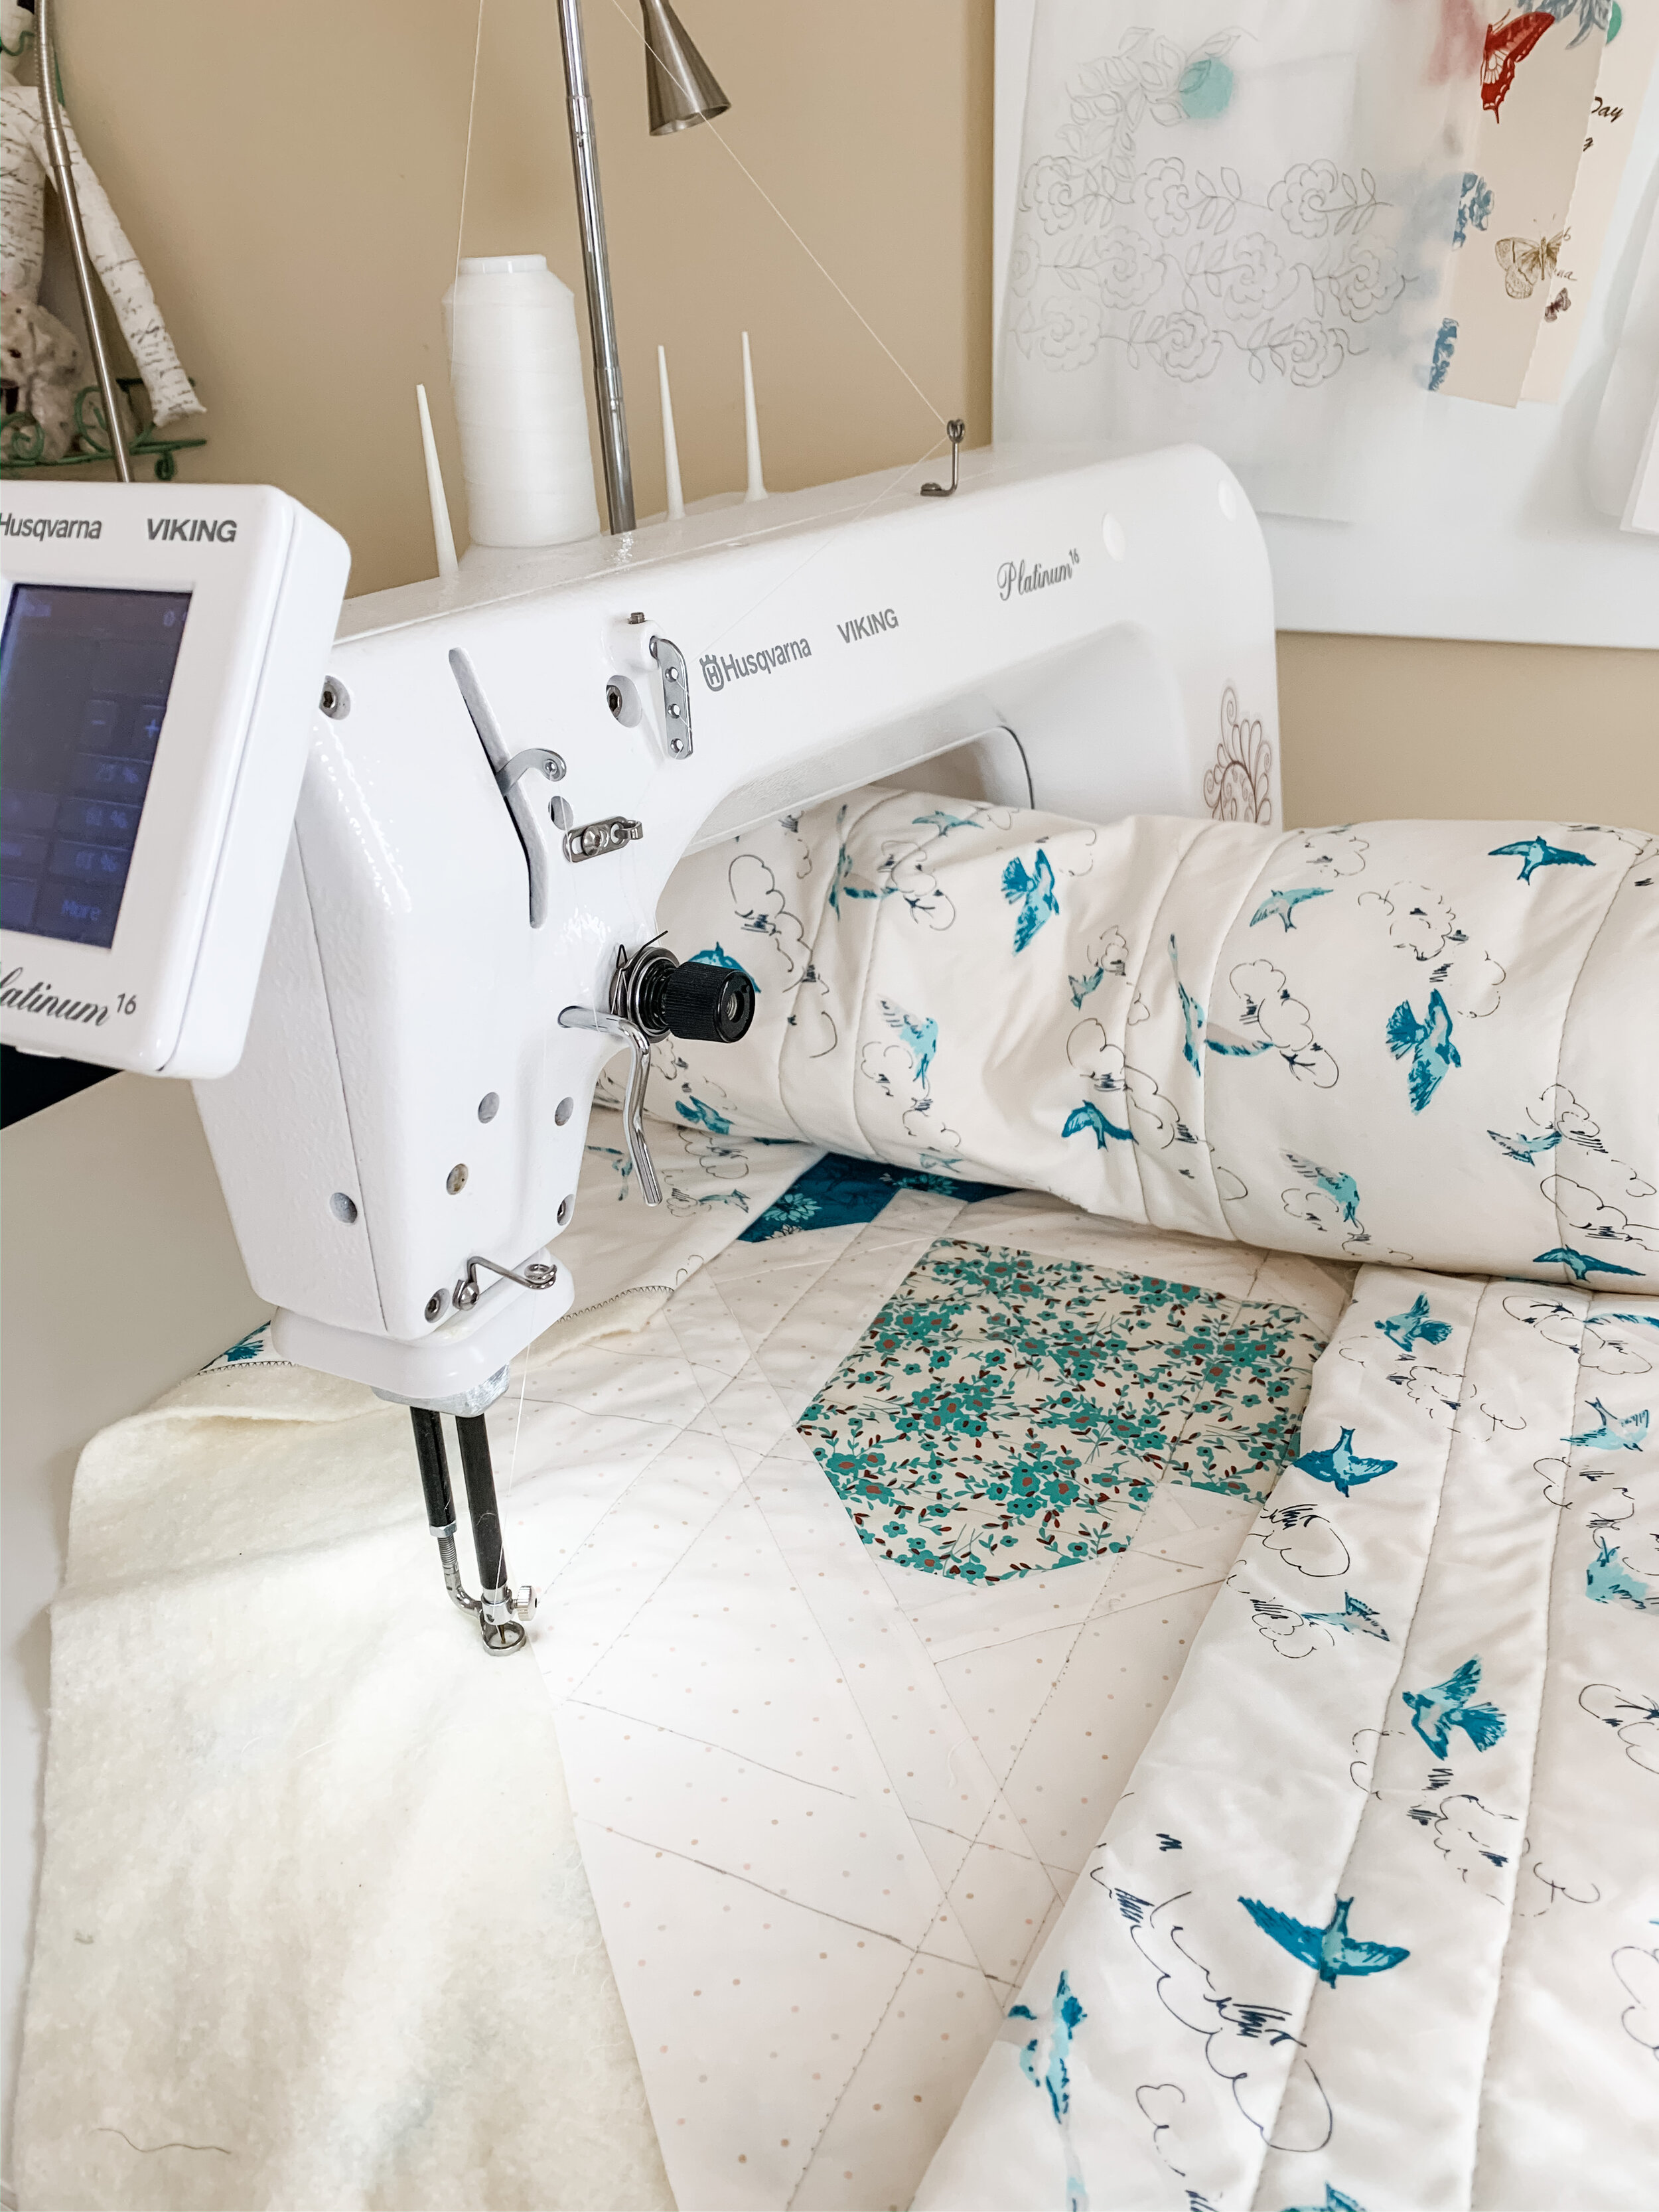
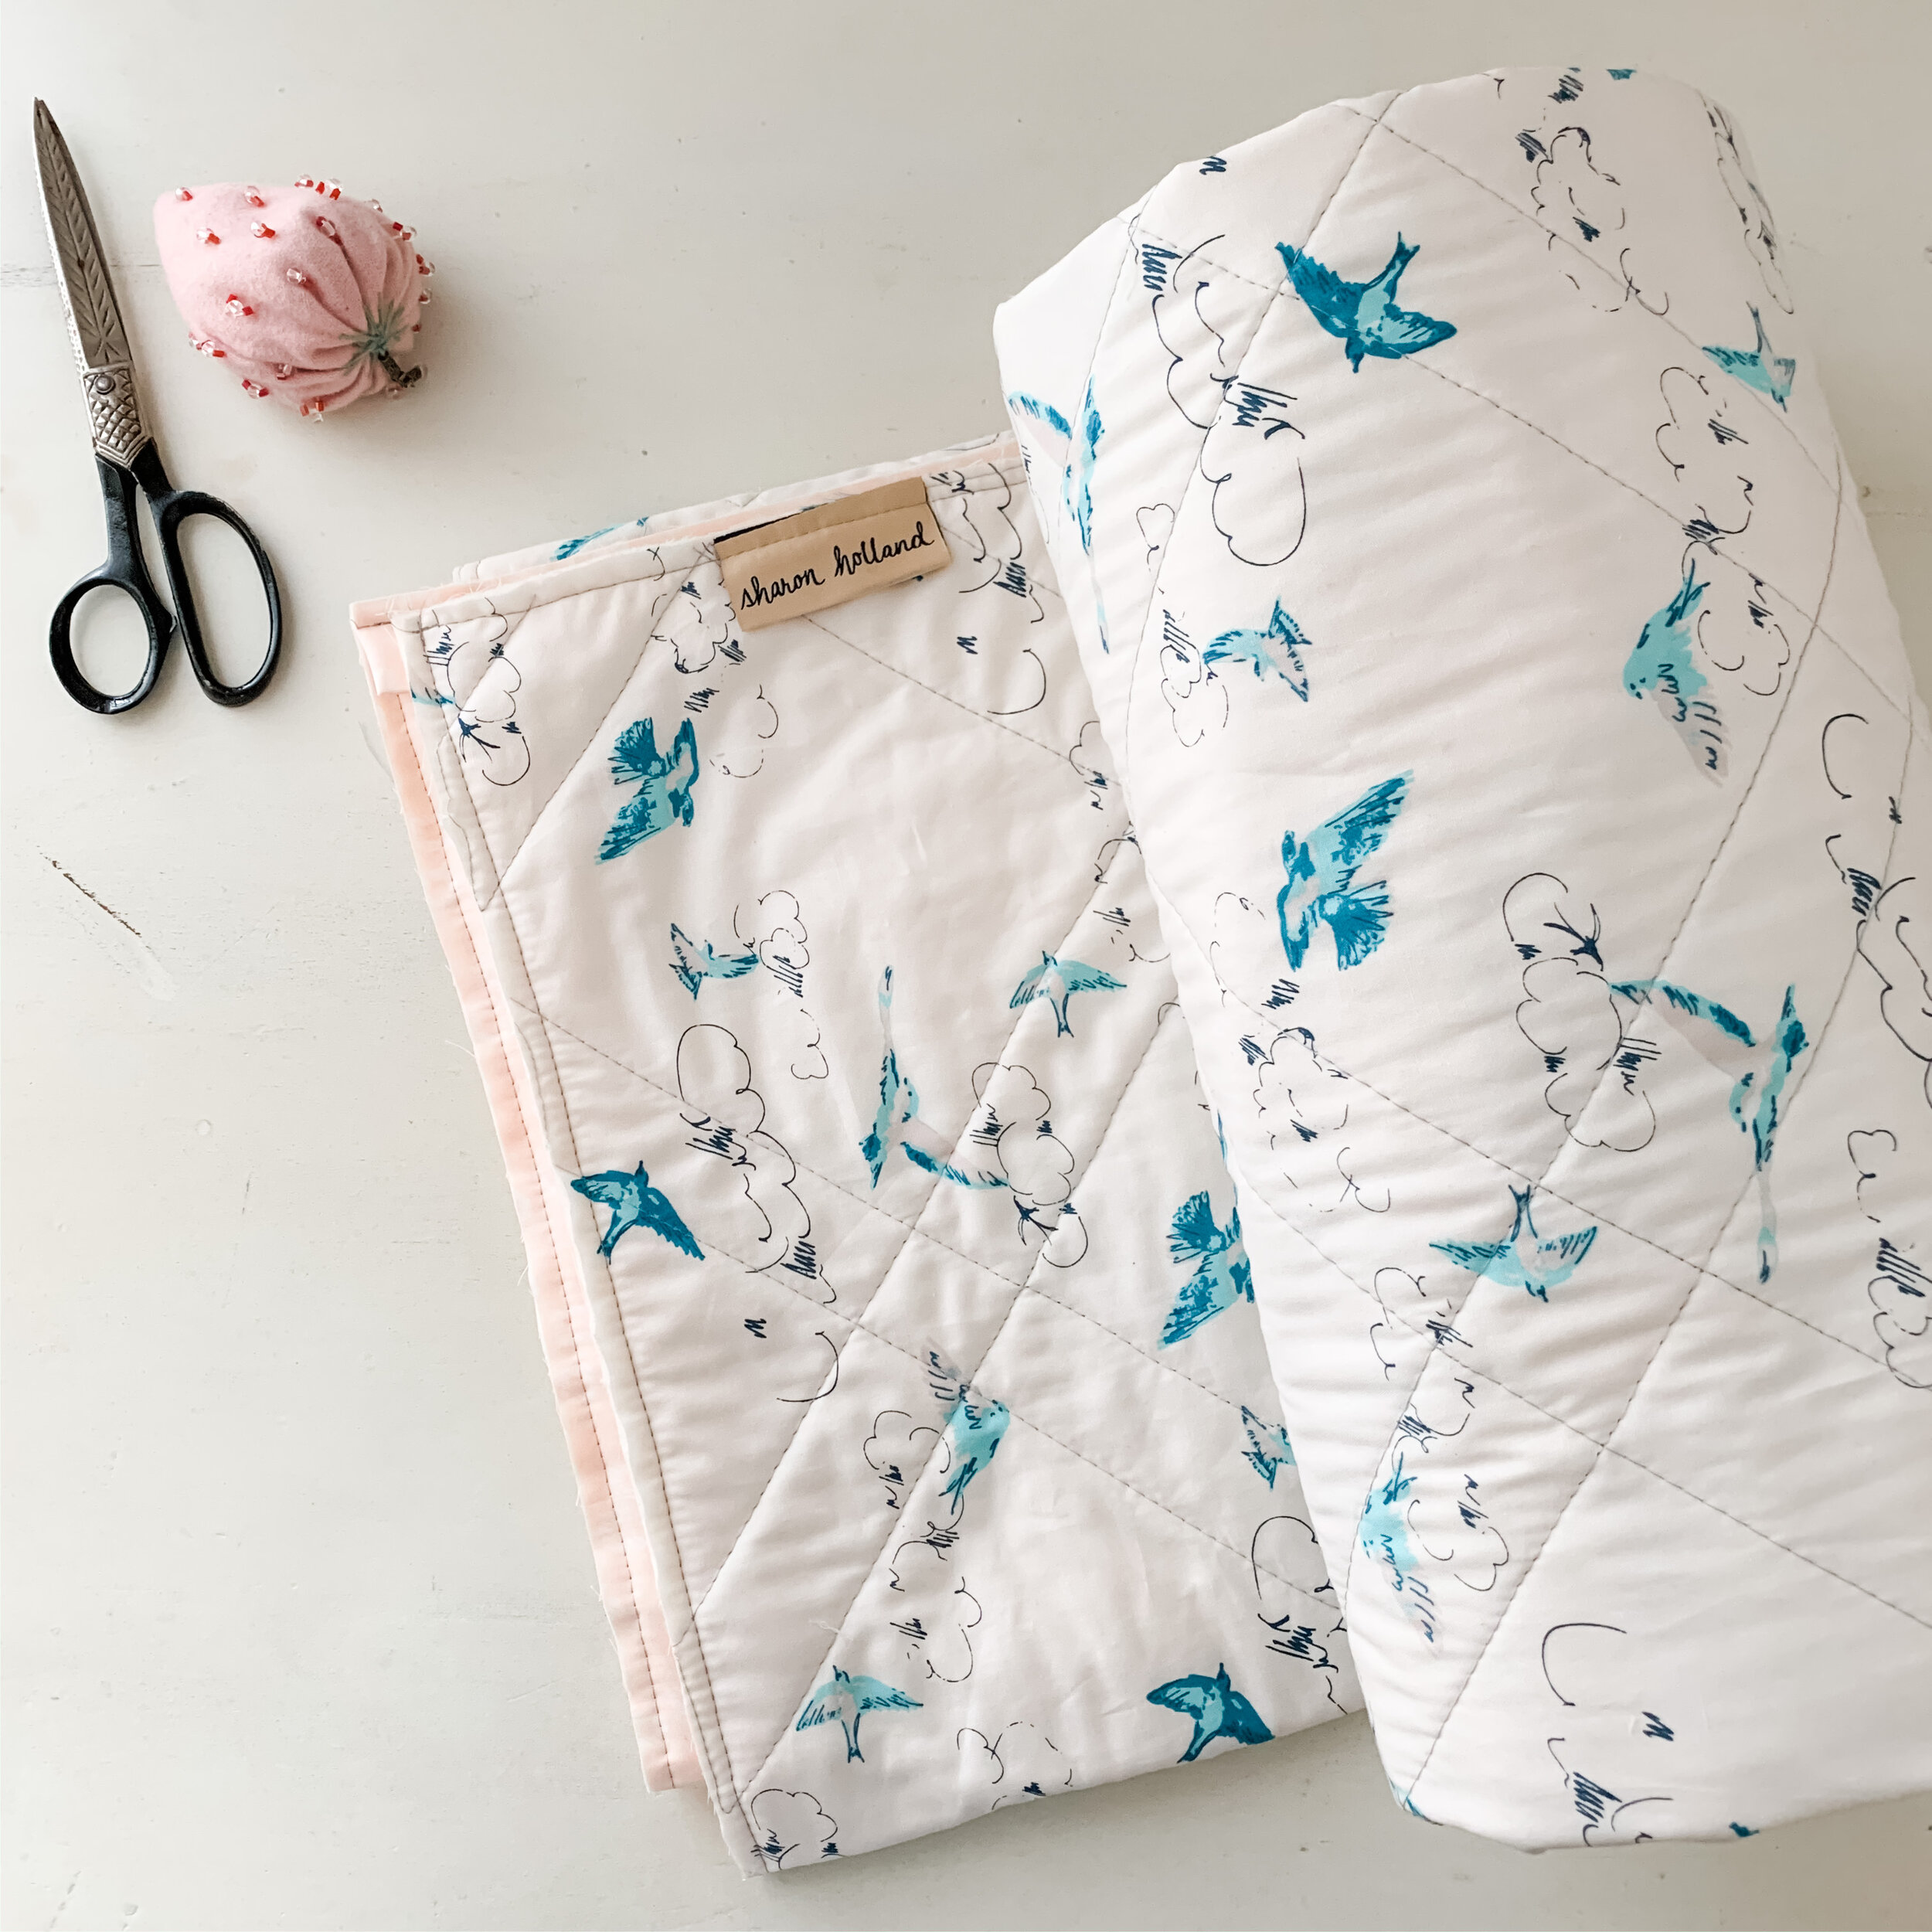
I'm not a professional quilter by any means. I get by and call my quilting style "organic" because it's not perfect and lines are not straight. I love the human touch that non-perfect quilting adds to my quilts. I used my mid-arm Viking Platinum 16 for quilting my top. The quilting guide lines were marked out ahead of time and the quilting went really fast after that to just follow the diagonal lines as shown below in the quilting diagram.

Quilting diagram

Quilting diagram

I used my favorite Hobb’s Tuscany Silk batting inside my quilt and love how light and drapey it is—especially for handling and maneuvering when quilting.

IMG_6137.jpeg

The backing on my quilt is from my Everlasting fabric collection for Art Gallery Fabrics and is called Summer’s Dance. For the binding I used Woodblock Ballerina that was also used for hearts.

Sugared Hearts Material List 2.jpg

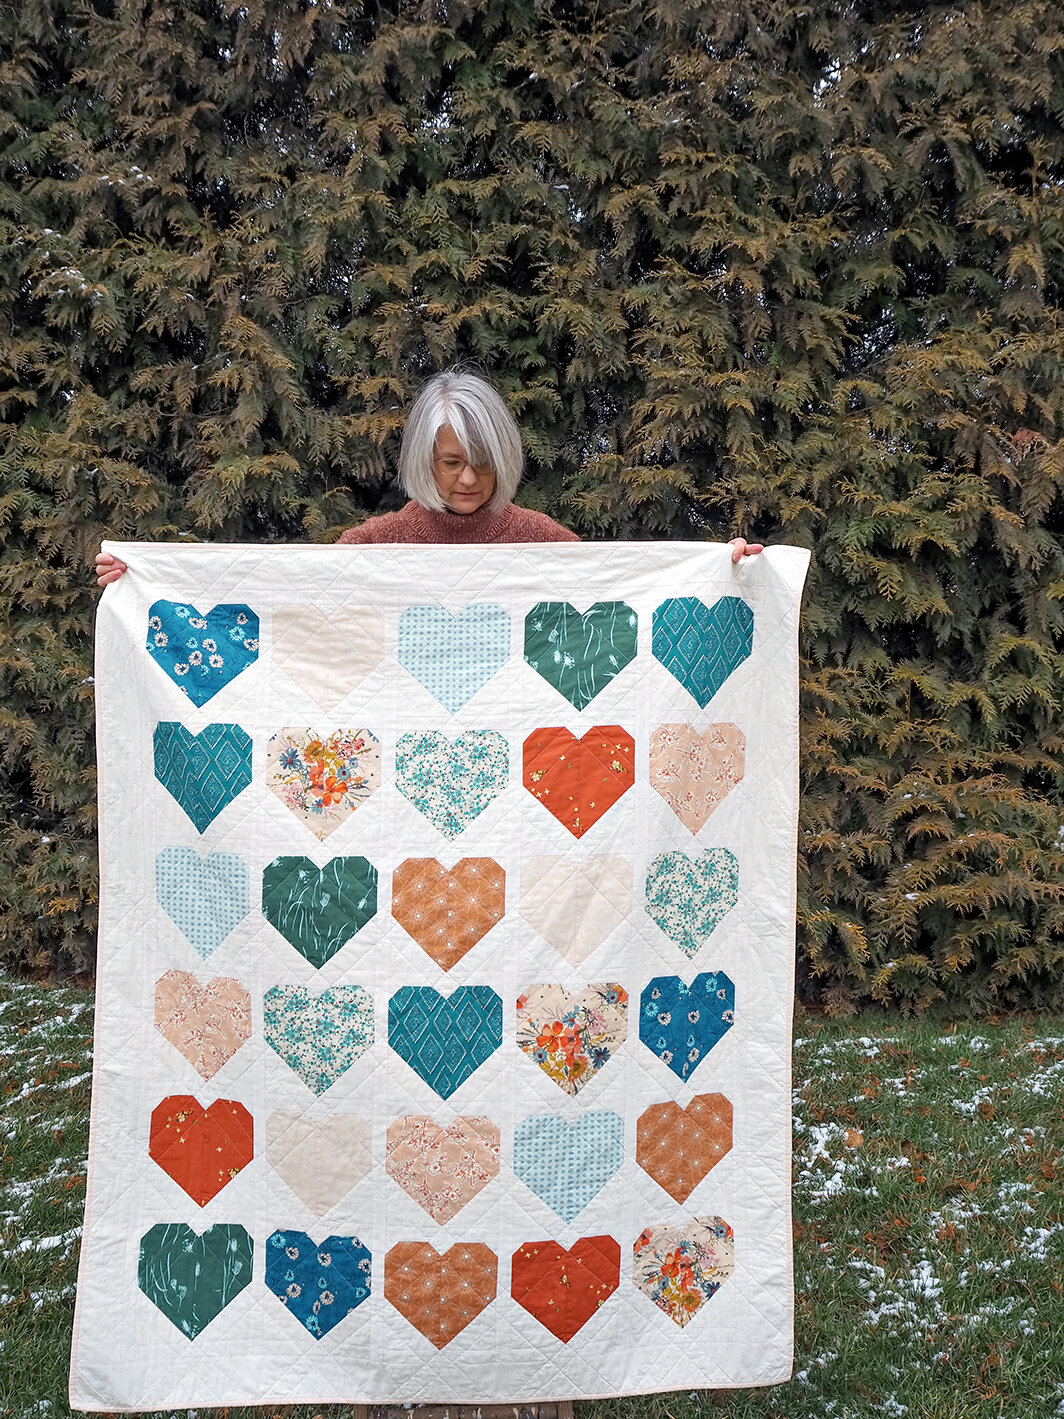
Here’s another look at the prints that went into my quilt. My Heart quilt’s stitched from a curated mix of fabrics from Art Gallery Fabrics Ballerina Fusion (a recolored mix of AGF designer prints), my Spirited, Everlasting, Signature, and Maureen’s Enchanted Voyage and Mystical Land collections.

My non-traditional Valentine colors remind me of sugared gum drops and candy. I’m crazy over this color palette and went with my heart when I did my fabric pull.

Sharon Holland Finished Heart Quilt-1.jpg

One of the biggest challenges of photographing quilts this time of year is the gloomy, cold weather. I had some grand plans for how to photograph this out doors but the wind didn’t cooperate. It started to rain shortly after we got these shots…

Heart Quilt Sharon Holland-1.jpg
 
Heart Quilt Sharon Holland-2.jpg

Be sure to check out Maureen’s blog to see her finished quilt top and bonus project from left over HSTs all made using a mix of Amy Sinabaldi’s MayFair and the new Foresta Fusion collection. Quilt kits for Maureen’s quilt are available at Lady Belle Fabric.

Photo and Heart quilt by Maureen Cracknell

Photo and Heart quilt by Maureen Cracknell

Bonus Project

Since I finished my quilt by Sunday I could’ve easily stopped there, written this blog post and moved on to the other projects stacking up on my desk but no—that’s too easy!

Pillow from HSTs-7.jpg

Remember in my Instagram Stories videos where I told you to hold onto those large half square triangle (HST) waste pieces???

Sharon Holland Finished Heart Quilt-2.jpg

I turned mine into this fun pillow! As a bonus, I’ll share with you how to make one (or more) for yourself!

The beauty of this type of project is that it can be customized to any size you want. I happened to have an extra rectangular pillow I wasn’t using anywhere in the house so I used it as my pillow form. It measures around 14’’ x 26’’ and is probably not a standard size.

Pillow from HSTs-5.jpg

I trimmed 36 HSTs to 3-1/2’’ square using my Bloc_Loc Ruler then arranged them into a design. I would’ve loved if the design was symmetrical but no such luck in this improv piece using scraps. I don’t really notice it now that the pillow is done.

I added 2’’-wide strips to the top and bottom to get it all up to the size I needed.

HST pillow  Chenille-it quilting.jpg

I’ve done a few projects on this blog where I’ve incorporated Chenille-it Blooming Bias and I can’t tell you enough how much I love this added texture—especially to pillows!

Pillow from HSTs-3.jpg

After stitching quilting lines to outline the chevron shapes 1/4’’ inside the seam allowances I added the 3/8 inch-wide Chenille-it to my pillow top. Stitching the blooming bias down not only adheres the product but also works as quilting.

Pillow from HSTs-2.jpg

I added two echo rows of chenille to the background areas. To read about how to stitch and then bloom the chenille, read more on my Chenille Pillow with Hidden Zipper post/tutorial. Plus, to see the gorgeous decorator pillows I made more recently with my Spirited Trail Marker print and Chenille-it, read HERE.

For more Chenille-it projects, here’s a fun You Tube video!

HST pillow.jpg

Personally I love a zipper closure on a pillow. Especially in a case like this where I’m using an existing pillow as the pillow form and like to switch out or clean the pillow covers regularly. You’ll find my go-to method for adding a hidden zipper on a pillow HERE. It’s insanely easy to do!

Sharon Holland Heart Quilt Finished-3.jpg

Now, not only do I have a heart quilt to snuggle under this Valentine’s Day but I have a coordinating pillow to go along with it!

Sharon Holland Heart Quilt Finished-1.jpg

Maureen and I want to thank you for sewing along with us and sharing your progress of your blocks to Instagram. We love seeing your work and encourage you to follow along, share, and tag when you post. Use the sew along hashtag of #agfLOVEquilt and be sure to tag @sharonhollanddesigns @maureencracknell and @cluckclucksew so we can see your progress! If you’re sewing with Art Gallery Fabrics don’t forget to tag them too as they love to see what Makers are making with @artgalleryfabrics !

Happy Valentine’s Day!

I am an Amazon Associate site and earn from qualifying purchases on the products I’ve linked below. The helpful products selected are the same or similar to materials used to make the project(s) in this blog post or related items I think you may enjoy.

Heart Quilt Sew Along

Heart Quilt Sew Along

Heart Quilt Graphics D-01.jpg

I know, I know that just two posts back on January 8th I said that Maureen Cracknell and I had no plans for a sew along, but, turns out that I was wrong about that (insert laugh/cry emoji)!!!!

You know how it is when you see pretty fabrics and the perfect quilt block—you just have to stop everything and make a quilt with it, right?!?!?! That’s what happened with Maureen and I when we both received happy mail from Art Gallery Fabrics with the new Foresta and Ballerina Fusions. Our boxes both arrived on Saturday and by Sunday we were making plans to host a Heart Quilt Sew Along using Allison Harris’s Heart block pattern. It all happened that fast and so will this sew along as we plan to start and finish our quilts and sew along by Valentine’s Day.

Heart Block Zip Pouch by Maureen Cracknell

Heart Block Zip Pouch by Maureen Cracknell

Prior to this last weekend, Maureen was stitching zip pouches using Allison Harris’s of Cluck Cluck Sew Heart Block tutorial to make heart blocks that she then turned into Mirrored Hearts zippered pouches for her Etsy shop. She loved making the hearts so much she’d told me she’d love to make a quilt from the hearts next.

Like I said, as soon as the new fabrics came in, now we both wanted to make heart quilts!

Photo by Maureen Cracknell

Photo by Maureen Cracknell

Allison’s Heart Block tutorial has a free download for her heart block with size options and a quilt layout for a 6’’ square block. You’ll also find suggestions for how to customize this block into other projects.

For this sew along we have Allison’s permission to use her block and we’ve selected and designed a quilt using an 8” square block, sashing, and border layout to make a 52’’ x 61’’ throw-size quilt. You’ll find a free download for our quilt layout, coloring sheet, and fabric requirements on the Sew Along page.

We’ve not included piecing instructions in our free download because the Heart Block tutorial at Cluck Cluck Sew will cover what you’ll need to know about making the heart blocks and next week I’ll go over putting the quilt top together with sashing and borders right here on this blog.

You may want to design a different layout for your heart blocks or follow Allison’s quilt tutorial from her site—Feel free to be creative! This is a casual sew along and a customizable project. The end goal is to have have fun sewing along with your Quilty virtual friends and have a finished project to gift, admire, or snuggle under by Valentine’s Day!

Assorted Art Gallery Fabrics from Mayfair and Foresta Fusion photo courtesy of Maureen Cracknell

Assorted Art Gallery Fabrics from Mayfair and Foresta Fusion photo courtesy of Maureen Cracknell

You may have seen our fabric pull posts on Instagram as teasers to this sew along?

Maureen will be making her Heart Quilt from a mash up of Amy Sinabaldi’s MayFair and the new Foresta Fusion collection. Fusions are a group of ten prints from various Art Gallery Fabric designers that have been recolored and curated into the new color story. The two collections pair beautifully and have a romanic look for a heart quilt.

Quilt kits for the quilt Maureen will be stitching are available at Lady Belle Fabric.

Heart Block 30 -- Maureen's Version-01.jpg

The Heart Block is a fast block to piece and this quilt is a great way to show off your favorite prints! If you’re planning to make quilts like Maureen and mine, we’ve gone with a 30-block quilt and pulled 10 fat quarters. Background, backing, and binding requirements are listed in our free PDF download for the quilt layout in the illustration above.

Heart Quilt fabric pull by Sharon Holland

Heart Quilt fabric pull by Sharon Holland

I’ll be making my Heart quilt from a curated mix of fabrics from: Art Gallery Fabrics Ballerina Fusion (a recolored mix of AGF designer prints), my Spirited, Everlasting, Signature, and Maureen’s Enchanted Voyage and Mystical Land collections.

My non-traditional Valentine colors remind me of sugared gum drops and candy. I’m crazy over this color palette and went with my heart when I did my fabric pull.

Heart Block 30Block 10prints-01.jpg

Due to the short notice of our sew along there’s not a quilt kit or bundle that exactly matches my fabric pull. However, Fabric Stork has created two beautiful bundles of ten Art Gallery Prints that would make a gorgeous heart block quilt that has a similar color story. You’ll still need to get your background fabric, backing, and binding.

AGF Bundle from Fabric Stork

AGF Bundle from Fabric Stork

AGF Bundle from Fabric Stork

AGF Bundle from Fabric Stork

We’ll be posting our progress on Instagram and encourage you to follow along and share your fabric pull and progress as well. When posting your quilt to Instagram use the sew along hashtag of #agfLOVEquilt and be sure to tag @sharonhollanddesigns @maureencracknell and @cluckclucksew so we can see your progress! If you’re sewing with Art Gallery Fabrics don’t forget to tag them too as they love to see what Makers are making with @artgalleryfabrics !

Sharon Holland Heart Blocks.jpg

I’ll be adding progress snippets, videos, and tips videos to my Instagram Stories as I work on my quilt. As you can see, I’m pretty far along and have all my 30 blocks made only after two half-day sewing sessions. I’m excited to see it all come together!

I am an Amazon Associate site and earn from qualifying purchases on the products I’ve linked below. The helpful products selected are the same or similar to materials used to make the project(s) in this blog post or related items I think you may enjoy.

Asheville and Outfits

Asheville and Outfits

IMG_2906.jpg

This August marked my husband and my 35th wedding anniversary. I suggested we take a long weekend and visit Biltmore Estates in Asheville, NC.

IMG_3758.jpg

This blog post is going to be uncomfortable for me because I’m not used to being the subject of so many pictures but I’ve no choice if I want to show you the pretty garments I made from my prints. Hopefully the stunning location will distract a bit—hehe.

IMG_2990.jpeg

I’ve been wanting to make myself some rayon dress for ages now but never seem to find the time or the perfect dress pattern—I’m super picky about what style of garments I like and what looks good on my frame.

Simplicity patterns

Simplicity patterns

I found these two patterns online and loved the simple, yet interesting cut of the dress. For the two dresses I wore and modeled at Biltmore I used the Simplicity 8231 pattern by Sew House Seven in the two sleeve options of the knee-length cuts. On the Sew House Seven website, this dress is called the Mississippi Avenue Dress and Top and doesn’t have the cap-sleeve option.

Sew House Seven Simplicity 8231 pattern

Sew House Seven Simplicity 8231 pattern

My first make I went with the sleeveless version in my Flower Keeper - Everlasting rayon for Art Gallery Fabrics. When I designed this print I envisioned it to be made into dresses and I just had to make one for myself! I realize now that the photo of the dress above was taken before I added the shoulder ties to you can look for that fun detail in the following photos.

IMG_3798.jpg

Maybe August isn’t the most spectacular month for the gardens at Biltmore but they were no less beautiful. The walled garden was my favorite—I could’ve spent all day there.

IMG_2998.jpeg

I felt absolutely transported as we visited the garden first thing in the morning and had it practically to ourselves. I tried to imagine how the Vanderbilt family would have relaxed and enjoyed these grounds everyday as a matter of their everyday life.

Walled Garden Biltmore Estates

Walled Garden Biltmore Estates

Here’s just a few photos because I don’t want to ruin your experience if you go and if I shared all my shots this post would never have an end!

Walled Garden Biltmore Estates

Walled Garden Biltmore Estates

Conservatory Biltmore Estates

Conservatory Biltmore Estates

Sew House Seven Simplicity 8231 pattern

Sew House Seven Simplicity 8231 pattern

The cap-sleeve version is made from my Tiny Dancer - Bachelorette Fusion rayon that has a champaign-gold metallic ink on the seed puffs. The smokey teal-green is a great color for any time of the year.

IMG_2929.jpg

A rayon dress was so comfy to wear in the North Carolina in August!

IMG_2906.jpg

For this make I hacked in side pockets which I absolutely love! My daughter liked this dress so much she requested one just like it and I stitched one for her (with pockets, of course) as soon as we got back home.

Biltmore Estates

Biltmore Estates

So, enough about me in the pictures, whew! I have just a few more photos of the house I’d like to share and then a knit dress make done after our trip that I’ve not had a chance to photograph me wearing yet because I’ve gotten busy painting and using photos from our trip as subjects. I am planning a Part 2 post in a couple weeks to talk about my personal painting challenge and finding inspiration.

Winter Garden inside Biltmore Estates

Winter Garden inside Biltmore Estates

Right off the main foyer of Biltmore is the glass domed conservatory called the Winter Garden and is in my top picks of favorite rooms in the house. But, that list would be a long one because there’s so many beautiful rooms!

Oak Sitting Room at Biltmore Estates

Oak Sitting Room at Biltmore Estates

I believe this is Mrs. Vanderbilts family sitting room. Even though this is a grand home, each room felt intimate and inviting.

Gun Room at Biltmore Estates

Gun Room at Biltmore Estates

Room after room was exquisite and I particularly loved the colors used throughout the house. It is all very much to my tastes, especially when the furnishings were less formal like here in the Gun Room.

IMG_3775.jpg

I highly recommend you get the audio tour when you purchase tickets to view the house. It allows you to listen at your own pace as you do a self guided tour of the rooms. There’s an incredible amount to see and learn about the house and family!

Rooftop of Biltmore Estate

Rooftop of Biltmore Estate

As well as the house tour we also took the Rooftop tour. This was an experience and we learned so much about the architecture of Biltmore as well as witnessed amazing scenes like these photos I took from the roof.

IMG_3772.jpg

Yup, you bet I petted the gargoyles!

Grounds at Biltmore Estate

Grounds at Biltmore Estate

We had a wonderful trip and when normally it’s hard to get back to reality after an experience like that, I was instead energized and ready to get creative and hit the ground running as soon as we got home.

Simplicity New Look N6626 pattern

Simplicity New Look N6626 pattern

I hadn’t time to finish my knit dress before we left so once back I got right to work making a dress for my daughter from Tiny Dancer rayon and then the New Look 6626 knit dress from Art Gallery Fabrics Cherished Wishes - Everlasting for myself. There’s enough material left over I plan to make my granddaughter a dress too.

I hope you enjoyed this tiny, tiny tour of Biltmore—there’s so much more than what I’ve shown here including the winery, shops, more gardens, and beautiful grounds designed by Fredrick Law Olmsted who also designed a little park called Central Park in NY. I hope I’ve inspired you to do some garment sewing for yourself or skip the garment sewing and maybe some traveling! I’ve been very pleased with these patterns and feel both were great beginner-level dresses that look, feel, and fit great.

Everlasting Blog Tour - Week 1 Recap + Giveaway

Everlasting Blog Tour - Week 1 Recap + Giveaway

Everlasting_blog tour square.jpg

It’s felt like Christmas in July this week as the Everlasting Blog Tour makers posted their tour makes. I want to give a huge thanks to everyone taking part in the tour and for the incredible gifts they’re giving all of us by sharing their talents and creativity.

This May saw the release of Everlasting, my seventh fabric line for Art Gallery Fabrics. Romantic, summer-inspired prints make sewing easy with a classic palette of navy, red, turquoise, and blush. Everlasting has been a huge success and is available in shops everywhere. See FABRICS page for stock listings of online shops.

I knew right away I wanted this collection to have a blog tour and coordinated a list of wonderfully talented makers to share their love of stitching with all of us. Here in the States we’re enjoying summer and I know I’d love these long, lazy days to never end. So, to keep those summer vibes going, over the next three weeks you’ll find inspired sewing posts, exciting makers to follow, beautiful projects, and of course, weekly giveaways all focused around my Everlasting fabric collection—you won’t want to miss a day!

EVERLASTING BLOG TOUR SCHEDULE

Friday, July 12 - Sharon Holland

Monday, July 15 - Marija Vujcic

Tuesday, July 16 - Carolina Moore

Wednesday, July 17 - Dana Willard

Thursday, July 18 - Lisa Ruble

Friday, July 19 - Dritz Sewing

Monday, July 22 - Eleri Kerian

Tuesday, July 23 - Marisa Wilhelmi

Wednesday, July 24 - Sharon McConnell

Thursday, July 25 - Modernly Morgan

Friday, July 26 - Alexis Wright

Monday, July 29 - Priscilla Geissler

Tuesday, July 30 - Maureen Cracknell

Wednesday, July 31 - Elina Temmes

Everlasting Strawberries Banner.jpg

Week 1 Recap

Day 1 of the Everlasting Blog Tour started out with a bang as Marija Vujcic gave us not just one but THREE amazing sewing projects to drool over. Marija is a must-follow maker and so passionate about sewing. She can sew anything and does everything to perfection. Find tutorials for her projects along with the soon-to-be-published pattern for this amazing Everlasting Garden quilt (top left).

Everlasting Blog Tour projects by Marija Vujcic

Everlasting Blog Tour projects by Marija Vujcic

Day 2 belonged to Carolina Moore our very own Art Gallery Fabrics Sewcialite. Carolina created a stunning improv quilt incorporating traditional English Paper-Pieced blocks by Brimfield Awalkening into a color-blocked modern strip quilt. Learn more about Carolina and see the stunning quilting on this quilt on her blog.

Everlasting Blog Tour project by Carolina Moore

Everlasting Blog Tour project by Carolina Moore

Day 3 had me smiling ear to ear when Dana Willard (an Art Gallery Fabrics sister-designer) posted about her smartly-designed reversible skirt. I adore Dana and she has the best tutorials! This easy-pease skirt can be sized for any girl-young or old and a must-make for your summer sewing.

Everlasting Blog Tour project by Dana Willard

Everlasting Blog Tour project by Dana Willard

Day 4 was Lisa Ruble’s stop on this fun blog tour. Lisa and I have worked together over the years and she’s a wonderful and passionate quilter, amazing person, and extremely talented in everything she does. Definitely follow Lisa on her quilting adventures! Now through the end of the month you can get 10% this gorgeous Ribbon Weave quilt pattern that Lisa made using the blues and teal prints from Everlasting.

Everlasting Blog Tour project by Lisa Ruble

Everlasting Blog Tour project by Lisa Ruble

Day 5 ends the first week with one of our tour sponsors and everybody’s favorite notion company, Dritz Sewing! The super talent team of creatives at Dritz bring us the most innovative and fun projects. Their tutorials and products are easy-to-use and give your projects that professional finishing touch. Make a customizable cork banner to hang in your sewing room, office, or how about making one for those going off to college!?!? The possibilities are endless! Find all the how-to’s and make this pretty banner to display favorite things on the Dritz Make Something Blog.

Everlasting Blog Tour project by Dritz Sewing

Everlasting Blog Tour project by Dritz Sewing

Week 1 Giveaway Now Closed: Congratulations Lacey!

What an amazing week, right??? The only way to make it even better is to have a giveaway to keep the party hopping. The week 1 sponsored giveaway comes to you from Dritz Sewing.

Dritz Giveaway Graphic 2.jpg

The Dritz story spans nearly 100 years, and encompasses tens of thousands of creative products. What began as a family business in 1920s New York City, is today a storied brand that is recognized by DIY enthusiasts around the world. Today, Dritz embodies a heritage of quality, value and innovation. Sewists and quilters alike turn to Dritz for top-notch quilting and sewing supplies. Dritz is conveniently sold via mass merchants, independent shops and online retailers, so it’s readily available where and when you need it. - See more at: Dritz!
Products  *  Projects & Patterns  *  Instagram  *  Blog 

To get you started on your Banner, Dritz is including the following fun hardware and notions to their giveaway package:

  • Double Cap Rivets Nickel 750-65

  • Rivet Tool 750T

  • Triangle Rings 738-65

  • D-Rings 1" 117-1-65

  • Swivel Hooks (2 packages) 512

  • Grommet Pliers 1P

  • Nickel Grommets 1-65

THANK YOU DRITZ FOR THIS GENEROUS PRIZE!

* Note * This giveaway is open to US residents only (sorry, international friends). If you're a "no reply" or anonymous commenter, please remember to include your email address in your comment--you can't win if I can't get a hold of you!

1. Simply leave a comment here under this post! (First comment entry).

2. Follow Dritz on their Blog and/or Instagram. Just let me know that you did by making a separate comment here to record that entry. (Separate comment - second entry). 

3. My followers get a third entry! If you follow via subscribing to my posts, through Bloglovin (or other service), or on Instagram, just let me know by making a separate comment here to record that entry. (Separate comment - third entry). Note: I'm no longer on Facebook.

4. Help spread the word!! I know that many of you already do, so I thought it would be nice to add that as another way to enter! Spread the word about the Everlasting Blog Tour on YOUR instagram, facebook, tweet, pin, blog post, etc... (separate comment - fourth entry). 

That’s four possible entries! Enter now through Tuesday, July 23. The winner will be picked at random around 4 pm Eastern. I’ll post the name of the winner on this blog post once they've been notified and responded to my email.

Happy sewing,

Sharon