Heart Quilt Sew Along - Week 3

Heart Quilt Sew Along - Week 3

Sharon Holland Heart Quilt Cozy SQ.jpg

It’s the final week in the Heart Quilt sew along. This fast and fun sew along has been hosted by myself and Maureen Cracknell with special thanks to Allison Harris of Cluck Cluck Sew for allowing us to use her Heart Block in our quilt layout.

If you’re just joining us, you’ll want to get up to speed by reading first weeks post announcing the sew along. If you’re already making heart block or at the point to start adding the sashing and borders—check out week 2 HERE.

This last post is dedicated to turning that top into a quilt plus I’ve added an extra bonus project for all those left over half square triangles from trimming the large flippy corners off the hearts!

Sharon Holland Heart Quilt Finished-5.jpg

Quilting

Rather than reinvent the wheel, I'm directing you to the blog post for Finishing that was originally posted during the Sewcial Bee Sampler sew along. You'll find all the tutorial information for spray basting, quilting, and binding your quilt. The sizes have changed but the concept for basting, quilting, and binding your quilt are the same. As stated in that post, there are many ways to finish a quilt and I am blogging about how I finish my quilts. If you have a preferred method, please do it the way you're comfortable with. If you intend to send your top off to be professionally quilted, discuss with your long-arm quilter how they'd like you to prepare your quilt top and backing for being quilted. 

IMG_6074.jpeg

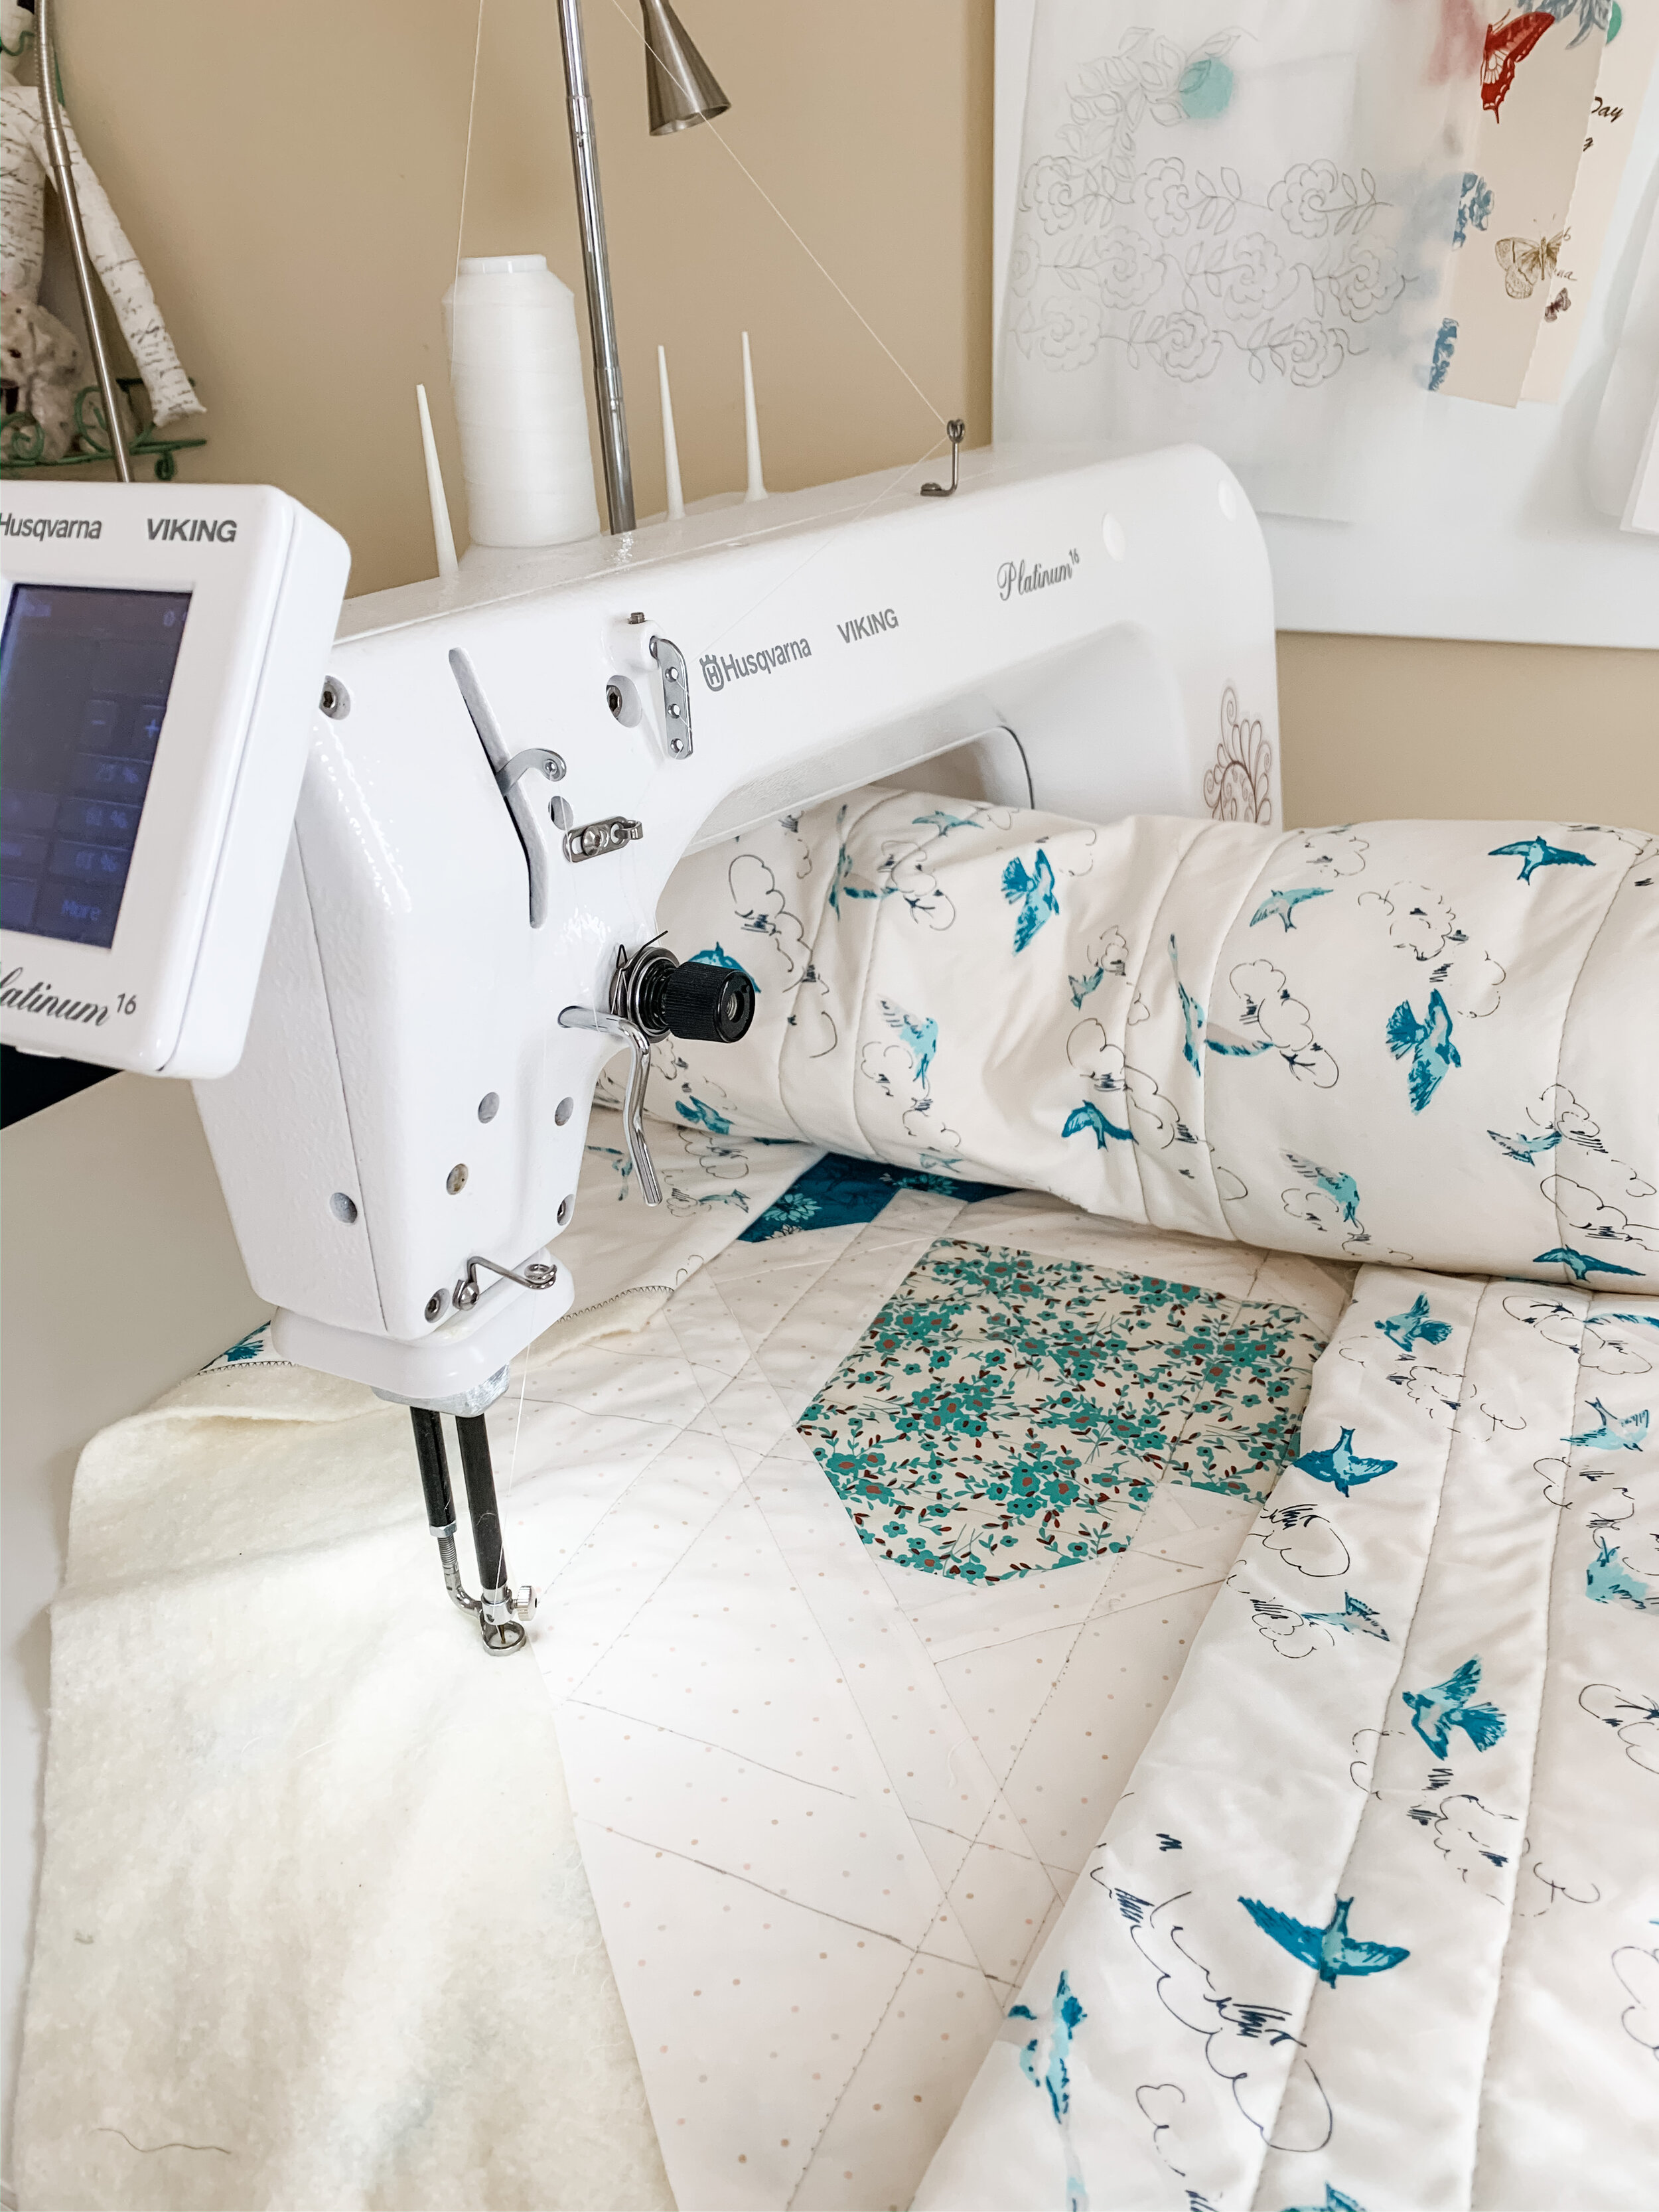
I'm not a professional quilter by any means. I get by and call my quilting style "organic" because it's not perfect and lines are not straight. I love the human touch that non-perfect quilting adds to my quilts. I used my mid-arm Viking Platinum 16 for quilting my top. The quilting guide lines were marked out ahead of time and the quilting went really fast after that to just follow the diagonal lines as shown below in the quilting diagram.

Quilting diagram

Quilting diagram

I used my favorite Hobb’s Tuscany Silk batting inside my quilt and love how light and drapey it is—especially for handling and maneuvering when quilting.

IMG_6137.jpeg

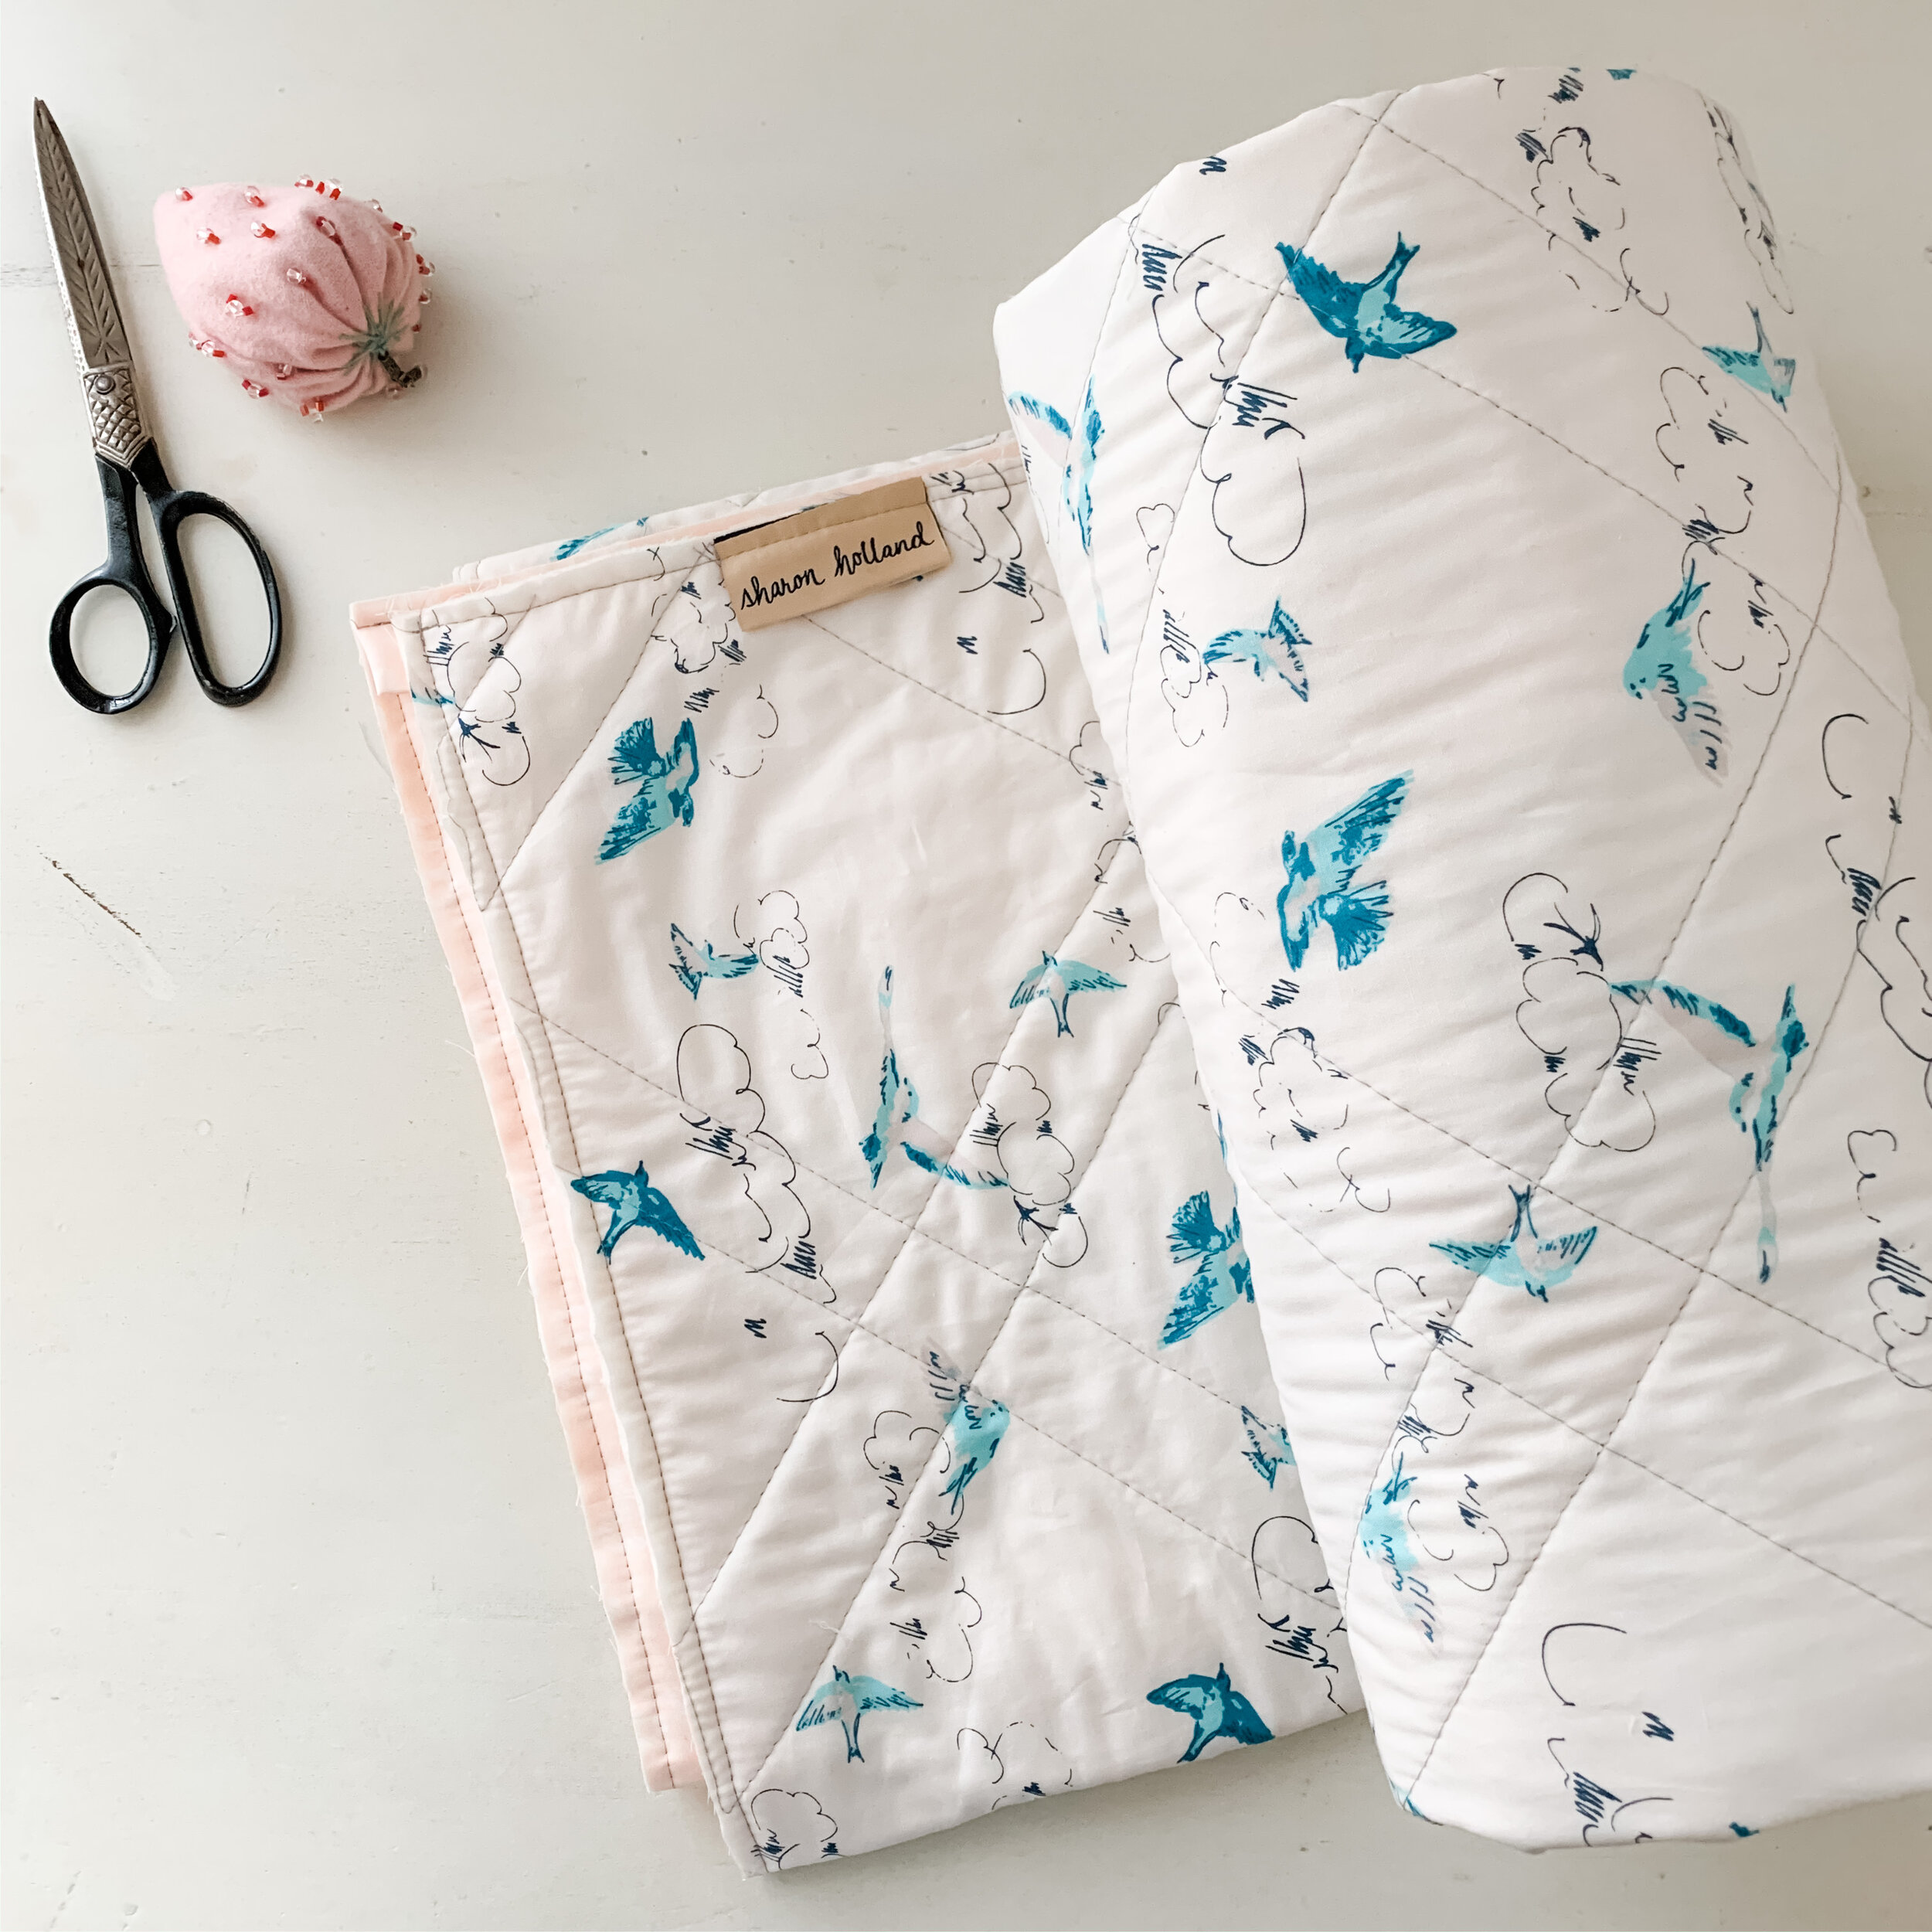
The backing on my quilt is from my Everlasting fabric collection for Art Gallery Fabrics and is called Summer’s Dance. For the binding I used Woodblock Ballerina that was also used for hearts.

Sugared Hearts Material List 2.jpg

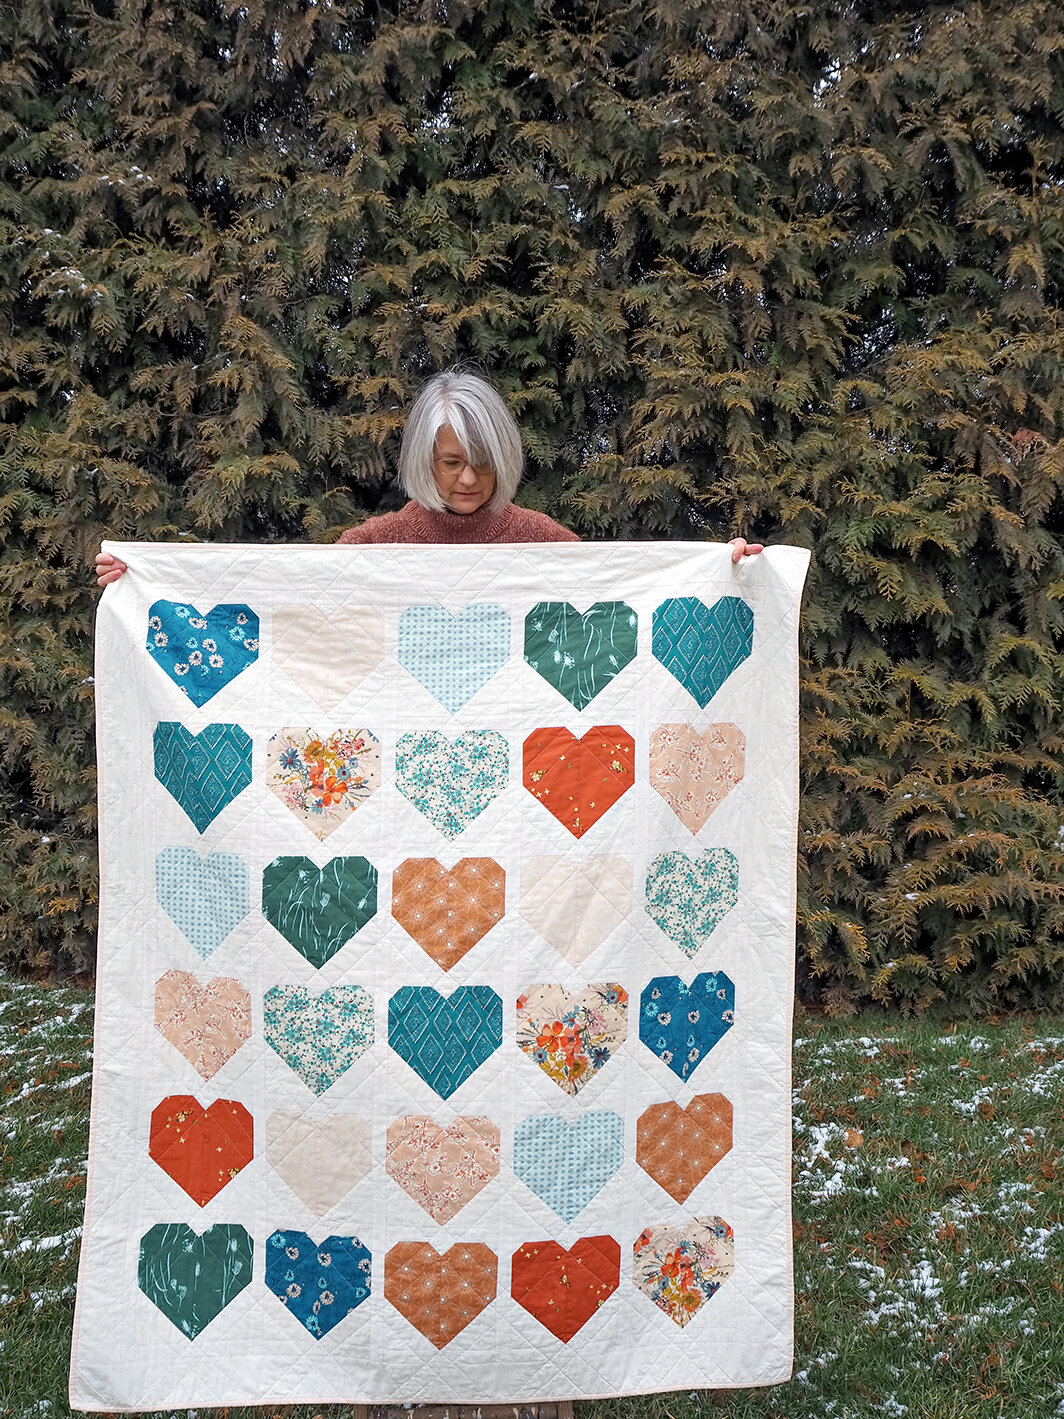
Here’s another look at the prints that went into my quilt. My Heart quilt’s stitched from a curated mix of fabrics from Art Gallery Fabrics Ballerina Fusion (a recolored mix of AGF designer prints), my Spirited, Everlasting, Signature, and Maureen’s Enchanted Voyage and Mystical Land collections.

My non-traditional Valentine colors remind me of sugared gum drops and candy. I’m crazy over this color palette and went with my heart when I did my fabric pull.

Sharon Holland Finished Heart Quilt-1.jpg

One of the biggest challenges of photographing quilts this time of year is the gloomy, cold weather. I had some grand plans for how to photograph this out doors but the wind didn’t cooperate. It started to rain shortly after we got these shots…

Heart Quilt Sharon Holland-1.jpg
 
Heart Quilt Sharon Holland-2.jpg

Be sure to check out Maureen’s blog to see her finished quilt top and bonus project from left over HSTs all made using a mix of Amy Sinabaldi’s MayFair and the new Foresta Fusion collection. Quilt kits for Maureen’s quilt are available at Lady Belle Fabric.

Photo and Heart quilt by Maureen Cracknell

Photo and Heart quilt by Maureen Cracknell

Bonus Project

Since I finished my quilt by Sunday I could’ve easily stopped there, written this blog post and moved on to the other projects stacking up on my desk but no—that’s too easy!

Pillow from HSTs-7.jpg

Remember in my Instagram Stories videos where I told you to hold onto those large half square triangle (HST) waste pieces???

Sharon Holland Finished Heart Quilt-2.jpg

I turned mine into this fun pillow! As a bonus, I’ll share with you how to make one (or more) for yourself!

The beauty of this type of project is that it can be customized to any size you want. I happened to have an extra rectangular pillow I wasn’t using anywhere in the house so I used it as my pillow form. It measures around 14’’ x 26’’ and is probably not a standard size.

Pillow from HSTs-5.jpg

I trimmed 36 HSTs to 3-1/2’’ square using my Bloc_Loc Ruler then arranged them into a design. I would’ve loved if the design was symmetrical but no such luck in this improv piece using scraps. I don’t really notice it now that the pillow is done.

I added 2’’-wide strips to the top and bottom to get it all up to the size I needed.

HST pillow  Chenille-it quilting.jpg

I’ve done a few projects on this blog where I’ve incorporated Chenille-it Blooming Bias and I can’t tell you enough how much I love this added texture—especially to pillows!

Pillow from HSTs-3.jpg

After stitching quilting lines to outline the chevron shapes 1/4’’ inside the seam allowances I added the 3/8 inch-wide Chenille-it to my pillow top. Stitching the blooming bias down not only adheres the product but also works as quilting.

Pillow from HSTs-2.jpg

I added two echo rows of chenille to the background areas. To read about how to stitch and then bloom the chenille, read more on my Chenille Pillow with Hidden Zipper post/tutorial. Plus, to see the gorgeous decorator pillows I made more recently with my Spirited Trail Marker print and Chenille-it, read HERE.

For more Chenille-it projects, here’s a fun You Tube video!

HST pillow.jpg

Personally I love a zipper closure on a pillow. Especially in a case like this where I’m using an existing pillow as the pillow form and like to switch out or clean the pillow covers regularly. You’ll find my go-to method for adding a hidden zipper on a pillow HERE. It’s insanely easy to do!

Sharon Holland Heart Quilt Finished-3.jpg

Now, not only do I have a heart quilt to snuggle under this Valentine’s Day but I have a coordinating pillow to go along with it!

Sharon Holland Heart Quilt Finished-1.jpg

Maureen and I want to thank you for sewing along with us and sharing your progress of your blocks to Instagram. We love seeing your work and encourage you to follow along, share, and tag when you post. Use the sew along hashtag of #agfLOVEquilt and be sure to tag @sharonhollanddesigns @maureencracknell and @cluckclucksew so we can see your progress! If you’re sewing with Art Gallery Fabrics don’t forget to tag them too as they love to see what Makers are making with @artgalleryfabrics !

Happy Valentine’s Day!

I am an Amazon Associate site and earn from qualifying purchases on the products I’ve linked below. The helpful products selected are the same or similar to materials used to make the project(s) in this blog post or related items I think you may enjoy.

Hold Tight Petite Sew Along - Cutting and Piecing

Hold Tight Petite Sew Along - Cutting and Piecing

Hold Tight Petite Sew Along W2.jpg

Welcome back to Week #2 of the Hold Tight Petite sew along. As part of Blair Stocker’s Wise Craft Ruby Ruler™ Ambassador series and being August’s Ruby Ambassador (Read my interview by Blair—here), I thought it would be the perfect opportunity for Blair and I to collaborate on a project and explore the world of color through fabrics.

August Ruby Ambassador - Sharon Holland

August Ruby Ambassador - Sharon Holland

Blair’s ruby-hued artist’s viewfinder tools the Ruby Ruler™ and Ruby Minder™ where invaluable tools in last week’s study on Color and Value. I blogged about how, as a designer, I go about selecting colors for my fabric collections or a color story for a quilt and how I used the Ruby Minder™ to check my selections. If you missed the first week, read more here. Plus you’ll find additional color theory materials covered on Week #1 and Week #2 of the original Hold Tight sew along as well as in the skill-building demonstration videos. Find these helpful videos on my Sew Along page which are available for viewing any time.

Ruby Minder™ by Blair Stocker of Wise Craft Handmade

Ruby Minder™ by Blair Stocker of Wise Craft Handmade

For more Color and Value study, Blair has a wonderful online class, Make Modern Scrap Quilts Using Color Value which is an evergreen class—you buy its and it’s yours forever, there are no "sessions". Read more about this class on Wise Craft Handmade.

Plus, for this Hold Tight Petite sew along, Blair Stocker will be following up my Wednesday morning blog posts with a Facebook Live session at 11 am Pacific on Wednesday, August 14 cutting pieces with templates and curved rulers as well as sewing curves. This workshop-like experience with Blair on Facebook is a huge bonus along with connecting with more than 1,500 other quilter’s via Blairs private Facebook group! Blair will host live sessions to support my sew along blog posts and share with you her expertise. Note: Blair’s FB group is free to join by answering three questions when requesting to be added to the group. If you can’t join in the live sessions—no problem—the videos are available for replay and ready to view when you are!

Hold Tight 2 sizes.jpg

This sew along is free to join—no sign up forms—just follow along and have fun. You’ll will need, however, the Hold Tight quit pattern. If you don't have my Hold Tight quilt pattern already, you'll want to purchase the Hold Tight PDF pattern from my Shop page. The Hold Tight pattern now includes two sizes—the original over-sized throw and the new petite crib-size quilt. The material lists, cutting requirements, coloring sheet, and full-size templates are part of the fully illustrated PDF pattern. These sew along blog posts serve to supplement the PDF but don't provide the detailed pattern information that you'll find in the PDF available for purchase. If you’ve purchased the original PDF prior to August 5, 2019 and didn’t receive a special newsletter email from this blog sharing the link to the Petite Add-On download, see my SEW ALONG page to get your copy of the bonus size. You’ll find the Add-On download that contains the crib-size material list, cutting guide, and coloring sheet. Note: You’ll still need the original Hold Tight pattern for quilt details. The current PDF in my shop has been updated with both quilt sizes so patterns purchased after August 5, 2019 include both quilt sizes—no add-on necessary.

Week #2 - Cutting and Piecing

Even though I’ve labeled this pattern an intermediate skill level quilt pattern, I firmly believe that even a confident beginner can tackle curved patchwork with ease because you’ve completed the following:

  1. You’ve printed out the PDF instructions and templates to 100% scale (with borders) onto US letter size paper and because you’ve cut your fabrics true to size (see Hold Tight Sew Along Week #2 post).

  2. You’re sewing with an accurate seam allowance. As with any patchwork sewing its imperative to stitch with an accurate 1/4” seam allowance. Take a moment to read the Seam Allowance section on my Perfect Patchwork tutorial.

I’ve prepared bonus video tutorials and you’ll find the Hold Tight Sew Along Week #3 parts 1 and 2 are extremely helpful for pinning, sewing, press, and squaring up your blocks. Find all the Hold Tight Sew Along videos on my Sew Along page.

This week’s blog post is going to be an easy one for me to compose compared to last week’s epic Color and Value post because the information about Cutting and Piecing hasn’t changed from my first sew along. Instead of copying and pasting all that information to this post, I’ll refer you to Week #2 and Week #3 of the first sew along. So, go ahead, take a look at that information and then come back to this post for some additional tips, pretty photos, and information about this week’s giveaway!

Hold Tight Petite Cutting and Piecing.jpg

Learning Live

The beauty of an event like this being co-hosted is you get to experience different perspectives, sewing tricks, and in the case of Blair’s Live Facebook sessions, a new way of viewing information. This week, Blair will be cutting and piecing her blocks and carrying on what I started in my video demonstrations. This is your chance to ask Blair questions and maybe gain a few new tricks to sewing with curved patchwork.

Hold Tight Piecing.jpg

Sew On

As I briefly talked about last week when looking ahead, I’ll be covering Quilt-As-You-Go (QAYG) as a quilt assembly option in the next post for Week #3. If you’re interested in trying the QAYG finishing method, regardless of what quilt size you’re stitching, resist the urge to start sewing all the blocks together to form the balloon shapes and quilt top. A background square and the A/B block, and B/B/C blocks like you see in the above photo are ALL considered blocks. For this week, concentrate on sewing the blocks and only go so far as to sew the blocks together into horizontal rows. Alternate seam pressing directions on your rows so the rows will nest together when assembling. Example: Even rows press all the seams to the right and odd rows, press all the seams to the left.

Next week on the third and final sew along post I’ll blog about QAYG assembly, hand quilting, and finishing your quilt. If you’re wanting to finish your quilt as a traditional top with batting and backing sandwich to be quilted, you can work ahead. Find tutorials and tips on the Finishing post and videos created during the first sew along. It’s always nice to have options and work at your own pace!

Hold Tight horizontal rows-02.jpg

I’m excited to see what colors Blair selected for her quilt and would love to see your inspiration for your color story, fabric pull, and progress as you sew along. If you’re on Instagram, tag me @sharonhollanddesigns and Blair @blairs use the #holdtightquilt hashtag so we can follow your progress. If you’re sewing with Art Gallery Fabrics be sure to tag #artgalleryfabrics too!

There’s also a wonderful resource of inspiration and a look at all the Hold Tight quilt posted to Instagram if you search the #holdtightquilt and #holdtightsewalong hashtags! If you’re on Pinterest, I have a Hold Tight Sew Along board—you can find and follow me at ShareDesigns (Sharon Holland Designs).

Hold Tight Petite Graphic.jpg

WEEK #2 GIVEAWAY

Our Art Gallery Fabrics sponsor will be giving away an amazing prize of a quilt kit! The kit will include: The Hold Tight PDF pattern (which can be substituted with a different pattern in my SHOP if you already have purchased), fabric to make a Hold Tight Petite quilt top just like the one I created for this sew along, binding, and your choice of any AGF print for the backing!

Art Gallery Fabrics Pure Solids

Art Gallery Fabrics Pure Solids

This giveaway and the giveaway rules and details will be announced on Instagram Thursday morning around 9 am eastern. The giveaway will be held on my Instagram account @sharonhollanddesigns and you’ll be prompted for how to enter on that post. Be sure you’re following myself and Blair @blairs and Art Gallery Fabrics @artgalleryfabrics so you don’t miss a thing!

Happy sewing,

Sharon

New Fabric Collection!

New Fabric Collection!

Everlasting Collection.jpg

Spring is an exciting time of year with trees leafing out, flowers blooming, and the weather warming up for spending time outdoors. I’ve been anticipating spring even more than usual because my newest fabric line, Everlasting for Art Gallery Fabrics will be available in May at your local quilt shops and favorite online retailers.

Everlasting Fabric Rolls 2.jpg

Everlasting is my seventh collection for Art Gallery Fabrics and it tells the story of love, marriage, and family.

The summertime palette or navy, coral, blush, and teal pull at my heartstrings as I associate this collection with my daughter, Anna. As my only girl, Anna and I have had a special bond. She has a creative mind, is a nurturing mother, is smart, positive, and has a tender soul. Sometimes I see myself in her mixed together with the other important women in my life, my mother and grandmother but mostly she’s her own person and I love her dearly. I’m so proud of the woman she’s become.

Photo credit: Red Tree Photos

Photo credit: Red Tree Photos

Everlasting has a classic elegance to the prints that were inspired by my daughter’s wedding. The colors for her wedding were navy and sunflower yellow. The bridesmaids, groom and groomsmen all wore navy. Anna’s bouquet was simple, ivory roses and the other flowers and colors came from seasonal wildflowers.

Photo credit: Red Tree Photos

Photo credit: Red Tree Photos

My daughter wore my mothers 1959 wedding dress and the cut of this dress couldn’t have been any more perfect for my daughter’s classic yet modest style. See more about this collection and the other spring collections in the AGF Fabric Collections | May-August 2019 Look Book.

Sharon Holland_Garment Illustration Still.jpg

Just as it would be hard to image a wedding or springtime without flowers, I can’t image a fabric collection without floral prints. Joyful blooms and fresh picked wildflowers make this collection feel like you’ve stepped into a summer garden party.

Wedding Reception_Sharon Holland.jpg

Rather than calling my Everlasting collection a mini collection (because there’s only 10 quilting cotton prints in one color way) I think of this collection as being an intimate gathering. 

Everlasting Low Volume Prints.jpg

Everlasting has all the things needed for stitching beautiful quilts from the large floral hero print, medium scale prints in coordinate colors, and beloved, low volume blenders. Think of this fabric line as a marriage ceremony with only close loved ones in attendance.

There’s three knits and one rayon prints—perfect for summer garment sewing!

Everlasting Fabrics 2.jpg

In just a few short weeks, the Everlasting LookBook will be published for inspiration viewing and quilt shops will have these prints in stock for your next make. Let your local shop know you’d like them to carry Everlasting from Art Gallery Fabrics and as online stores start listing their inventory I’ll be adding links to those shops on my Fabrics page.

Diamond-Cut Quilt_Sharon Holland.jpg

Meanwhile, myself and a bunch of other super talented makers will be busily stitching up beautiful and inspirational projects from Everlasting prints. Here’s a peek at a new quilt pattern I’m working on called, Diamond-Cut. I can’t wait to show you more!

Happy New Year - 2019

Happy New Year - 2019

My last post was the end of November 2018 so I need to fill you in on what’s happened between then and now. December went by so fast I didn’t even get a chance to make an appearance on this space-my apologies.

Holly Spring by Sharon Holland

Holly Spring by Sharon Holland

My December revolved around friends and family and I just didn’t bother with keeping up my social spaces during that family time. I had a wonderful Thanksgiving through Christmas and I hope you did as well.

If you follow me on Instagram you saw that I had painted similar sprigs of holly art for sale and then painted larger pieces as gifts. I was very pleased with the response to my art and am very encouraged to continue painting and eventually selling prints and originals in the future. Thanks to everyone who purchased my art!

Holly by Sharon Holland

Holly by Sharon Holland

Right after Christmas and up until writing this post I’ve managed to find extra time to paint. I’ve been exploring acrylics and revisiting watercolors when painting these following pieces.

October Bouquet by Sharon Holland

October Bouquet by Sharon Holland

Daisies by Sharon Holland

Daisies by Sharon Holland

 
Floral Wreath - yellows - Sharon Holland

Floral Wreath - yellows - Sharon Holland

 
Floral Wreath - reds - Sharon Holland

Floral Wreath - reds - Sharon Holland

Exploring with different mediums and styles is a good way for me to reacquaint myself with painting. The more I create, the more my style as an artist will emerge. I feel I need to make a larger body of work before I decide which paintings to turn into prints and what sort of products to offer (note cards, posters, fabric, original art, etc).

Sharon Holland Studio.jpg

In the world of design there’s a lot of hurry up and waiting going on behind the scenes. It’s not always easy to have things to share because release dates are set way into the future. Very soon spring fabric collections will be revealed and this week I’m putting the finishing touches on a short intro video for my next Art Gallery Fabrics line. The photo above shows my office workspace littered with ideas for a fall collection that I’m currently working on and the photo below is a still shot from my promo video.

Sharon Holland - Designer

Sharon Holland - Designer

Case in point is my quilt featured in Quilts & More magazine. I made this quilt last spring and sent it off to my friends at All People quilt as soon as it was finished. Because a magazine need to work so far in advance, it was not going to show up in print until the Spring 2019 issue—that’s a long time to wait to be able to show you my quilt! Good thing I had plenty to keep me busy with until now because I really hate wating!

Sense of Direction by Sharon Holland. Used with permission from Quilts & More™ magazine. ©2019 Meredith Corporation. All rights reserved.

Sense of Direction by Sharon Holland. Used with permission from Quilts & More™ magazine. ©2019 Meredith Corporation. All rights reserved.

This fun quilt is made using fabrics from my Signature collection for Art Gallery Fabrics and AGF Pure Elements solids. Great for even a beginner, this full-size quilt is a quick to piece and with it’s simple, diagonal quilting it’s also quick to finish.

Sense of Direction by Sharon Holland. Used with permission from Quilts & More™ magazine. ©2019 Meredith Corporation. All rights reserved.

Sense of Direction by Sharon Holland. Used with permission from Quilts & More™ magazine. ©2019 Meredith Corporation. All rights reserved.

 
Sense of Direction by Sharon Holland

Sense of Direction by Sharon Holland

Look for the Spring Quilts & More magazine on newsstands beginning January 11th.

Quilts & More Spring 2019. Used with permission from Quilts & More™ magazine. ©2019 Meredith Corporation. All rights reserved.

Quilts & More Spring 2019. Used with permission from Quilts & More™ magazine. ©2019 Meredith Corporation. All rights reserved.

What a bright and beautiful way to start out the first post of the new year with all these flowers and colorful quilts and projects!

Looking ahead, I know many of you are wondering if Maureen Cracknell and I are planning a new sew along for this year…well, remember that hurry up and wait aspect of designing? After much deliberation we both decided we’ll be skipping this year. Preparing a sew along takes months of advance work which both Maureen and I don’t have at our disposal right now. Speaking for myself I have personal and artistic growth reasons why I need to step away from a sew along this year.

Over the last two years and three sew alongs we’ve prepared you for patchwork success and pushed you to push yourself as an artist. When we start our next sampler (hopefully in early 2020) you’ll be ready to take on bigger challenges right along side us.

You can expect to see new fabric lines from both Maureen and myself, blog tour appearances, and with various “irons in the fire” you won’t be without new inspiration, new sewing projects, and fabrics to add to your stash throughout the year. We hope you’ll continue to stop by our blogs and other social platforms to say “hi” and see what we’re up to.

Cheers to a new year and all it has to offer!